Ogof Draenen Dollimore Series trip 21/07/2018
Unless otherwise stated, camera, setups, lighting, edits and gallery effects by Tarquin. Modelling and lighting at various points will be Pete Bolt, Paul Fairman, Louise Hull, Alan McBride and David Webb.
This gallery only covers parts of the series not photographed on other trips, and concentrates on the smallest and biggest passages, rather than the formations.
 The Scaffolded Shaft breakthrough dig in the Entrance Series. This is where the cave finally went big.
Modelling by Louise, lighting by Tarquin, Louise and David
The Scaffolded Shaft breakthrough dig in the Entrance Series. This is where the cave finally went big.
Modelling by Louise, lighting by Tarquin, Louise and David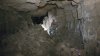 The Nunnery, looking towards The Chapel from the junction with Perseverance II.
Modelling by David, lighting by Tarquin and David
The Nunnery, looking towards The Chapel from the junction with Perseverance II.
Modelling by David, lighting by Tarquin and David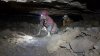 Perseverance II. This was originally lower, but the stones have been cleared by passing cavers to leave it crawling sized.
Modelling by Louise and Pete, lighting by Tarquin, Louise and Pete
Perseverance II. This was originally lower, but the stones have been cleared by passing cavers to leave it crawling sized.
Modelling by Louise and Pete, lighting by Tarquin, Louise and Pete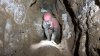 The first half of the Last Sandwich.
Modelling by Louise, lighting by Tarquin, Louise and David
The first half of the Last Sandwich.
Modelling by Louise, lighting by Tarquin, Louise and David The first half of the Last Sandwich.
Modelling by Louise, lighting by Tarquin, Louise and David
The first half of the Last Sandwich.
Modelling by Louise, lighting by Tarquin, Louise and David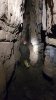 The second half of the Last Sandwich, mostly stooping or walking.
Modelling by Paul, lighting by Tarquin and Paul
The second half of the Last Sandwich, mostly stooping or walking.
Modelling by Paul, lighting by Tarquin and Paul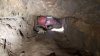 The second half of the Last Sandwich, one of the tighter crawls near the end.
Modelling by Louise, lighting by Tarquin, Louise and David
The second half of the Last Sandwich, one of the tighter crawls near the end.
Modelling by Louise, lighting by Tarquin, Louise and David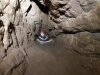 The tighter crawls.
Modelling by Paul, lighting by Tarquin and Paul
The tighter crawls.
Modelling by Paul, lighting by Tarquin and Paul Looking into the start of the final dig.
Modelling by Louise, lighting by Tarquin and Louise
Looking into the start of the final dig.
Modelling by Louise, lighting by Tarquin and Louise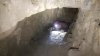 Looking into the start of the final dig.
Modelling by Louise, lighting by Tarquin and Louise
Looking into the start of the final dig.
Modelling by Louise, lighting by Tarquin and Louise Looking out of the start of the final dig.
Modelling by Paul, lighting by Tarquin and Paul
Looking out of the start of the final dig.
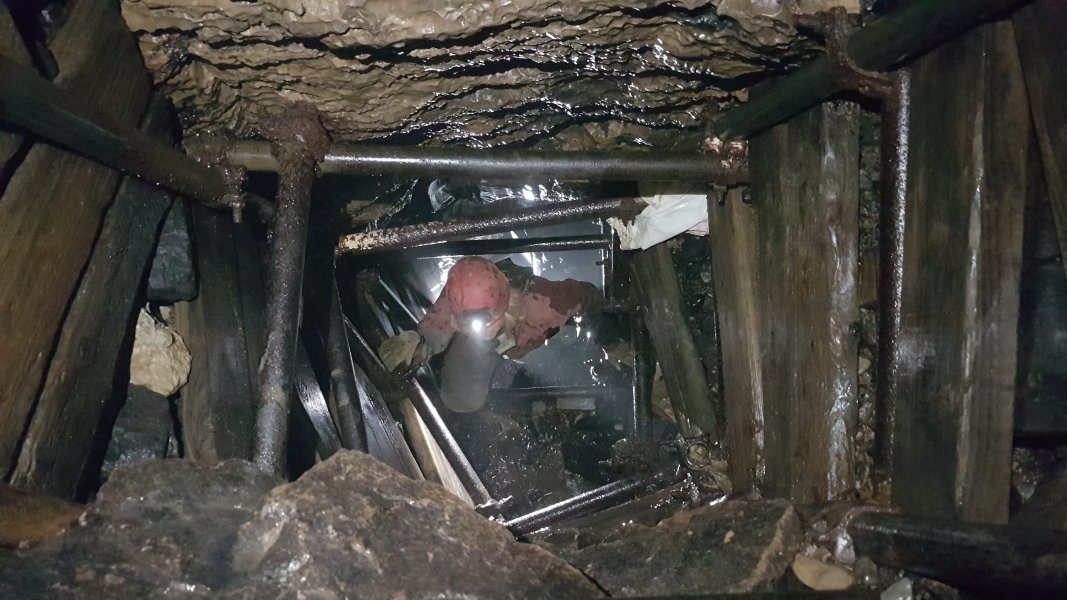
Modelling by Paul, lighting by Tarquin and Paul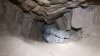 Looking out through the U-bend in the final dig. Until 2017, this was tighter, with a large lump in one wall forcing a squeeze which was one of the featured obstacles of the route into Dollimore Series. In 2017, the squeeze was enlarged without consultation, leaving it as large as a regular flat-out crawl.
Modelling by Paul
Looking out through the U-bend in the final dig. Until 2017, this was tighter, with a large lump in one wall forcing a squeeze which was one of the featured obstacles of the route into Dollimore Series. In 2017, the squeeze was enlarged without consultation, leaving it as large as a regular flat-out crawl.
Modelling by Paul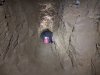 Beyond the U-bend.
Modelling by Paul, lighting by Tarquin and Paul
Beyond the U-bend.
Modelling by Paul, lighting by Tarquin and Paul-
The exit from the dig, which originally had a loose slope of rubble which would collapse onto passing cavers. This was removed soon after the breakthrough. Until 2017, the roof of the crawl was a V-shaped opening, forcing a second squeeze where most cavers would have to do an awkward rotation with sand falling into their ear. This was also removed without consultation in 2017, leaving this larger crawl.
Modelling by Paul, lighting by Tarquin and Paul
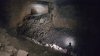 The breakthrough dig leads to a rocky balcony overlooking one of the most impressive views in the cave. To the left is upstream MSAD.
Modelling by Alan and Dave, lighting by Tarquin, Alan and Dave
The breakthrough dig leads to a rocky balcony overlooking one of the most impressive views in the cave. To the left is upstream MSAD.
Modelling by Alan and Dave, lighting by Tarquin, Alan and Dave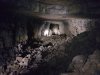 To the right is the most impressive downstream MSAD. The original discoverers, while admiring this view, decided to name both the series and this passage after their former clubmate Nicola Dollimore, who had died on a recent expedition in France. It is hard to imagine a higher honour.
Modelling by David, Paul, Louise and Pete, lighting by Tarquin, Alan, David, Paul, Lousie and Pete
To the right is the most impressive downstream MSAD. The original discoverers, while admiring this view, decided to name both the series and this passage after their former clubmate Nicola Dollimore, who had died on a recent expedition in France. It is hard to imagine a higher honour.
Modelling by David, Paul, Louise and Pete, lighting by Tarquin, Alan, David, Paul, Lousie and Pete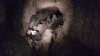 MSAD at the first enormous boulder pile. Half way up on the right is the small side passage Clique. In the shadows at the top is Screaming Like A Stuck Pig.
Modelling by Paul, Louise and Pete, lighting by Tarquin, Paul, Louise and Pete
MSAD at the first enormous boulder pile. Half way up on the right is the small side passage Clique. In the shadows at the top is Screaming Like A Stuck Pig.
Modelling by Paul, Louise and Pete, lighting by Tarquin, Paul, Louise and Pete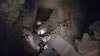 One of the largest sections of MSAD, just before its junction with Out Of The Blue.
Modelling by Paul, Alan, Louise and Pete, lighting by Tarquin, David, Paul, Alan, Louise and Pete
One of the largest sections of MSAD, just before its junction with Out Of The Blue.
Modelling by Paul, Alan, Louise and Pete, lighting by Tarquin, David, Paul, Alan, Louise and Pete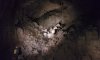 The junction with Out Of The Blue, where MSAD has its largest cross section. It is very hard to see the true scale in a picture (and this one definitely does not do it justice), as the section lacks the distant views of the passage before it, and it would take a much wider angle lens to actually see it all. However, its dimensions here are 22 metres wide, and about 15 metres high. Much of the width is in alcoves at the top of the boulder slopes. Out Of The Blue is on the left edge of the picture. In the distance is Hall Of The One, the second largest chamber in the cave, which looks very small in this picture.
Modelling by Paul, Alan and Louise, lighting by David, Paul, Alan, Louise and Pete
The junction with Out Of The Blue, where MSAD has its largest cross section. It is very hard to see the true scale in a picture (and this one definitely does not do it justice), as the section lacks the distant views of the passage before it, and it would take a much wider angle lens to actually see it all. However, its dimensions here are 22 metres wide, and about 15 metres high. Much of the width is in alcoves at the top of the boulder slopes. Out Of The Blue is on the left edge of the picture. In the distance is Hall Of The One, the second largest chamber in the cave, which looks very small in this picture.
Modelling by Paul, Alan and Louise, lighting by David, Paul, Alan, Louise and Pete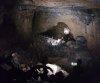 Into The Black, the massive passage that continues down a climb. These two chambers at its start are as large in area together as Hall Of The One, though substantially smaller in volume. The route to Dogleg Complex is up the slope in the distance on the left.
Modelling and lighting by David, Paul, Alan, Louise and Pete
Into The Black, the massive passage that continues down a climb. These two chambers at its start are as large in area together as Hall Of The One, though substantially smaller in volume. The route to Dogleg Complex is up the slope in the distance on the left.
Modelling and lighting by David, Paul, Alan, Louise and Pete The Geryon, one of the most spectacular helictite formations in the UK, and the target of our trip. The other formations in this area have been extensively photographed previously, so are not covered here.
Modelling by Louise, lighting by Paul, David, Alan, Pete and Louise
The Geryon, one of the most spectacular helictite formations in the UK, and the target of our trip. The other formations in this area have been extensively photographed previously, so are not covered here.
Modelling by Louise, lighting by Paul, David, Alan, Pete and Louise
 The Scaffolded Shaft breakthrough dig in the Entrance Series. This is where the cave finally went big.
Modelling by Louise, lighting by Tarquin, Louise and David
The Scaffolded Shaft breakthrough dig in the Entrance Series. This is where the cave finally went big.
Modelling by Louise, lighting by Tarquin, Louise and David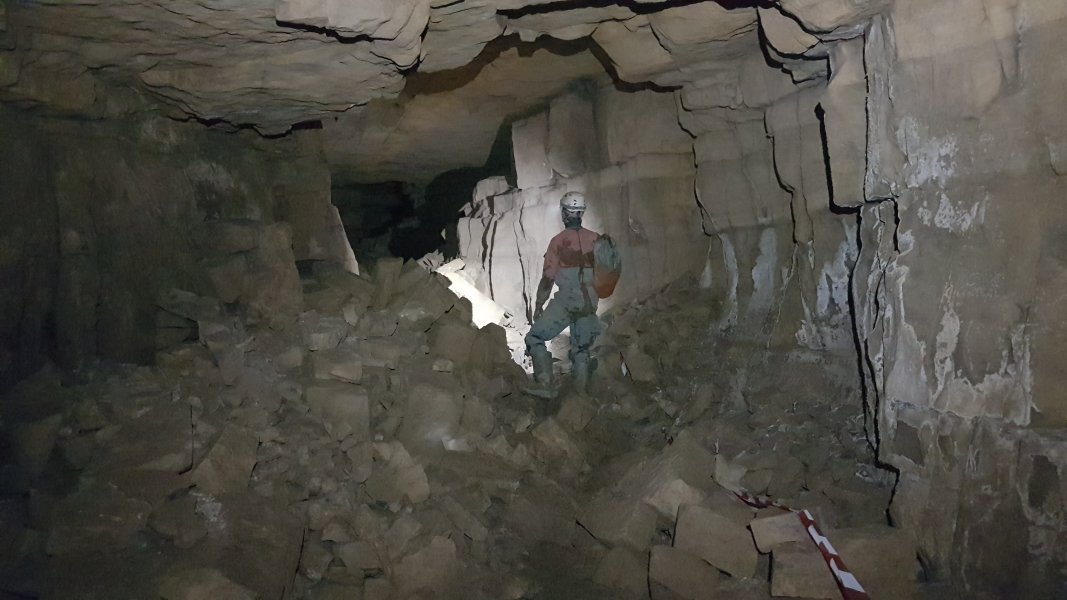 The Nunnery, looking towards The Chapel from the junction with Perseverance II.
Modelling by David, lighting by Tarquin and David
The Nunnery, looking towards The Chapel from the junction with Perseverance II.
Modelling by David, lighting by Tarquin and David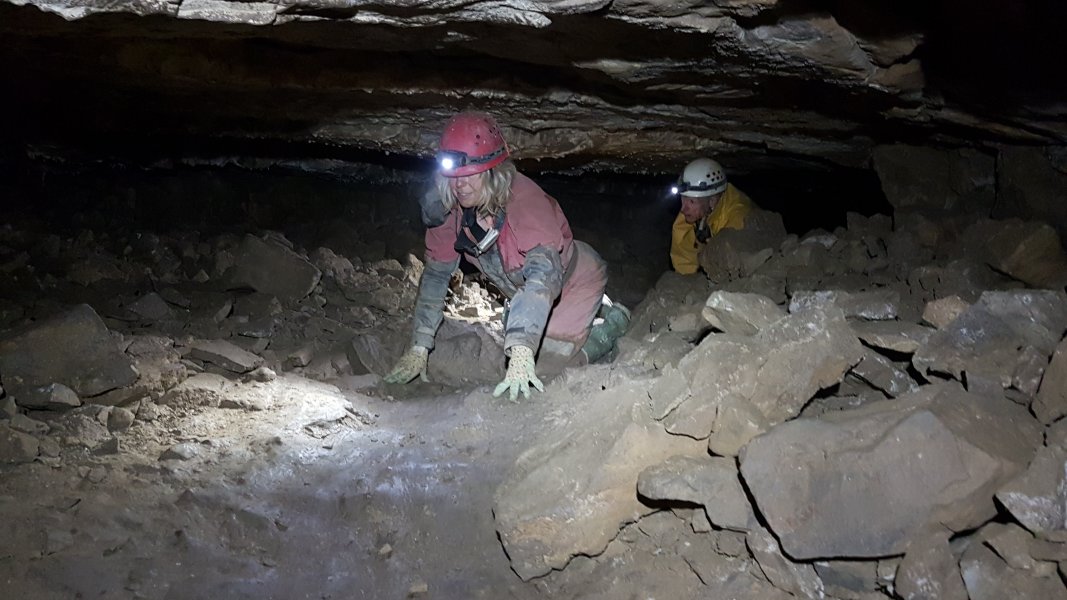 Perseverance II. This was originally lower, but the stones have been cleared by passing cavers to leave it crawling sized.
Modelling by Louise and Pete, lighting by Tarquin, Louise and Pete
Perseverance II. This was originally lower, but the stones have been cleared by passing cavers to leave it crawling sized.
Modelling by Louise and Pete, lighting by Tarquin, Louise and Pete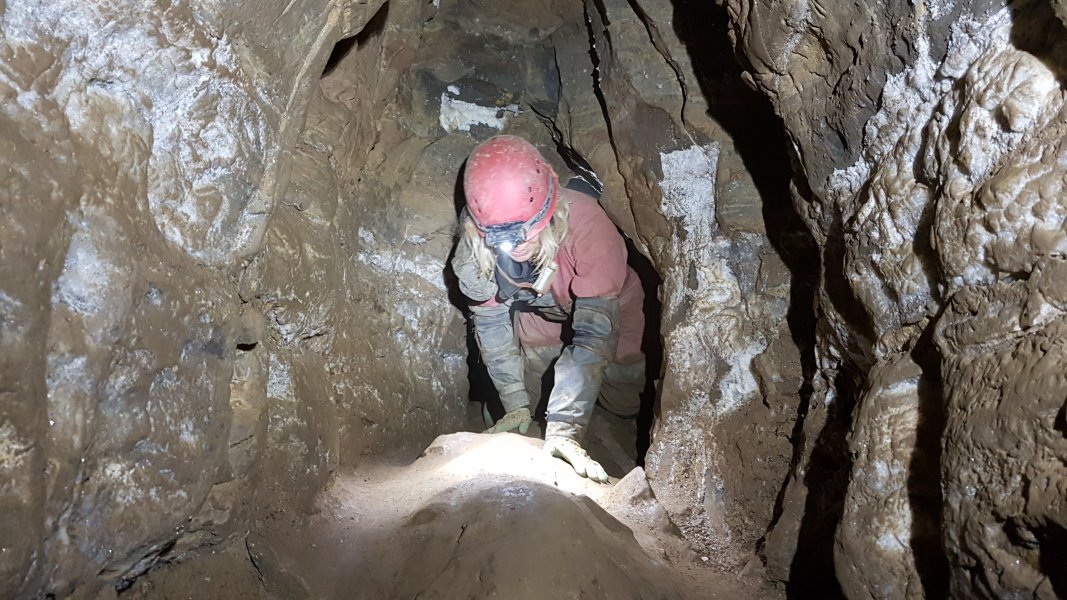 The first half of the Last Sandwich.
Modelling by Louise, lighting by Tarquin, Louise and David
The first half of the Last Sandwich.
Modelling by Louise, lighting by Tarquin, Louise and David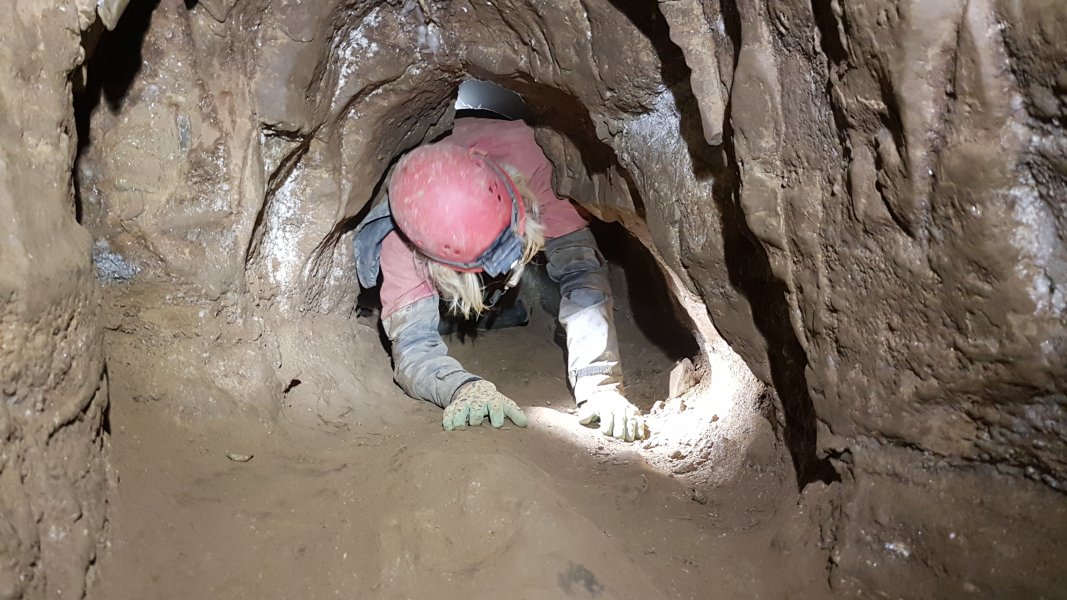 The first half of the Last Sandwich.
Modelling by Louise, lighting by Tarquin, Louise and David
The first half of the Last Sandwich.
Modelling by Louise, lighting by Tarquin, Louise and David The second half of the Last Sandwich, mostly stooping or walking.
Modelling by Paul, lighting by Tarquin and Paul
The second half of the Last Sandwich, mostly stooping or walking.
Modelling by Paul, lighting by Tarquin and Paul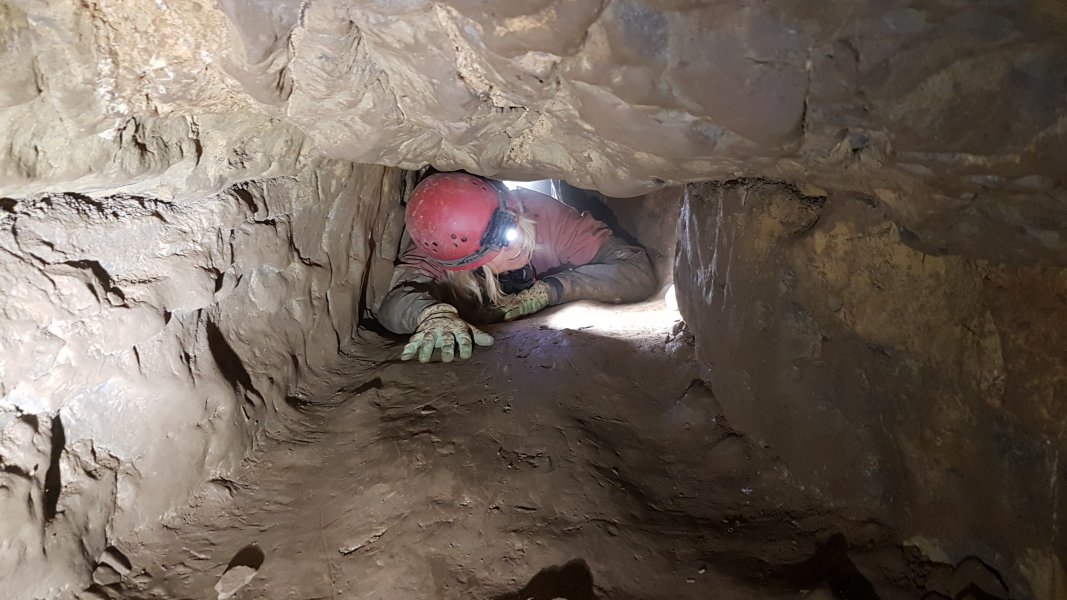 The second half of the Last Sandwich, one of the tighter crawls near the end.
Modelling by Louise, lighting by Tarquin, Louise and David
The second half of the Last Sandwich, one of the tighter crawls near the end.
Modelling by Louise, lighting by Tarquin, Louise and David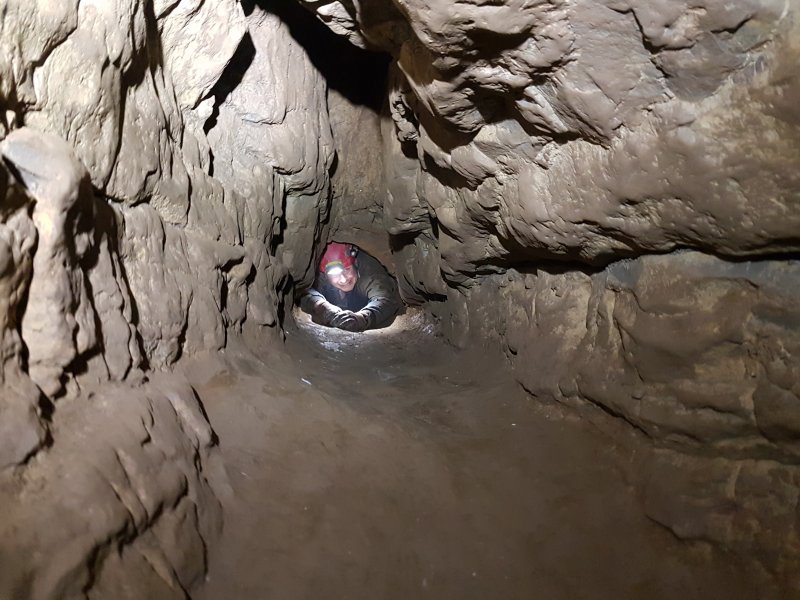 The tighter crawls.
Modelling by Paul, lighting by Tarquin and Paul
The tighter crawls.
Modelling by Paul, lighting by Tarquin and Paul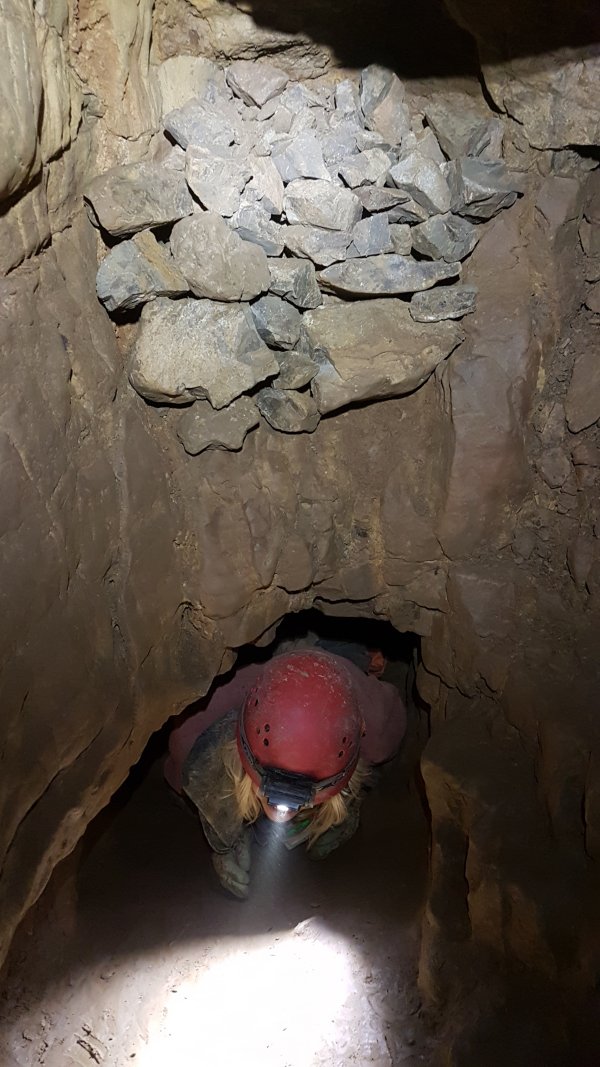 Looking into the start of the final dig.
Modelling by Louise, lighting by Tarquin and Louise
Looking into the start of the final dig.
Modelling by Louise, lighting by Tarquin and Louise Looking into the start of the final dig.
Modelling by Louise, lighting by Tarquin and Louise
Looking into the start of the final dig.
Modelling by Louise, lighting by Tarquin and Louise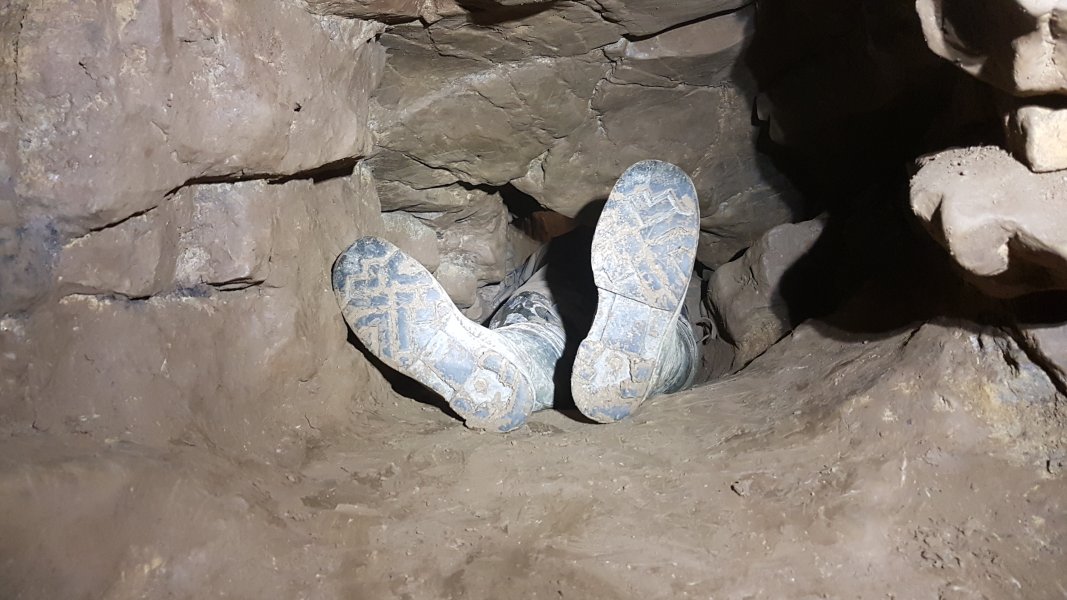 Looking out of the start of the final dig.
Modelling by Paul, lighting by Tarquin and Paul
Looking out of the start of the final dig.
Modelling by Paul, lighting by Tarquin and Paul Looking out through the U-bend in the final dig. Until 2017, this was tighter, with a large lump in one wall forcing a squeeze which was one of the featured obstacles of the route into Dollimore Series. In 2017, the squeeze was enlarged without consultation, leaving it as large as a regular flat-out crawl.
Modelling by Paul
Looking out through the U-bend in the final dig. Until 2017, this was tighter, with a large lump in one wall forcing a squeeze which was one of the featured obstacles of the route into Dollimore Series. In 2017, the squeeze was enlarged without consultation, leaving it as large as a regular flat-out crawl.
Modelling by Paul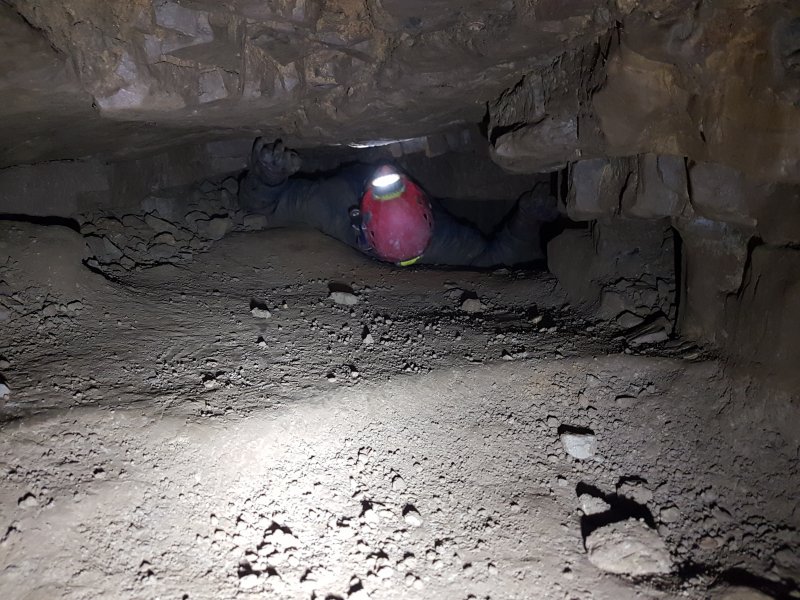 Beyond the U-bend.
Modelling by Paul, lighting by Tarquin and Paul
Beyond the U-bend.
Modelling by Paul, lighting by Tarquin and Paul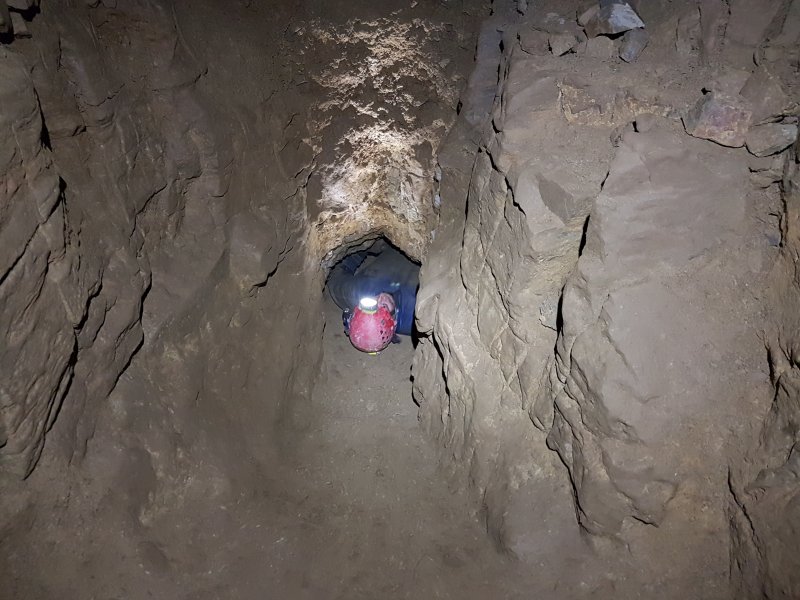 The exit from the dig, which originally had a loose slope of rubble which would collapse onto passing cavers. This was removed soon after the breakthrough. Until 2017, the roof of the crawl was a V-shaped opening, forcing a second squeeze where most cavers would have to do an awkward rotation with sand falling into their ear. This was also removed without consultation in 2017, leaving this larger crawl.
Modelling by Paul, lighting by Tarquin and Paul
The exit from the dig, which originally had a loose slope of rubble which would collapse onto passing cavers. This was removed soon after the breakthrough. Until 2017, the roof of the crawl was a V-shaped opening, forcing a second squeeze where most cavers would have to do an awkward rotation with sand falling into their ear. This was also removed without consultation in 2017, leaving this larger crawl.
Modelling by Paul, lighting by Tarquin and Paul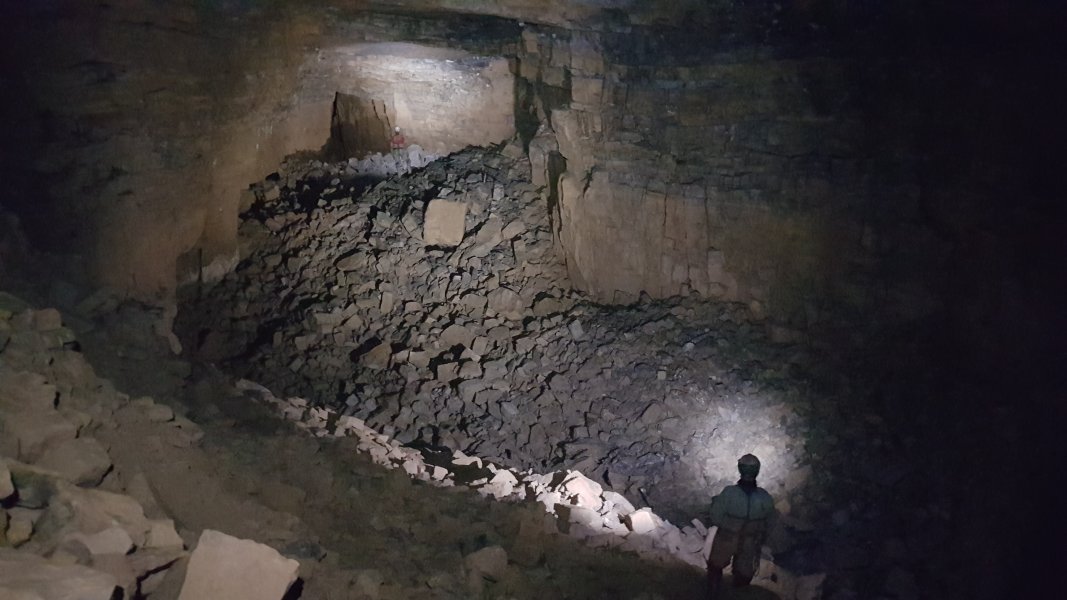 The breakthrough dig leads to a rocky balcony overlooking one of the most impressive views in the cave. To the left is upstream MSAD.
Modelling by Alan and Dave, lighting by Tarquin, Alan and Dave
The breakthrough dig leads to a rocky balcony overlooking one of the most impressive views in the cave. To the left is upstream MSAD.
Modelling by Alan and Dave, lighting by Tarquin, Alan and Dave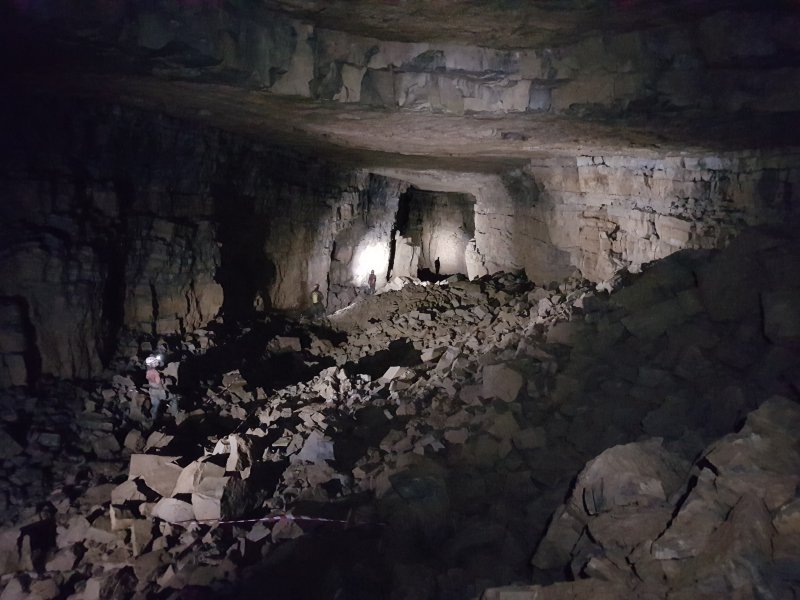 To the right is the most impressive downstream MSAD. The original discoverers, while admiring this view, decided to name both the series and this passage after their former clubmate Nicola Dollimore, who had died on a recent expedition in France. It is hard to imagine a higher honour.
Modelling by David, Paul, Louise and Pete, lighting by Tarquin, Alan, David, Paul, Lousie and Pete
To the right is the most impressive downstream MSAD. The original discoverers, while admiring this view, decided to name both the series and this passage after their former clubmate Nicola Dollimore, who had died on a recent expedition in France. It is hard to imagine a higher honour.
Modelling by David, Paul, Louise and Pete, lighting by Tarquin, Alan, David, Paul, Lousie and Pete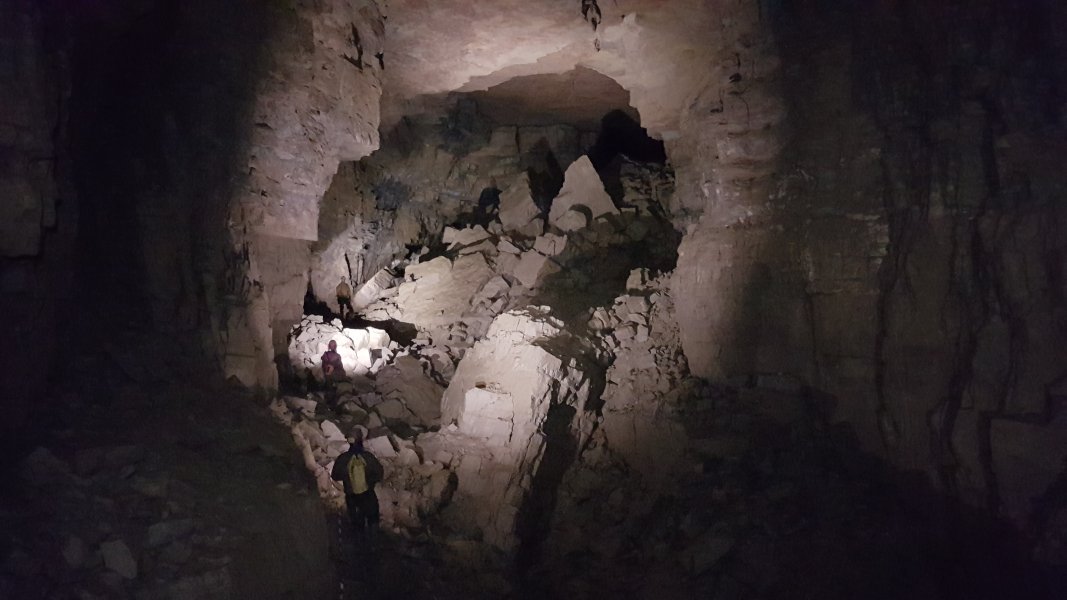 MSAD at the first enormous boulder pile. Half way up on the right is the small side passage Clique. In the shadows at the top is Screaming Like A Stuck Pig.
Modelling by Paul, Louise and Pete, lighting by Tarquin, Paul, Louise and Pete
MSAD at the first enormous boulder pile. Half way up on the right is the small side passage Clique. In the shadows at the top is Screaming Like A Stuck Pig.
Modelling by Paul, Louise and Pete, lighting by Tarquin, Paul, Louise and Pete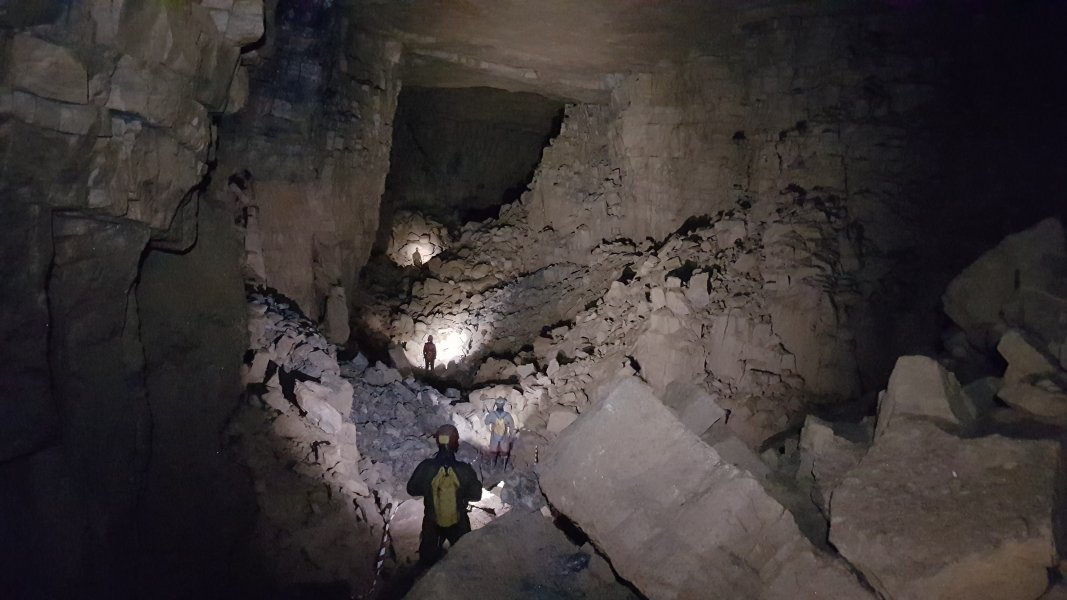 One of the largest sections of MSAD, just before its junction with Out Of The Blue.
Modelling by Paul, Alan, Louise and Pete, lighting by Tarquin, David, Paul, Alan, Louise and Pete
One of the largest sections of MSAD, just before its junction with Out Of The Blue.
Modelling by Paul, Alan, Louise and Pete, lighting by Tarquin, David, Paul, Alan, Louise and Pete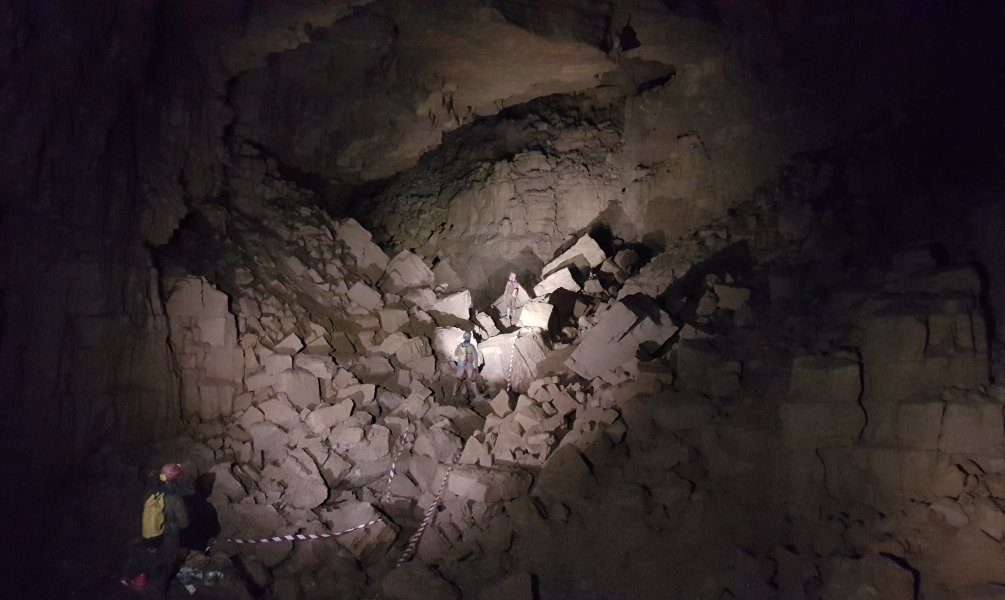 The junction with Out Of The Blue, where MSAD has its largest cross section. It is very hard to see the true scale in a picture (and this one definitely does not do it justice), as the section lacks the distant views of the passage before it, and it would take a much wider angle lens to actually see it all. However, its dimensions here are 22 metres wide, and about 15 metres high. Much of the width is in alcoves at the top of the boulder slopes. Out Of The Blue is on the left edge of the picture. In the distance is Hall Of The One, the second largest chamber in the cave, which looks very small in this picture.
Modelling by Paul, Alan and Louise, lighting by David, Paul, Alan, Louise and Pete
The junction with Out Of The Blue, where MSAD has its largest cross section. It is very hard to see the true scale in a picture (and this one definitely does not do it justice), as the section lacks the distant views of the passage before it, and it would take a much wider angle lens to actually see it all. However, its dimensions here are 22 metres wide, and about 15 metres high. Much of the width is in alcoves at the top of the boulder slopes. Out Of The Blue is on the left edge of the picture. In the distance is Hall Of The One, the second largest chamber in the cave, which looks very small in this picture.
Modelling by Paul, Alan and Louise, lighting by David, Paul, Alan, Louise and Pete Into The Black, the massive passage that continues down a climb. These two chambers at its start are as large in area together as Hall Of The One, though substantially smaller in volume. The route to Dogleg Complex is up the slope in the distance on the left.
Modelling and lighting by David, Paul, Alan, Louise and Pete
Into The Black, the massive passage that continues down a climb. These two chambers at its start are as large in area together as Hall Of The One, though substantially smaller in volume. The route to Dogleg Complex is up the slope in the distance on the left.
Modelling and lighting by David, Paul, Alan, Louise and Pete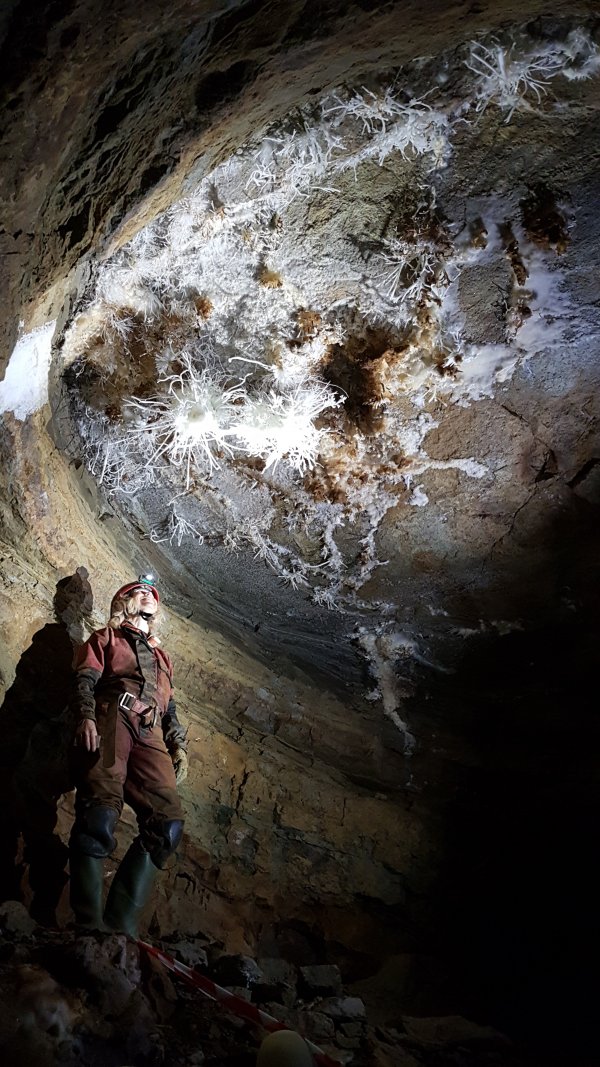 The Geryon, one of the most spectacular helictite formations in the UK, and the target of our trip. The other formations in this area have been extensively photographed previously, so are not covered here.
Modelling by Louise, lighting by Paul, David, Alan, Pete and Louise
The Geryon, one of the most spectacular helictite formations in the UK, and the target of our trip. The other formations in this area have been extensively photographed previously, so are not covered here.
Modelling by Louise, lighting by Paul, David, Alan, Pete and Louise