Ogof Craig a Ffynnon Fifth Choke trip 17/12/2017
Unless otherwise stated, camera and setups by Tarquin, modelling (where used) by Antonia Freem, lighting by Tarquin and Antonia, edits and gallery effects by Tarquin.
I make no apologies; this will be a long gallery. Through the last two decades, access to this spectacular cave had been quite restricted, requiring visitors to make friends with one of the keyholders (although I had visited many times before). Access to Helictite Passage was generally not openly permitted, though countless cavers had in fact been there anyway, secretly, and only rarely publishing pictures that might betray their visit. Now under new access management, visits are allowed, and that means that photography is also allowed, and pictures can be shared.
This gallery is complemented by my later gallery, which covers everything up to Hall Of The Mountain King, and the big passages before Fifth Choke. It is best to view that gallery first. This gallery instead will concentrate on everything beyond Hall of the Mountain King. It forms a complete record of everything along Helictite Passage, as well as a few other parts that may be overlooked. The main purpose was to video much of this part of the cave with Antonia, and to hunt for some rather special formations. Antonia's video will therefore cover the big passage, leaving my camera to concentrate on pretty things. Oh, and it's not a camera, it's a phone, which is not at all designed for these conditions, and does not even have an optical zoom, which rather limits its usefulness in a cave. These pictures were taken without any flashguns, using only caving and filming lamps. Please accept them for what they are.
 Cave pearls in the Hall of the Mountain King. Some of the larger ones are about 2-3 cm across.
Lighting by Antonia
Cave pearls in the Hall of the Mountain King. Some of the larger ones are about 2-3 cm across.
Lighting by Antonia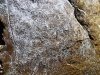 Glistening selenite on the walls of Severn Tunnel.
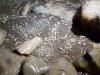
 The selenite is transparent, and glistens like diamond when lights reflect off it.
 :o
:o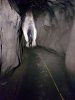 Severn Tunnel.
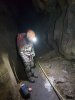 White powder on the floor of Severn Tunnel. This may be piles of gypsum, or possibly something more interesting.
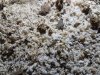 With a texture like breadcrumbs or snowflakes, this matches one of the forms of cryostal.
Lighting by Tarquin
With a texture like breadcrumbs or snowflakes, this matches one of the forms of cryostal.
Lighting by Tarquin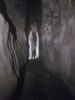 Taller section of Severn Tunnel, with occasional rock bridges.
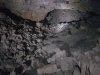 Looking back from Fourth Choke along the huge passage towards the boulder ruckle. The Lower Series starts in the right side of the archway.
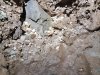 Immediately after Fourth Choke, some drips have exposed some small calcite formations buried beneath the mud, which seem to match the stereotypical appearance of cryostal.
Lighting by Tarquin
Immediately after Fourth Choke, some drips have exposed some small calcite formations buried beneath the mud, which seem to match the stereotypical appearance of cryostal.
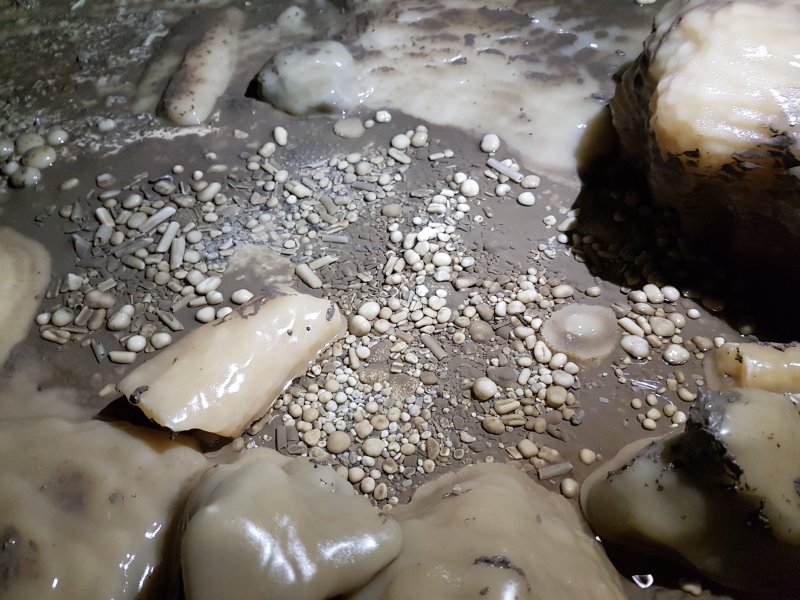
Lighting by Tarquin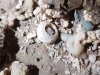 Hollow beads of calcite, with other crystal growths.
Lighting by Tarquin
Hollow beads of calcite, with other crystal growths.
Lighting by Tarquin Aggregations of small beads.
Lighting by Tarquin
Aggregations of small beads.
Lighting by Tarquin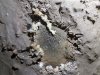 Aggregations and larger beads.
Lighting by Tarquin
Aggregations and larger beads.
Lighting by Tarquin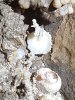 Beads and growths.
Lighting by Tarquin
Beads and growths.
Lighting by Tarquin Mud covered growths on the mud banks.
Lighting by Tarquin
Mud covered growths on the mud banks.
Lighting by Tarquin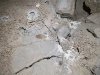 Drips clearing the mud off the cryostal. This looks like the surrounding mud is bobbly, but it is actually cryostal coated in a thin layer of wet mud. This would appear to be due to a flood, with water backing up as a result of Fourth Choke, which at the same time prevented the cryostal from being washed away. Possibly, the flood could be periglacial (after the glaciation that created the cryostal in the first place).
Lighting by Tarquin
Drips clearing the mud off the cryostal. This looks like the surrounding mud is bobbly, but it is actually cryostal coated in a thin layer of wet mud. This would appear to be due to a flood, with water backing up as a result of Fourth Choke, which at the same time prevented the cryostal from being washed away. Possibly, the flood could be periglacial (after the glaciation that created the cryostal in the first place).
Lighting by Tarquin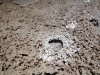 Drip hole exposing cryostal.
Lighting by Tarquin
Drip hole exposing cryostal.
Lighting by Tarquin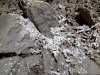 Clean-washed cryostal.
Lighting by Tarquin
Clean-washed cryostal.
Lighting by Tarquin The wide passage and mud banks after Fourth Choke. One of the patches of cryostal can be seen in the floor to the right. Beyond here, the passage gets far too big for the camera to produce useful results, especially with only one person to provide light.
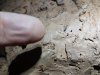 A marshfly (a type of Dipteran fly; Heleomyza serrata or captiosa), walking around, at about 125 metres below surface, at the junction with Promised Land. These are often seen dying or dead on the walls of passages near cave entrances, but this is a very long way underground. Perhaps an egg or larvae got washed in by a stream.
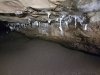 An undercut on the right contains some attractive helictite formations, at the start of the famous Helictite Passage. Not the most imaginative name in the World, but very descriptive.
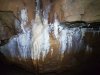 The second group of helictites is much more substantial, with a very clear historic tide mark showing an old ponding level. The ponding matches the old lip of the mud banks on the main passage, but the stream in the passage now flows through the rocks beneath the passage, and it no longer floods to quite such a severe level.
 Detail of the helictites. These early ones are relatively large, and all on the left wall.
 The third group, with its attractive column.
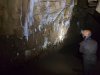 The wall beside the column.
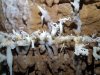 The upper part of the wall has pure white helictites.
Lighting by Tarquin
The upper part of the wall has pure white helictites.
Lighting by Tarquin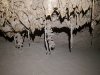 The lower part, below the tide mark, are coated in mud, with evident underwater development.
Lighting by Tarquin
The lower part, below the tide mark, are coated in mud, with evident underwater development.
Lighting by Tarquin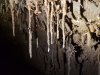 Regrowth since the water drained.
Lighting by Antonia
Regrowth since the water drained.
Lighting by Antonia Small examples before the corner.
Lighting by Tarquin
Small examples before the corner.
Lighting by Tarquin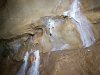 More small examples before the corner. These are the last on the left wall.
Lighting by Tarquin
More small examples before the corner. These are the last on the left wall.
Lighting by Tarquin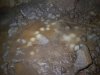 Calcite floor of a small aven, with distinctive light patches where drips are landing.
Lighting by Tarquin
Calcite floor of a small aven, with distinctive light patches where drips are landing.
Lighting by Tarquin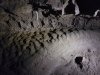 Mud ripples in an undercut. These are, rather unexpectedly, showing a flow of water into this inlet passage, rather than out of it. Presumably this is just an eddy.
Lighting by Antonia
Mud ripples in an undercut. These are, rather unexpectedly, showing a flow of water into this inlet passage, rather than out of it. Presumably this is just an eddy.
Lighting by Antonia Cavers are then asked to proceed with one or two people at a time, since the passage beyond becomes extremely well decorated, and great care must be taken to avoid damaging the formations, which are only a few cm away. There are very few places where people can pass each other.
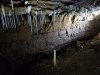 Straws, seeming quite out of place in this passage.
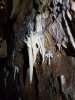 Now beyond the corner, the incredible helictites begin, all on the right wall. This set are quite minimalist, but still something most of us would have been proud to find.
Lighting by Tarquin
Now beyond the corner, the incredible helictites begin, all on the right wall. This set are quite minimalist, but still something most of us would have been proud to find.
Lighting by Tarquin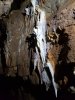 Also quite minimalist, with one small intricate bit.
Lighting by Tarquin
Also quite minimalist, with one small intricate bit.
Lighting by Tarquin The intricate bit.
Lighting by Tarquin
The intricate bit.
Lighting by Tarquin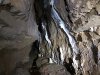 Triple set. The passage starts to get quite narrow, with progress here being made by stooping to the left, avoiding the right wall.
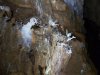 Start of the triple set.
Lighting by Tarquin and Antonia
Start of the triple set.
Lighting by Tarquin and Antonia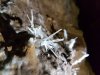 Detail of an anthodite urchin.
Lighting by Antonia
Detail of an anthodite urchin.
Lighting by Antonia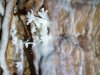 Start of the triple set.
Lighting by Tarquin
Start of the triple set.
Lighting by Tarquin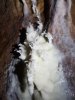 First of the triple set.
Lighting by Tarquin
First of the triple set.
Lighting by Tarquin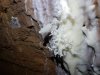 First of the triple set.
Lighting by Tarquin
First of the triple set.
Lighting by Tarquin Second of the triple set.
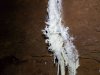 Second of the triple set.
Lighting by Tarquin
Second of the triple set.
Lighting by Tarquin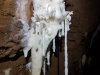 Straws hanging off the side of a curtain, very similar to Draenen's Hanging Basket.
Lighting by Tarquin
Straws hanging off the side of a curtain, very similar to Draenen's Hanging Basket.
Lighting by Tarquin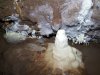 Below the second of the triple set.
Lighting by Tarquin
Below the second of the triple set.
Lighting by Tarquin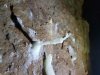 Pronged helictite between the triple sets.
Lighting by Antonia
Pronged helictite between the triple sets.
Lighting by Antonia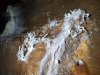 Between the triple sets.
Lighting by Tarquin
Between the triple sets.
Lighting by Tarquin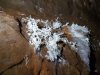 From another angle.
Lighting by Tarquin
From another angle.
Lighting by Tarquin Between the triple sets.
Lighting by Tarquin
Between the triple sets.
Lighting by Tarquin Between the triple sets.
Lighting by Antonia
Between the triple sets.
Lighting by Antonia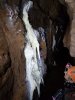 Third and most impressive of the triple set.
Lighting by Tarquin
Third and most impressive of the triple set.
Lighting by Tarquin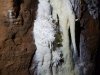 The most elaborate cluster of the triple set.
Lighting by Tarquin
The most elaborate cluster of the triple set.
Lighting by Tarquin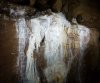 The next set is the crowning glory of the passage - easily the best in the cave. The passage is very narrow at this point, and the picture was actually taken as a panorama, with the camera wedged against the opposite wall, unable to see what it was actually taking. The picture quality definitely suffers. In some patches though, there are so many helictites and anthodites that the surface just looks blurred. This set of helictites also has the only significant amount of mud damage on it, presumably because of someone losing their balance in the narrow passage. Still, that is quite impressive given how long ago this passage was found, and thankfully only a little flowstone was muddied, not any of the helictites.
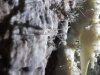 Needle thin anthodites, which cover this breathtaking formation.
Lighting by Antonia
Needle thin anthodites, which cover this breathtaking formation.
Lighting by Antonia A profusion of helictites and needle-like anthodites. The mud on the bottom-left is natural, not put there by cavers.
Lighting by Antonia
A profusion of helictites and needle-like anthodites. The mud on the bottom-left is natural, not put there by cavers.
Lighting by Antonia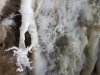 Helictites and anthodites.
Lighting by Antonia
Helictites and anthodites.
Lighting by Antonia Incredible branching anthodite.
Lighting by Antonia
Incredible branching anthodite.
Lighting by Antonia Helictite cluster.
Lighting by Antonia
Helictite cluster.
Lighting by Antonia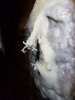 A cross between Gonzo from The Muppets, and Cthulhu (or Davy Jones, if you prefer).
Lighting by Tarquin
A cross between Gonzo from The Muppets, and Cthulhu (or Davy Jones, if you prefer).
Lighting by Tarquin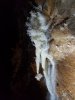 One of the most iconic helictite formations in the cave, with its fine pom pom.
Lighting by Tarquin
One of the most iconic helictite formations in the cave, with its fine pom pom.
Lighting by Tarquin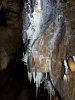 Just beyond is the next set, with its distinctively large helictites. This is where most visits end. We weren't sure, but on our way out, we noticed that the tape may possibly have been intended to block the next section of passage, but if so, it had fallen into the stream. Or perhaps it is meant to be where it was, allowing access beyond this point.
Lighting by Tarquin
Just beyond is the next set, with its distinctively large helictites. This is where most visits end. We weren't sure, but on our way out, we noticed that the tape may possibly have been intended to block the next section of passage, but if so, it had fallen into the stream. Or perhaps it is meant to be where it was, allowing access beyond this point.
Lighting by Tarquin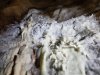 Top of the set.
Lighting by Tarquin
Top of the set.
Lighting by Tarquin A set of chess pieces.
Lighting by Tarquin
A set of chess pieces.
Lighting by Tarquin Hairy.
Lighting by Tarquin
Hairy.
Lighting by Tarquin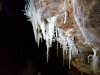 Below the lip.
Lighting by Tarquin
Below the lip.
Lighting by Tarquin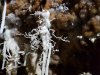 Detail.
Lighting by Tarquin
Detail.
Lighting by Tarquin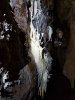 Videoing the helictites.
Lighting by Tarquin
Videoing the helictites.
Lighting by Tarquin Immediately afterwards, it becomes very difficult to progress along the passage while walking, as the formations narrow the gap so far that they risk damage from any passing cavers. Clothing needs to be held in, and only thin cavers can get anywhere without lying in the stream. The helictites are still rather lovely, of course. The muddy tide mark shows that this passage can in fact flood, rearranging the tapes.
Lighting by Tarquin
Immediately afterwards, it becomes very difficult to progress along the passage while walking, as the formations narrow the gap so far that they risk damage from any passing cavers. Clothing needs to be held in, and only thin cavers can get anywhere without lying in the stream. The helictites are still rather lovely, of course. The muddy tide mark shows that this passage can in fact flood, rearranging the tapes.
Lighting by Tarquin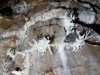 Helictites that fill the upper part of the rift.
Lighting by Tarquin
Helictites that fill the upper part of the rift.
Lighting by Tarquin The upper part of the rift.
Lighting by Tarquin
The upper part of the rift.
Lighting by Tarquin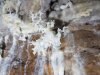 Detail.
Lighting by Tarquin
Detail.
Lighting by Tarquin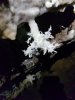 Bonsai tree.
Lighting by Tarquin
Bonsai tree.
Lighting by Tarquin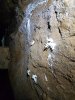 It is finally possible to stand again, with minimal helictites.
Lighting by Tarquin
It is finally possible to stand again, with minimal helictites.
Lighting by Tarquin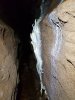 A set of helictites that seem to bear a resemblance to something else...
Lighting by Tarquin
A set of helictites that seem to bear a resemblance to something else...
Lighting by Tarquin A long helictite reminiscent of Draenen.
Lighting by Tarquin
A long helictite reminiscent of Draenen.
Lighting by Tarquin A really dramatic, elaborate set.
Lighting by Tarquin
A really dramatic, elaborate set.
Lighting by Tarquin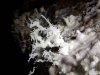 Helictite detail.
Lighting by Tarquin
Helictite detail.
Lighting by Tarquin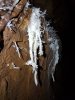 Helictites and anthodites.
Lighting by Tarquin
Helictites and anthodites.
Lighting by Tarquin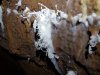 A rib of helictites.
Lighting by Tarquin
A rib of helictites.
Lighting by Tarquin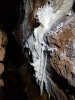 An extremely impressive, head-sized helictite growth that looks more like coral than calcite.
Lighting by Tarquin
An extremely impressive, head-sized helictite growth that looks more like coral than calcite.
Lighting by Tarquin Beyond here, the helictites reduce the gap far too much, and progress is only possible by grovelling in the stream.
Lighting by Tarquin
Beyond here, the helictites reduce the gap far too much, and progress is only possible by grovelling in the stream.
Lighting by Tarquin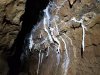 At least the view above is quite nice.
Lighting by Tarquin
At least the view above is quite nice.
Lighting by Tarquin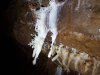 One of the best ones. Wonky picture, but I was lying on my back in the stream to take it, so enjoy what you get.
Lighting by Tarquin
One of the best ones. Wonky picture, but I was lying on my back in the stream to take it, so enjoy what you get.
Lighting by Tarquin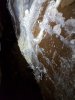 Walking possible again, and another helictite patch.
Lighting by Tarquin
Walking possible again, and another helictite patch.
Lighting by Tarquin Detail of an impressive helictite and straw, like an inverted ornamental candelabra.
Lighting by Tarquin
Detail of an impressive helictite and straw, like an inverted ornamental candelabra.
Lighting by Tarquin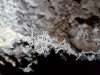 And its other helictite cluster.
Lighting by Tarquin
And its other helictite cluster.
Lighting by Tarquin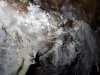 Another incredible cluster of needle thin anthodites.
Lighting by Tarquin
Another incredible cluster of needle thin anthodites.
Lighting by Tarquin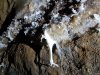 Pigeon's foot.
Lighting by Tarquin
Pigeon's foot.
Lighting by Tarquin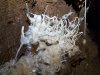 Aragonite helictites very much like Draenen's Medusa's Children, on the wrong side of the passage.
Lighting by Tarquin
Aragonite helictites very much like Draenen's Medusa's Children, on the wrong side of the passage.
Lighting by Tarquin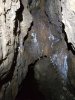 Terminal calcite blockage, at which point the inlet becomes too narrow. Or it would be, but someone has tried blasting the rift, presumably the original explorers. I did not want to grovel in the stream yet again to see how far they had managed to get, especially since it would have required a thorough soaking.
Lighting by Tarquin
Terminal calcite blockage, at which point the inlet becomes too narrow. Or it would be, but someone has tried blasting the rift, presumably the original explorers. I did not want to grovel in the stream yet again to see how far they had managed to get, especially since it would have required a thorough soaking.
Lighting by Tarquin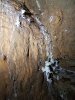 Helictites on the blockage.
Lighting by Tarquin
Helictites on the blockage.
Lighting by Tarquin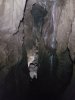 The pitch into the Promised Land, which has now been bypassed with fixed aids allowing a relatively simple climb, drops into a very tall rift.
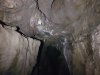 Some small helictites in the ceiling, which can be seen with difficulty from the pitch head.
 A larger cluster of small helictites in the ceiling, which cannot be easily seen from below, but can be viewed via a tricky climb up the rift.
Lighting by Tarquin
A larger cluster of small helictites in the ceiling, which cannot be easily seen from below, but can be viewed via a tricky climb up the rift.
Lighting by Tarquin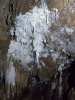 At the junction with the Promised Land, a very impressive set of helictites are tucked up in the ceiling, Hard to see, and hard to light well while perched high up the rift with feet on either wall.
Lighting by Tarquin
At the junction with the Promised Land, a very impressive set of helictites are tucked up in the ceiling, Hard to see, and hard to light well while perched high up the rift with feet on either wall.
Lighting by Tarquin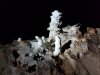 The start of the Promised Land houses the famous Pagoda stalagmite, with its phallic stalagmite companions. The formation, with its tiers created by splashes depositing calcite, is very similar to a stalagmite at Daren Cilau's White Company, and Draenen's Snowy Christmas Tree, but is perhaps the neatest and most iconic of the three.
Lighting by Antonia
The start of the Promised Land houses the famous Pagoda stalagmite, with its phallic stalagmite companions. The formation, with its tiers created by splashes depositing calcite, is very similar to a stalagmite at Daren Cilau's White Company, and Draenen's Snowy Christmas Tree, but is perhaps the neatest and most iconic of the three.
Lighting by Antonia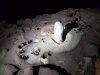 Another stalagmite in the same area, with drip pockets.
Lighting by Tarquin
Another stalagmite in the same area, with drip pockets.
Lighting by Tarquin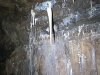 A large stalactite in the ceiling with hair-like helictites. This one really needs a better camera with a proper zoom lens.
Lighting by Antonia
A large stalactite in the ceiling with hair-like helictites. This one really needs a better camera with a proper zoom lens.
Lighting by Antonia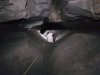 The Promised Land, with mud banks creating a diamond shape.
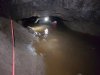 On our return, a heavy rainstorm had melted the snow on the hillsides, and Northwest Inlet was carrying much more water than normal. Gasoline Alley (seen here) was substantially higher than I am used to seeing, with the airspace significantly reduced. There is normally a shallow stream here, and it is normally possible to crawl through while remaining dry at this point. The stream below First Choke was powerful but not in flood, with evidence of previous flood lines much higher up the walls. In such conditions, Gasoline Alley sumps.
 Cave pearls in the Hall of the Mountain King. Some of the larger ones are about 2-3 cm across.
Lighting by Antonia
Cave pearls in the Hall of the Mountain King. Some of the larger ones are about 2-3 cm across.
Lighting by Antonia Glistening selenite on the walls of Severn Tunnel.
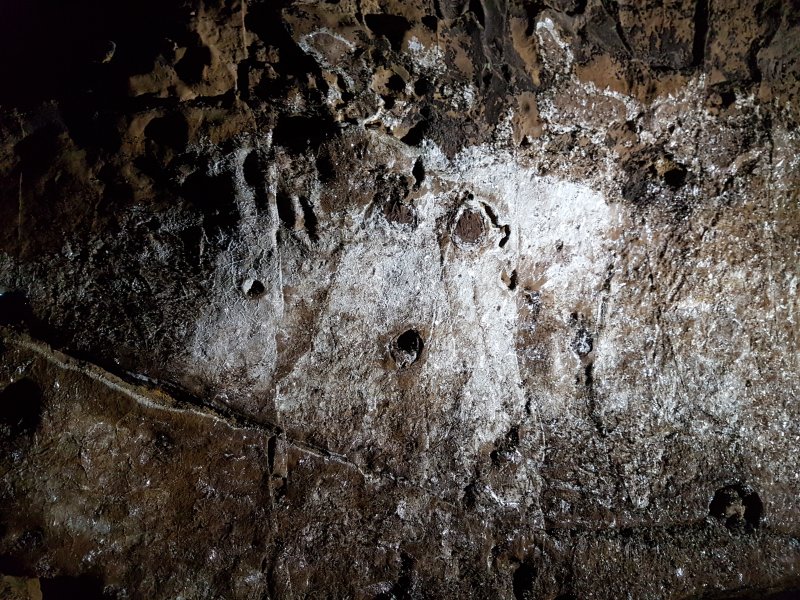 :o
:o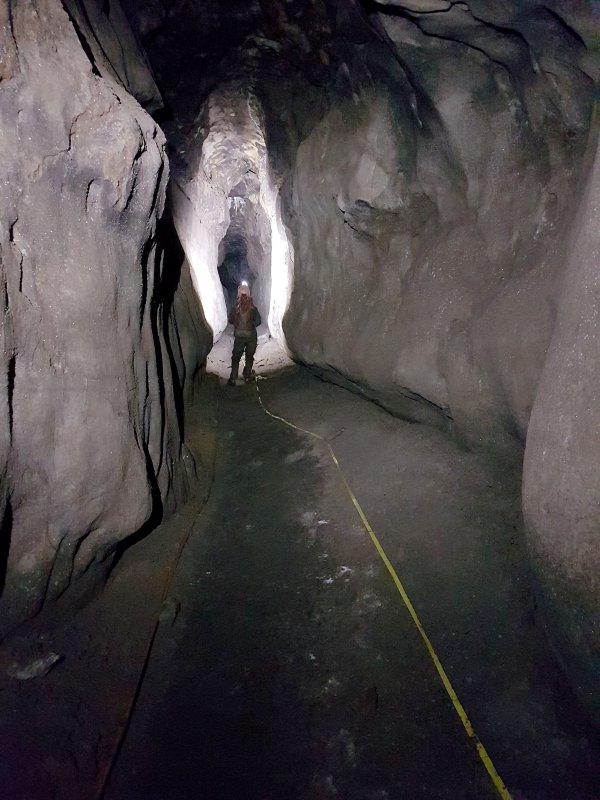 Severn Tunnel.
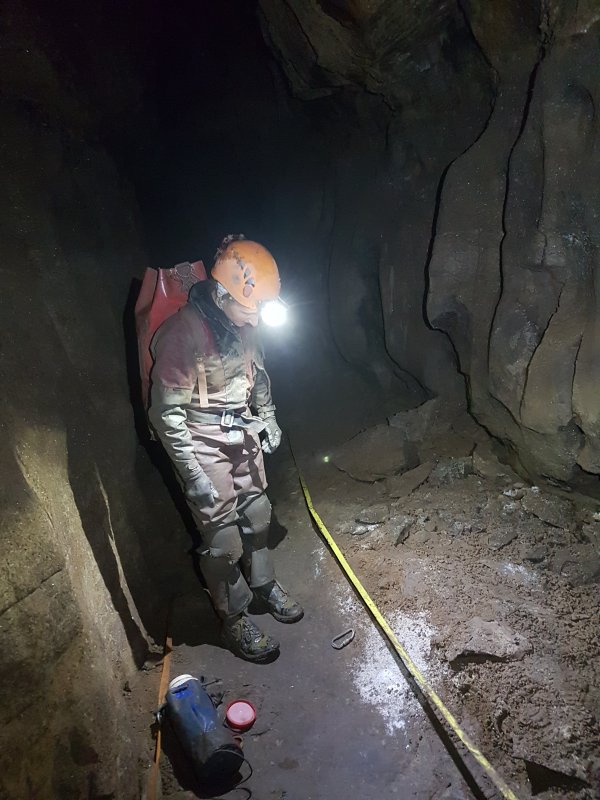 White powder on the floor of Severn Tunnel. This may be piles of gypsum, or possibly something more interesting.
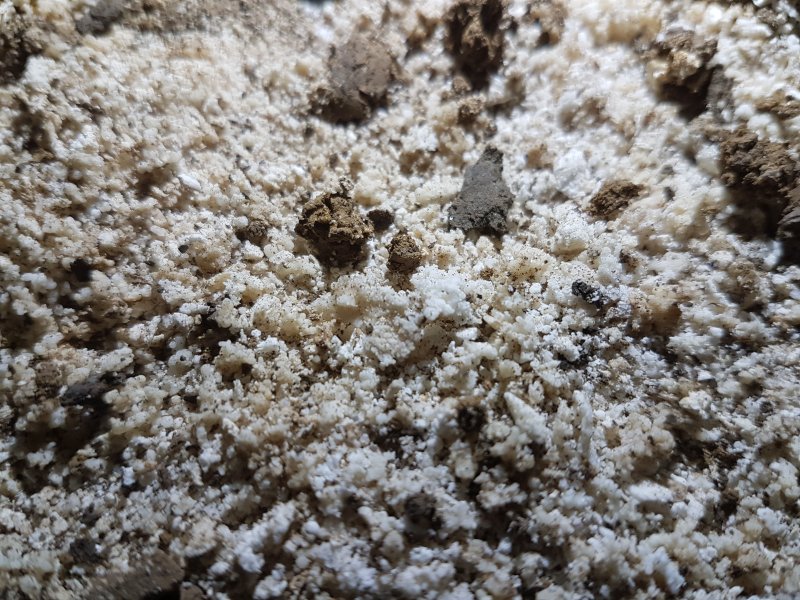 With a texture like breadcrumbs or snowflakes, this matches one of the forms of cryostal.
Lighting by Tarquin
With a texture like breadcrumbs or snowflakes, this matches one of the forms of cryostal.
Lighting by Tarquin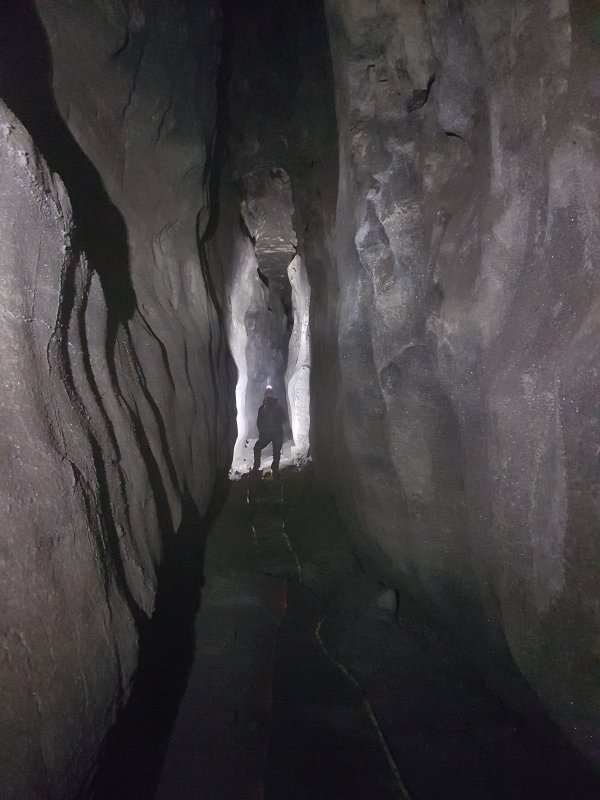 Taller section of Severn Tunnel, with occasional rock bridges.
 Looking back from Fourth Choke along the huge passage towards the boulder ruckle. The Lower Series starts in the right side of the archway.
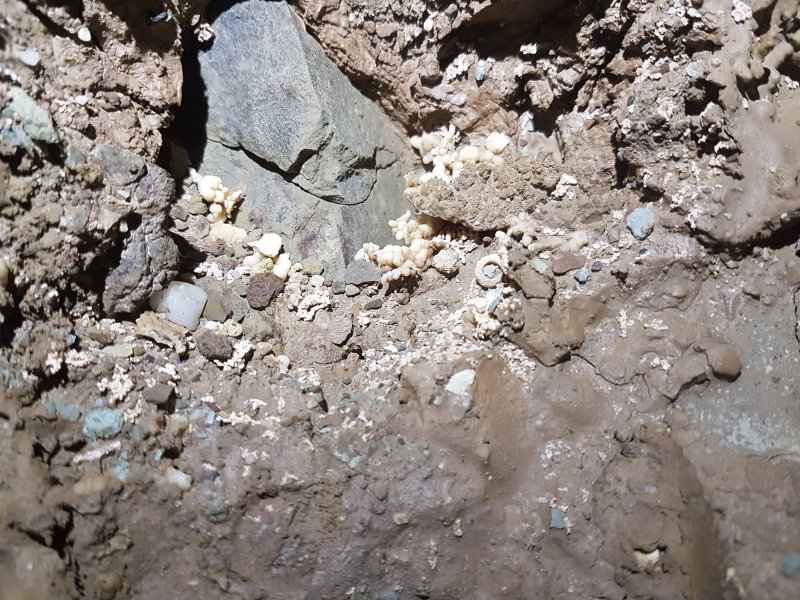 Immediately after Fourth Choke, some drips have exposed some small calcite formations buried beneath the mud, which seem to match the stereotypical appearance of cryostal.
Lighting by Tarquin
Immediately after Fourth Choke, some drips have exposed some small calcite formations buried beneath the mud, which seem to match the stereotypical appearance of cryostal.
Lighting by Tarquin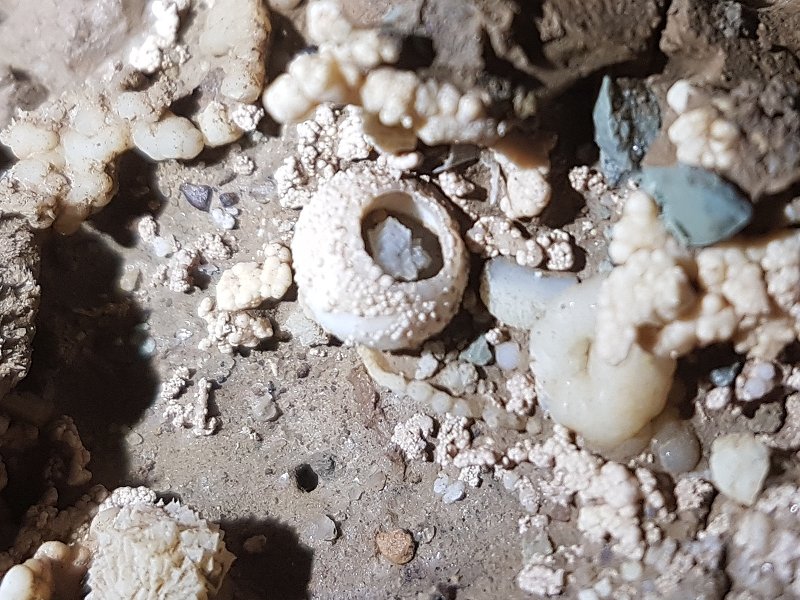 Hollow beads of calcite, with other crystal growths.
Lighting by Tarquin
Hollow beads of calcite, with other crystal growths.
Lighting by Tarquin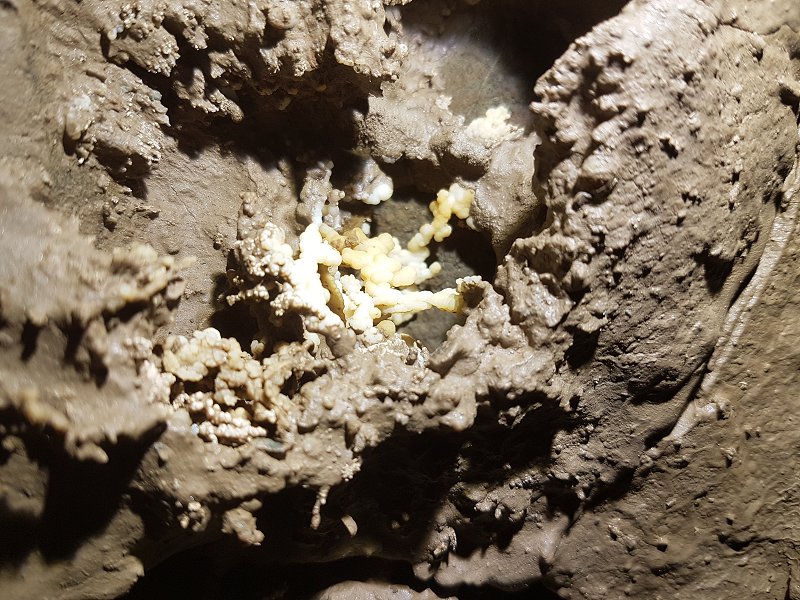 Aggregations of small beads.
Lighting by Tarquin
Aggregations of small beads.
Lighting by Tarquin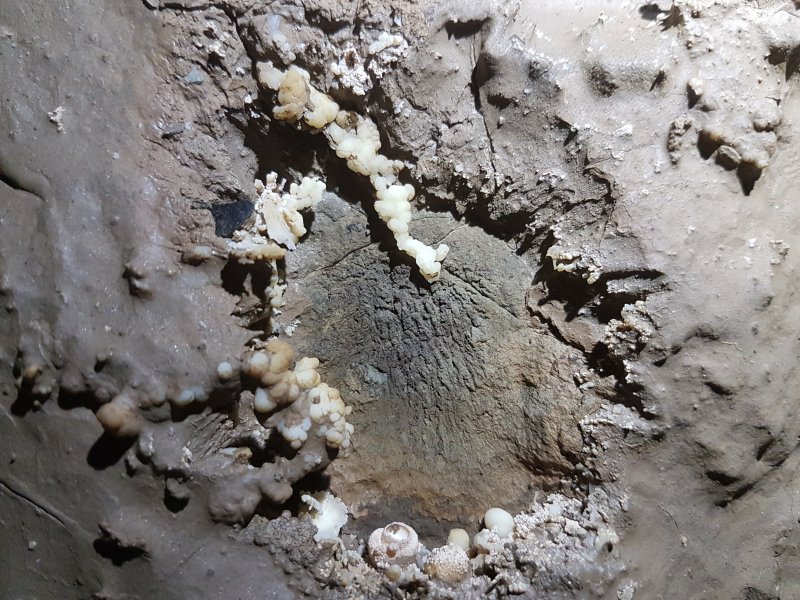 Aggregations and larger beads.
Lighting by Tarquin
Aggregations and larger beads.
Lighting by Tarquin Beads and growths.
Lighting by Tarquin
Beads and growths.
Lighting by Tarquin Mud covered growths on the mud banks.
Lighting by Tarquin
Mud covered growths on the mud banks.
Lighting by Tarquin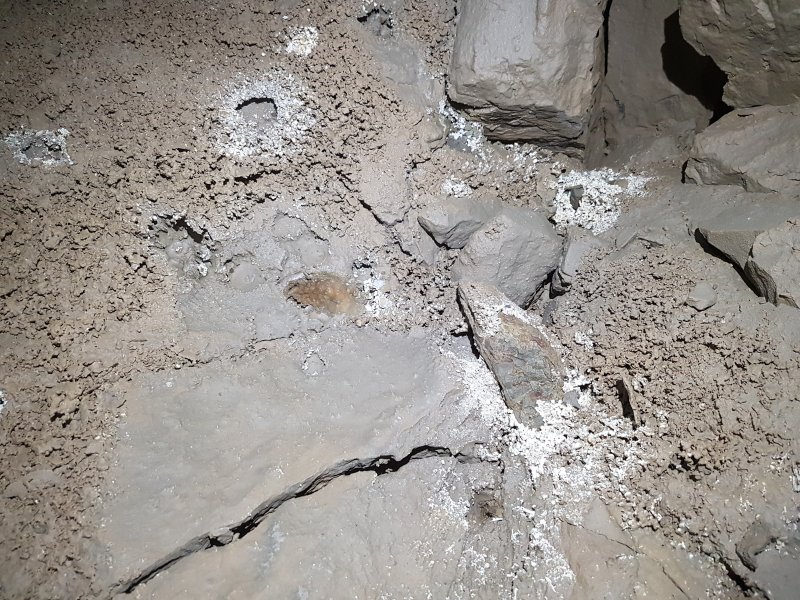 Drips clearing the mud off the cryostal. This looks like the surrounding mud is bobbly, but it is actually cryostal coated in a thin layer of wet mud. This would appear to be due to a flood, with water backing up as a result of Fourth Choke, which at the same time prevented the cryostal from being washed away. Possibly, the flood could be periglacial (after the glaciation that created the cryostal in the first place).
Lighting by Tarquin
Drips clearing the mud off the cryostal. This looks like the surrounding mud is bobbly, but it is actually cryostal coated in a thin layer of wet mud. This would appear to be due to a flood, with water backing up as a result of Fourth Choke, which at the same time prevented the cryostal from being washed away. Possibly, the flood could be periglacial (after the glaciation that created the cryostal in the first place).
Lighting by Tarquin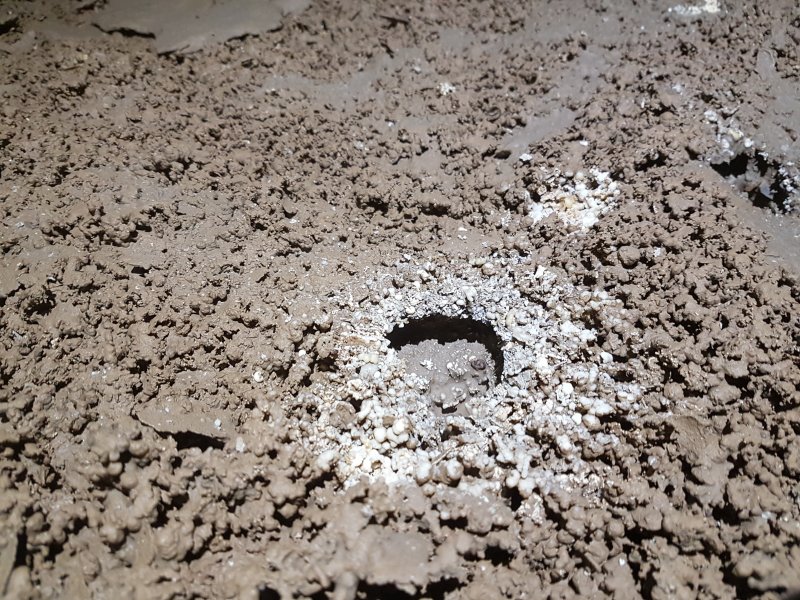 Drip hole exposing cryostal.
Lighting by Tarquin
Drip hole exposing cryostal.
Lighting by Tarquin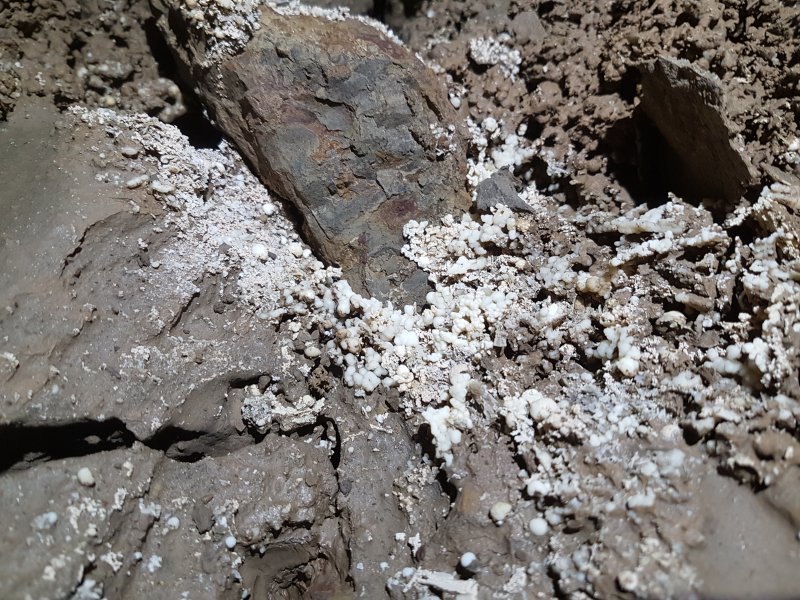 Clean-washed cryostal.
Lighting by Tarquin
Clean-washed cryostal.
Lighting by Tarquin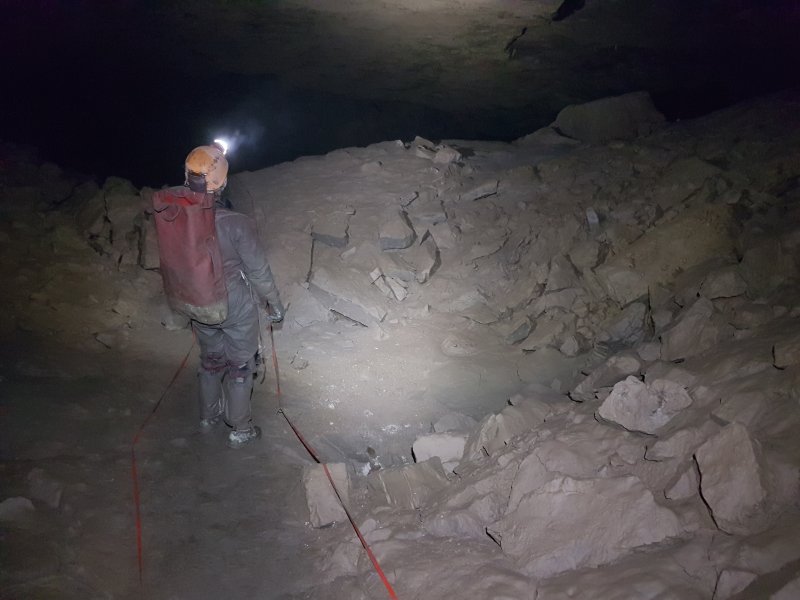 The wide passage and mud banks after Fourth Choke. One of the patches of cryostal can be seen in the floor to the right. Beyond here, the passage gets far too big for the camera to produce useful results, especially with only one person to provide light.
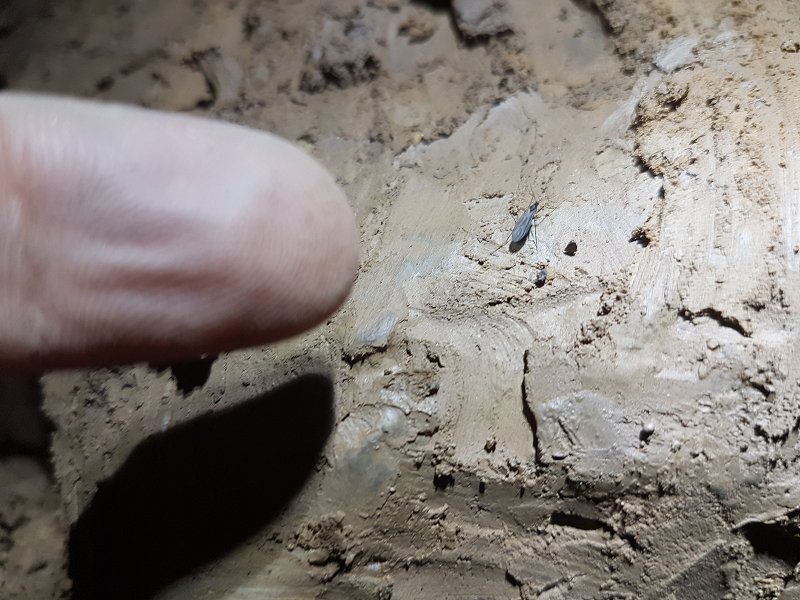 A marshfly (a type of Dipteran fly; Heleomyza serrata or captiosa), walking around, at about 125 metres below surface, at the junction with Promised Land. These are often seen dying or dead on the walls of passages near cave entrances, but this is a very long way underground. Perhaps an egg or larvae got washed in by a stream.
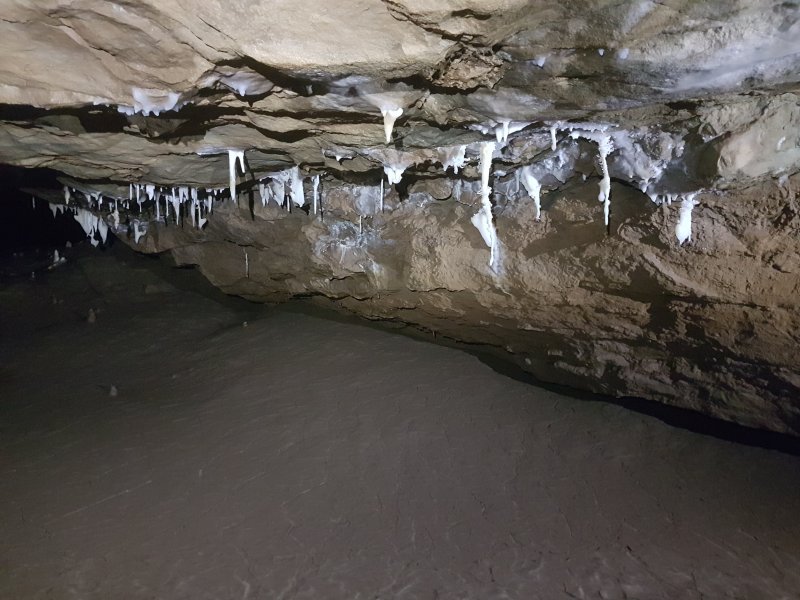 An undercut on the right contains some attractive helictite formations, at the start of the famous Helictite Passage. Not the most imaginative name in the World, but very descriptive.
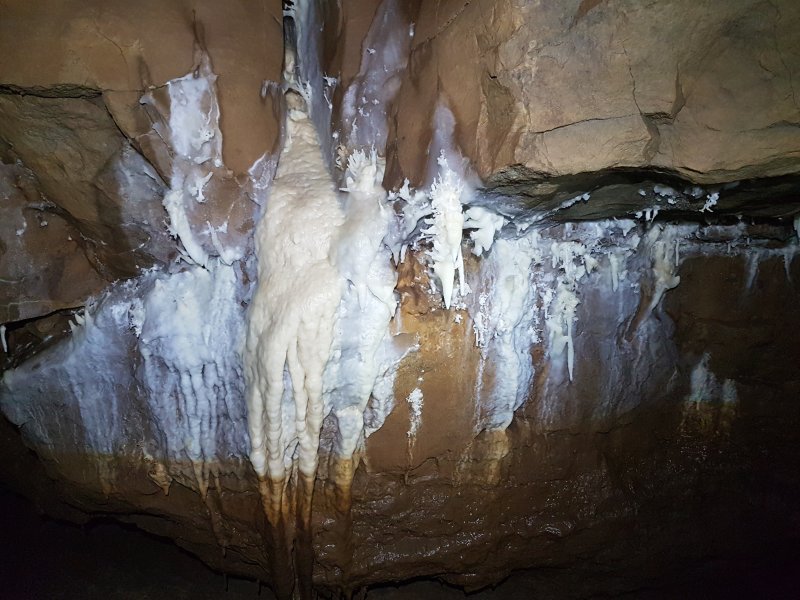 The second group of helictites is much more substantial, with a very clear historic tide mark showing an old ponding level. The ponding matches the old lip of the mud banks on the main passage, but the stream in the passage now flows through the rocks beneath the passage, and it no longer floods to quite such a severe level.
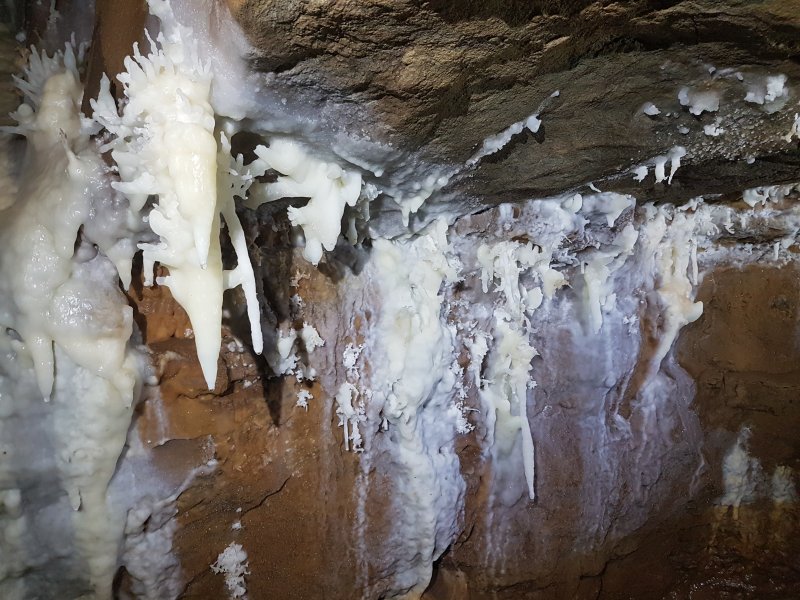 Detail of the helictites. These early ones are relatively large, and all on the left wall.
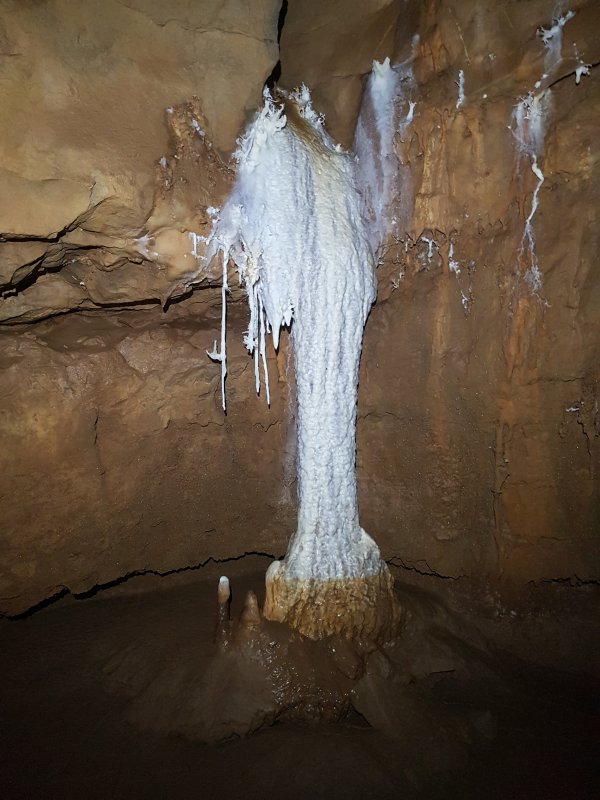 The third group, with its attractive column.
 The wall beside the column.
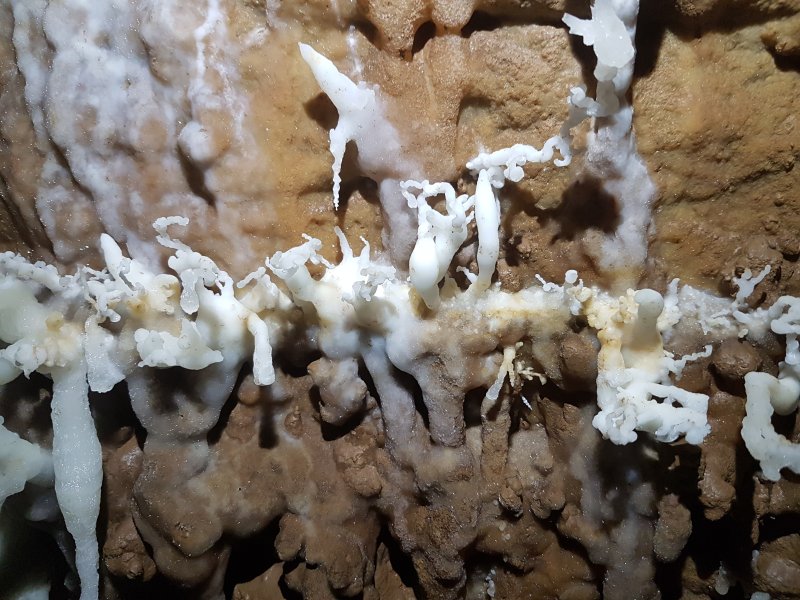 The upper part of the wall has pure white helictites.
Lighting by Tarquin
The upper part of the wall has pure white helictites.
Lighting by Tarquin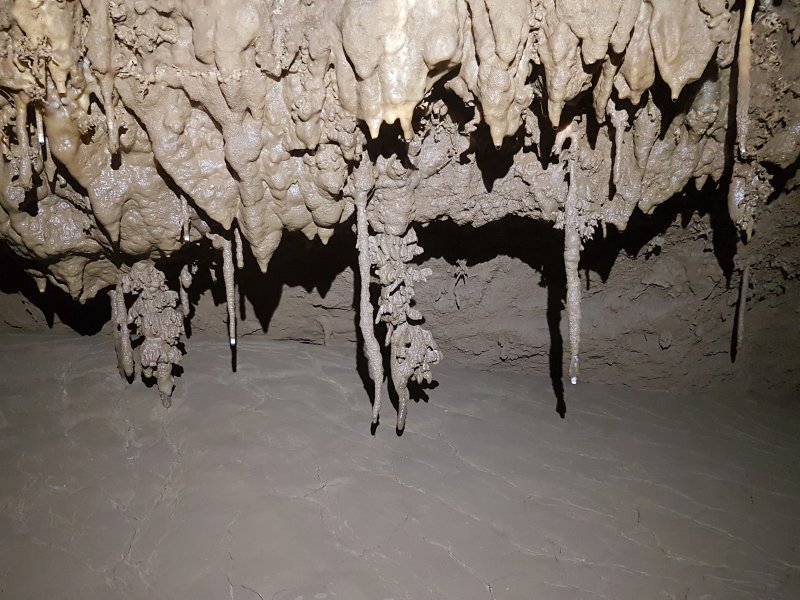 The lower part, below the tide mark, are coated in mud, with evident underwater development.
Lighting by Tarquin
The lower part, below the tide mark, are coated in mud, with evident underwater development.
Lighting by Tarquin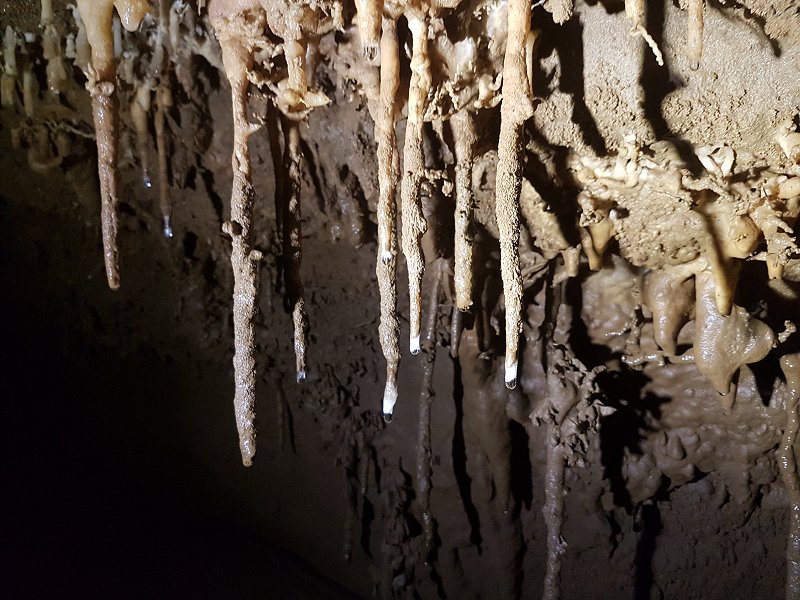 Regrowth since the water drained.
Lighting by Antonia
Regrowth since the water drained.
Lighting by Antonia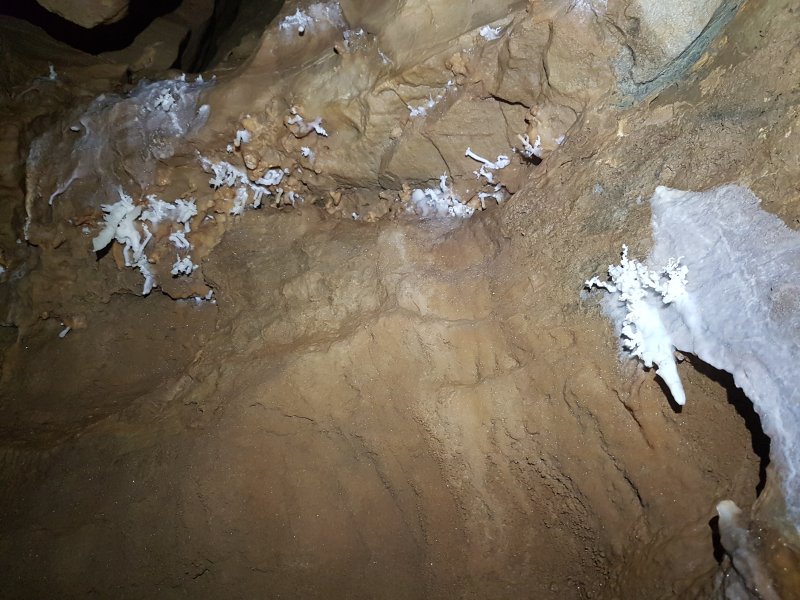 Small examples before the corner.
Lighting by Tarquin
Small examples before the corner.
Lighting by Tarquin More small examples before the corner. These are the last on the left wall.
Lighting by Tarquin
More small examples before the corner. These are the last on the left wall.
Lighting by Tarquin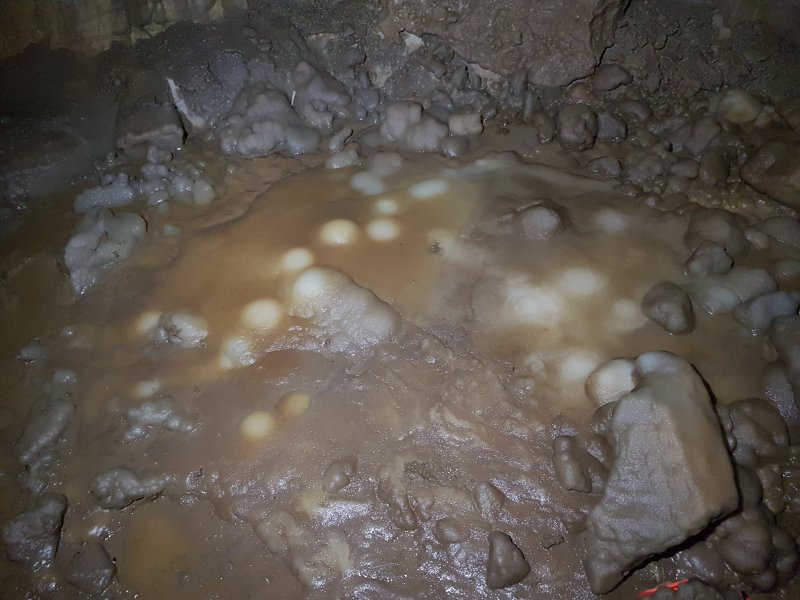 Calcite floor of a small aven, with distinctive light patches where drips are landing.
Lighting by Tarquin
Calcite floor of a small aven, with distinctive light patches where drips are landing.
Lighting by Tarquin Mud ripples in an undercut. These are, rather unexpectedly, showing a flow of water into this inlet passage, rather than out of it. Presumably this is just an eddy.
Lighting by Antonia
Mud ripples in an undercut. These are, rather unexpectedly, showing a flow of water into this inlet passage, rather than out of it. Presumably this is just an eddy.
Lighting by Antonia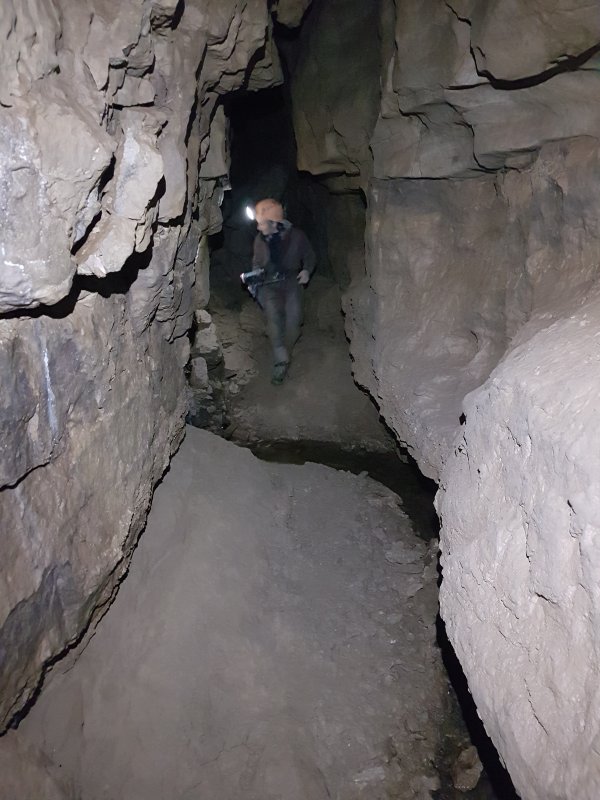 Cavers are then asked to proceed with one or two people at a time, since the passage beyond becomes extremely well decorated, and great care must be taken to avoid damaging the formations, which are only a few cm away. There are very few places where people can pass each other.
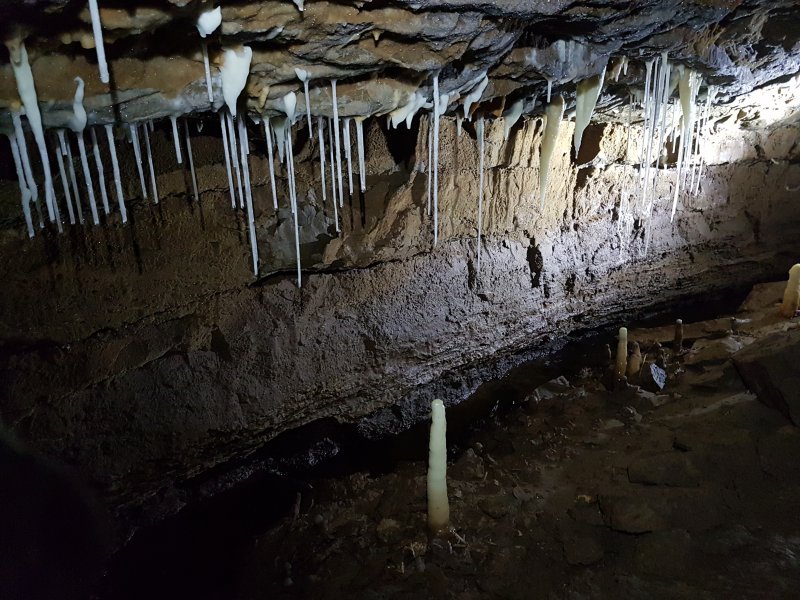 Straws, seeming quite out of place in this passage.
 Now beyond the corner, the incredible helictites begin, all on the right wall. This set are quite minimalist, but still something most of us would have been proud to find.
Lighting by Tarquin
Now beyond the corner, the incredible helictites begin, all on the right wall. This set are quite minimalist, but still something most of us would have been proud to find.
Lighting by Tarquin Also quite minimalist, with one small intricate bit.
Lighting by Tarquin
Also quite minimalist, with one small intricate bit.
Lighting by Tarquin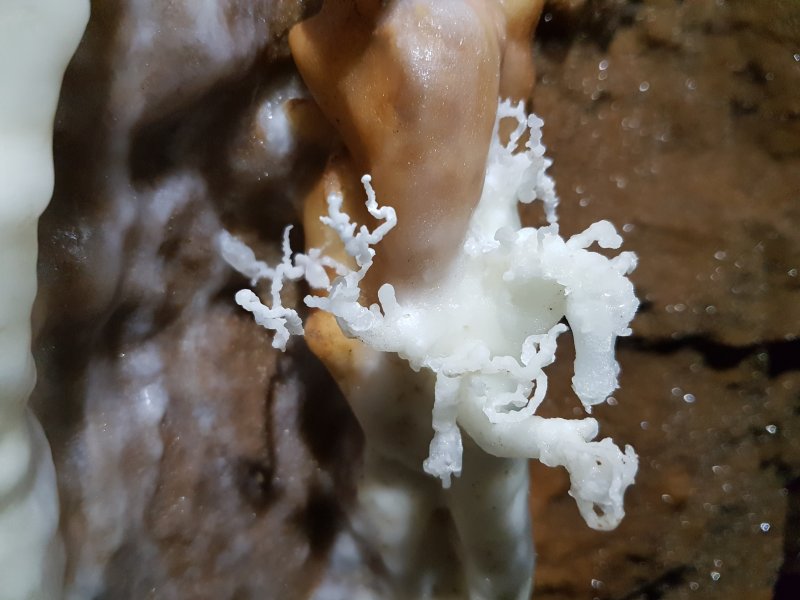 The intricate bit.
Lighting by Tarquin
The intricate bit.
Lighting by Tarquin Triple set. The passage starts to get quite narrow, with progress here being made by stooping to the left, avoiding the right wall.
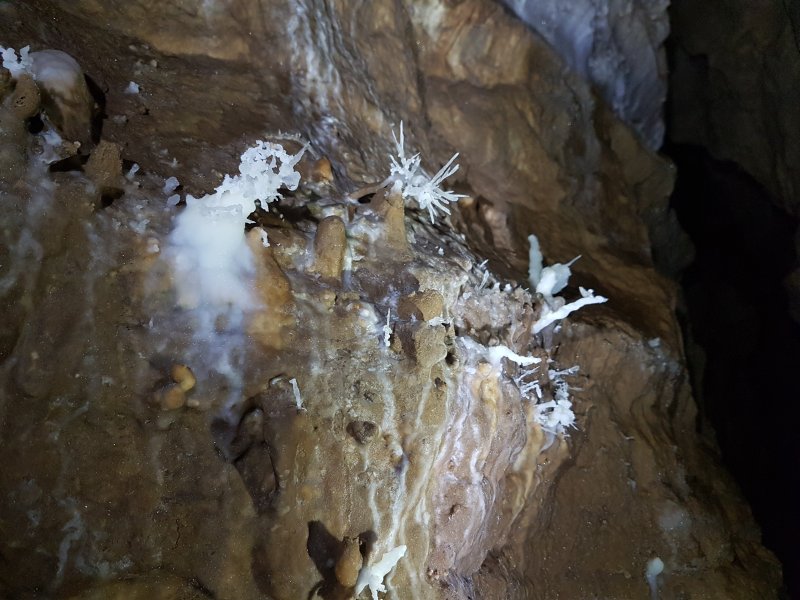 Start of the triple set.
Lighting by Tarquin and Antonia
Start of the triple set.
Lighting by Tarquin and Antonia Detail of an anthodite urchin.
Lighting by Antonia
Detail of an anthodite urchin.
Lighting by Antonia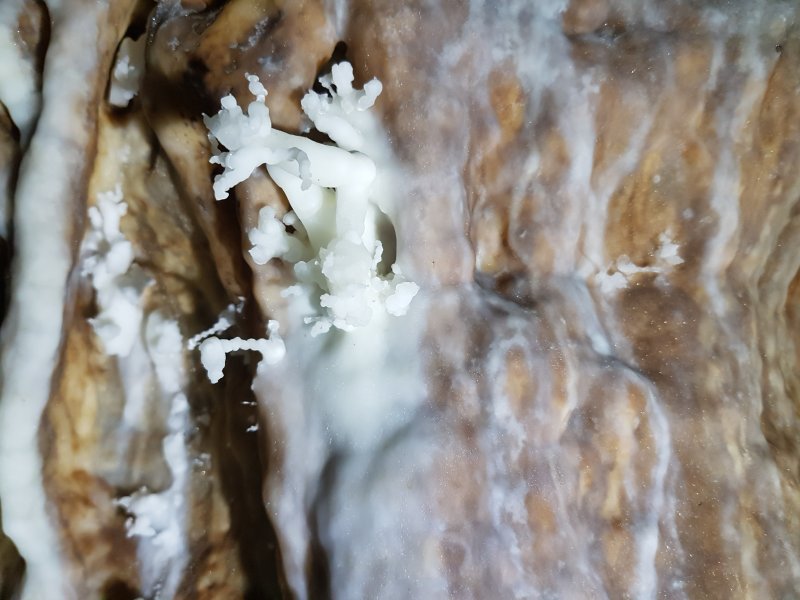 Start of the triple set.
Lighting by Tarquin
Start of the triple set.
Lighting by Tarquin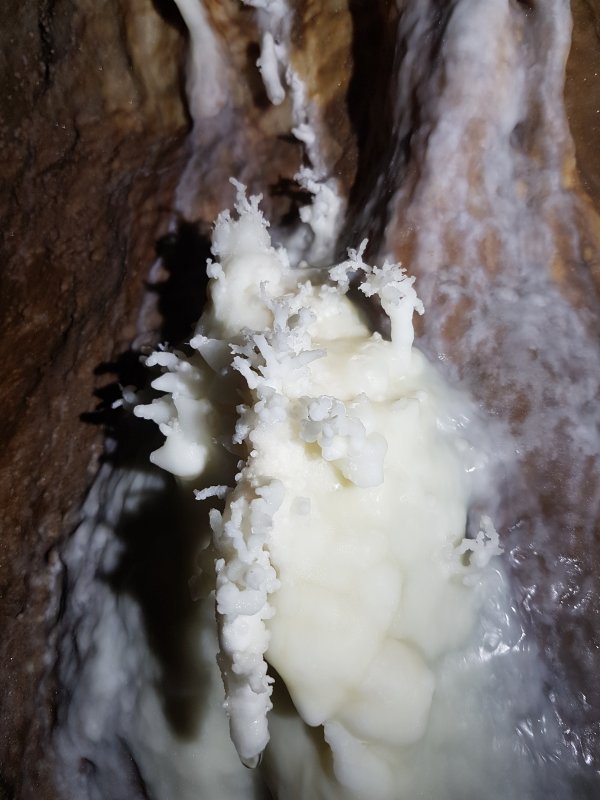 First of the triple set.
Lighting by Tarquin
First of the triple set.
Lighting by Tarquin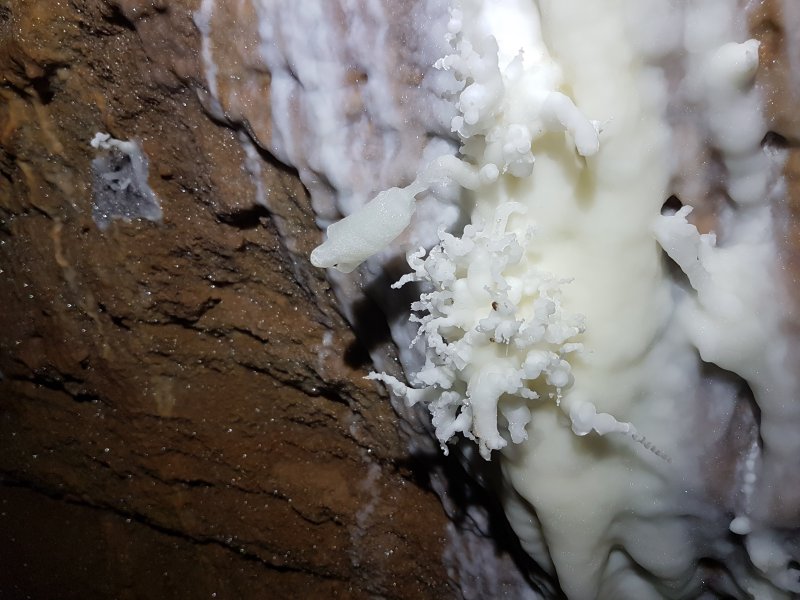 First of the triple set.
Lighting by Tarquin
First of the triple set.
Lighting by Tarquin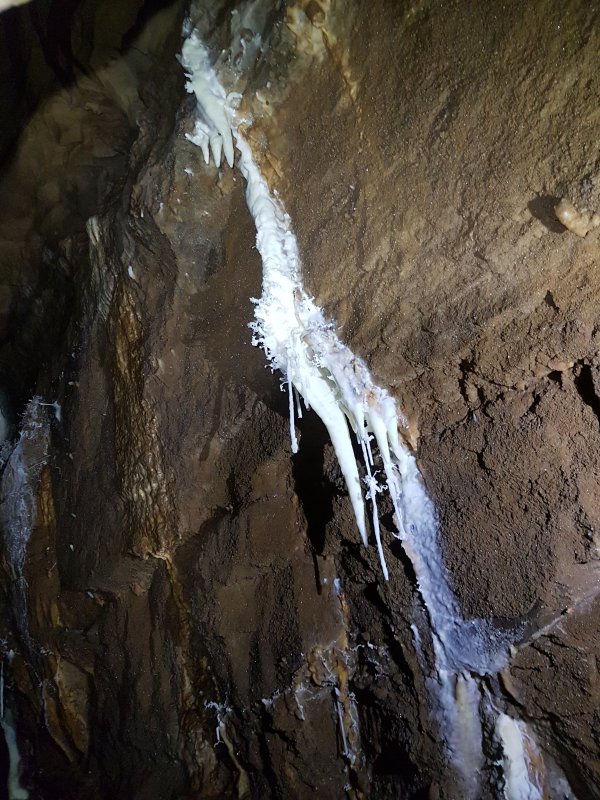 Second of the triple set.
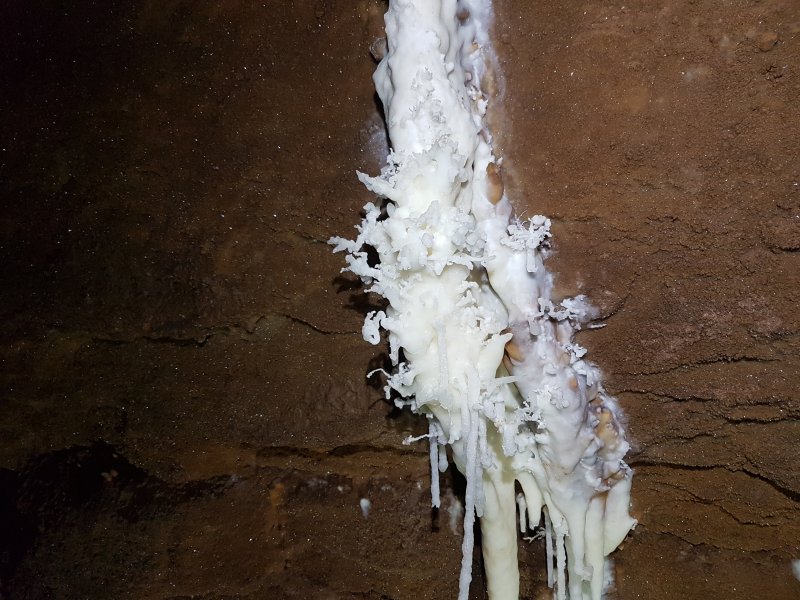 Second of the triple set.
Lighting by Tarquin
Second of the triple set.
Lighting by Tarquin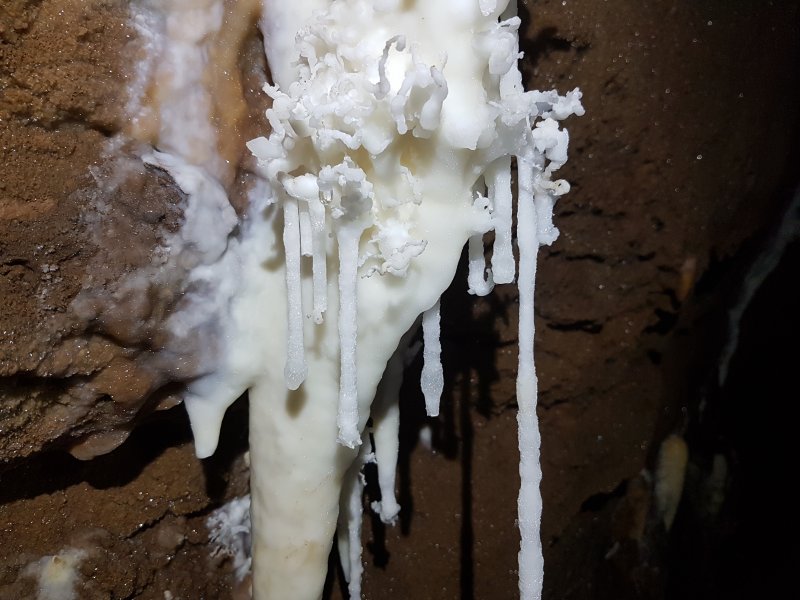 Straws hanging off the side of a curtain, very similar to Draenen's Hanging Basket.
Lighting by Tarquin
Straws hanging off the side of a curtain, very similar to Draenen's Hanging Basket.
Lighting by Tarquin Below the second of the triple set.
Lighting by Tarquin
Below the second of the triple set.
Lighting by Tarquin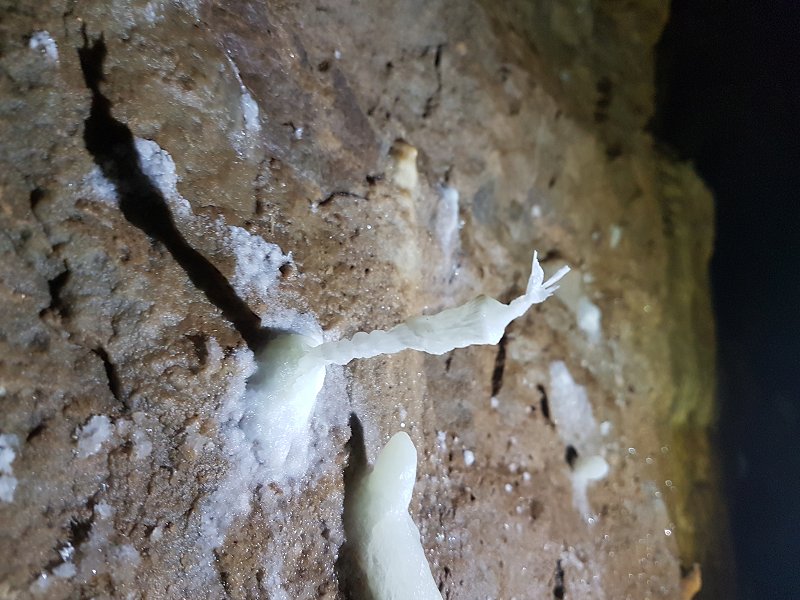 Pronged helictite between the triple sets.
Lighting by Antonia
Pronged helictite between the triple sets.
Lighting by Antonia Between the triple sets.
Lighting by Tarquin
Between the triple sets.
Lighting by Tarquin From another angle.
Lighting by Tarquin
From another angle.
Lighting by Tarquin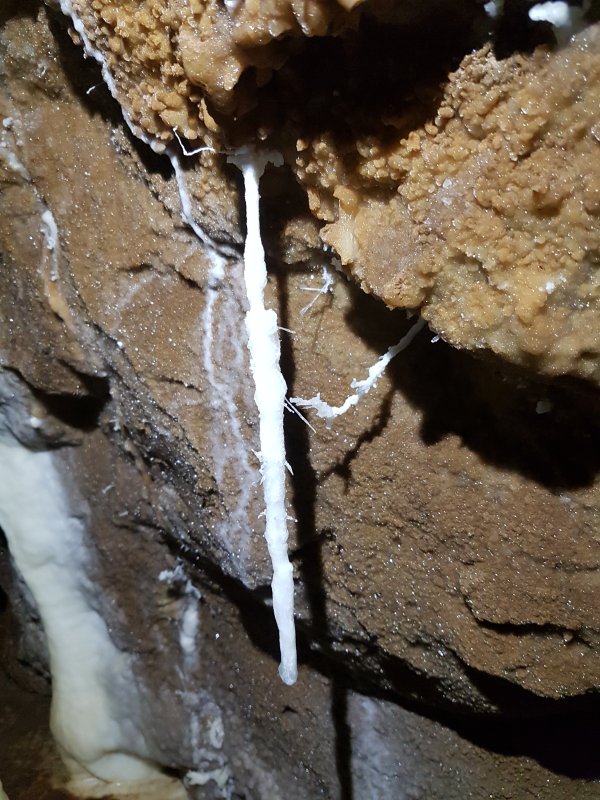 Between the triple sets.
Lighting by Tarquin
Between the triple sets.
Lighting by Tarquin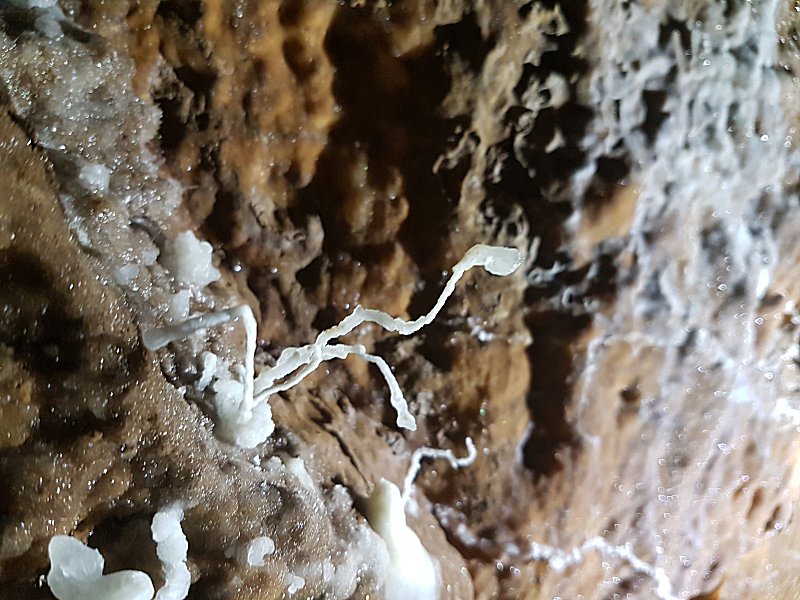 Between the triple sets.
Lighting by Antonia
Between the triple sets.
Lighting by Antonia Third and most impressive of the triple set.
Lighting by Tarquin
Third and most impressive of the triple set.
Lighting by Tarquin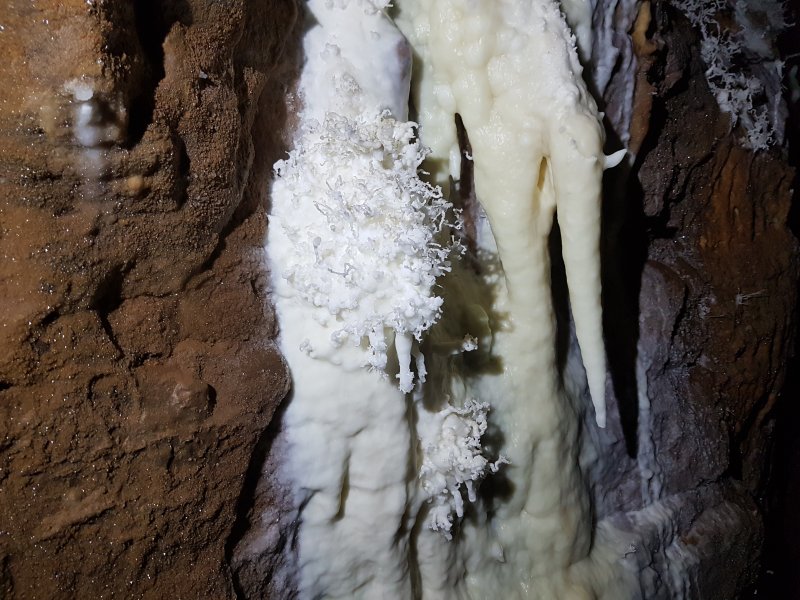 The most elaborate cluster of the triple set.
Lighting by Tarquin
The most elaborate cluster of the triple set.
Lighting by Tarquin The next set is the crowning glory of the passage - easily the best in the cave. The passage is very narrow at this point, and the picture was actually taken as a panorama, with the camera wedged against the opposite wall, unable to see what it was actually taking. The picture quality definitely suffers. In some patches though, there are so many helictites and anthodites that the surface just looks blurred. This set of helictites also has the only significant amount of mud damage on it, presumably because of someone losing their balance in the narrow passage. Still, that is quite impressive given how long ago this passage was found, and thankfully only a little flowstone was muddied, not any of the helictites.
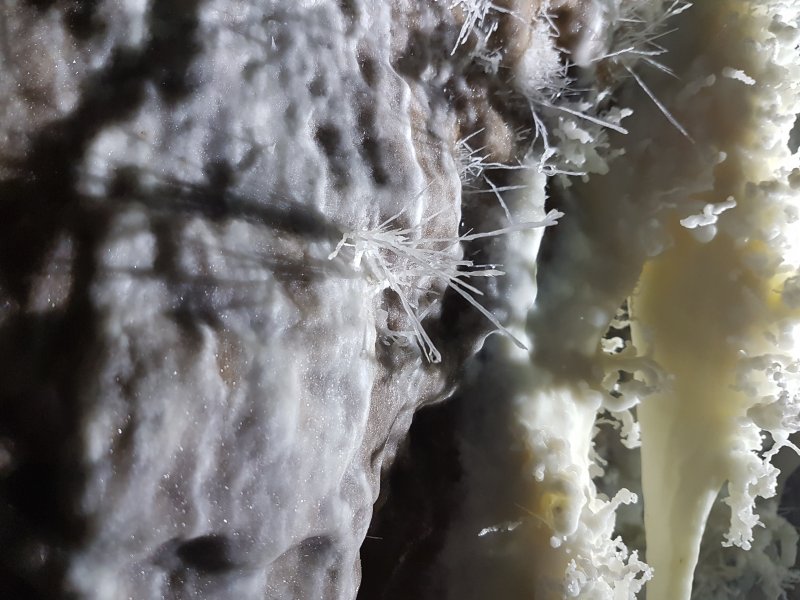 Needle thin anthodites, which cover this breathtaking formation.
Lighting by Antonia
Needle thin anthodites, which cover this breathtaking formation.
Lighting by Antonia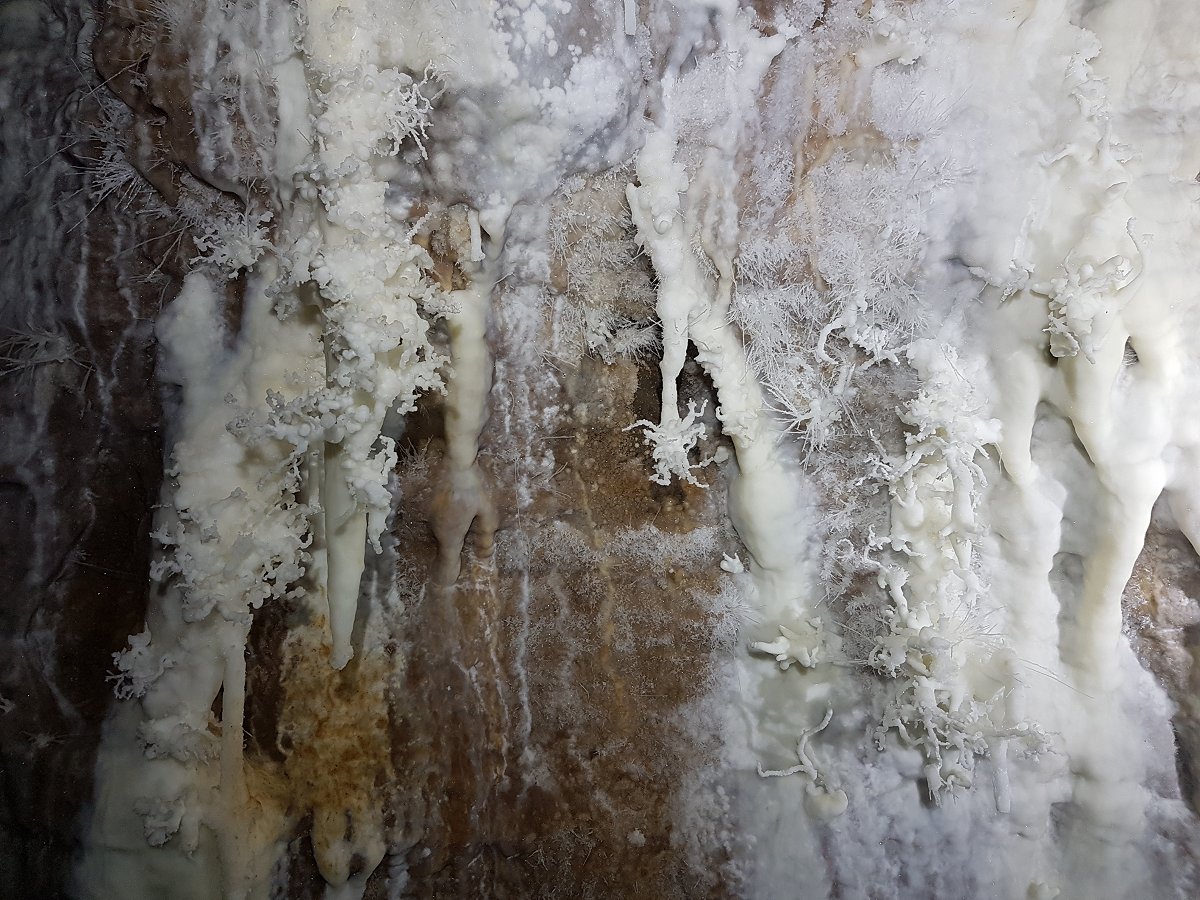 A profusion of helictites and needle-like anthodites. The mud on the bottom-left is natural, not put there by cavers.
Lighting by Antonia
A profusion of helictites and needle-like anthodites. The mud on the bottom-left is natural, not put there by cavers.
Lighting by Antonia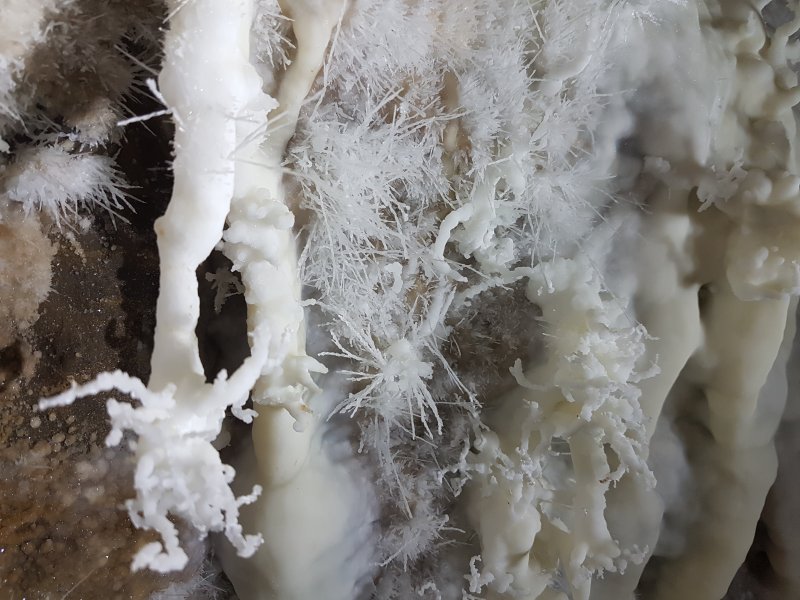 Helictites and anthodites.
Lighting by Antonia
Helictites and anthodites.
Lighting by Antonia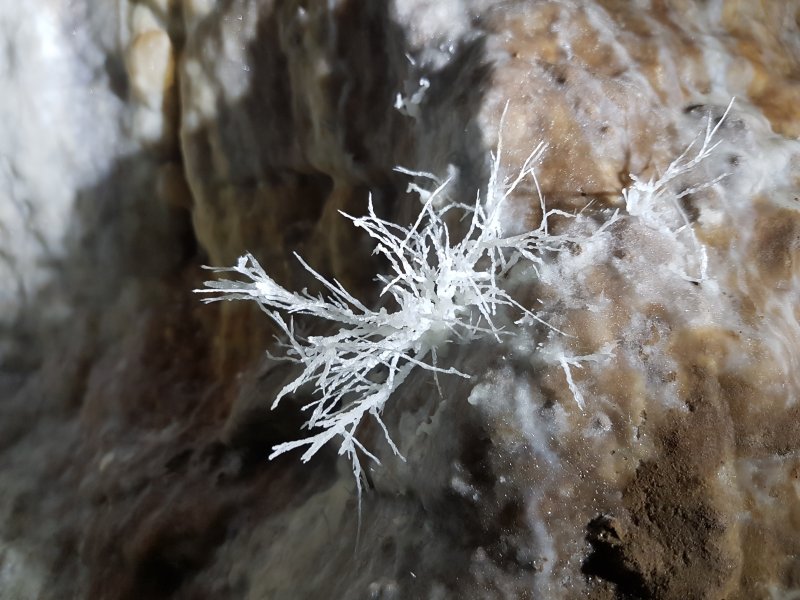 Incredible branching anthodite.
Lighting by Antonia
Incredible branching anthodite.
Lighting by Antonia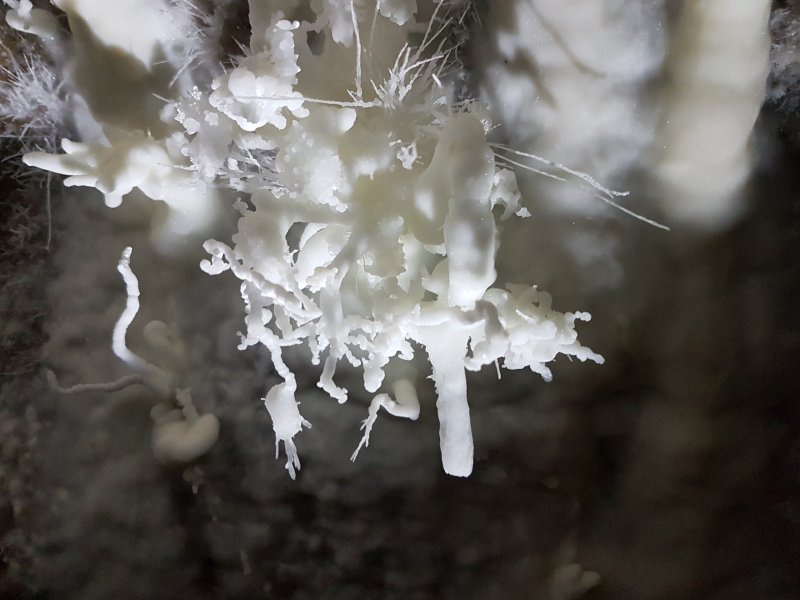 Helictite cluster.
Lighting by Antonia
Helictite cluster.
Lighting by Antonia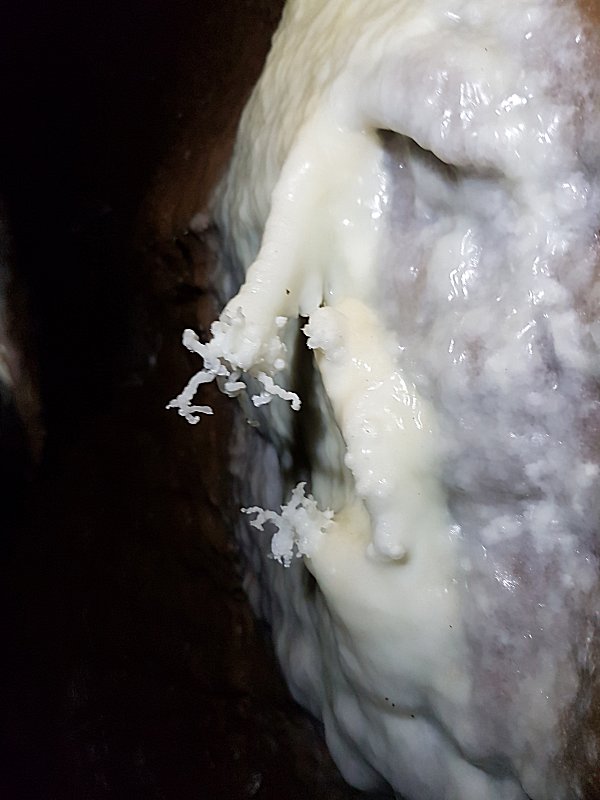 A cross between Gonzo from The Muppets, and Cthulhu (or Davy Jones, if you prefer).
Lighting by Tarquin
A cross between Gonzo from The Muppets, and Cthulhu (or Davy Jones, if you prefer).
Lighting by Tarquin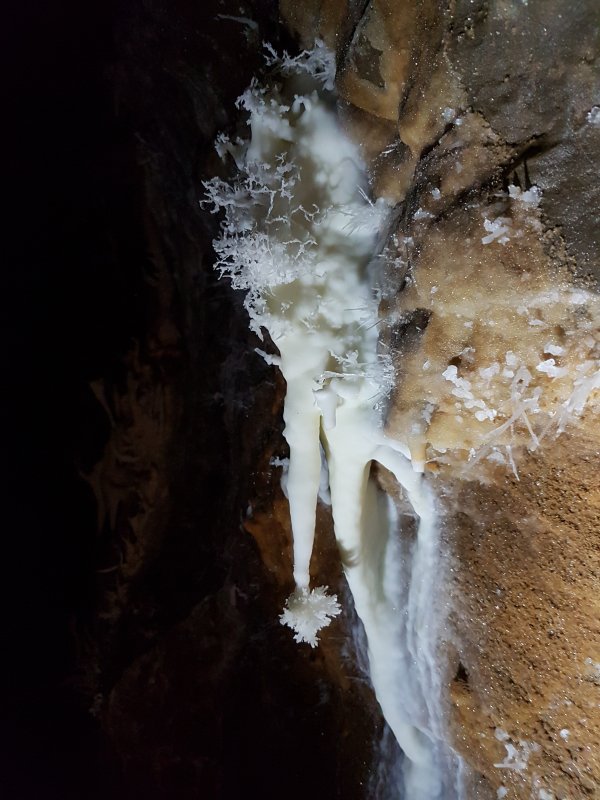 One of the most iconic helictite formations in the cave, with its fine pom pom.
Lighting by Tarquin
One of the most iconic helictite formations in the cave, with its fine pom pom.
Lighting by Tarquin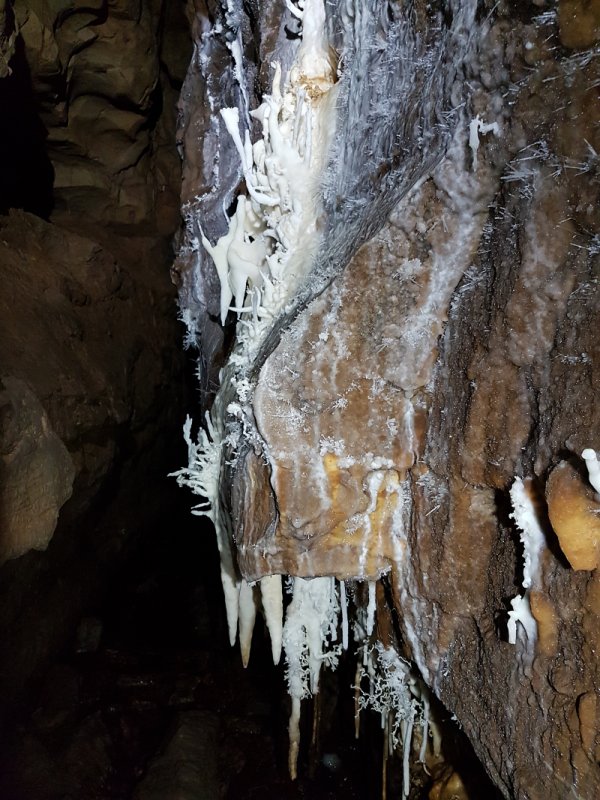 Just beyond is the next set, with its distinctively large helictites. This is where most visits end. We weren't sure, but on our way out, we noticed that the tape may possibly have been intended to block the next section of passage, but if so, it had fallen into the stream. Or perhaps it is meant to be where it was, allowing access beyond this point.
Lighting by Tarquin
Just beyond is the next set, with its distinctively large helictites. This is where most visits end. We weren't sure, but on our way out, we noticed that the tape may possibly have been intended to block the next section of passage, but if so, it had fallen into the stream. Or perhaps it is meant to be where it was, allowing access beyond this point.
Lighting by Tarquin Top of the set.
Lighting by Tarquin
Top of the set.
Lighting by Tarquin A set of chess pieces.
Lighting by Tarquin
A set of chess pieces.
Lighting by Tarquin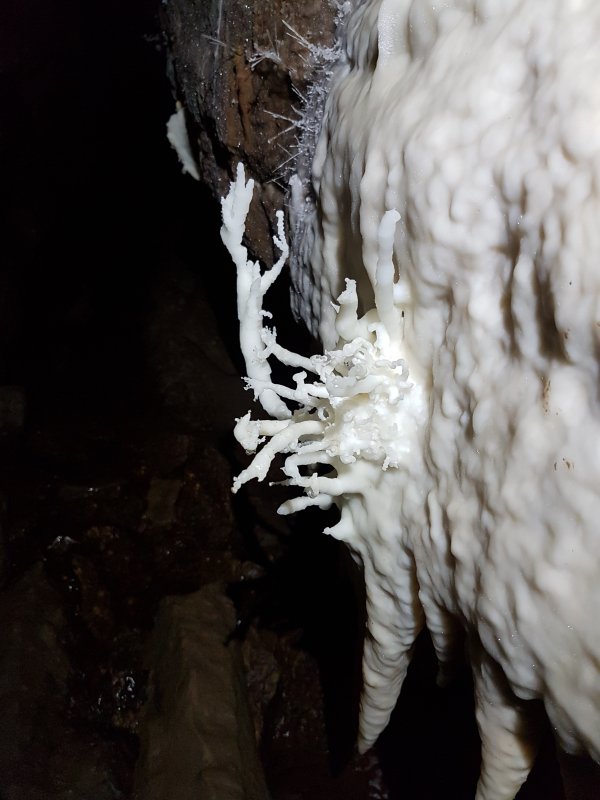 Hairy.
Lighting by Tarquin
Hairy.
Lighting by Tarquin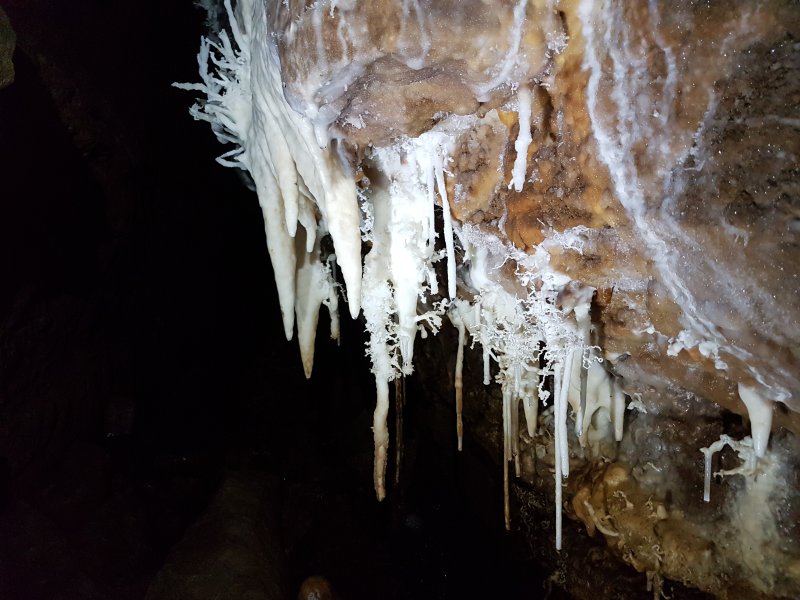 Below the lip.
Lighting by Tarquin
Below the lip.
Lighting by Tarquin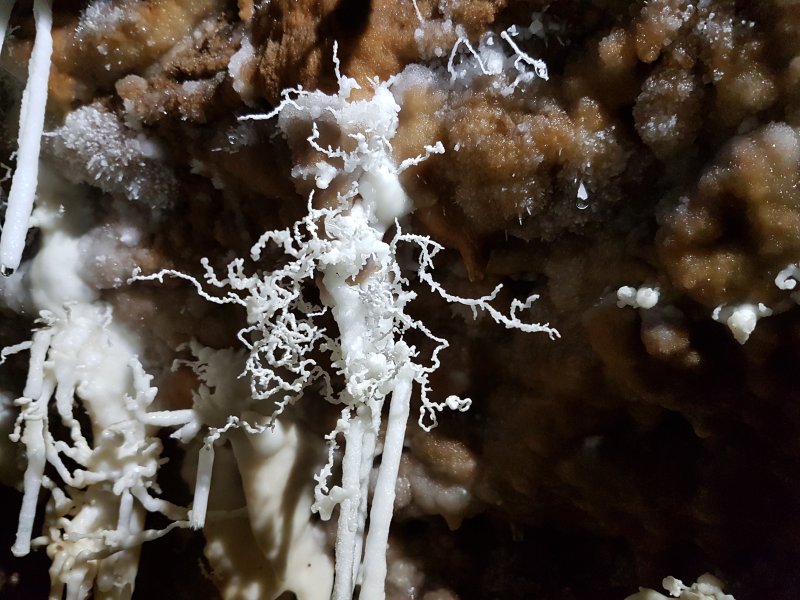 Detail.
Lighting by Tarquin
Detail.
Lighting by Tarquin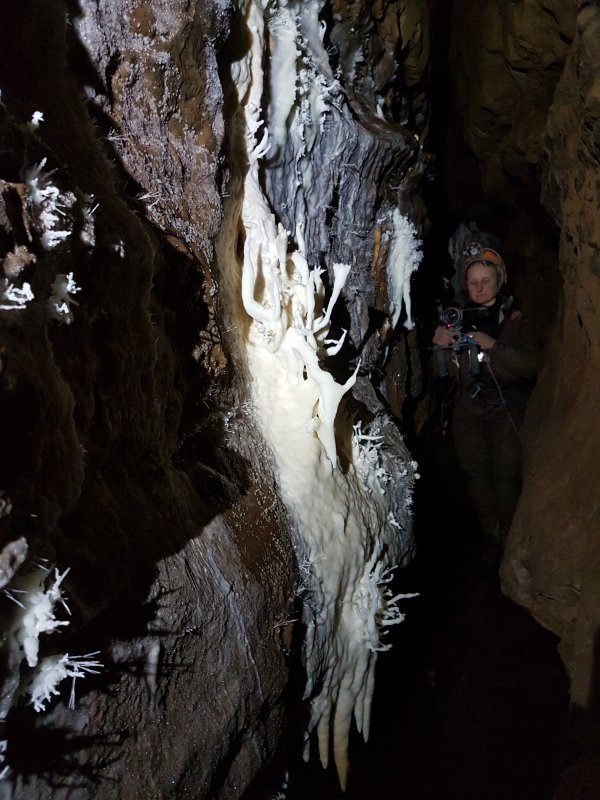 Videoing the helictites.
Lighting by Tarquin
Videoing the helictites.
Lighting by Tarquin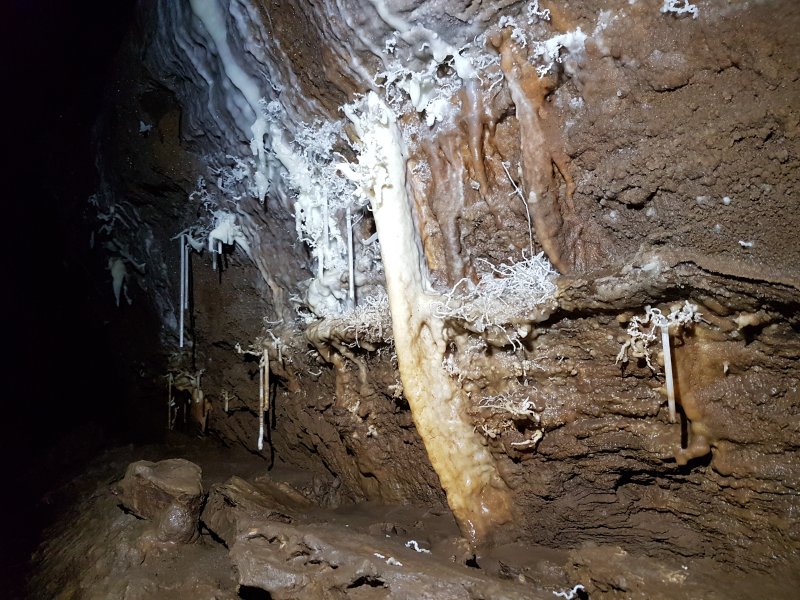 Immediately afterwards, it becomes very difficult to progress along the passage while walking, as the formations narrow the gap so far that they risk damage from any passing cavers. Clothing needs to be held in, and only thin cavers can get anywhere without lying in the stream. The helictites are still rather lovely, of course. The muddy tide mark shows that this passage can in fact flood, rearranging the tapes.
Lighting by Tarquin
Immediately afterwards, it becomes very difficult to progress along the passage while walking, as the formations narrow the gap so far that they risk damage from any passing cavers. Clothing needs to be held in, and only thin cavers can get anywhere without lying in the stream. The helictites are still rather lovely, of course. The muddy tide mark shows that this passage can in fact flood, rearranging the tapes.
Lighting by Tarquin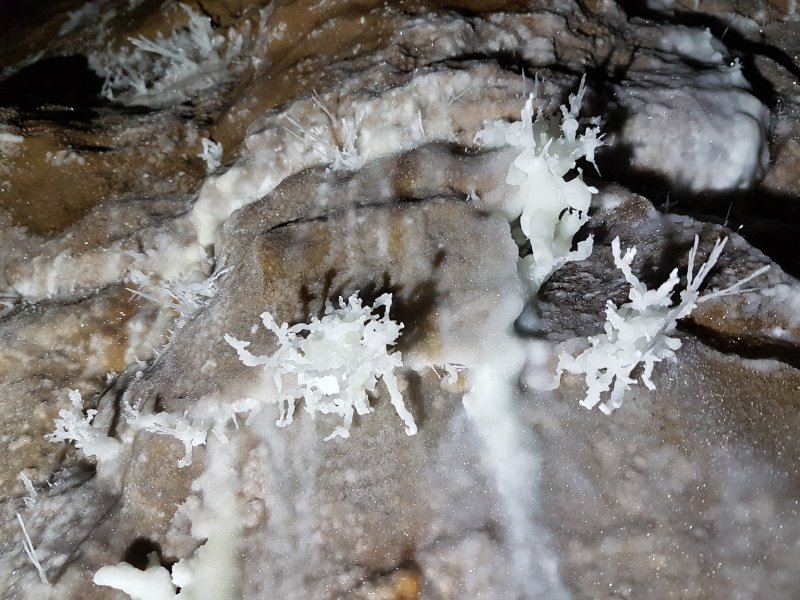 Helictites that fill the upper part of the rift.
Lighting by Tarquin
Helictites that fill the upper part of the rift.
Lighting by Tarquin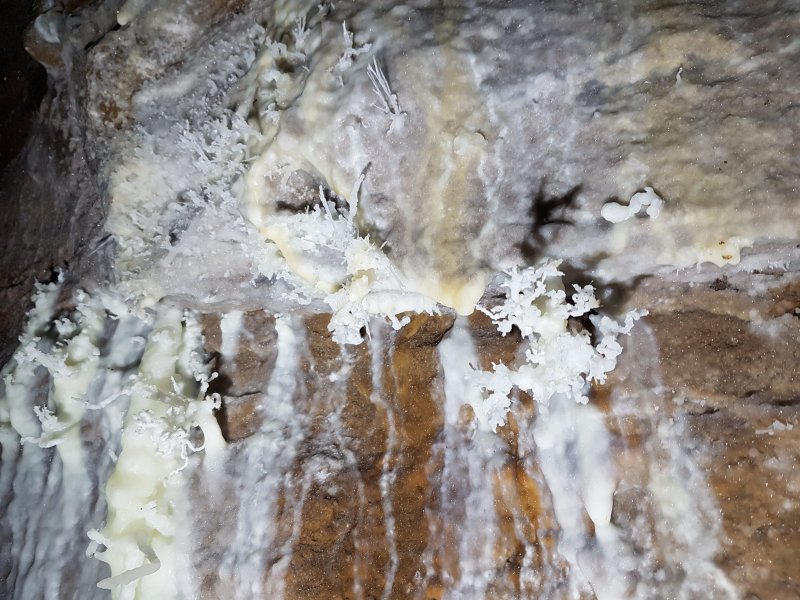 The upper part of the rift.
Lighting by Tarquin
The upper part of the rift.
Lighting by Tarquin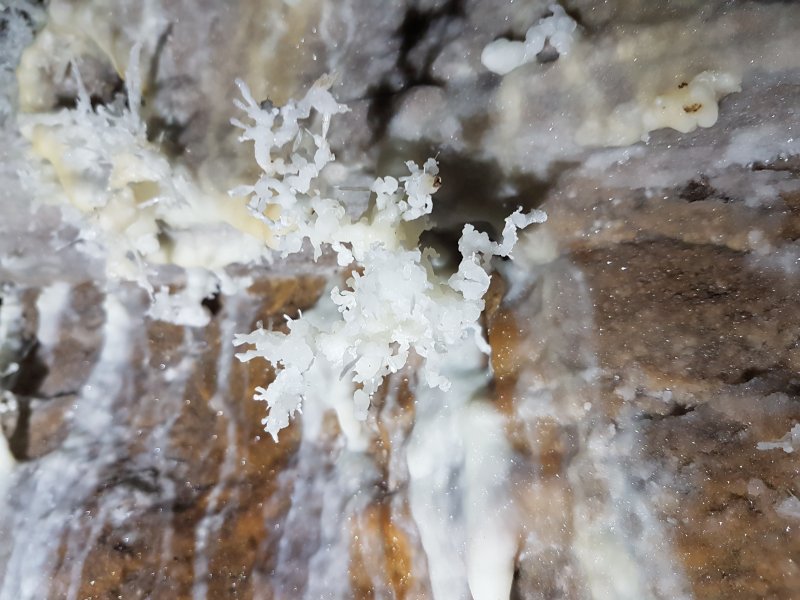 Detail.
Lighting by Tarquin
Detail.
Lighting by Tarquin Bonsai tree.
Lighting by Tarquin
Bonsai tree.
Lighting by Tarquin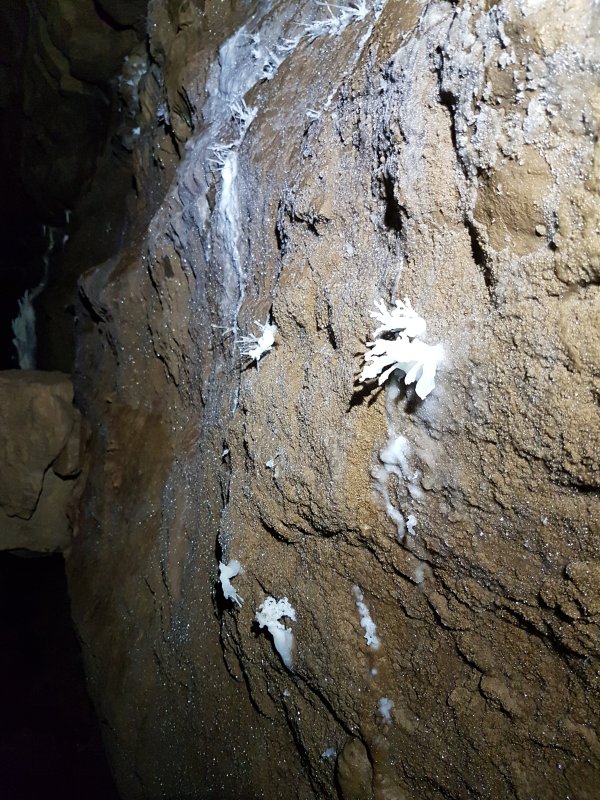 It is finally possible to stand again, with minimal helictites.
Lighting by Tarquin
It is finally possible to stand again, with minimal helictites.
Lighting by Tarquin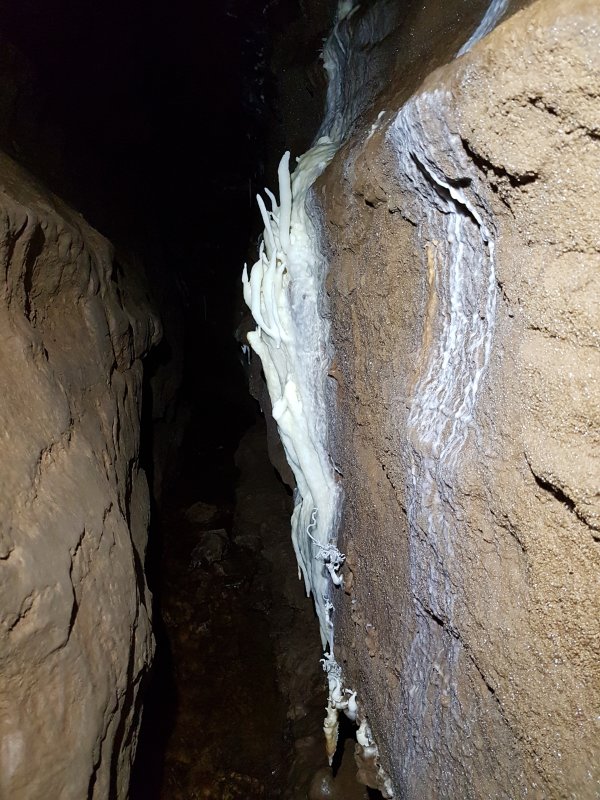 A set of helictites that seem to bear a resemblance to something else...
Lighting by Tarquin
A set of helictites that seem to bear a resemblance to something else...
Lighting by Tarquin A long helictite reminiscent of Draenen.
Lighting by Tarquin
A long helictite reminiscent of Draenen.
Lighting by Tarquin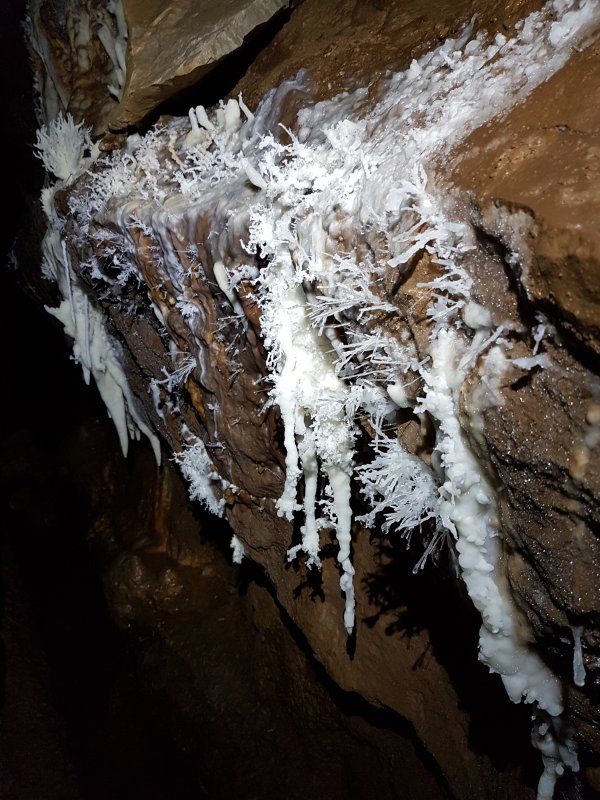 A really dramatic, elaborate set.
Lighting by Tarquin
A really dramatic, elaborate set.
Lighting by Tarquin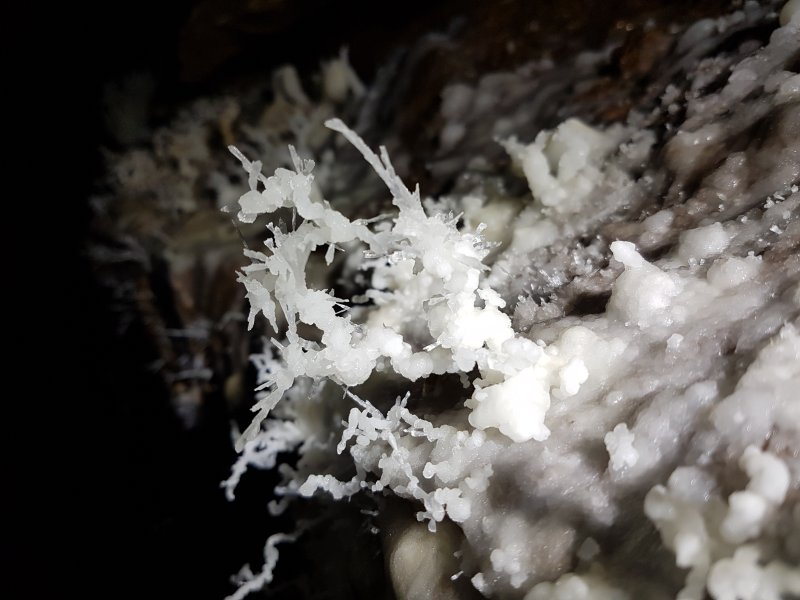 Helictite detail.
Lighting by Tarquin
Helictite detail.
Lighting by Tarquin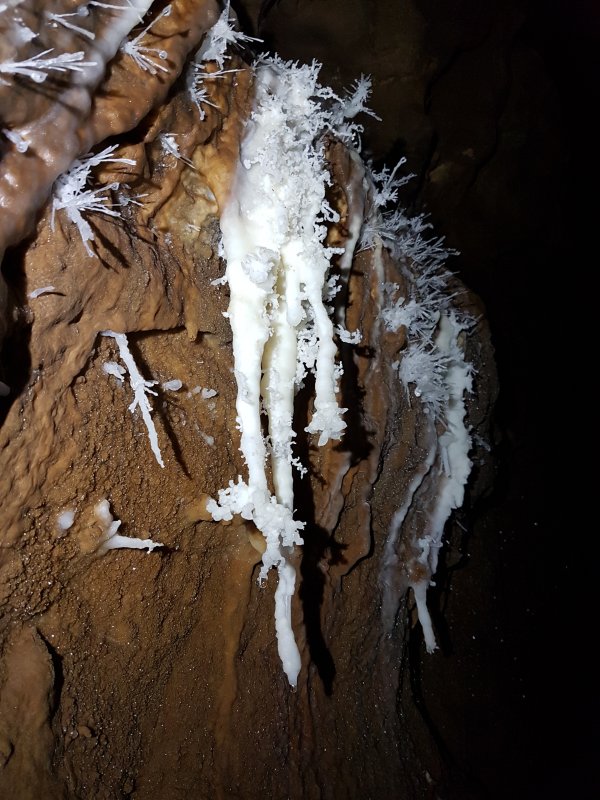 Helictites and anthodites.
Lighting by Tarquin
Helictites and anthodites.
Lighting by Tarquin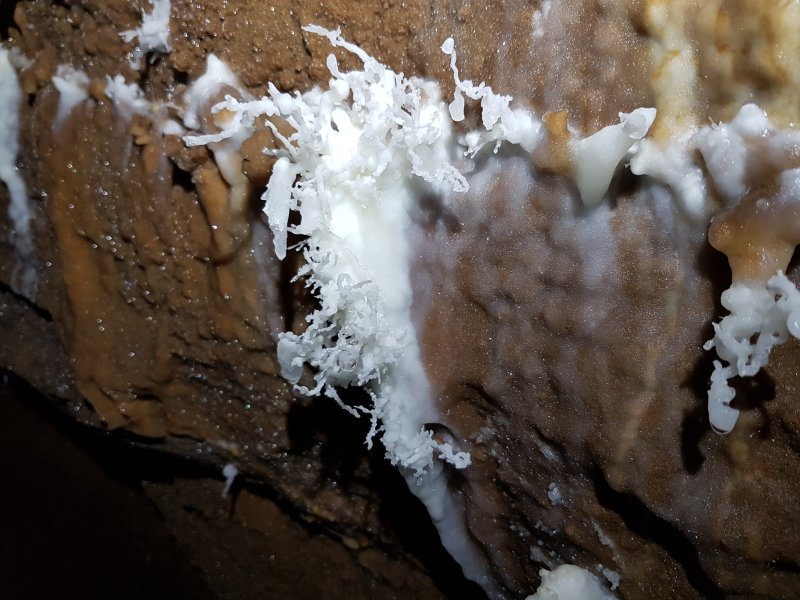 A rib of helictites.
Lighting by Tarquin
A rib of helictites.
Lighting by Tarquin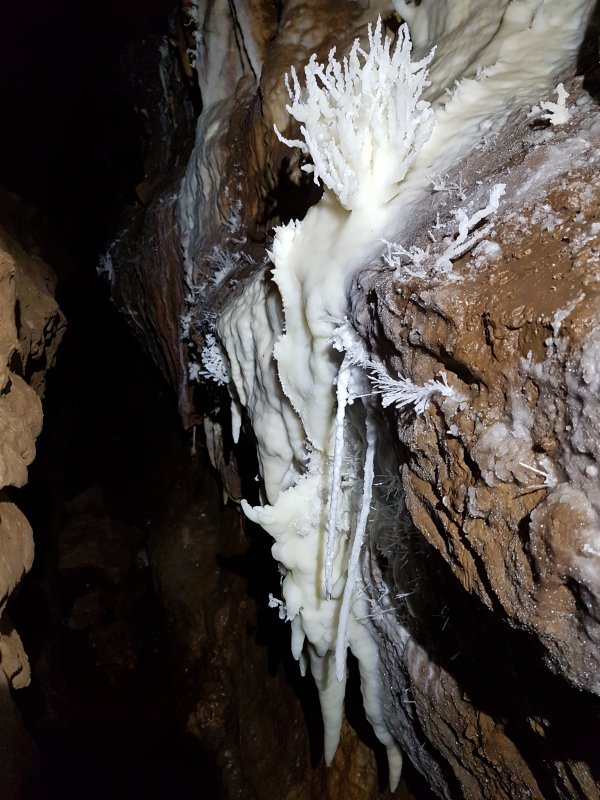 An extremely impressive, head-sized helictite growth that looks more like coral than calcite.
Lighting by Tarquin
An extremely impressive, head-sized helictite growth that looks more like coral than calcite.
Lighting by Tarquin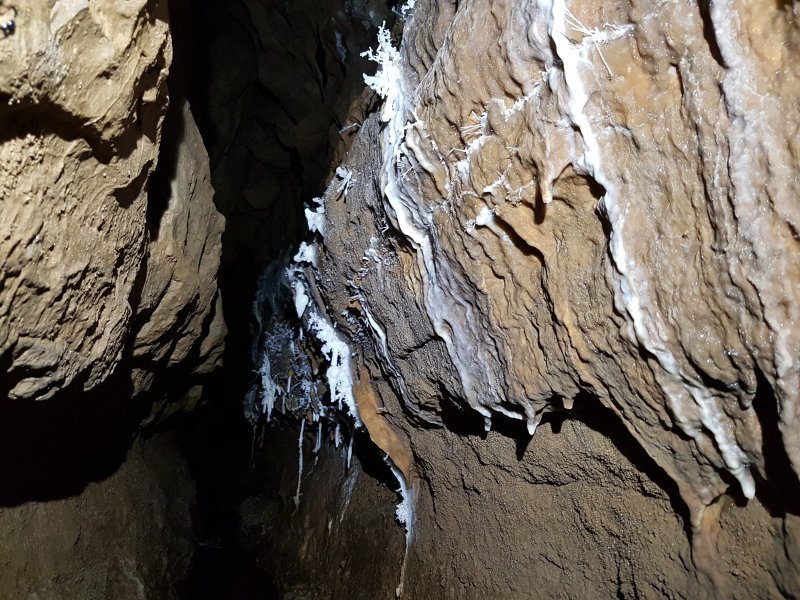 Beyond here, the helictites reduce the gap far too much, and progress is only possible by grovelling in the stream.
Lighting by Tarquin
Beyond here, the helictites reduce the gap far too much, and progress is only possible by grovelling in the stream.
Lighting by Tarquin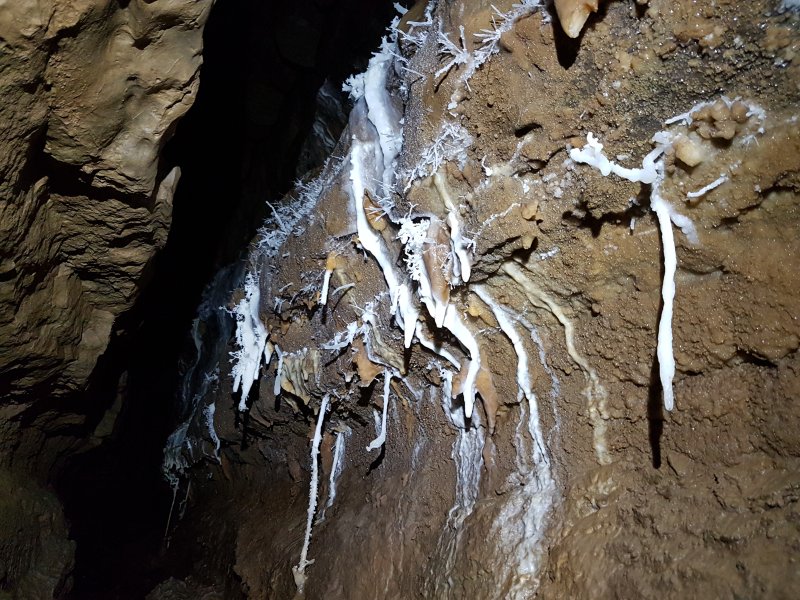 At least the view above is quite nice.
Lighting by Tarquin
At least the view above is quite nice.
Lighting by Tarquin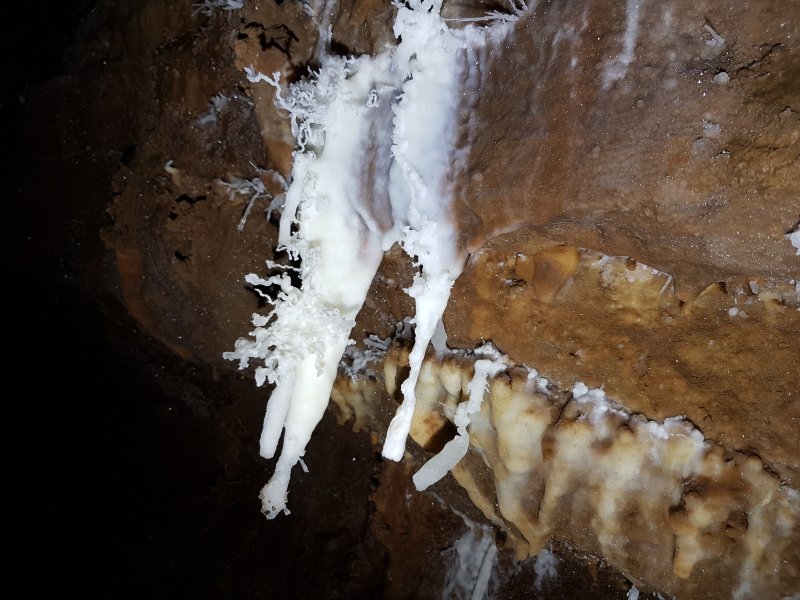 One of the best ones. Wonky picture, but I was lying on my back in the stream to take it, so enjoy what you get.
Lighting by Tarquin
One of the best ones. Wonky picture, but I was lying on my back in the stream to take it, so enjoy what you get.
Lighting by Tarquin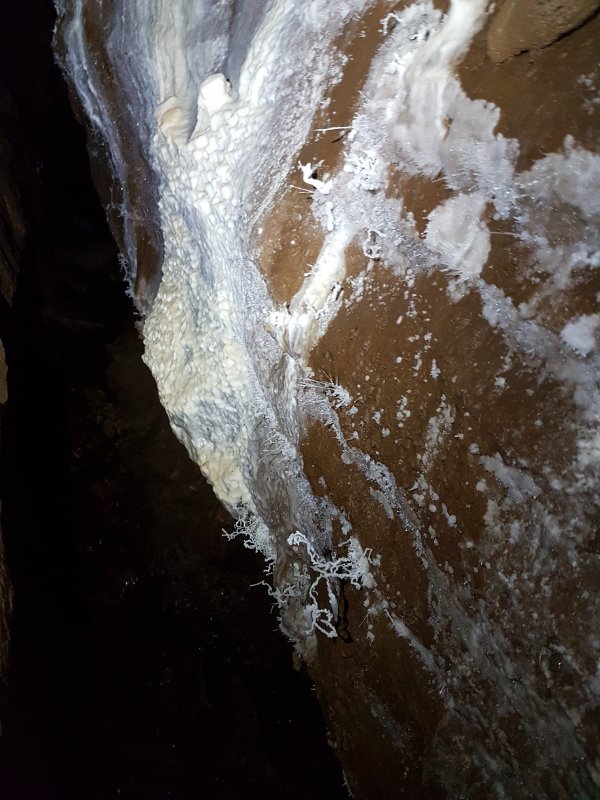 Walking possible again, and another helictite patch.
Lighting by Tarquin
Walking possible again, and another helictite patch.
Lighting by Tarquin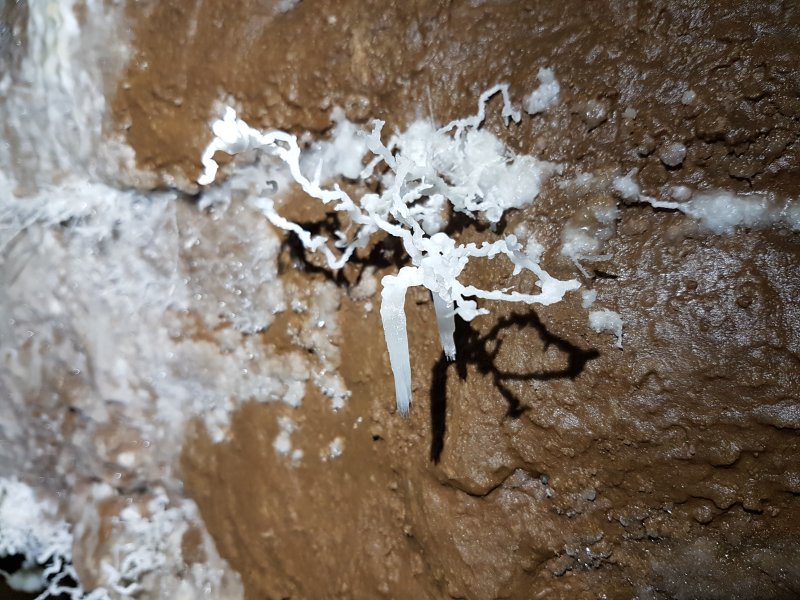 Detail of an impressive helictite and straw, like an inverted ornamental candelabra.
Lighting by Tarquin
Detail of an impressive helictite and straw, like an inverted ornamental candelabra.
Lighting by Tarquin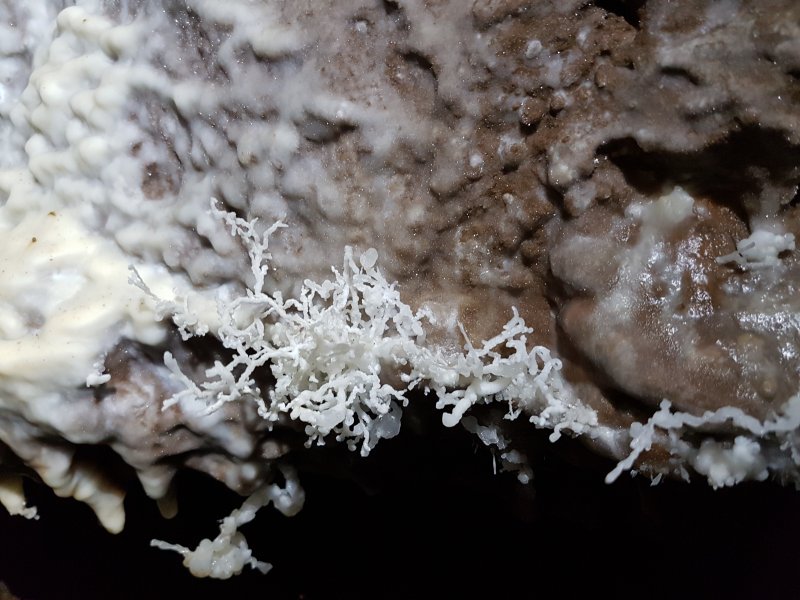 And its other helictite cluster.
Lighting by Tarquin
And its other helictite cluster.
Lighting by Tarquin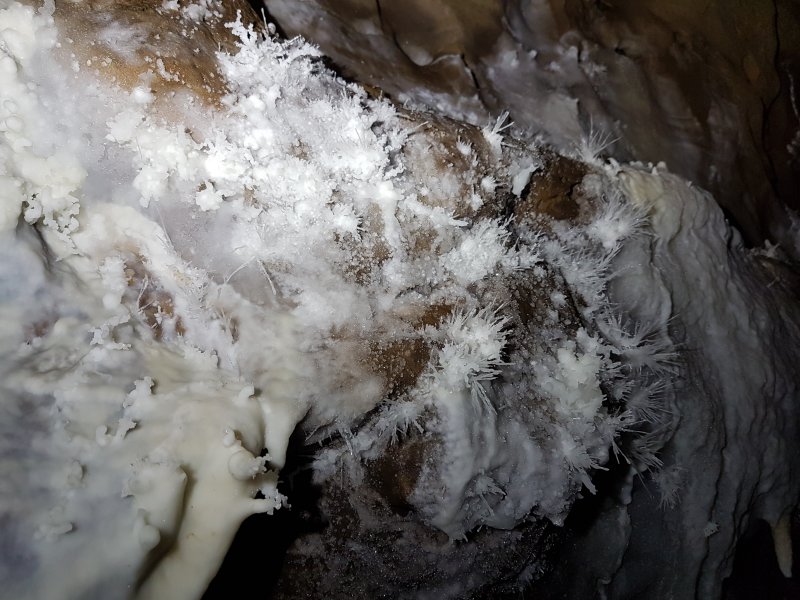 Another incredible cluster of needle thin anthodites.
Lighting by Tarquin
Another incredible cluster of needle thin anthodites.
Lighting by Tarquin Pigeon's foot.
Lighting by Tarquin
Pigeon's foot.
Lighting by Tarquin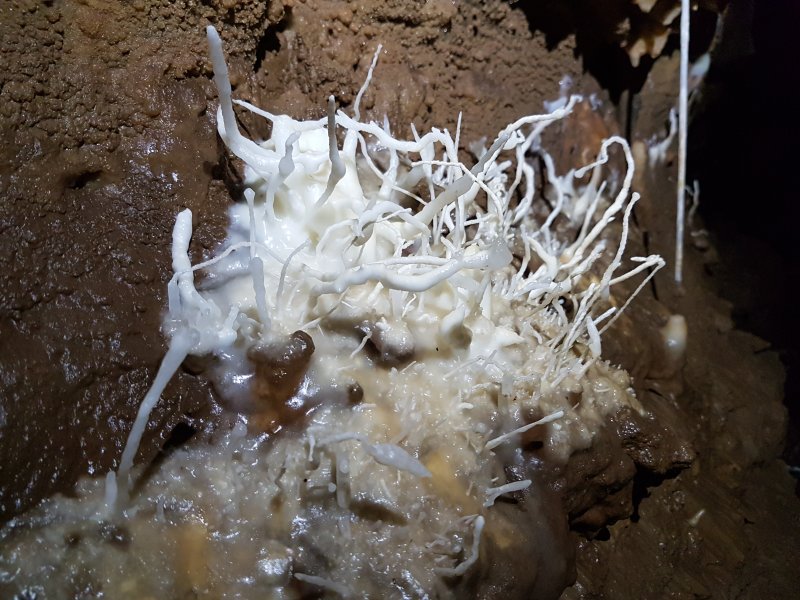 Aragonite helictites very much like Draenen's Medusa's Children, on the wrong side of the passage.
Lighting by Tarquin
Aragonite helictites very much like Draenen's Medusa's Children, on the wrong side of the passage.
Lighting by Tarquin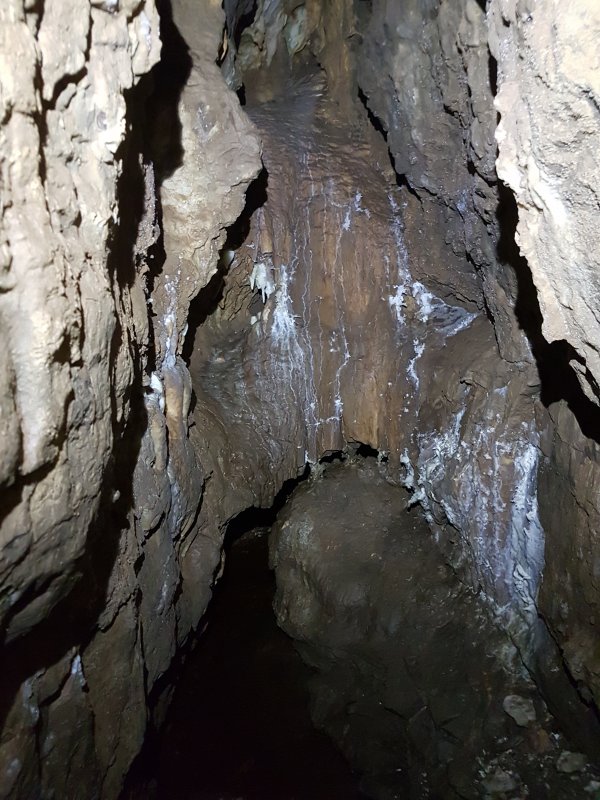 Terminal calcite blockage, at which point the inlet becomes too narrow. Or it would be, but someone has tried blasting the rift, presumably the original explorers. I did not want to grovel in the stream yet again to see how far they had managed to get, especially since it would have required a thorough soaking.
Lighting by Tarquin
Terminal calcite blockage, at which point the inlet becomes too narrow. Or it would be, but someone has tried blasting the rift, presumably the original explorers. I did not want to grovel in the stream yet again to see how far they had managed to get, especially since it would have required a thorough soaking.
Lighting by Tarquin Helictites on the blockage.
Lighting by Tarquin
Helictites on the blockage.
Lighting by Tarquin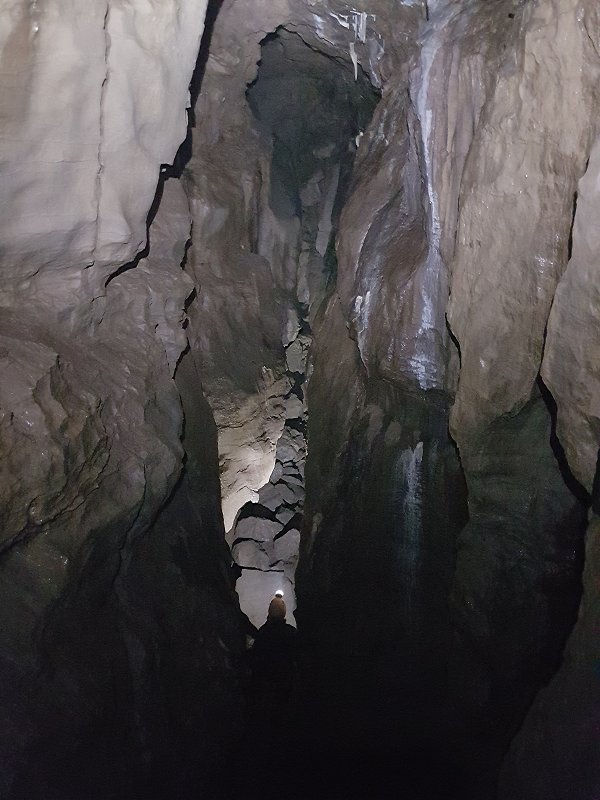 The pitch into the Promised Land, which has now been bypassed with fixed aids allowing a relatively simple climb, drops into a very tall rift.
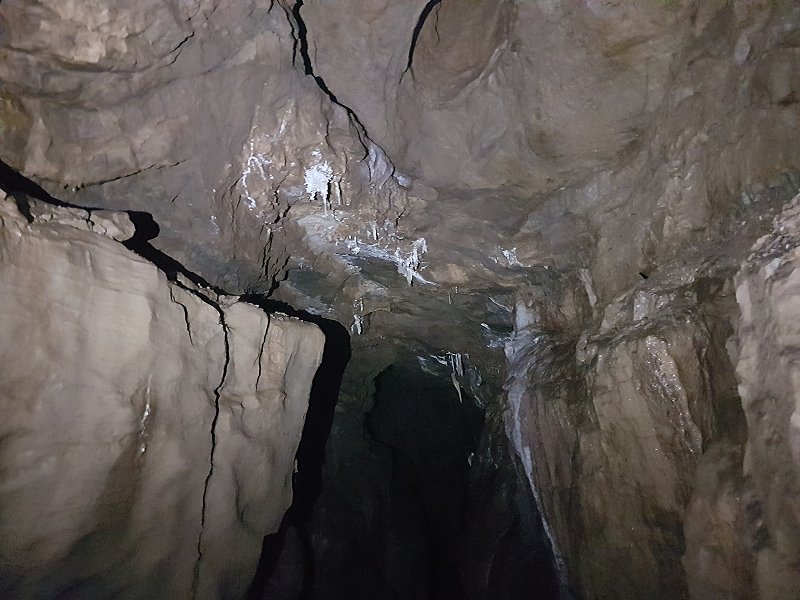 Some small helictites in the ceiling, which can be seen with difficulty from the pitch head.
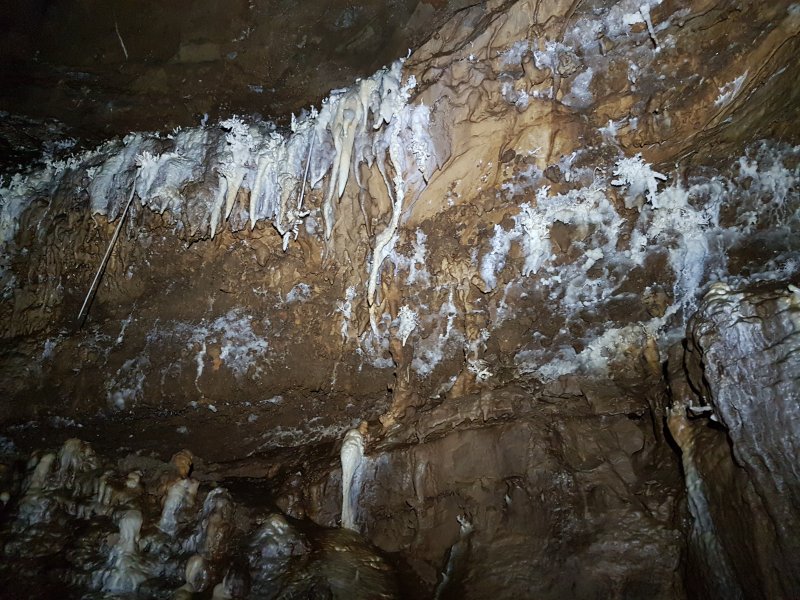 A larger cluster of small helictites in the ceiling, which cannot be easily seen from below, but can be viewed via a tricky climb up the rift.
Lighting by Tarquin
A larger cluster of small helictites in the ceiling, which cannot be easily seen from below, but can be viewed via a tricky climb up the rift.
Lighting by Tarquin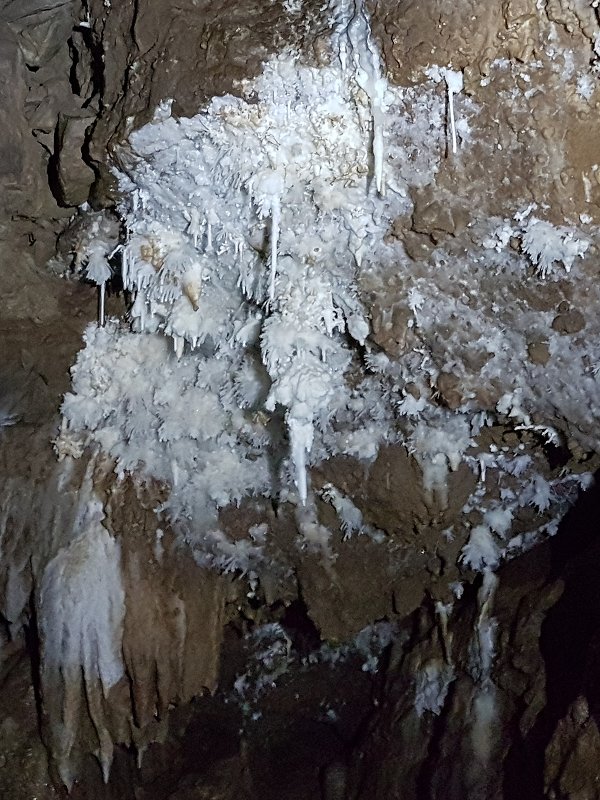 At the junction with the Promised Land, a very impressive set of helictites are tucked up in the ceiling, Hard to see, and hard to light well while perched high up the rift with feet on either wall.
Lighting by Tarquin
At the junction with the Promised Land, a very impressive set of helictites are tucked up in the ceiling, Hard to see, and hard to light well while perched high up the rift with feet on either wall.
Lighting by Tarquin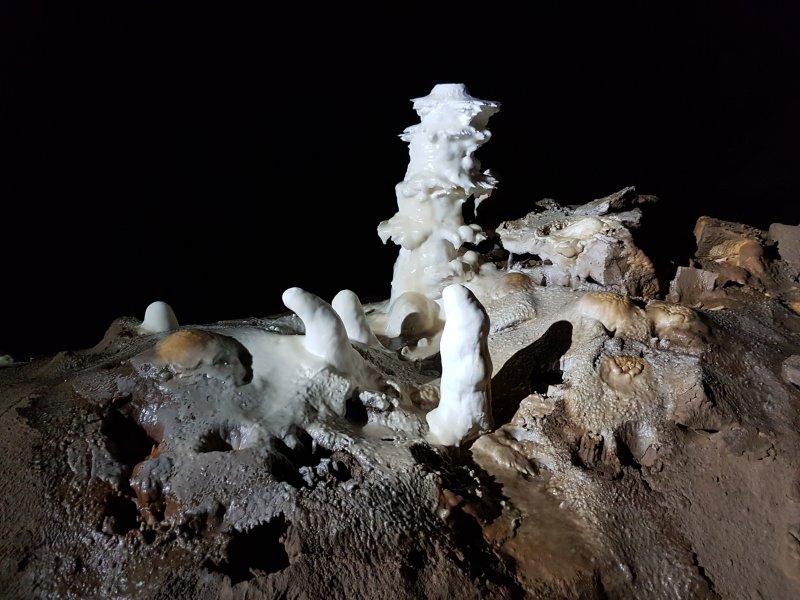 The start of the Promised Land houses the famous Pagoda stalagmite, with its phallic stalagmite companions. The formation, with its tiers created by splashes depositing calcite, is very similar to a stalagmite at Daren Cilau's White Company, and Draenen's Snowy Christmas Tree, but is perhaps the neatest and most iconic of the three.
Lighting by Antonia
The start of the Promised Land houses the famous Pagoda stalagmite, with its phallic stalagmite companions. The formation, with its tiers created by splashes depositing calcite, is very similar to a stalagmite at Daren Cilau's White Company, and Draenen's Snowy Christmas Tree, but is perhaps the neatest and most iconic of the three.
Lighting by Antonia Another stalagmite in the same area, with drip pockets.
Lighting by Tarquin
Another stalagmite in the same area, with drip pockets.
Lighting by Tarquin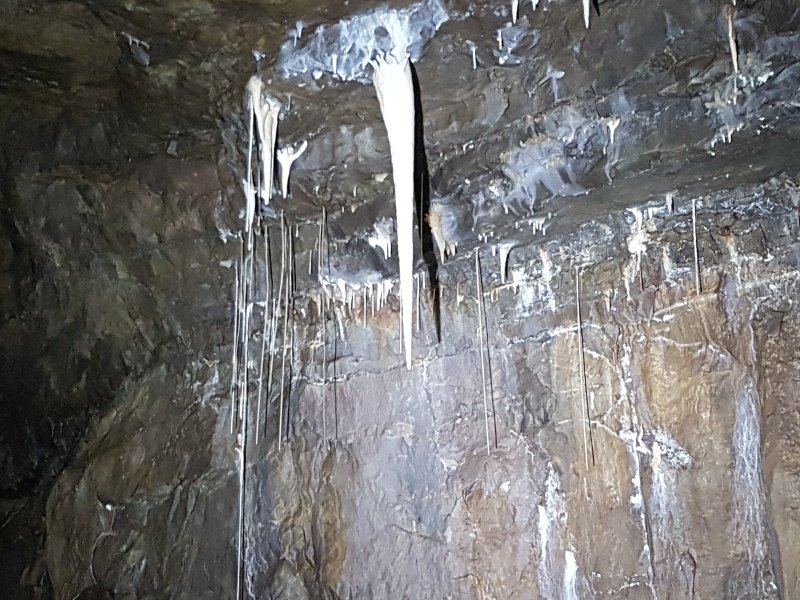 A large stalactite in the ceiling with hair-like helictites. This one really needs a better camera with a proper zoom lens.
Lighting by Antonia
A large stalactite in the ceiling with hair-like helictites. This one really needs a better camera with a proper zoom lens.
Lighting by Antonia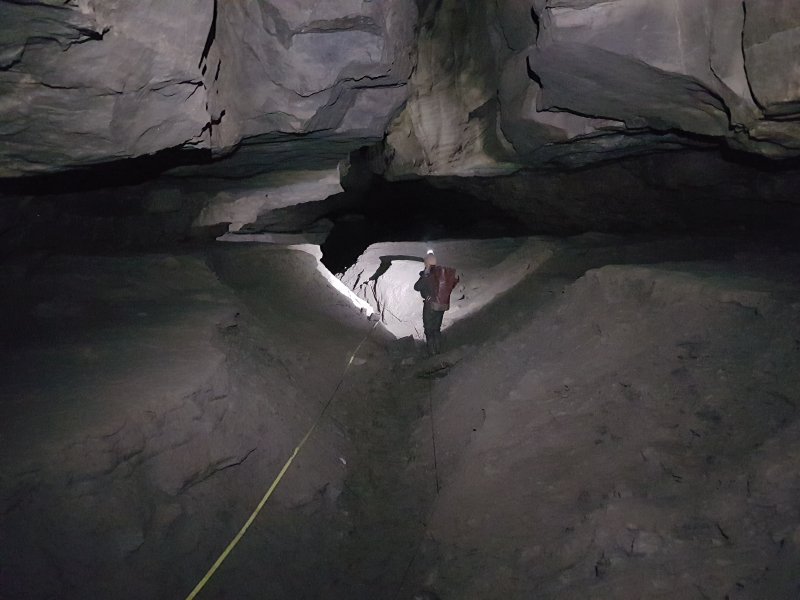 The Promised Land, with mud banks creating a diamond shape.
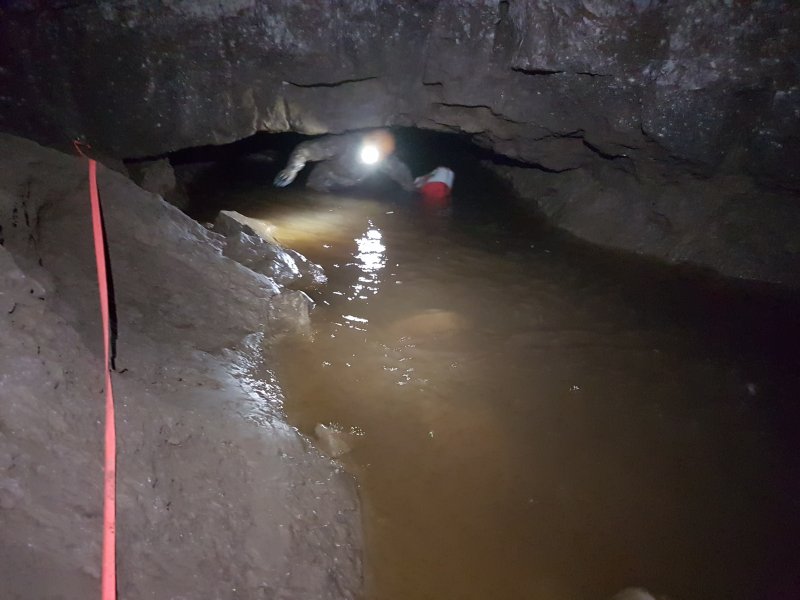 On our return, a heavy rainstorm had melted the snow on the hillsides, and Northwest Inlet was carrying much more water than normal. Gasoline Alley (seen here) was substantially higher than I am used to seeing, with the airspace significantly reduced. There is normally a shallow stream here, and it is normally possible to crawl through while remaining dry at this point. The stream below First Choke was powerful but not in flood, with evidence of previous flood lines much higher up the walls. In such conditions, Gasoline Alley sumps.