Slaughter Stream Cave Remelt Plant trip 15/04/2022
Unless otherwise stated, camera, setups, lighting, edits and gallery effects by Tarquin. Modelling and lighting at various points will be Jann Padley, Steve Pritchard, Tim Nichols and Mark Tringham.
This trip was an attempt to join up Left Wing and Bat Remains To Be Seen Passage, which would create a round trip within Remelt Plant. The squeezes through those passages are undoubtedly much tighter than the normal route through Upper Series, and the passage length is nearly twice as long, but there is no contest; we would prefer to use that route rather than Upper Series to reach Bat Pitch. The other parts of Remelt Plant are covered in a previous gallery.
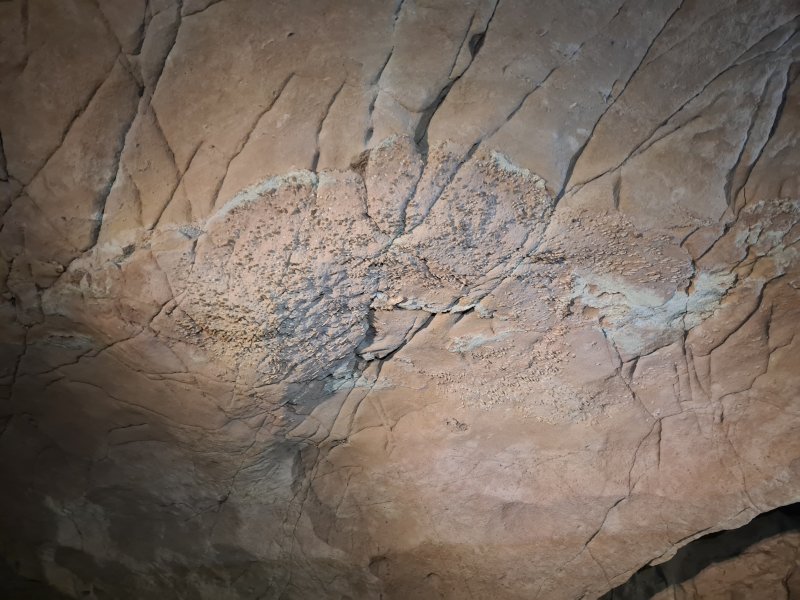
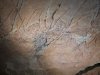 Large Syringopora fossil in Dog's Grave Passage, at the far end of the phreatic tube section beyond Norman.
Lighting by Tarquin, Jann and Steve
Large Syringopora fossil in Dog's Grave Passage, at the far end of the phreatic tube section beyond Norman.
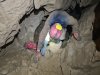
Lighting by Tarquin, Jann and Steve Bat Remains To Be Seen Passage (or just "Bat Remains") starts as a rift connecting to the side of Bat Pitch.
Modelling by Tim, lighting by Tarquin and Tim
Bat Remains To Be Seen Passage (or just "Bat Remains") starts as a rift connecting to the side of Bat Pitch.
Modelling by Tim, lighting by Tarquin and Tim Much of its length is a comfortable crawl.
Modelling by Tim, lighting by Tarquin and Tim
Much of its length is a comfortable crawl.
Modelling by Tim, lighting by Tarquin and Tim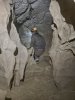 Remains of a small cascade in Bat Remains To Be Seen Passage, showing that the water used to flow from Left Wing through Bat Remains To Be Seen Passage, towards Bat Pitch, while the passage was an active vadose streamway.
Modelling by Tim, lighting by Tarquin and Tim
Remains of a small cascade in Bat Remains To Be Seen Passage, showing that the water used to flow from Left Wing through Bat Remains To Be Seen Passage, towards Bat Pitch, while the passage was an active vadose streamway.
Modelling by Tim, lighting by Tarquin and Tim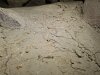 Remains of the first bat. These are scattered around, but there are most of the skeletal bones here, including the top of a skull near the camera.
Modelling by Tom Bowling
Remains of the first bat. These are scattered around, but there are most of the skeletal bones here, including the top of a skull near the camera.
Modelling by Tom Bowling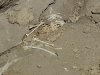 Remains of the second bat. The long wing bones, rib cage, and upturned skull can all be seen.
Modelling by Terminal Innings
Remains of the second bat. The long wing bones, rib cage, and upturned skull can all be seen.
Modelling by Terminal Innings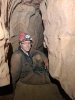 Stooping size.
Modelling by Tim
Stooping size.
Modelling by Tim Remains of the third bat. The bones seem to be decaying because of the humidity. This part of the cave felt, to us, like the driest of deserts, but there is apparently some moisture here.
Modelling by Table Dennis
Remains of the third bat. The bones seem to be decaying because of the humidity. This part of the cave felt, to us, like the driest of deserts, but there is apparently some moisture here.
Modelling by Table Dennis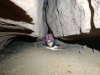 The squeeze. This is fairly tight, but could easily be dug larger. Dragging a tackle bag through was fairly easy, but on the way out, mine pulled under a side ledge and got stuck, requiring a much less fun reverse through the squeeze.
Modelling by Tim, lighting by Tarquin and Tim
The squeeze. This is fairly tight, but could easily be dug larger. Dragging a tackle bag through was fairly easy, but on the way out, mine pulled under a side ledge and got stuck, requiring a much less fun reverse through the squeeze.
Modelling by Tim, lighting by Tarquin and Tim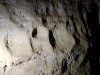 Scallops, confirming that the phreatic flow here was also in the same direction; towards Bat Pitch.
 After the squeeze, resuming its familiar size. This part of the passage has a distinctive mineralised bed at ceiling height, which looked almost like chert.
Modelling by Tim
After the squeeze, resuming its familiar size. This part of the passage has a distinctive mineralised bed at ceiling height, which looked almost like chert.
Modelling by Tim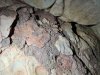 Various iron minerals, including some yellow and orange ochres, red haematite and black goethite.
 Layered effect in the minerals. While this looks like sandstone, the colouring again appears to be iron.
 A section of walking sized passage.
Modelling by Tim, lighting by Tarquin and Tim
A section of walking sized passage.
Modelling by Tim, lighting by Tarquin and Tim-
A rare section of walking sized passage. Enjoy it.
Modelling by Tim, lighting by Tarquin and Tim
 Top of a climb down near the end of Bat Remains To Be Seen Passage. This seems backwards, because the flow was from below. This therefore was a phreatic riser, and subsquently the lip of a paleo-sump, while the passage was active.
Modelling by Tim, lighting by Tarquin and Tim
Top of a climb down near the end of Bat Remains To Be Seen Passage. This seems backwards, because the flow was from below. This therefore was a phreatic riser, and subsquently the lip of a paleo-sump, while the passage was active.
Modelling by Tim, lighting by Tarquin and Tim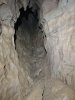 Looking back to the base of the climb. The mud floor here was slightly damp.
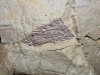 Slickensides below the climb. This is one of the few passages that does not seem to follow a line of fault breccia, so this was unexpected. It runs pasallel to the passage below the climb.
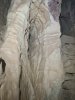 A rock cleft at the end of the passage, which was said to be somewhat vulvar (though a certain part was apparently difficult to find), giving part of the name to the dig.
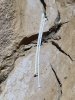 Remains of the fourth bat in the cleft; just a couple of wing finger bones.
Modelling by Fourth Base
Remains of the fourth bat in the cleft; just a couple of wing finger bones.
Modelling by Fourth Base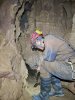 Someone had previously scratched the surface of the dig, but had made very little progress, so Tim set to work lowering the floor.
Modelling by Tim, lighting by Tarquin and Tim
Someone had previously scratched the surface of the dig, but had made very little progress, so Tim set to work lowering the floor.
Modelling by Tim, lighting by Tarquin and Tim Some large rocks remained, and needed to be surgically removed from the mud floor. The entrenching tool soon proved to be too feeble to handle it, and became a two-piece, so we resorted to using the tiniest crowbar, more like a scalpel. Some leg powered removal of rocks, and I pushed into our only breakthrough; a 2 metre crawl, with hanging death in an aven above. We could see light from the far side via the aven, and talk to the diggers through narrow fractures, but the way on is down into the floor, so that is where we continued. The dig got named Fanny's Rock Surgery.
Modelling by Tim
Some large rocks remained, and needed to be surgically removed from the mud floor. The entrenching tool soon proved to be too feeble to handle it, and became a two-piece, so we resorted to using the tiniest crowbar, more like a scalpel. Some leg powered removal of rocks, and I pushed into our only breakthrough; a 2 metre crawl, with hanging death in an aven above. We could see light from the far side via the aven, and talk to the diggers through narrow fractures, but the way on is down into the floor, so that is where we continued. The dig got named Fanny's Rock Surgery.
Modelling by Tim Conditions at the dig were incredibly warm, and layers had to be removed.
Modelling by Tim
Conditions at the dig were incredibly warm, and layers had to be removed.
Modelling by Tim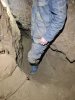 The entrance to the dig as we left it. Unfortunately, the dig face is 2 metres further in, so a lot of spoil would need to be removed to enlarge the whole way in.
Modelling by Tim, lighting by Tarquin and Tim
The entrance to the dig as we left it. Unfortunately, the dig face is 2 metres further in, so a lot of spoil would need to be removed to enlarge the whole way in.
Modelling by Tim, lighting by Tarquin and Tim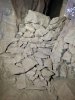 We had backfilled a large alcove, building up the dry stone wall from just a couple of rocks high to about 1.5 metres high.
Lighting by Tarquin and Tim
We had backfilled a large alcove, building up the dry stone wall from just a couple of rocks high to about 1.5 metres high.
Lighting by Tarquin and Tim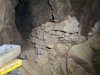 The side of the passage had also been used for stacking space, with a wall 1 metre high backfilled with spoil. All of this had come out of the dig. There is still stacking space.
Lighting by Tarquin and Tim
The side of the passage had also been used for stacking space, with a wall 1 metre high backfilled with spoil. All of this had come out of the dig. There is still stacking space.
Lighting by Tarquin and Tim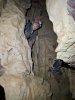 On our exit, we visited the other team in Left Wing. This climb down is a former cascade, just after the climb up into Left Wing. Once again, the water flow direction was clearly into Left Wing from Star Shaft 2.
Modelling by Tim
On our exit, we visited the other team in Left Wing. This climb down is a former cascade, just after the climb up into Left Wing. Once again, the water flow direction was clearly into Left Wing from Star Shaft 2.
Modelling by Tim A familiar crawling sized passage, in Left Wing.
Modelling by Tim, lighting by Tarquin and Tim
A familiar crawling sized passage, in Left Wing.
Modelling by Tim, lighting by Tarquin and Tim The squeeze in Left Wing is undoubtedly the tightest in Remelt Plant, at about 8.5 inches (22 cm) at its widest point. The vertical orientation makes it tighter as you wedge down into the gap, but with belts removed, it is not particularly difficult. Smaller cavers can stand up and walk through, using another wide point near the ceiling.
Modelling by Tim
The squeeze in Left Wing is undoubtedly the tightest in Remelt Plant, at about 8.5 inches (22 cm) at its widest point. The vertical orientation makes it tighter as you wedge down into the gap, but with belts removed, it is not particularly difficult. Smaller cavers can stand up and walk through, using another wide point near the ceiling.
Modelling by Tim A brief section of walking passage.
Modelling by Tim, lighting by Tarquin and Tim
A brief section of walking passage.
Modelling by Tim, lighting by Tarquin and Tim The Left Wing passage ended in a chamber, which would once have been completely filled with a sump pool. The dry stone wall on the left had been completely built from the day's digging.
Modelling by Mark and Tim, lighting by Tarquin, Mark and Tim
The Left Wing passage ended in a chamber, which would once have been completely filled with a sump pool. The dry stone wall on the left had been completely built from the day's digging.
Modelling by Mark and Tim, lighting by Tarquin, Mark and Tim The dig in Left Wing was impressively deep, following an arch under the wall, with the floor having been above his head when they started. The paleo-sump seems to have filled with debris, and therefore the most likely way to connect the passages is down this pit, and under an arch, emerging from the floor of our dig in Bat Remains To Be Seen Passage. The two passages are now just 1 metre apart. A good spade and a 3-man team had helped progress from this side. The oval eyehole near the top of the picture is where the vocal connection had come from, and probably corresponds to a fractured hole seen just above the floor in the other dig.
Modelling by Tim, lighting by Tarquin and Tim
The dig in Left Wing was impressively deep, following an arch under the wall, with the floor having been above his head when they started. The paleo-sump seems to have filled with debris, and therefore the most likely way to connect the passages is down this pit, and under an arch, emerging from the floor of our dig in Bat Remains To Be Seen Passage. The two passages are now just 1 metre apart. A good spade and a 3-man team had helped progress from this side. The oval eyehole near the top of the picture is where the vocal connection had come from, and probably corresponds to a fractured hole seen just above the floor in the other dig.
Modelling by Tim, lighting by Tarquin and Tim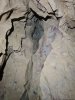 An aven in the end wall of the chamber provided a light connection to the aven we had seen in the other dig. A connection through here would be possible, but enlargement and rock breaking would be needed.
 Large Syringopora fossil in Dog's Grave Passage, at the far end of the phreatic tube section beyond Norman.
Lighting by Tarquin, Jann and Steve
Large Syringopora fossil in Dog's Grave Passage, at the far end of the phreatic tube section beyond Norman.
Lighting by Tarquin, Jann and Steve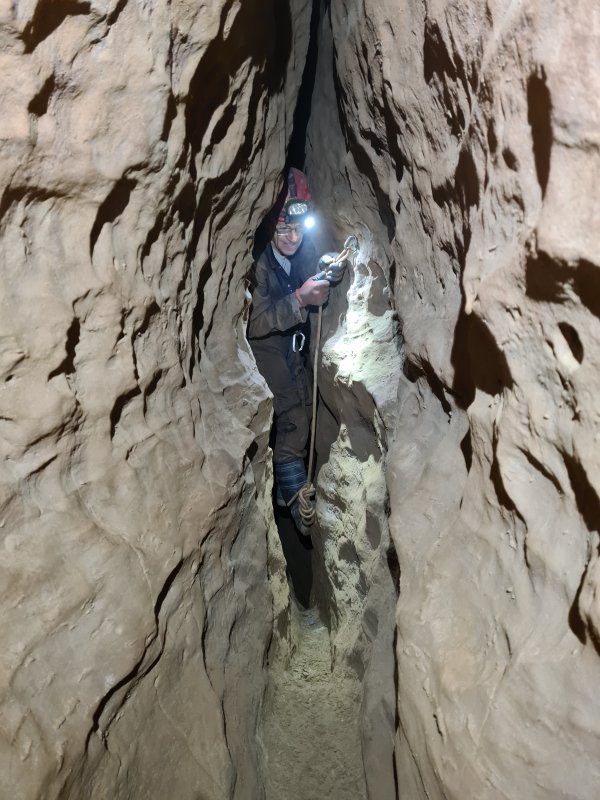 Bat Remains To Be Seen Passage (or just "Bat Remains") starts as a rift connecting to the side of Bat Pitch.
Modelling by Tim, lighting by Tarquin and Tim
Bat Remains To Be Seen Passage (or just "Bat Remains") starts as a rift connecting to the side of Bat Pitch.
Modelling by Tim, lighting by Tarquin and Tim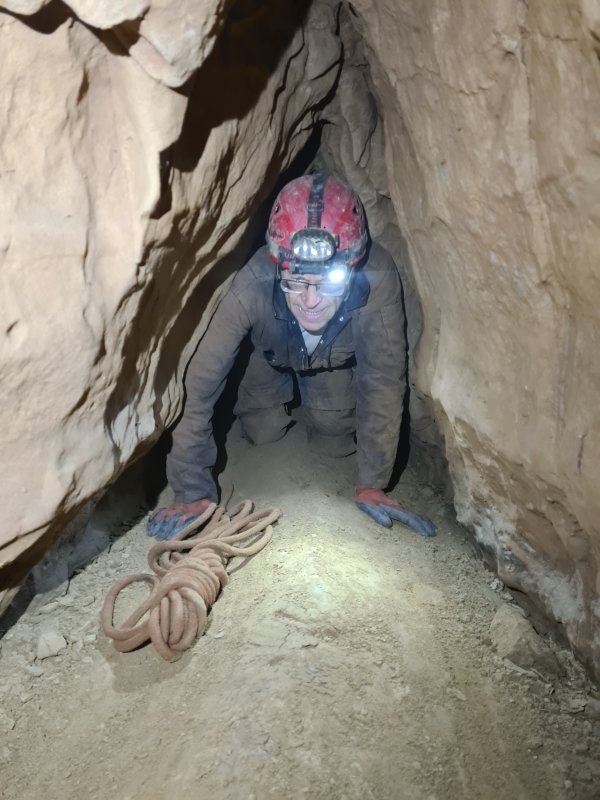 Much of its length is a comfortable crawl.
Modelling by Tim, lighting by Tarquin and Tim
Much of its length is a comfortable crawl.
Modelling by Tim, lighting by Tarquin and Tim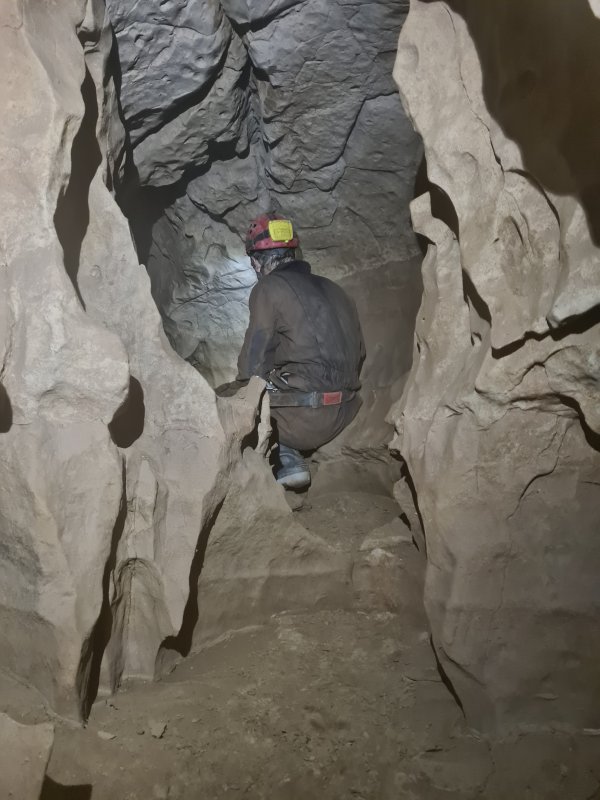 Remains of a small cascade in Bat Remains To Be Seen Passage, showing that the water used to flow from Left Wing through Bat Remains To Be Seen Passage, towards Bat Pitch, while the passage was an active vadose streamway.
Modelling by Tim, lighting by Tarquin and Tim
Remains of a small cascade in Bat Remains To Be Seen Passage, showing that the water used to flow from Left Wing through Bat Remains To Be Seen Passage, towards Bat Pitch, while the passage was an active vadose streamway.
Modelling by Tim, lighting by Tarquin and Tim Remains of the first bat. These are scattered around, but there are most of the skeletal bones here, including the top of a skull near the camera.
Modelling by Tom Bowling
Remains of the first bat. These are scattered around, but there are most of the skeletal bones here, including the top of a skull near the camera.
Modelling by Tom Bowling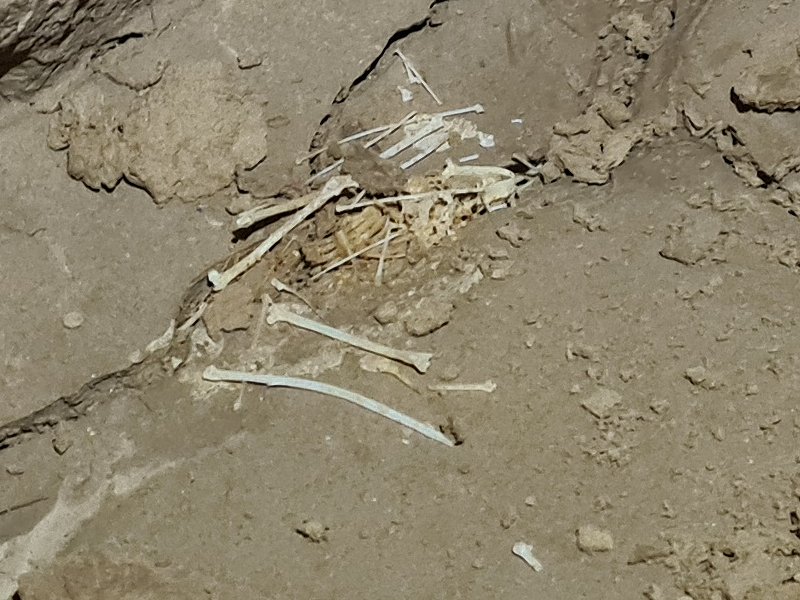 Remains of the second bat. The long wing bones, rib cage, and upturned skull can all be seen.
Modelling by Terminal Innings
Remains of the second bat. The long wing bones, rib cage, and upturned skull can all be seen.
Modelling by Terminal Innings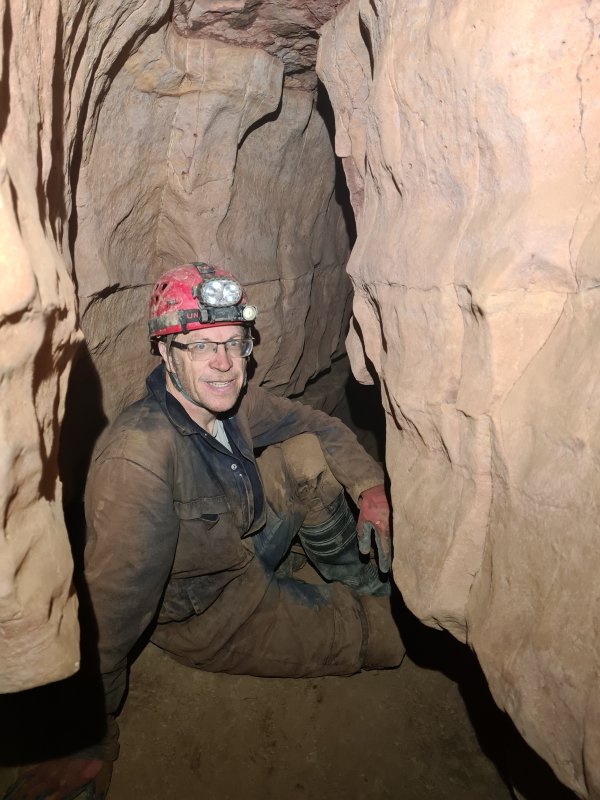 Stooping size.
Modelling by Tim
Stooping size.
Modelling by Tim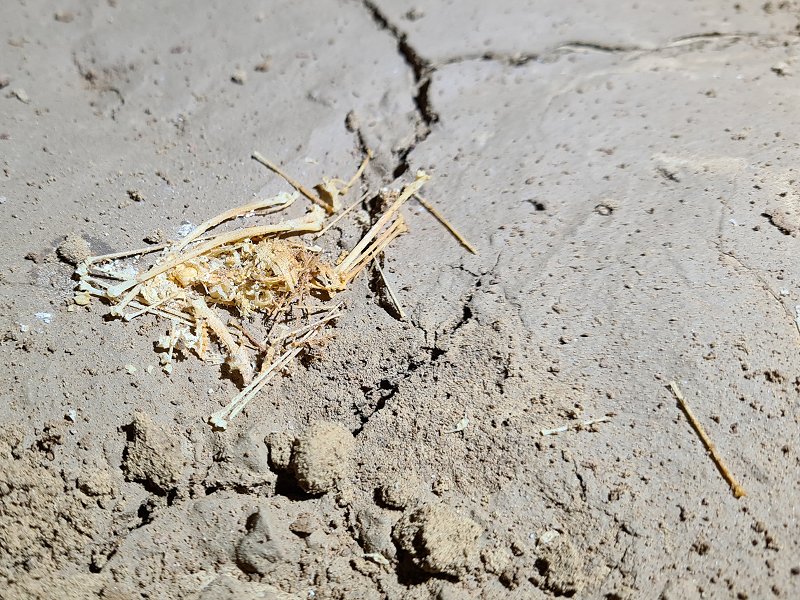 Remains of the third bat. The bones seem to be decaying because of the humidity. This part of the cave felt, to us, like the driest of deserts, but there is apparently some moisture here.
Modelling by Table Dennis
Remains of the third bat. The bones seem to be decaying because of the humidity. This part of the cave felt, to us, like the driest of deserts, but there is apparently some moisture here.
Modelling by Table Dennis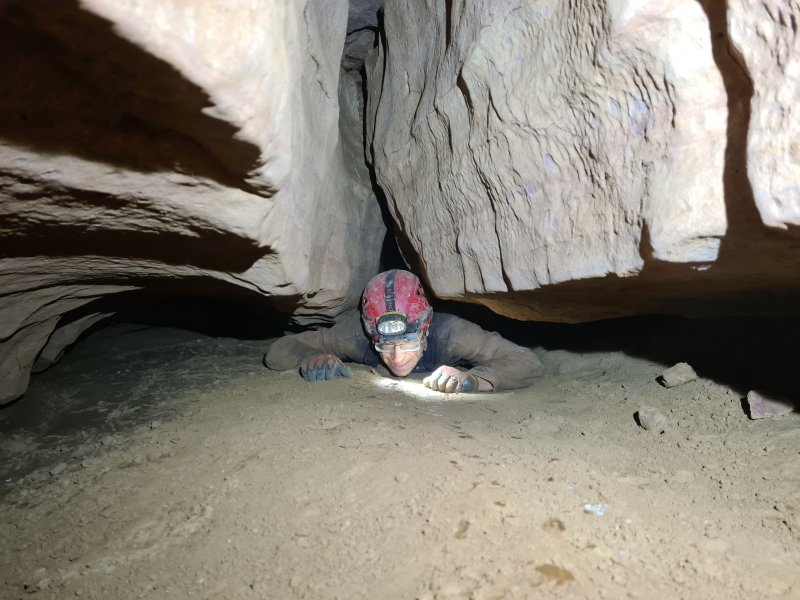 The squeeze. This is fairly tight, but could easily be dug larger. Dragging a tackle bag through was fairly easy, but on the way out, mine pulled under a side ledge and got stuck, requiring a much less fun reverse through the squeeze.
Modelling by Tim, lighting by Tarquin and Tim
The squeeze. This is fairly tight, but could easily be dug larger. Dragging a tackle bag through was fairly easy, but on the way out, mine pulled under a side ledge and got stuck, requiring a much less fun reverse through the squeeze.
Modelling by Tim, lighting by Tarquin and Tim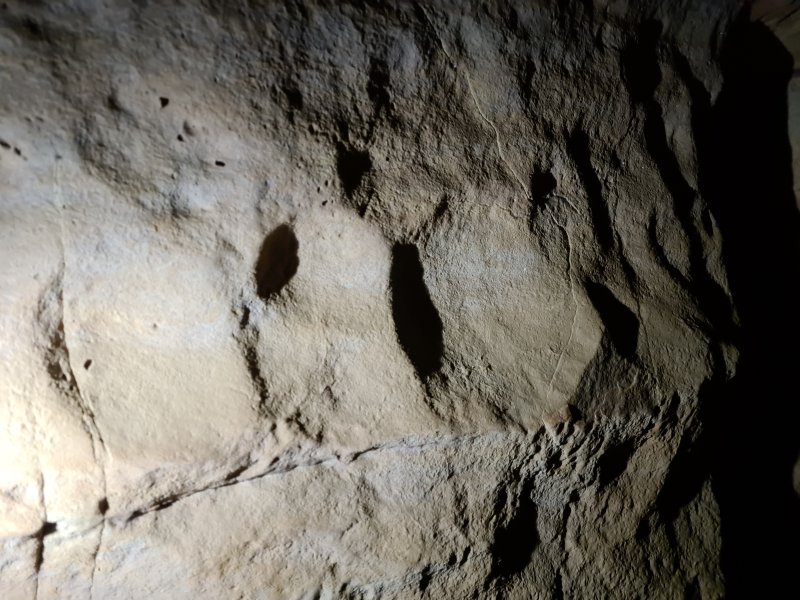 Scallops, confirming that the phreatic flow here was also in the same direction; towards Bat Pitch.
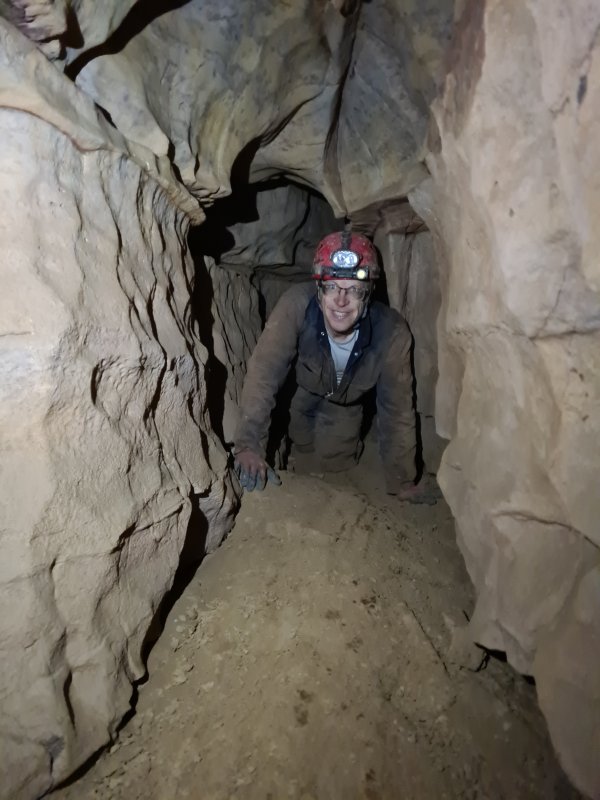 After the squeeze, resuming its familiar size. This part of the passage has a distinctive mineralised bed at ceiling height, which looked almost like chert.
Modelling by Tim
After the squeeze, resuming its familiar size. This part of the passage has a distinctive mineralised bed at ceiling height, which looked almost like chert.
Modelling by Tim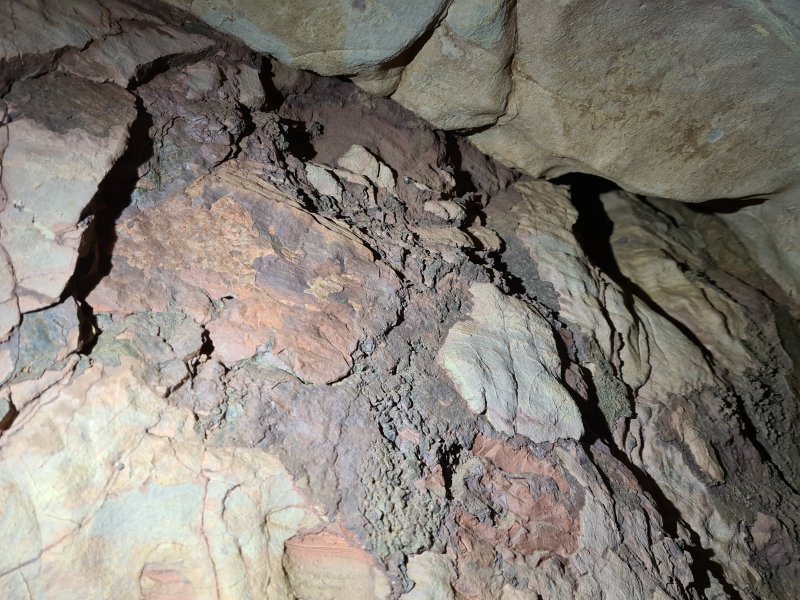 Various iron minerals, including some yellow and orange ochres, red haematite and black goethite.
 Layered effect in the minerals. While this looks like sandstone, the colouring again appears to be iron.
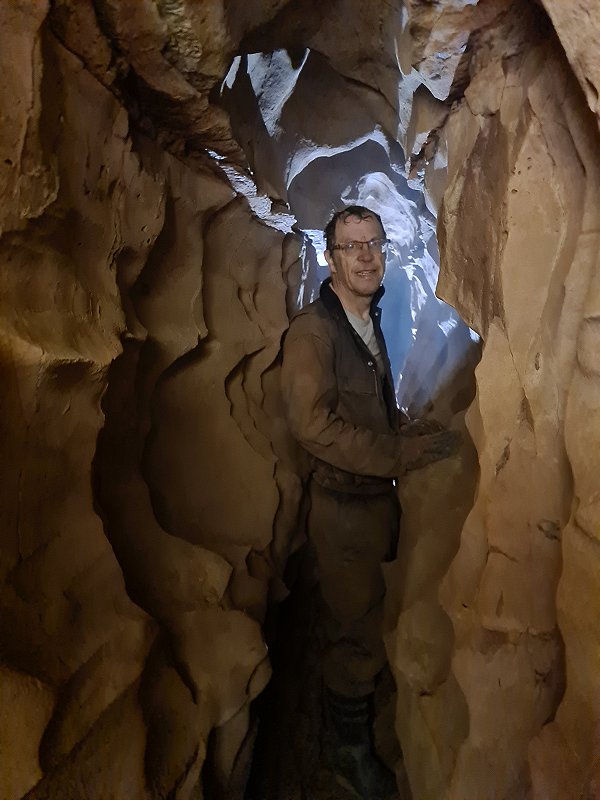 A section of walking sized passage.
Modelling by Tim, lighting by Tarquin and Tim
A section of walking sized passage.
Modelling by Tim, lighting by Tarquin and Tim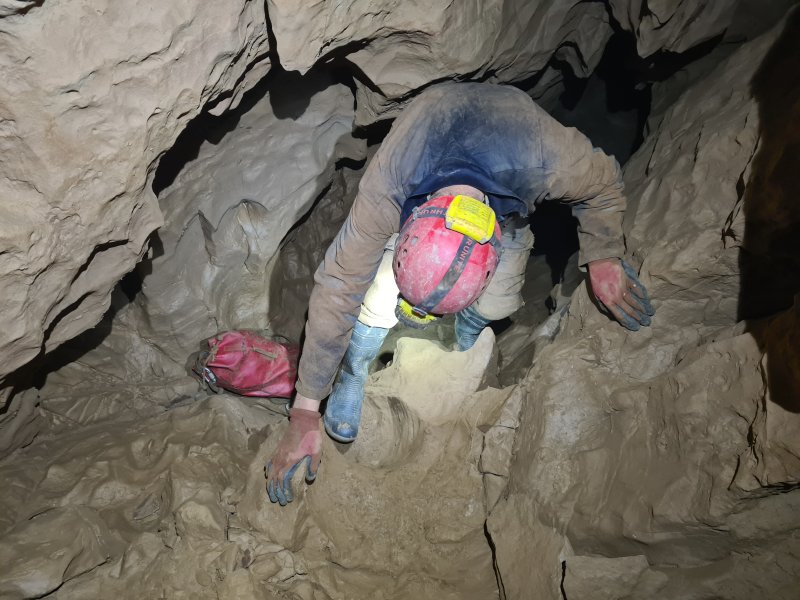 Top of a climb down near the end of Bat Remains To Be Seen Passage. This seems backwards, because the flow was from below. This therefore was a phreatic riser, and subsquently the lip of a paleo-sump, while the passage was active.
Modelling by Tim, lighting by Tarquin and Tim
Top of a climb down near the end of Bat Remains To Be Seen Passage. This seems backwards, because the flow was from below. This therefore was a phreatic riser, and subsquently the lip of a paleo-sump, while the passage was active.
Modelling by Tim, lighting by Tarquin and Tim Looking back to the base of the climb. The mud floor here was slightly damp.
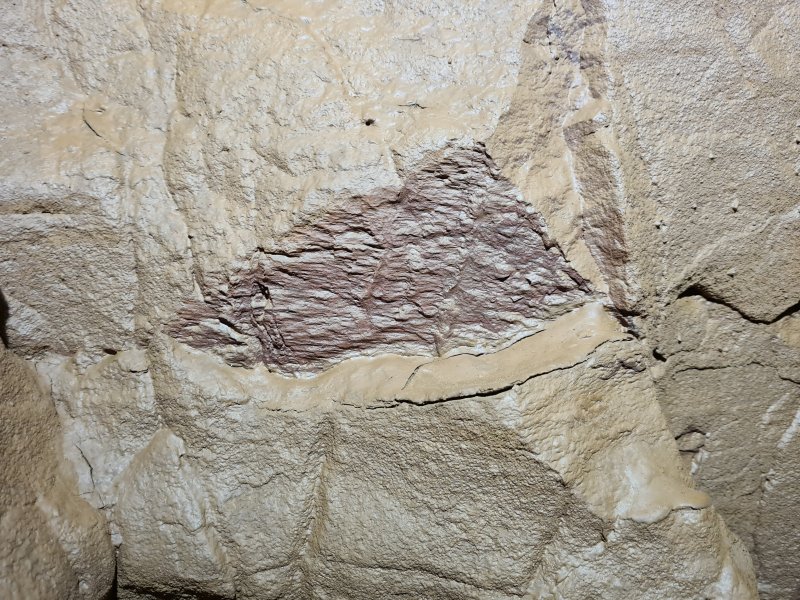 Slickensides below the climb. This is one of the few passages that does not seem to follow a line of fault breccia, so this was unexpected. It runs pasallel to the passage below the climb.
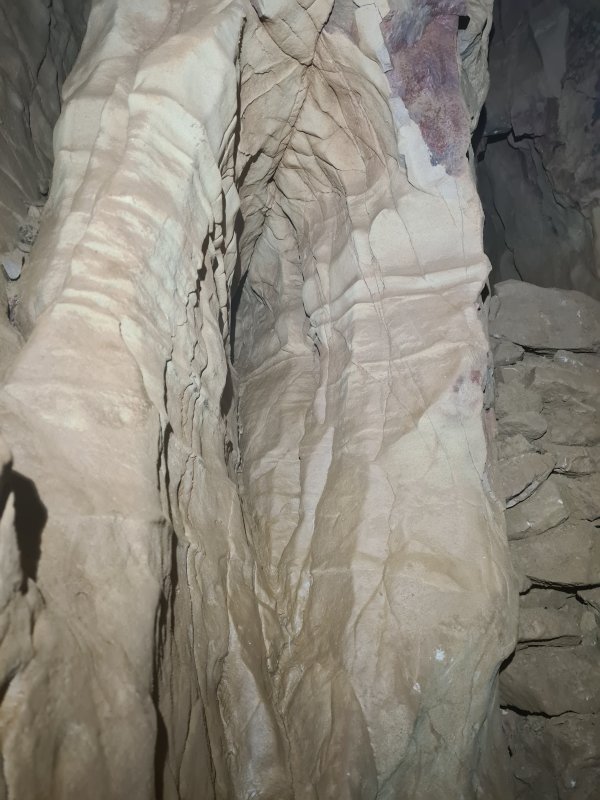 A rock cleft at the end of the passage, which was said to be somewhat vulvar (though a certain part was apparently difficult to find), giving part of the name to the dig.
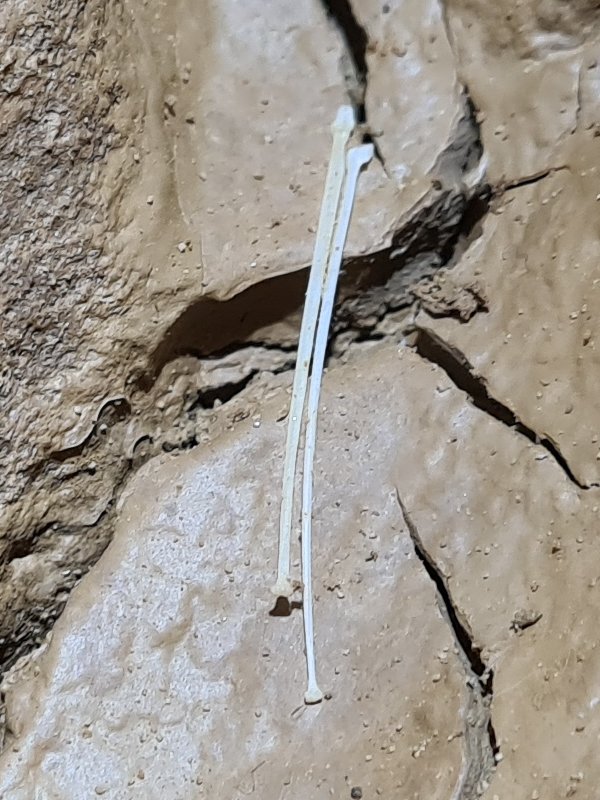 Remains of the fourth bat in the cleft; just a couple of wing finger bones.
Modelling by Fourth Base
Remains of the fourth bat in the cleft; just a couple of wing finger bones.
Modelling by Fourth Base Someone had previously scratched the surface of the dig, but had made very little progress, so Tim set to work lowering the floor.
Modelling by Tim, lighting by Tarquin and Tim
Someone had previously scratched the surface of the dig, but had made very little progress, so Tim set to work lowering the floor.
Modelling by Tim, lighting by Tarquin and Tim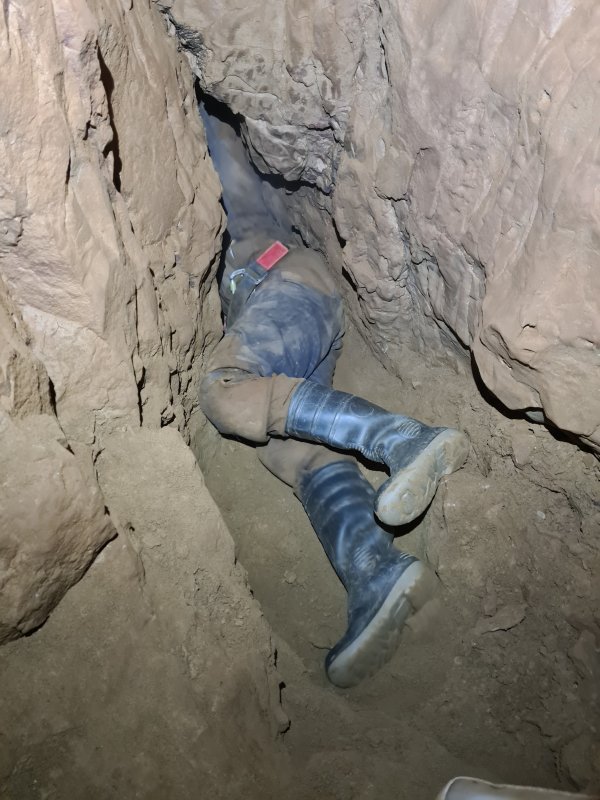 Some large rocks remained, and needed to be surgically removed from the mud floor. The entrenching tool soon proved to be too feeble to handle it, and became a two-piece, so we resorted to using the tiniest crowbar, more like a scalpel. Some leg powered removal of rocks, and I pushed into our only breakthrough; a 2 metre crawl, with hanging death in an aven above. We could see light from the far side via the aven, and talk to the diggers through narrow fractures, but the way on is down into the floor, so that is where we continued. The dig got named Fanny's Rock Surgery.
Modelling by Tim
Some large rocks remained, and needed to be surgically removed from the mud floor. The entrenching tool soon proved to be too feeble to handle it, and became a two-piece, so we resorted to using the tiniest crowbar, more like a scalpel. Some leg powered removal of rocks, and I pushed into our only breakthrough; a 2 metre crawl, with hanging death in an aven above. We could see light from the far side via the aven, and talk to the diggers through narrow fractures, but the way on is down into the floor, so that is where we continued. The dig got named Fanny's Rock Surgery.
Modelling by Tim Conditions at the dig were incredibly warm, and layers had to be removed.
Modelling by Tim
Conditions at the dig were incredibly warm, and layers had to be removed.
Modelling by Tim The entrance to the dig as we left it. Unfortunately, the dig face is 2 metres further in, so a lot of spoil would need to be removed to enlarge the whole way in.
Modelling by Tim, lighting by Tarquin and Tim
The entrance to the dig as we left it. Unfortunately, the dig face is 2 metres further in, so a lot of spoil would need to be removed to enlarge the whole way in.
Modelling by Tim, lighting by Tarquin and Tim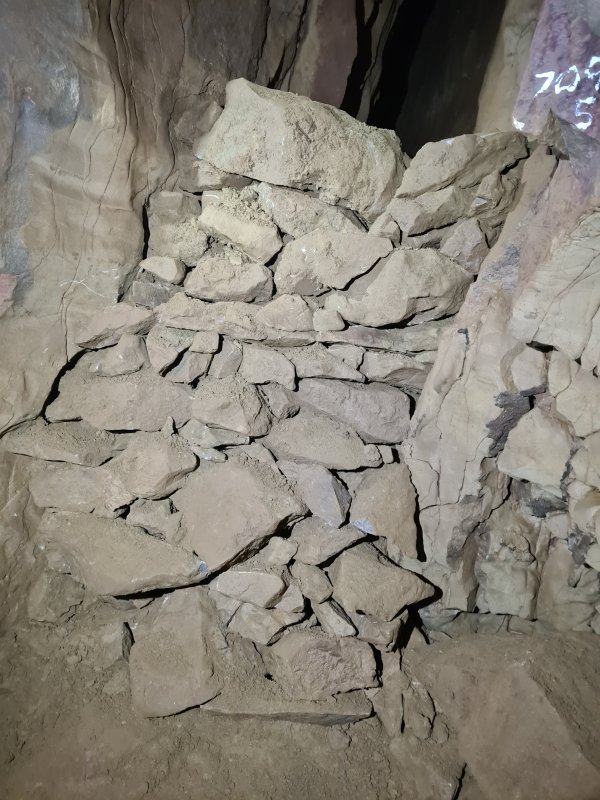 We had backfilled a large alcove, building up the dry stone wall from just a couple of rocks high to about 1.5 metres high.
Lighting by Tarquin and Tim
We had backfilled a large alcove, building up the dry stone wall from just a couple of rocks high to about 1.5 metres high.
Lighting by Tarquin and Tim The side of the passage had also been used for stacking space, with a wall 1 metre high backfilled with spoil. All of this had come out of the dig. There is still stacking space.
Lighting by Tarquin and Tim
The side of the passage had also been used for stacking space, with a wall 1 metre high backfilled with spoil. All of this had come out of the dig. There is still stacking space.
Lighting by Tarquin and Tim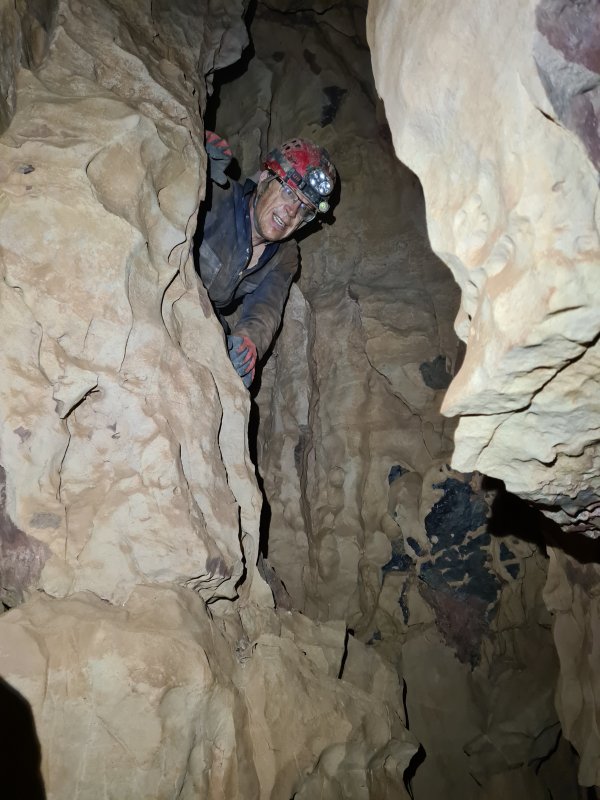 On our exit, we visited the other team in Left Wing. This climb down is a former cascade, just after the climb up into Left Wing. Once again, the water flow direction was clearly into Left Wing from Star Shaft 2.
Modelling by Tim
On our exit, we visited the other team in Left Wing. This climb down is a former cascade, just after the climb up into Left Wing. Once again, the water flow direction was clearly into Left Wing from Star Shaft 2.
Modelling by Tim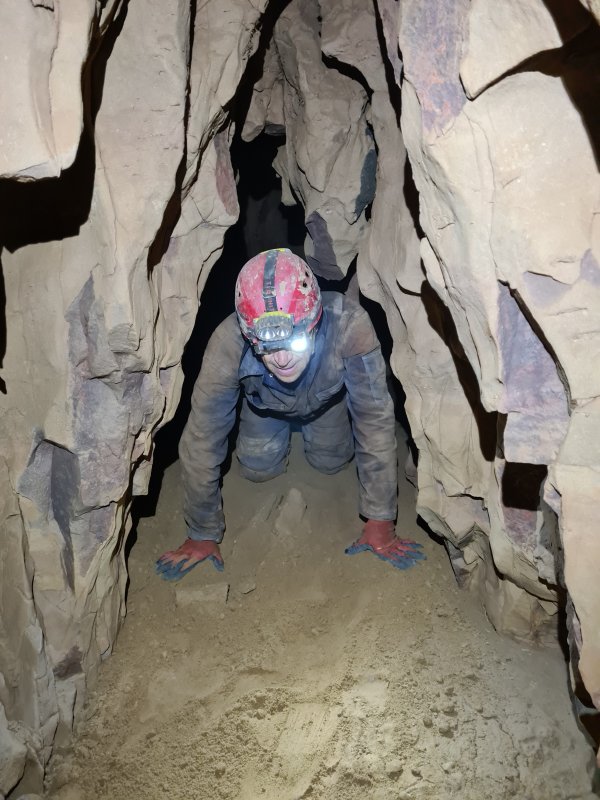 A familiar crawling sized passage, in Left Wing.
Modelling by Tim, lighting by Tarquin and Tim
A familiar crawling sized passage, in Left Wing.
Modelling by Tim, lighting by Tarquin and Tim The squeeze in Left Wing is undoubtedly the tightest in Remelt Plant, at about 8.5 inches (22 cm) at its widest point. The vertical orientation makes it tighter as you wedge down into the gap, but with belts removed, it is not particularly difficult. Smaller cavers can stand up and walk through, using another wide point near the ceiling.
Modelling by Tim
The squeeze in Left Wing is undoubtedly the tightest in Remelt Plant, at about 8.5 inches (22 cm) at its widest point. The vertical orientation makes it tighter as you wedge down into the gap, but with belts removed, it is not particularly difficult. Smaller cavers can stand up and walk through, using another wide point near the ceiling.
Modelling by Tim A brief section of walking passage.
Modelling by Tim, lighting by Tarquin and Tim
A brief section of walking passage.
Modelling by Tim, lighting by Tarquin and Tim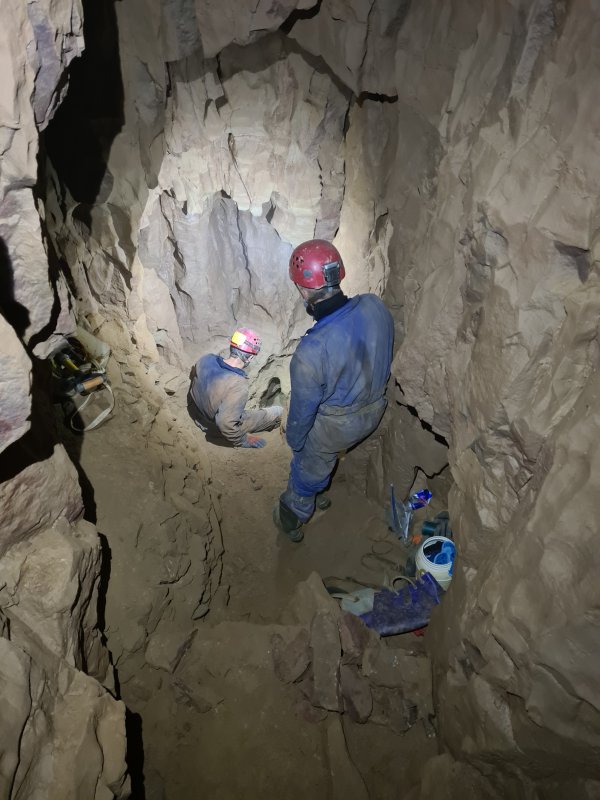 The Left Wing passage ended in a chamber, which would once have been completely filled with a sump pool. The dry stone wall on the left had been completely built from the day's digging.
Modelling by Mark and Tim, lighting by Tarquin, Mark and Tim
The Left Wing passage ended in a chamber, which would once have been completely filled with a sump pool. The dry stone wall on the left had been completely built from the day's digging.
Modelling by Mark and Tim, lighting by Tarquin, Mark and Tim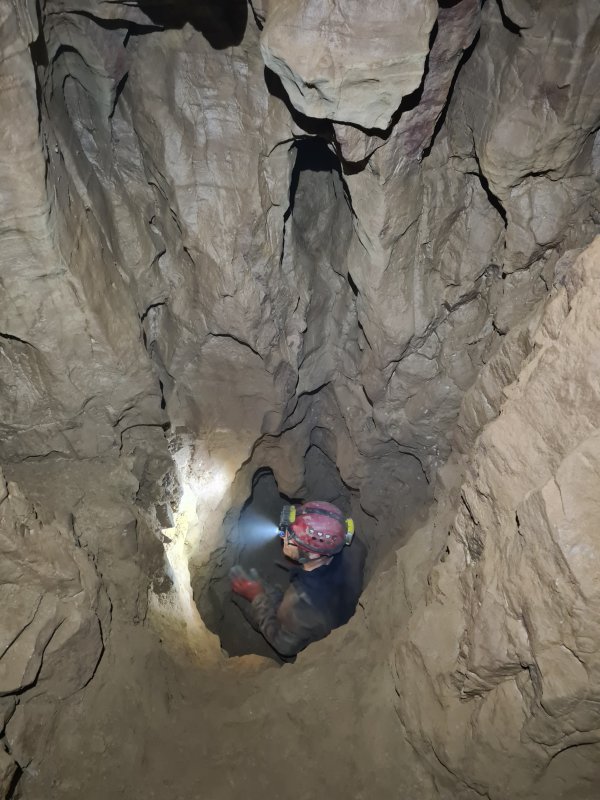 The dig in Left Wing was impressively deep, following an arch under the wall, with the floor having been above his head when they started. The paleo-sump seems to have filled with debris, and therefore the most likely way to connect the passages is down this pit, and under an arch, emerging from the floor of our dig in Bat Remains To Be Seen Passage. The two passages are now just 1 metre apart. A good spade and a 3-man team had helped progress from this side. The oval eyehole near the top of the picture is where the vocal connection had come from, and probably corresponds to a fractured hole seen just above the floor in the other dig.
Modelling by Tim, lighting by Tarquin and Tim
The dig in Left Wing was impressively deep, following an arch under the wall, with the floor having been above his head when they started. The paleo-sump seems to have filled with debris, and therefore the most likely way to connect the passages is down this pit, and under an arch, emerging from the floor of our dig in Bat Remains To Be Seen Passage. The two passages are now just 1 metre apart. A good spade and a 3-man team had helped progress from this side. The oval eyehole near the top of the picture is where the vocal connection had come from, and probably corresponds to a fractured hole seen just above the floor in the other dig.
Modelling by Tim, lighting by Tarquin and Tim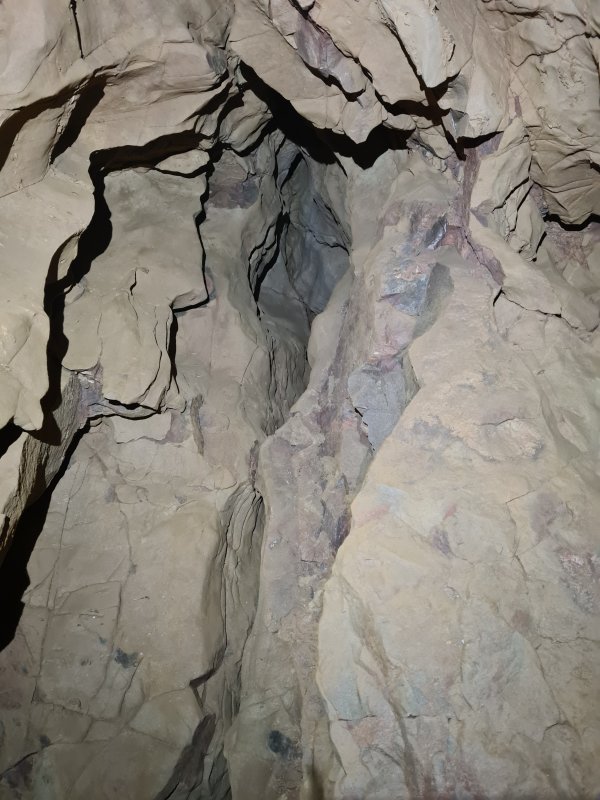 An aven in the end wall of the chamber provided a light connection to the aven we had seen in the other dig. A connection through here would be possible, but enlargement and rock breaking would be needed.