Slaughter Stream Cave Remelt Plant trips 16-17/10/2021 and 05/03/2022
Unless otherwise stated, camera, setups, lighting, edits and gallery effects by Tarquin. Modelling and lighting at various points will be Mark Tringham, Sencer Coltu, Judi and Tim Nichols.
These were a pair of surveying trips covering parts of Remelt Plant, the most remote part of Slaughter Stream Cave. The first trip, to the Lower Series, was done over two days, taking 25 hours and 20 minutes. The second trip, to the end of the Northern Line, was done as a single day trip, taking 12 hours and 40 minutes. Without surveying, the second trip would have been 10 hours and 25 minutes. The gallery is intended to assist in assessing the speleogenesis (cave development) of this part of the cave, and is therefore somewhat lengthy. Left Wing and Bat Remains To Be Seen are covered in a later gallery.
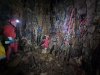 The cave has ladders for most of the Entrance Series, with a rope used for the Balcony and Pen Pot Pitches. After that, SRT gear is not needed (but cows tails are useful in Remelt Plant's Upper Series). So the base of Pen Pot Pitch becomes decorated with the discarded sets of SRT gear, trying to keep them clear of the water on the floor. On this day, there was also a scientific research and videography team in the cave, researching the skeleton of Norman the dog. There were 9 sets of SRT gear adorning the walls.
Modelling by Sencer and Judi, lighting by Tarquin, Sencer and Judi
The cave has ladders for most of the Entrance Series, with a rope used for the Balcony and Pen Pot Pitches. After that, SRT gear is not needed (but cows tails are useful in Remelt Plant's Upper Series). So the base of Pen Pot Pitch becomes decorated with the discarded sets of SRT gear, trying to keep them clear of the water on the floor. On this day, there was also a scientific research and videography team in the cave, researching the skeleton of Norman the dog. There were 9 sets of SRT gear adorning the walls.
Modelling by Sencer and Judi, lighting by Tarquin, Sencer and Judi Fossil favosites coral, looking like a honeycomb, in the Graveyard.
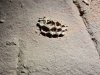 Much more obvious honeycombed favosites fossil in The Chunnel.
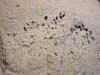 Fossilised coral in The Chunnel, near the start of Bicknor Street Passage. Like most of the branched coral fossils in this cave, this appears to be a Syringopora.
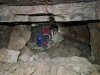 Our first target was some surveying an oxbow in Bicknor Street Passage. The junction of The Chunnel and Bicknor Street Passage sits directly below the parking area on Bicknor Street.
Modelling by Judi and Mark, lighting by Tarquin, Judi and Mark
Our first target was some surveying an oxbow in Bicknor Street Passage. The junction of The Chunnel and Bicknor Street Passage sits directly below the parking area on Bicknor Street.
Modelling by Judi and Mark, lighting by Tarquin, Judi and Mark The first passage we surveyed was a small tube between Bicknor Street Passage and the CPP2 oxbow. This is only short and did not earn a proper photograph - this picture was of the rock that was used as a survey station, rather than the passage itself.
Modelling by Sencer, lighting by Tarquin and Sencer
The first passage we surveyed was a small tube between Bicknor Street Passage and the CPP2 oxbow. This is only short and did not earn a proper photograph - this picture was of the rock that was used as a survey station, rather than the passage itself.
Modelling by Sencer, lighting by Tarquin and Sencer Unusual nodules at the start of CPP2. It is not known if these are fossils or just darkened mineral lumps.
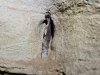 The thin nodule could so easily be a fossil. It is especally distinctive how the rock around it has been corroded away, without the nodule itself being affected.
 The smaller nodule.
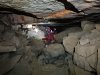 Surveying at the start of CPP2.
Modelling by Judi and Sencer, lighting by Tarquin, Judi and Sencer
Surveying at the start of CPP2.
Modelling by Judi and Sencer, lighting by Tarquin, Judi and Sencer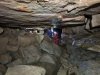 Being attacked by a giant plastic bat in CPP2
Modelling by Judi, Fruiti and Sencer, lighting by Tarquin, Judi and Sencer
Being attacked by a giant plastic bat in CPP2
Modelling by Judi, Fruiti and Sencer, lighting by Tarquin, Judi and Sencer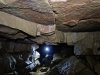 The ceiling is made of flat slabs, and it is only after passing underneath them that you realise that they are held up by nothing, and they are not actually connected to the ceiling at all.
Modelling by Mark, lighting by Tarquin and Mark
The ceiling is made of flat slabs, and it is only after passing underneath them that you realise that they are held up by nothing, and they are not actually connected to the ceiling at all.
Modelling by Mark, lighting by Tarquin and Mark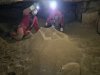 Sand castle in CPP2.
Modelling by Sencer and Judi, lighting by Tarquin, Sencer and Judi
Sand castle in CPP2.
Modelling by Sencer and Judi, lighting by Tarquin, Sencer and Judi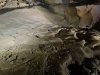 Sand formations in CPP2. Before our visit, these were unprotected.
Lighting by Mark and Judi
Sand formations in CPP2. Before our visit, these were unprotected.
Lighting by Mark and Judi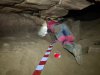 We returned with some conservation tape, and laid it throughout the passage.
Modelling by Judi, lighting by Tarquin and Judi
We returned with some conservation tape, and laid it throughout the passage.
Modelling by Judi, lighting by Tarquin and Judi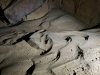 Sand formations in CPP2. These indicate a flow towards The Three Deserts.
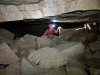 Nearing Desert Junction in CPP2.
Modelling by Judi, lighting by Tarquin and Judi
Nearing Desert Junction in CPP2.
Modelling by Judi, lighting by Tarquin and Judi Very large Syringopora fossil in The Chunnel, where a side rift from CPP2 connects. The entire fossil is around 50 cm across.
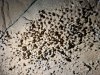 Detail of the fossil.
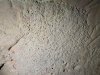 Nearby is another Syringopora fossil that is much larger. This one, sadly, has almost all been weathered away.
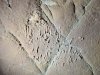 Smaller Syringopora fossil nearby.
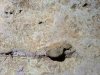 Large nodule, which is probably a fossil bone, below the Downward Dog squeeze in Dog's Grave Passage. This is used as a climbing foothold, so its original state is no longer visible.
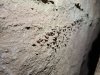 Another Syringopora, this time part way down Dog's Grave Passage.
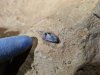 Fossil bone in Dog's Grave Passage. This is almost certainly going to be from a Ctenacanthus proto-shark (early shark).
Modelling by digitus Marki, lighting by Tarquin and Mark
Fossil bone in Dog's Grave Passage. This is almost certainly going to be from a Ctenacanthus proto-shark (early shark).
Modelling by digitus Marki, lighting by Tarquin and Mark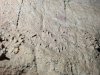 Another Syringopora in Dog's Grave Passage.
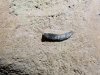 Another bone fossil in Dog's Grave Passage.
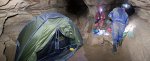 For the first trip, we all camped in Dog's Grave Passage, using the campsite that had been set up for the Remelt Plant digging project. The camp is fairly spacious, with plenty of sleeping spots. However, the toilet facilities are restricted to liquid waste only, and the draught means that tents are suggested. Most camping equipment needs to be brought in on the day, including sleeping bags, dry clothing and food. The extra gear means an awful lot more sweat and energy waste in The Three Deserts. For those of us who are used to long trips, it is easier to do a day trip, so we did not camp on the second trip. However, it is easier for others to camp the night before or after (or both), reducing the caving needed each day, but exchanging it for more work on the way in and out. The nearest safe water source is 20 minutes further into the cave, along some demanding traverses, and the rest of the trip is dry. Dehydration is a major factor, so sweating is a significant concern.
Modelling by Mark and Sencer, lighting by Tarquin, Mark, Sencer and Judi
For the first trip, we all camped in Dog's Grave Passage, using the campsite that had been set up for the Remelt Plant digging project. The camp is fairly spacious, with plenty of sleeping spots. However, the toilet facilities are restricted to liquid waste only, and the draught means that tents are suggested. Most camping equipment needs to be brought in on the day, including sleeping bags, dry clothing and food. The extra gear means an awful lot more sweat and energy waste in The Three Deserts. For those of us who are used to long trips, it is easier to do a day trip, so we did not camp on the second trip. However, it is easier for others to camp the night before or after (or both), reducing the caving needed each day, but exchanging it for more work on the way in and out. The nearest safe water source is 20 minutes further into the cave, along some demanding traverses, and the rest of the trip is dry. Dehydration is a major factor, so sweating is a significant concern.
Modelling by Mark and Sencer, lighting by Tarquin, Mark, Sencer and Judi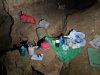 The cooking and seating area.
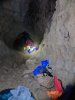 Paul Taylor's tent, which still sees occasional use by visitors. This is set in the secondary sleeping area back along Dog's Grave Passage.
Modelling by an unwitting Judi
Paul Taylor's tent, which still sees occasional use by visitors. This is set in the secondary sleeping area back along Dog's Grave Passage.
Modelling by an unwitting Judi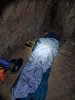 There are other sleeping spots at both sleeping areas, each of which has a comfortable sand floor. Some sleeping mats are left in situ.
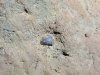 Fossil in Tinkle Passage, just above the water source. This one appears to be a shell, possibly a brachipod.
 Tinkle Passage starts with a climb up above the stream (which immediately flows out and is next seen in Kuwait Passage). From there, it is well decorated, and progress requires carefully avoiding the formations in a narrow rift.
Modelling by Judi, lighting by Tarquin and Judi
Tinkle Passage starts with a climb up above the stream (which immediately flows out and is next seen in Kuwait Passage). From there, it is well decorated, and progress requires carefully avoiding the formations in a narrow rift.
Modelling by Judi, lighting by Tarquin and Judi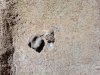 Unknown fossil in Tinkle Passage.
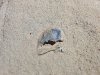 Another fossil, this time probably a shell. Linke many of the fossils, it is coated in manganese.
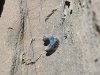 Fossil Ctenacanthus dorsal spine at the top of the climb down at the end of Tinkle Passage. This would have originally held up one of the dorsal fins of a Ctenacanthus shark, with the fin's cartilage sitting in the cup of the U-shape.
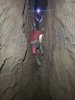 The climb down at the end of Tinkle Passage.
Modelling by Judi and Sencer, lighting by Tarquin, Judi and Sencer
The climb down at the end of Tinkle Passage.
Modelling by Judi and Sencer, lighting by Tarquin, Judi and Sencer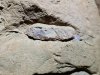 Another possible fossil bone in the chamber below the climb.
 The awkwardly narrow climb up above Snow Garden into Remelt Plant. This has very few useful holds, and is quite slippery.
Modelling by Judi, lighting by Tarquin and Judi
The awkwardly narrow climb up above Snow Garden into Remelt Plant. This has very few useful holds, and is quite slippery.
Modelling by Judi, lighting by Tarquin and Judi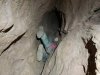 The fish flopping technique may prove useful.
Modelling by Judi, lighting by Tarquin and Judi
The fish flopping technique may prove useful.
Modelling by Judi, lighting by Tarquin and Judi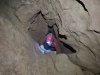 Top of the climb.
Modelling by Sencer, lighting by Tarquin and Sencer
Top of the climb.
Modelling by Sencer, lighting by Tarquin and Sencer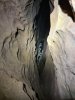 At the top, one direction leads back to a viewpoint over the Snow Garden.
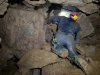 The way into Remelt Plant passes through a heavily faulted zone, where everything is made up from brecciated boulders, with some big gaps below them.
Modelling by Tim, lighting by Tarquin and Tim
The way into Remelt Plant passes through a heavily faulted zone, where everything is made up from brecciated boulders, with some big gaps below them.
Modelling by Tim, lighting by Tarquin and Tim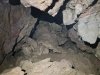 The most obvious way on reaches a choke.
 The movement of the fault causes the rock to be crushed into angular fragments, which have then re-cemented into a rock. Superficially, it may look like an alluvial conglomerate, but the rock fragments are distinctively angular instead of being rounded. This fault breccia is easily some of the most impressive in the cave, covering a very wide area.
 The way on is down to the side, ignoring the main choke.
Modelling by Judi, lighting by Tarquin, Sencer and Judi
The way on is down to the side, ignoring the main choke.
Modelling by Judi, lighting by Tarquin, Sencer and Judi Tiny jammed pebbles in the way on.
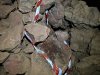 Guano in the way on.
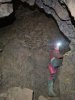 The passage then enlarges and climbs to a junction, with the entire ceiling made up from fault breccia.
Modelling by Judi, lighting by Tarquin and Judi
The passage then enlarges and climbs to a junction, with the entire ceiling made up from fault breccia.
Modelling by Judi, lighting by Tarquin and Judi To the left is the route to the Iron Works. This starts deceptively large, but soon reduces to a lengthy squeeze, before reaching the largest chamber in the series.
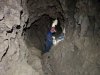 The main way on is to the right, with the ceiling again made up from the extensive fault breccia. This is where we started our survey.
Modelling by Mark and Judi, lighting by Tarquin, Mark and Judi
The main way on is to the right, with the ceiling again made up from the extensive fault breccia. This is where we started our survey.
Modelling by Mark and Judi, lighting by Tarquin, Mark and Judi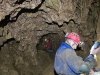 The breccia has distinctly pink and purple matrix, presumably haematite. Beyond here is one of the routes on, clambering down at the end to reach the other route.
Modelling by Mark and Judi, lighting by Tarquin, Mark and Judi
The breccia has distinctly pink and purple matrix, presumably haematite. Beyond here is one of the routes on, clambering down at the end to reach the other route.
Modelling by Mark and Judi, lighting by Tarquin, Mark and Judi Detail of the fault breccia. Incidentally, the wet hair is from sweating. This is a very dry part of the cave, and the effort to reach it is not to be underestimated. Water is a major consideration.
Modelling by Judi, lighting by Tarquin and Judi
Detail of the fault breccia. Incidentally, the wet hair is from sweating. This is a very dry part of the cave, and the effort to reach it is not to be underestimated. Water is a major consideration.
Modelling by Judi, lighting by Tarquin and Judi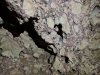 Breccia detail.
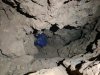 The other way on is down in the floor, into a passage running parallel to the upper passage.
Modelling by Mark, lighting by Tarquin and Mark
The other way on is down in the floor, into a passage running parallel to the upper passage.
Modelling by Mark, lighting by Tarquin and Mark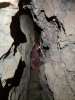 In the lower passage, where one wall is made up from the fault breccia.
Modelling by Judi, lighting by Tarquin and Judi
In the lower passage, where one wall is made up from the fault breccia.
Modelling by Judi, lighting by Tarquin and Judi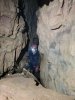 Looking back along the lower passage.
Modelling by Tim, lighting by Tarquin and Tim
Looking back along the lower passage.
Modelling by Tim, lighting by Tarquin and Tim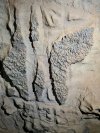 Crusts of probable goethite - a dark form of ochre - on the wall of the lower passage.
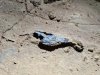 Fossils in the lower passage, probably brachiopod shells coated in manganese or goethite.
Lighting by Tarquin and Mark
Fossils in the lower passage, probably brachiopod shells coated in manganese or goethite.
Lighting by Tarquin and Mark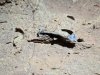 Fossils in the lower passage.
Lighting by Tarquin and Mark
Fossils in the lower passage.
Lighting by Tarquin and Mark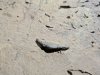 Fossils in the lower passage.
Lighting by Tarquin and Mark
Fossils in the lower passage.
Lighting by Tarquin and Mark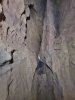 The upper and lower passages rejoin as two levels of a very tall rift, with numerous blind avens.
Modelling by Tim, lighting by Tarquin and Tim
The upper and lower passages rejoin as two levels of a very tall rift, with numerous blind avens.
Modelling by Tim, lighting by Tarquin and Tim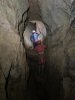 The way on becomes a phreatic tube with more avens.
Modelling by Judi and Mark, lighting by Tarquin, Judi and Mark
The way on becomes a phreatic tube with more avens.
Modelling by Judi and Mark, lighting by Tarquin, Judi and Mark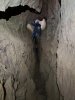 This immediately turns into a tall, keyhole-shaped phreatic riser.
Modelling by Mark, lighting by Tarquin and Mark
This immediately turns into a tall, keyhole-shaped phreatic riser.
Modelling by Mark, lighting by Tarquin and Mark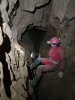 This poses yet more challenges, as the gap is wide enough to require traversing, a theme which continues for much of the next part of the cave.
Modelling by Judi and Mark, lighting by Tarquin, Judi and Mark
This poses yet more challenges, as the gap is wide enough to require traversing, a theme which continues for much of the next part of the cave.
Modelling by Judi and Mark, lighting by Tarquin, Judi and Mark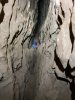 Above the riser, the passage continues as a rift traverse, without a proper floor.
Modelling by Mark, lighting by Tarquin, Judi and Mark
Above the riser, the passage continues as a rift traverse, without a proper floor.
Modelling by Mark, lighting by Tarquin, Judi and Mark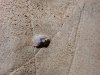 Unidentified fossil in the passage above the riser.
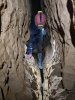 The passage contines as an awkward traverse to a junction, with Star Shaft II above. And yes, that really is its name.
Modelling by Mark, lighting by Tarquin and Mark
The passage contines as an awkward traverse to a junction, with Star Shaft II above. And yes, that really is its name.
Modelling by Mark, lighting by Tarquin and Mark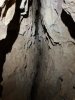 The main way on into the Upper Series of Remelt Plant is ahead, but the passage ahead - seen here - ends too tight, and instead, the way on is to ascend Star Shaft II to continue ahead at a higher level. On the first trip, we were put off by how small it seemed, so we decided to do the Lower Series instead, not realising that it is actually worse.
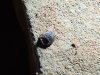 Unidentified fossil at Star Shaft II. The striations could mean that this is the tip of a Ctenacanthus dorsal spine, but it is relatively soft, so it is more likely to be a shell.
 The passage to the left at the junction is Left Wing, which has several holes in the floor, one of which can be free-climbed into the Lower Series.
Modelling by Tim, lighting by Tarquin and Tim
The passage to the left at the junction is Left Wing, which has several holes in the floor, one of which can be free-climbed into the Lower Series.
Modelling by Tim, lighting by Tarquin and Tim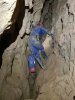 Left Wing continues large for a while, with more traversing.
Modelling by Mark, lighting by Tarquin and Mark
Left Wing continues large for a while, with more traversing.
Modelling by Mark, lighting by Tarquin and Mark Fossil shells in Left Wing.
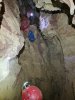 A climb then sets the scene for the smaller continuation of Left Wing. The passage is less than 40 metres long, passing through a tight squeeze to reach a dig, which is only 2 metres away from Bat Remains To Be Seen Passage. This would make a rather excellent little round trip in the series, if it were connected. Apart from the squeeze, it would be an easier route than the normal Upper Series route.
Modelling by Judi and Sencer, lighting by Tarquin, Judi and Sencer
A climb then sets the scene for the smaller continuation of Left Wing. The passage is less than 40 metres long, passing through a tight squeeze to reach a dig, which is only 2 metres away from Bat Remains To Be Seen Passage. This would make a rather excellent little round trip in the series, if it were connected. Apart from the squeeze, it would be an easier route than the normal Upper Series route.
Modelling by Judi and Sencer, lighting by Tarquin, Judi and Sencer The climb down into Lower Series, which we fitted with a rope.
Modelling by Tarquiin's welly and Tim, lighting by Tarquin and Tim
The climb down into Lower Series, which we fitted with a rope.
Modelling by Tarquiin's welly and Tim, lighting by Tarquin and Tim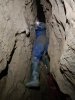 When we first surveyed this passage, there was no rope, and the climb was awkward for some.
Modelling by Mark, lighting by Tarquin and Mark
When we first surveyed this passage, there was no rope, and the climb was awkward for some.
Modelling by Mark, lighting by Tarquin and Mark Fossil shell in the Lower Series.
 Heading back underneath the way in is a tall rift. This reaches a junction below Star Shaft II, where to the left ends abruptly, and to the right heads out towards the keyhole riser, but becomes too tight before connecting to it.
Modelling by Judi, lighting by Tarquin and Judi
Heading back underneath the way in is a tall rift. This reaches a junction below Star Shaft II, where to the left ends abruptly, and to the right heads out towards the keyhole riser, but becomes too tight before connecting to it.
Modelling by Judi, lighting by Tarquin and Judi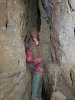 The other direction soon reaches an oxbow loop with shattered rock below the climb in Left Wing. To the right closes down, while ahead-left is a funnel that collects any fallen rocks, leading to a rift. The exit from the rift is a technically entertaining squeeze, elevated off the floor. This is the easier of the two squeezes in the Lower Series.
Modelling by Judi
The other direction soon reaches an oxbow loop with shattered rock below the climb in Left Wing. To the right closes down, while ahead-left is a funnel that collects any fallen rocks, leading to a rift. The exit from the rift is a technically entertaining squeeze, elevated off the floor. This is the easier of the two squeezes in the Lower Series.
Modelling by Judi The squeeze reaches a clamber down into a lengthy, winding rift passage, which starts off with a comfortable, sandy floor.
Modelling by Judi, lighting by Tarquin and Judi
The squeeze reaches a clamber down into a lengthy, winding rift passage, which starts off with a comfortable, sandy floor.
Modelling by Judi, lighting by Tarquin and Judi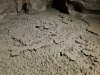 The sand turns to mud, and on a few corners, it is evident that the mud rests on top of what would once have been a beautiful calcite flow, shown by the remains of some dried out crystal pools with lily pads.
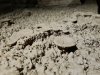 Detail of the crystal pool. The passage then enlarges, and rapidly shrinks at a too tight oxbow. The way on is a tight, blasted squeeze into the continuing passage. This ends too low after 130 metres, with a good draught, just 10 metres away from the side passage in Kuwait Passage. They are at the right heights for each other, and point towards each other, but the draught could not be detected at the other end. This is by far the most likely place to connect a round trip with Kuwait Passage.
 Ascending Star Shaft II, where we replaced the handline with a new one, using a proper anchor instead of a chockstone. It can be free climbed without a rope if needed, with difficulty.
Modelling by Tarquin's appendages and Mark, lighting by Tarquin, Mark and Tim
Ascending Star Shaft II, where we replaced the handline with a new one, using a proper anchor instead of a chockstone. It can be free climbed without a rope if needed, with difficulty.
Modelling by Tarquin's appendages and Mark, lighting by Tarquin, Mark and Tim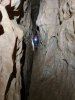 Traversing along above the dead-end rift. Again, there is no real floor here, and traversing involves making yourself wide enough not to fall down the gap. This area is hard work, but it does soon gain a solid floor.
Modelling by Mark, lighting by Tarquin and Mark
Traversing along above the dead-end rift. Again, there is no real floor here, and traversing involves making yourself wide enough not to fall down the gap. This area is hard work, but it does soon gain a solid floor.
Modelling by Mark, lighting by Tarquin and Mark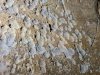 The walls of the passage have unusual pitting patterns, and we were struggling to explain them. My suggestion is that they might be caused by ice crystals, popping off a layer of the rock.
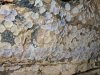 Pitting. These could be craters on a planet.
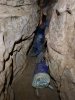 Despite looking horribly tight, the passage is actually easily navigable by most cavers. Just lie down and get on with it.
Modelling by Mark, lighting by Tarquin and Mark
Despite looking horribly tight, the passage is actually easily navigable by most cavers. Just lie down and get on with it.
Modelling by Mark, lighting by Tarquin and Mark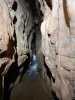 Nearing the end of the narrow part.
Modelling by Tim, lighting by Tarquin and Tim
Nearing the end of the narrow part.
Modelling by Tim, lighting by Tarquin and Tim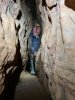 It is soon possible to stand awkwardly.
Modelling by Tim, lighting by Tarquin and Tim
It is soon possible to stand awkwardly.
Modelling by Tim, lighting by Tarquin and Tim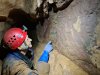 Slickensides on the wall of the passage, showing that this pssage is formed on a strike-slip fault.
Modelling by Mark, lighting by Tarquin and Mark
Slickensides on the wall of the passage, showing that this pssage is formed on a strike-slip fault.
Modelling by Mark, lighting by Tarquin and Mark Scratches on the other wall. These might be man-made, but they are above head height.
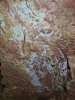 Colourful ceiling, probably different kinds of ochres.
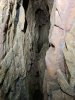 The tallest of a series of avens along the passage. There is no known passage above this.
Lighting by Tarquin and Tim
The tallest of a series of avens along the passage. There is no known passage above this.
Lighting by Tarquin and Tim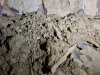 Mud deposits below the avens showing that they were likely to have been inlets, not phreatic uplift.
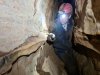 Shelves below the aven. These appear to be chert.
Modelling by Tim, lighting by Tarquin and Tim
Shelves below the aven. These appear to be chert.
Modelling by Tim, lighting by Tarquin and Tim Scallops showing a slow flow into the series.
Lighting by Tim
Scallops showing a slow flow into the series.
Lighting by Tim Traverse over a deep hole. This has not yet been surveyed, but apparently leads down only to a short, blind passage.
Modelling by Mark, lighting by Tarquin and Mark
Traverse over a deep hole. This has not yet been surveyed, but apparently leads down only to a short, blind passage.
Modelling by Mark, lighting by Tarquin and Mark The tightest squeeze in this passage, which is not particularly tight, and could easily be dug larger if needed.
Modelling by Mark, lighting by Tarquin and Mark
The tightest squeeze in this passage, which is not particularly tight, and could easily be dug larger if needed.
Modelling by Mark, lighting by Tarquin and Mark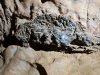 Lumpy deposit on the wall. This appears to be covered in manganese, and is likely to be just a lump of minerals or mud and pebbles.
 The small section pops out onto a climb down into a brief bit of comfortably sized passage, followed by a climb back up to a continuing smaller passage.
Modelling by Tim, lighting by Tarquin and Tim
The small section pops out onto a climb down into a brief bit of comfortably sized passage, followed by a climb back up to a continuing smaller passage.
Modelling by Tim, lighting by Tarquin and Tim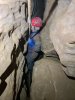 Top of Bat Pitch, where a wriggle through a gap suddenly opens out onto the top of the climb. There are ample ledges that can be used, but the drop is quite far if you get it wrong, so cows tails are suggested.
Modelling by Mark, lighting by Tarquin and Mark
Top of Bat Pitch, where a wriggle through a gap suddenly opens out onto the top of the climb. There are ample ledges that can be used, but the drop is quite far if you get it wrong, so cows tails are suggested.
Modelling by Mark, lighting by Tarquin and Mark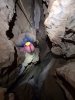 Bat Pitch is a major feature, as the passage grows in size dramatically, and several other routes lead off. It is free climbable, but the rope is required for safety, since te total drop is around 13 metres. The rope leading back under the camera is the way into Bat Remains To Be Seen Passage. The holes in the floor drop into Under-Pitch Passage. The way on to the end of Upper Series is ahead, down the next stage of the pitch.
Modelling by Tim and Mark, lighting by Tarquin, Tim and Mark
Bat Pitch is a major feature, as the passage grows in size dramatically, and several other routes lead off. It is free climbable, but the rope is required for safety, since te total drop is around 13 metres. The rope leading back under the camera is the way into Bat Remains To Be Seen Passage. The holes in the floor drop into Under-Pitch Passage. The way on to the end of Upper Series is ahead, down the next stage of the pitch.
Modelling by Tim and Mark, lighting by Tarquin, Tim and Mark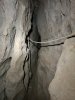 The traverse into Bat Remains To Be Seen Passage.
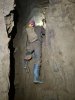 The lower section of Bat Pitch.
Modelling by Tim, lighting by Tarquin and Tim
The lower section of Bat Pitch.
Modelling by Tim, lighting by Tarquin and Tim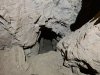 A hole on the side leads into Below-Pitch Passage, which is large and comfortable, but only around 30 metres long.
 Guano at the base of the pitch. This part of the cave is 120 metres underground, and has no known entrances nearby.
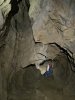 Phreatic riser and tall aven at the base of Bat Pitch.
Modelling by Mark, lighting by Tarquin, Tim and Mark
Phreatic riser and tall aven at the base of Bat Pitch.
Modelling by Mark, lighting by Tarquin, Tim and Mark Top of the phreatic riser.
Modelling by Mark, lighting by Tarquin and Mark
Top of the phreatic riser.
Modelling by Mark, lighting by Tarquin and Mark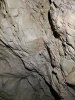 Slickensides in the riser.
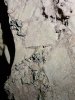 Deposits in the riser, which appear to be goethite.
 The passage alternates between walking sections and comfortable crawls, where care is needed to avoid damaging the sand formations.
Modelling by Tim, lighting by Tarquin and Tim
The passage alternates between walking sections and comfortable crawls, where care is needed to avoid damaging the sand formations.
Modelling by Tim, lighting by Tarquin and Tim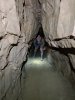 Stooping section.
Modelling by Tim, lighting by Tarquin and Tim
Stooping section.
Modelling by Tim, lighting by Tarquin and Tim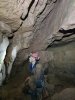 The passage turns an abrupt corner where it encounters a haematite-rich fault. The Lower Series ends almost directly beneath this point.
Modelling by Tim, lighting by Tarquin and Tim
The passage turns an abrupt corner where it encounters a haematite-rich fault. The Lower Series ends almost directly beneath this point.
Modelling by Tim, lighting by Tarquin and Tim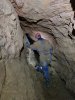 The hading of the fault is clearly visible in the other direction. The Lower Series is offset to the right side by the expected amount, according to the slope of this fault.
Modelling by Mark, lighting by Tarquin and Mark
The hading of the fault is clearly visible in the other direction. The Lower Series is offset to the right side by the expected amount, according to the slope of this fault.
Modelling by Mark, lighting by Tarquin and Mark The haematite staining in the fault breccia.
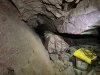 At the next bend, a passage continues ahead along the fault, reaching a large fault chamber. That chamber sits directly above the side passage from Kuwait Passage (but that passage is offset from the fault). A dig in the floor of that chamber is the closest point to Kuwait Passage.
Lighting by Tarquin, Tim and Mark
At the next bend, a passage continues ahead along the fault, reaching a large fault chamber. That chamber sits directly above the side passage from Kuwait Passage (but that passage is offset from the fault). A dig in the floor of that chamber is the closest point to Kuwait Passage.
Lighting by Tarquin, Tim and Mark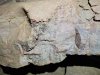 Slickensides on the corner.
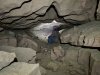 After the corner, the passage is big and comfortable.
Modelling by Mark, lighting by Tarquin and Mark
After the corner, the passage is big and comfortable.
Modelling by Mark, lighting by Tarquin and Mark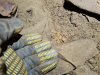 Bat skeleton in the passage.
Modelling by Billy
Bat skeleton in the passage.
Modelling by Billy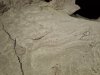 Sand formations.
 Sand formations.
 The direction of the ripples indicates a flow further into the series.
 Exposed styolites.
 Low side passage on the left, which ends directly over an aven at the end of Kuwait Passage, where the mud-filled oxbow starts. The vertical separation is nearly 20 metres.
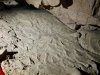 More sand formations, with the ripples continuing to suggest an onwards flow.
 Sand formations.
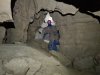 Triangular archway between chambers.
Modelling by Mark, lighting by Tarquin and Mark
Triangular archway between chambers.
Modelling by Mark, lighting by Tarquin and Mark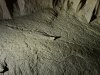 Sand formations.
Lighting by Tim
Sand formations.
Lighting by Tim Mud formations. This area has seen water relatively recently.
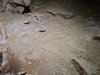 Mud formations and guano.
Lighting by Tarquin and Tim
Mud formations and guano.
Lighting by Tarquin and Tim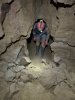 Arched doorway between chambers.
Modelling by Tim, lighting by Tarquin and Tim
Arched doorway between chambers.
Modelling by Tim, lighting by Tarquin and Tim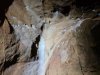 Helictites in the final chamber.
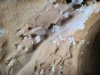 Helictites.
 Helictites.
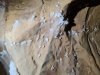 Helictites.
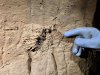 Syringopora fossil in the final chamber.
Modelling by Mark's glove, lighting by Tarquin and Mark
Syringopora fossil in the final chamber.
Modelling by Mark's glove, lighting by Tarquin and Mark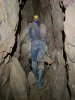 The passage now becomes rifty in style, and this was once the end of the cave. When the rift branches, the left branches end over the top of Kuwait Passage's terminal sump, but 25 metres higher than it.
Modelling by Tim, lighting by Tarquin and Tim
The passage now becomes rifty in style, and this was once the end of the cave. When the rift branches, the left branches end over the top of Kuwait Passage's terminal sump, but 25 metres higher than it.
Modelling by Tim, lighting by Tarquin and Tim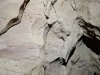 The only rift that actually goes anywhere is the northern branch. It has a visible bed of brachiopod shells.
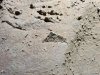 Shell fossils.
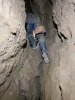 Clambering into the last part of the rifts.
Modelling by Tim, lighting by Tarquin and Tim
Clambering into the last part of the rifts.
Modelling by Tim, lighting by Tarquin and Tim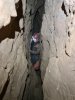 The passage has lost all its glory, and it is back to being awkward. This clamber down is entertaining on the return, having very few holds.
Modelling by Tim, lighting by Tarquin and Tim
The passage has lost all its glory, and it is back to being awkward. This clamber down is entertaining on the return, having very few holds.
Modelling by Tim, lighting by Tarquin and Tim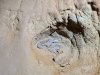 Ctenacanthus dorsal spine fossil in the rift.
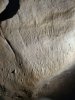 Surge marks, mud formations caused by repeated flooding, in the rift.
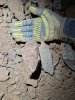 Rocks in the rift, showing the haematite staining (left), and the basic dolomite (right).
Modelling by Tarquin's hand.
Rocks in the rift, showing the haematite staining (left), and the basic dolomite (right).
Modelling by Tarquin's hand. The rift ends at Heat Exchanger, a challenging aven climb, with enough holds, but no space to use them. The name comes from the draught, which would randomly change direction.
Modelling by Tim, lighting by Tarquin and Tim
The rift ends at Heat Exchanger, a challenging aven climb, with enough holds, but no space to use them. The name comes from the draught, which would randomly change direction.
Modelling by Tim, lighting by Tarquin and Tim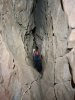 Looking down Heat Exchanger.
Modelling by Mark, lighting by Tarquin and Mark
Looking down Heat Exchanger.
Modelling by Mark, lighting by Tarquin and Mark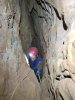 The top of Heat Exchanger. This was the end of the series, for many years.
Modelling by Mark, lighting by Tarquin and Mark
The top of Heat Exchanger. This was the end of the series, for many years.
Modelling by Mark, lighting by Tarquin and Mark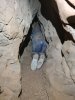 A narrow rift was then blasted into a crawl.
Modelling by Tim, lighting by Tarquin and Tim
A narrow rift was then blasted into a crawl.
Modelling by Tim, lighting by Tarquin and Tim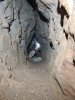 The crawl ends at by far the hardest squeeze in the series. It is an inclined rift leaning at about 30° to the left, gently sloping down onto the head of a 4 metre climb, needing a rotation while up in the air. The hard part is getting back up the climb, and inserting yourself into an ascending rift, throwing bags in front of you without them falling back out of the rift, or getting jammed in the bottom of it. It is not particularly tight, but it makes you wish that the blasting had been continued for another 2 metres.
Modelling by Tim, lighting by Tarquin and Tim
The crawl ends at by far the hardest squeeze in the series. It is an inclined rift leaning at about 30° to the left, gently sloping down onto the head of a 4 metre climb, needing a rotation while up in the air. The hard part is getting back up the climb, and inserting yourself into an ascending rift, throwing bags in front of you without them falling back out of the rift, or getting jammed in the bottom of it. It is not particularly tight, but it makes you wish that the blasting had been continued for another 2 metres.
Modelling by Tim, lighting by Tarquin and Tim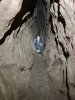 The climb lands in the start of Northern Line, a name that continues to the end of the series. At the bottom of the climb, the passage passes up and down another pair of climbs; this picture is taken from the bottom of the second climb. The climbs are incredibly slippery, with no holds, and returning up the second one, just two metres, may need assistance, but one person will always have to do the climbs unaided.
Modelling by Tim, lighting by Tarquin and Tim
The climb lands in the start of Northern Line, a name that continues to the end of the series. At the bottom of the climb, the passage passes up and down another pair of climbs; this picture is taken from the bottom of the second climb. The climbs are incredibly slippery, with no holds, and returning up the second one, just two metres, may need assistance, but one person will always have to do the climbs unaided.
Modelling by Tim, lighting by Tarquin and Tim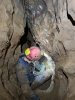 Small formations in the tube after the climbs. The scallops clearly show a flow onwards into the passage.
Modelling by Tim, lighting by Tarquin and Tim
Small formations in the tube after the climbs. The scallops clearly show a flow onwards into the passage.
Modelling by Tim, lighting by Tarquin and Tim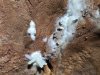 Helictites.
 Helictites.
 Yet another climb. Once again, this is incredibly slippery, thanks to the damp mud, but at least it does have some holds.
Modelling by Tim, lighting by Tarquin and Tim
Yet another climb. Once again, this is incredibly slippery, thanks to the damp mud, but at least it does have some holds.
Modelling by Tim, lighting by Tarquin and Tim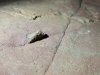 Fossil bone at the top of the climb. While this cannot be identified, it is likely to be from a proto-shark such as a Ctenacanthus, or some other cartilaginous fish. However, none of the bones in this area feature the classic cross section of a dorsal spine.
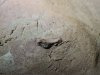 Fossil bone.
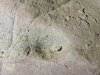 Fossil bone
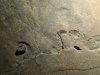 Fossils just after the corner at the top of the climb. The two on the right are shells.
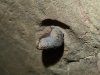 The one on the left, however, is much more special. It appears to be a fossil petalodont tooth, with a dentin side and an enameloid side. It does not appear to be a Ctenacanthus tooth, or a Psammodus tooth (the ones commonly seen elsewhere), and instead matches a Ctenoptychius tooth or a partial Petalorhynchus tooth.
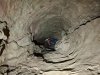 Looking back along the crawling sized tube that follows the greasy climbs. Mark is lying beside the fossils.
Modelling by Mark, lighting by Tarquin and Mark
Looking back along the crawling sized tube that follows the greasy climbs. Mark is lying beside the fossils.
Modelling by Mark, lighting by Tarquin and Mark A final climb down reaches a lower bedding. This part of the cave keeps jumping up and down between beddings. The scallops again show a flow onwards into the passage.
Modelling by Tim, lighting by Tarquin and Tim
A final climb down reaches a lower bedding. This part of the cave keeps jumping up and down between beddings. The scallops again show a flow onwards into the passage.
Modelling by Tim, lighting by Tarquin and Tim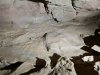 Wet mud formations. This part of the cave saw water not too long ago, but the mud cracks show it is not too recent.
 The passage now takes on its characteristic feel, being a series of phreatic loops sweeping up and down with the steeply dipping beds (around 25°).
Modelling by Tim, lighting by Tarquin and Tim
The passage now takes on its characteristic feel, being a series of phreatic loops sweeping up and down with the steeply dipping beds (around 25°).
Modelling by Tim, lighting by Tarquin and Tim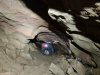 Ascending another riser.
Modelling by Mark, lighting by Tarquin and Mark
Ascending another riser.
Modelling by Mark, lighting by Tarquin and Mark A solutional pocket.
Modelling by Tim, lighting by Tarquin and Tim
A solutional pocket.
Modelling by Tim, lighting by Tarquin and Tim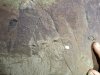 Fossil shells in the pocket.
Modelling by Tim's fingernails, lighting by Tarquin and Tim
Fossil shells in the pocket.
Modelling by Tim's fingernails, lighting by Tarquin and Tim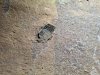 Fossil shells.
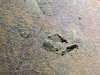 Fossil shells.
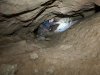 Surveying the next riser.
Modelling by Tim, lighting by Tarquin and Tim
Surveying the next riser.
Modelling by Tim, lighting by Tarquin and Tim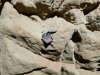 Unknown fossil in the riser.
 Looking back at a small step down.
Modelling by Mark, lighting by Tarquin and Mark
Looking back at a small step down.
Modelling by Mark, lighting by Tarquin and Mark After the step, where there is a ceiling notch.
Modelling by Tim, lighting by Tarquin and Tim
After the step, where there is a ceiling notch.
Modelling by Tim, lighting by Tarquin and Tim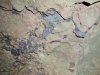 Possible goethite on the wall.
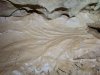 More mud formations.
Lighting by Tarquin and Tim
More mud formations.
Lighting by Tarquin and Tim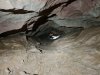 Another riser, complete with slippery mud.
Modelling by Tim, lighting by Tarquin and Tim
Another riser, complete with slippery mud.
Modelling by Tim, lighting by Tarquin and Tim Unidentified fossil bone. Once again, this is likely to be a proto-shark, but it has no identifying features. It could perhaps be a corroded Psammodus tooth plate.
Modelling by Tarquin's glove's stitching
Unidentified fossil bone. Once again, this is likely to be a proto-shark, but it has no identifying features. It could perhaps be a corroded Psammodus tooth plate.
Modelling by Tarquin's glove's stitching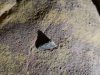 Another fossil bone, which looks very similar to the last one.
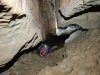 The distinctive notch that briefly develops in the ceiling. The passage often has little avens, but each of them appears to be a solutional pocket, rather than an inlet.
Modelling by Tim, lighting by Tarquin and Tim
The distinctive notch that briefly develops in the ceiling. The passage often has little avens, but each of them appears to be a solutional pocket, rather than an inlet.
Modelling by Tim, lighting by Tarquin and Tim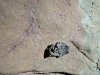 Small crust on the wall, probably more goethite.
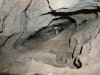 The passage floor becomes uncomfortably knobbly, and the size decreases, as it begins its final rise to the cross rift.
Modelling by a DistoX2 and Tim, lighting by Tarquin, the DistoX2 and Tim
The passage floor becomes uncomfortably knobbly, and the size decreases, as it begins its final rise to the cross rift.
Modelling by a DistoX2 and Tim, lighting by Tarquin, the DistoX2 and Tim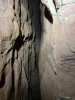 Up to the right, the cross rift is by far the most promising lead, with a noticeable draught. However, it becomes very narrow quite quickly, and soon becomes too narrow for progress. It can be seen to continue at both the higher and lower levels. The rift points back towards the end of Flow Choke Passage, away from the resurgence.
 The upper level of the rift, which is too narrow, but continues for a long way.
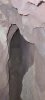 The lower level continues down a hole in the floor, but we did not fancy our chances getting back up if we descended into it, so this enhanced still image from a video is the best I can offer. It would not be navigable except by the tiniest of cavers.
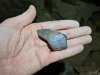 Fossil bone located in the bedding that continues beyond the cross rift. The striations suggest that it was probably a Ctenacanthus dorsal spine, but it has been weathered beyond recognition.
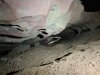 The way on along the original bedding continues lower than before, but soon opens back up to its former size.
Modelling by Tim, lighting by Tarquin and Tim
The way on along the original bedding continues lower than before, but soon opens back up to its former size.
Modelling by Tim, lighting by Tarquin and Tim The ceiling then lifts and it turns into a rift instead.
Modelling by Tim, lighting by Tarquin and Tim
The ceiling then lifts and it turns into a rift instead.
Modelling by Tim, lighting by Tarquin and Tim Just before the end of the passage, it turns sharply left, pointing towards the Slaughter Rising. This fossil Ctenacanthus dorsal spine sits on the corner, and is one of the largest known in the cave. This would have been a very big shark. The spine shows the characteristic U shape, which shows it is a dorsal spine that held up a dorsal fin.
Modelling by a Stanley glove on Tarquin's hand
Just before the end of the passage, it turns sharply left, pointing towards the Slaughter Rising. This fossil Ctenacanthus dorsal spine sits on the corner, and is one of the largest known in the cave. This would have been a very big shark. The spine shows the characteristic U shape, which shows it is a dorsal spine that held up a dorsal fin.
Modelling by a Stanley glove on Tarquin's hand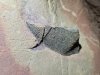 Beautifully textured surface of the spine. The texture is formed from miniature granules running laterally, but aligned longitudinally to create longitudinal stripes. Smaller spines have no granules.
 Stub of a dorsal spine, with the U shaped cross section just visible.
Modelling by Tarquin's fingertip
Stub of a dorsal spine, with the U shaped cross section just visible.
Modelling by Tarquin's fingertip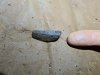 Tip of a dorsal spine found smothered in mud nearby. The striations clearly show that this is also a ctenacanthus dorsal spine, this time a much smaller one. These sharks had two dorsal fins, so presumably this is the smaller fin to the rear.
Modelling by Tarquin's other fingertip
Tip of a dorsal spine found smothered in mud nearby. The striations clearly show that this is also a ctenacanthus dorsal spine, this time a much smaller one. These sharks had two dorsal fins, so presumably this is the smaller fin to the rear.
Modelling by Tarquin's other fingertip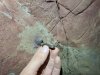 The two fossils may have originally been the same fossil, before they were eroded into separate pieces.
Modelling by a bit more of Tarquin's hand
The two fossils may have originally been the same fossil, before they were eroded into separate pieces.
Modelling by a bit more of Tarquin's hand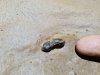 Unidentified fossil bone in the same area.
Modelling by Tarquin's pointy thing
Unidentified fossil bone in the same area.
Modelling by Tarquin's pointy thing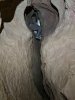 The passage them ramps up a keyhole shaped riser, and immediately becomes too tight.
Modelling by Tim, lighting by Tarquin and Tim
The passage them ramps up a keyhole shaped riser, and immediately becomes too tight.
Modelling by Tim, lighting by Tarquin and Tim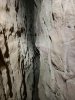 The passage visibly continues in the slot of the keyhole, but is too tight.
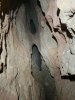 Aven above the top of the keyhole. Also too tight.
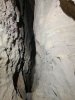 The top part of the keyhole also pinches into a very narrow rift, which continues far too tight.
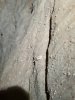 The top of the rift is full of fossils. This part is a set of crinoid fragments.
 More unidentified fossil bones in the top of the top of the rift. The largest could perhaps be a tooth plate (such as a Psammodus) but appears to be too thin.
 The cave has ladders for most of the Entrance Series, with a rope used for the Balcony and Pen Pot Pitches. After that, SRT gear is not needed (but cows tails are useful in Remelt Plant's Upper Series). So the base of Pen Pot Pitch becomes decorated with the discarded sets of SRT gear, trying to keep them clear of the water on the floor. On this day, there was also a scientific research and videography team in the cave, researching the skeleton of Norman the dog. There were 9 sets of SRT gear adorning the walls.
Modelling by Sencer and Judi, lighting by Tarquin, Sencer and Judi
The cave has ladders for most of the Entrance Series, with a rope used for the Balcony and Pen Pot Pitches. After that, SRT gear is not needed (but cows tails are useful in Remelt Plant's Upper Series). So the base of Pen Pot Pitch becomes decorated with the discarded sets of SRT gear, trying to keep them clear of the water on the floor. On this day, there was also a scientific research and videography team in the cave, researching the skeleton of Norman the dog. There were 9 sets of SRT gear adorning the walls.
Modelling by Sencer and Judi, lighting by Tarquin, Sencer and Judi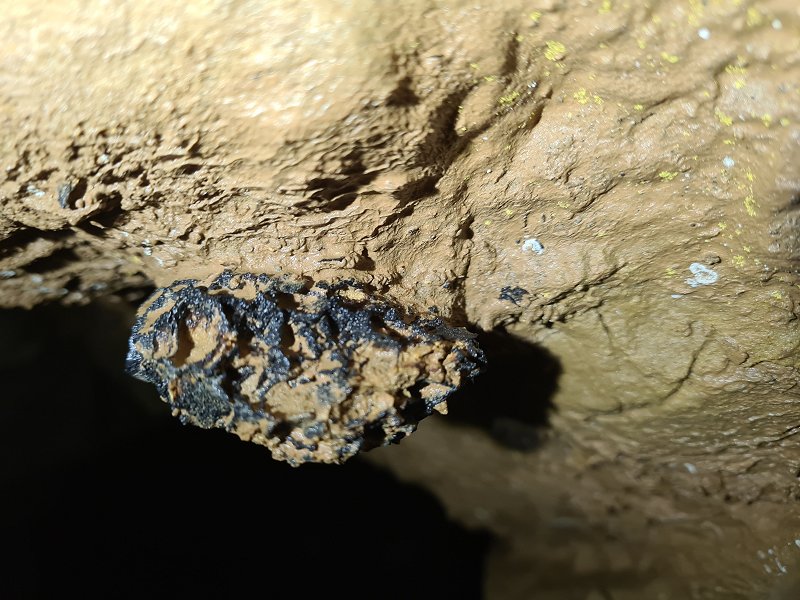 Fossil favosites coral, looking like a honeycomb, in the Graveyard.
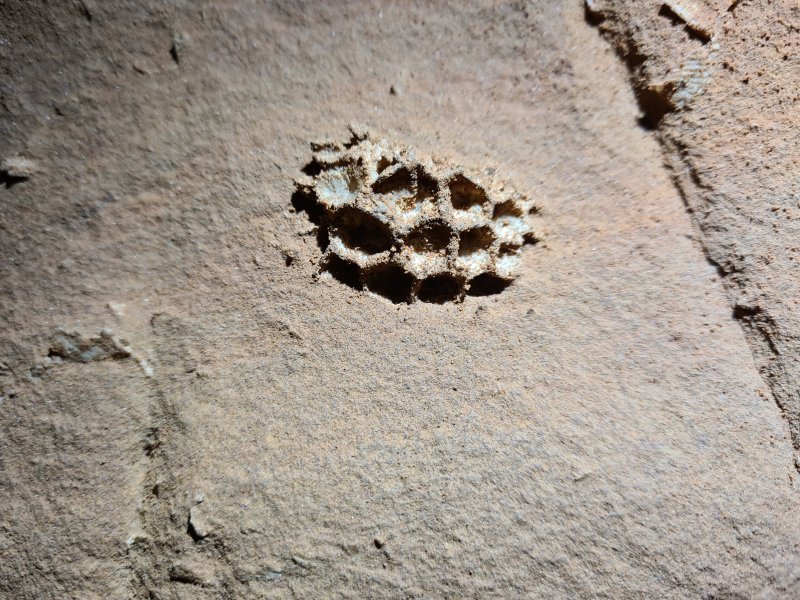 Much more obvious honeycombed favosites fossil in The Chunnel.
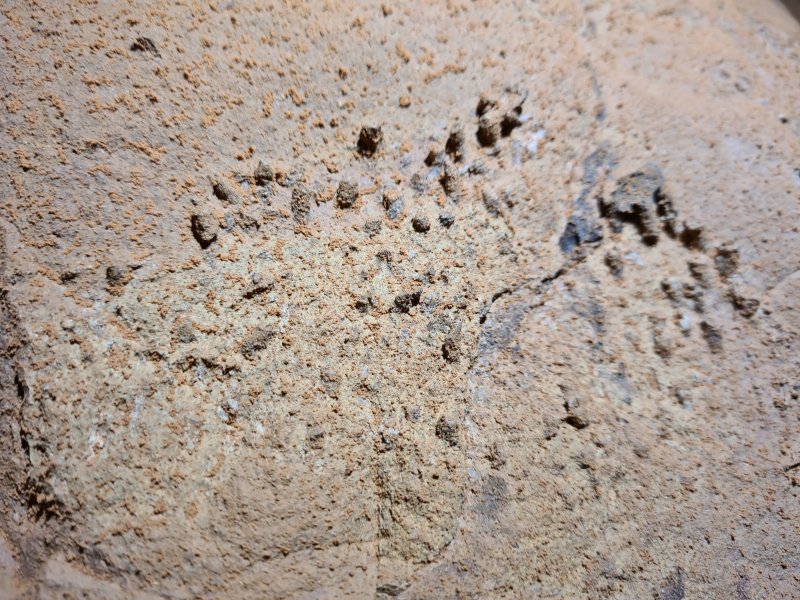 Fossilised coral in The Chunnel, near the start of Bicknor Street Passage. Like most of the branched coral fossils in this cave, this appears to be a Syringopora.
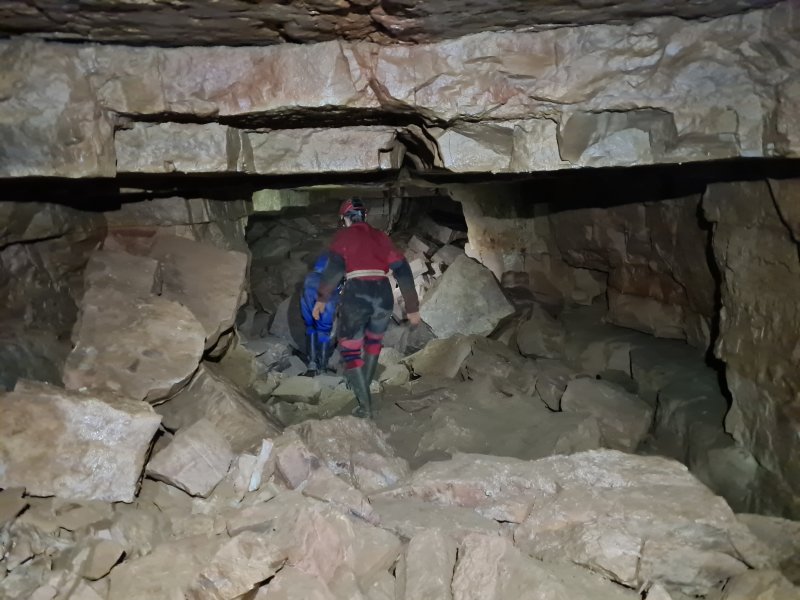 Our first target was some surveying an oxbow in Bicknor Street Passage. The junction of The Chunnel and Bicknor Street Passage sits directly below the parking area on Bicknor Street.
Modelling by Judi and Mark, lighting by Tarquin, Judi and Mark
Our first target was some surveying an oxbow in Bicknor Street Passage. The junction of The Chunnel and Bicknor Street Passage sits directly below the parking area on Bicknor Street.
Modelling by Judi and Mark, lighting by Tarquin, Judi and Mark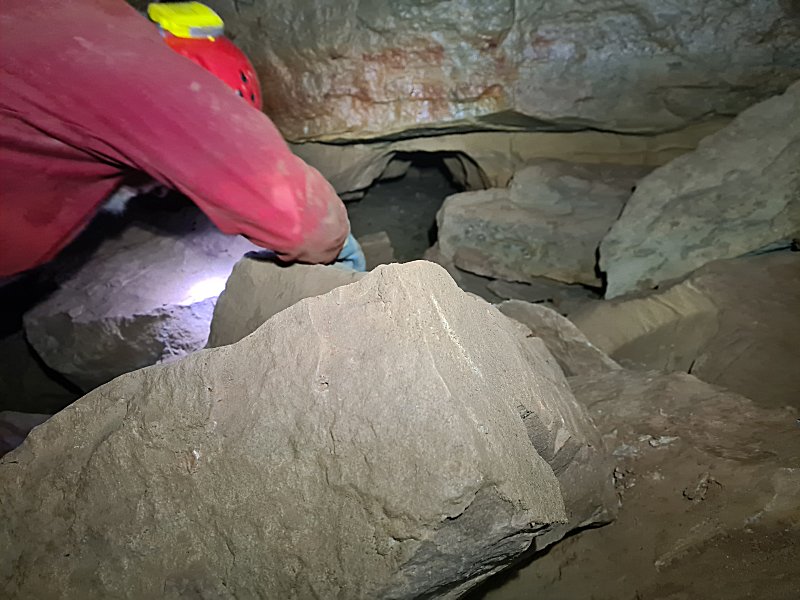 The first passage we surveyed was a small tube between Bicknor Street Passage and the CPP2 oxbow. This is only short and did not earn a proper photograph - this picture was of the rock that was used as a survey station, rather than the passage itself.
Modelling by Sencer, lighting by Tarquin and Sencer
The first passage we surveyed was a small tube between Bicknor Street Passage and the CPP2 oxbow. This is only short and did not earn a proper photograph - this picture was of the rock that was used as a survey station, rather than the passage itself.
Modelling by Sencer, lighting by Tarquin and Sencer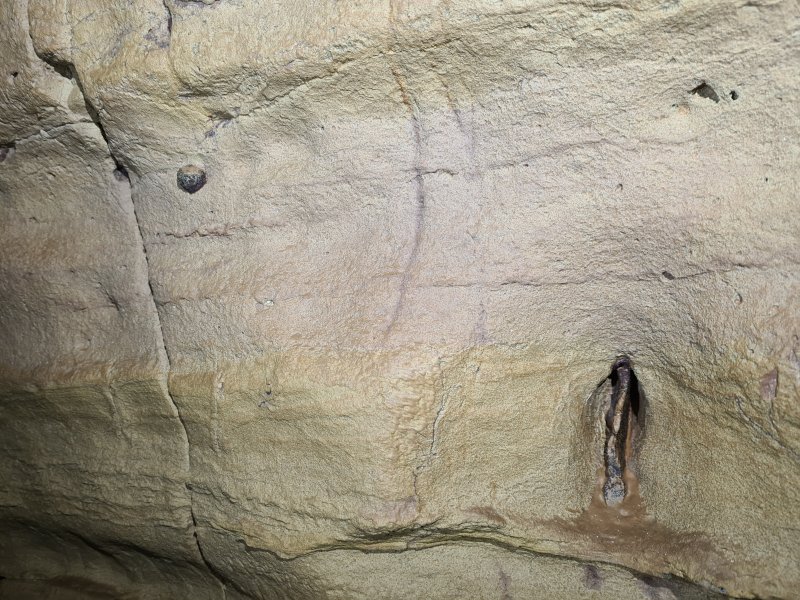 Unusual nodules at the start of CPP2. It is not known if these are fossils or just darkened mineral lumps.
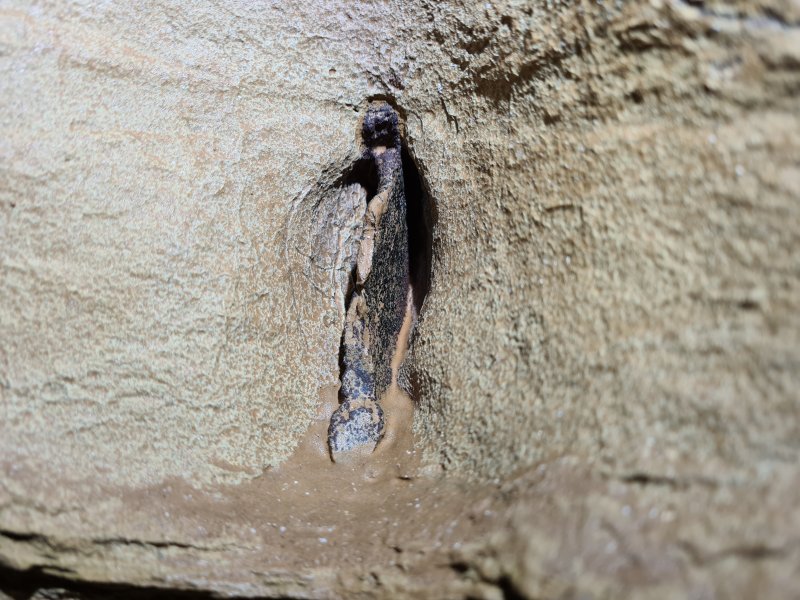 The thin nodule could so easily be a fossil. It is especally distinctive how the rock around it has been corroded away, without the nodule itself being affected.
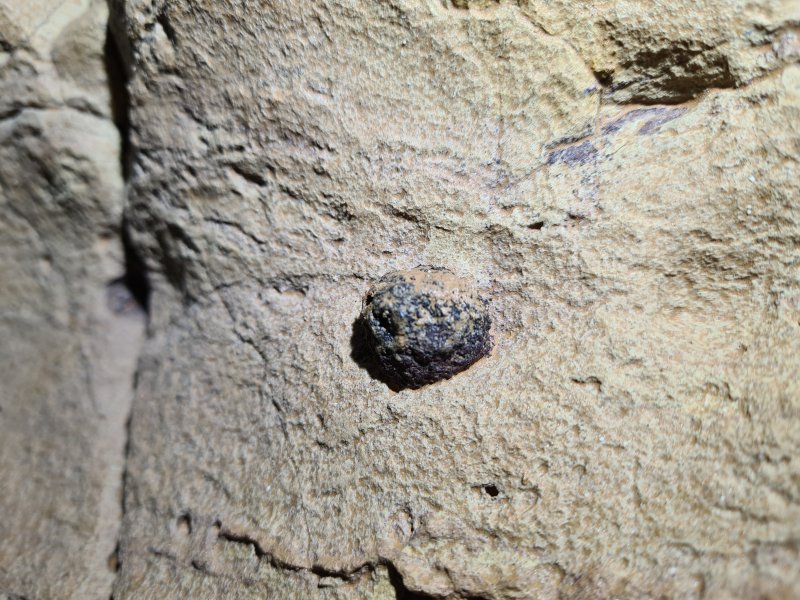 The smaller nodule.
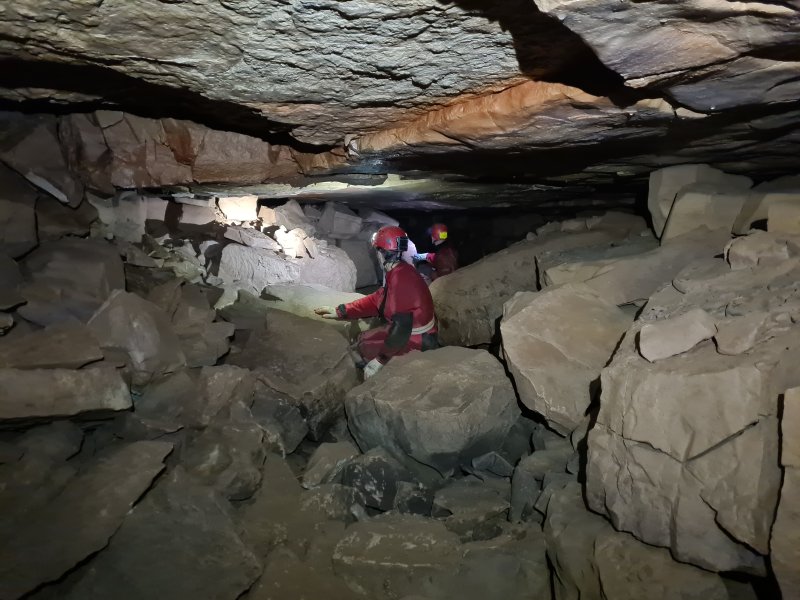 Surveying at the start of CPP2.
Modelling by Judi and Sencer, lighting by Tarquin, Judi and Sencer
Surveying at the start of CPP2.
Modelling by Judi and Sencer, lighting by Tarquin, Judi and Sencer Being attacked by a giant plastic bat in CPP2
Modelling by Judi, Fruiti and Sencer, lighting by Tarquin, Judi and Sencer
Being attacked by a giant plastic bat in CPP2
Modelling by Judi, Fruiti and Sencer, lighting by Tarquin, Judi and Sencer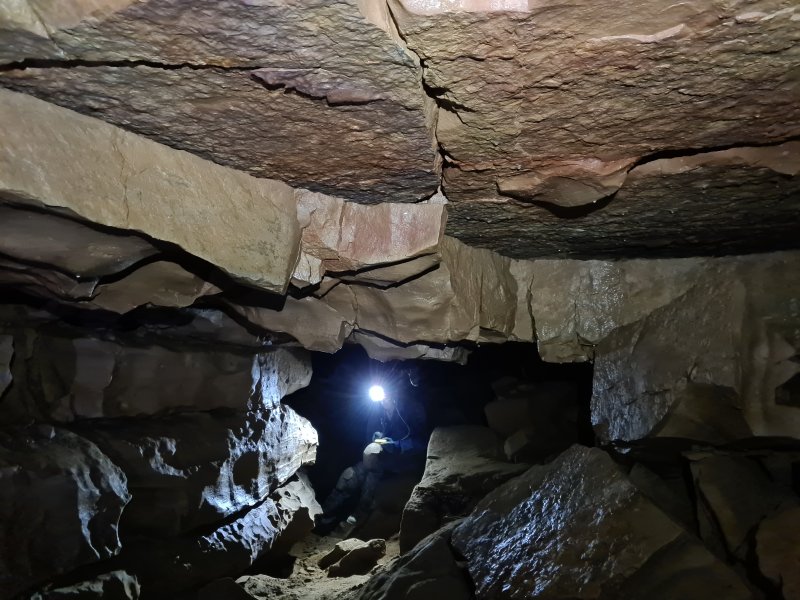 The ceiling is made of flat slabs, and it is only after passing underneath them that you realise that they are held up by nothing, and they are not actually connected to the ceiling at all.
Modelling by Mark, lighting by Tarquin and Mark
The ceiling is made of flat slabs, and it is only after passing underneath them that you realise that they are held up by nothing, and they are not actually connected to the ceiling at all.
Modelling by Mark, lighting by Tarquin and Mark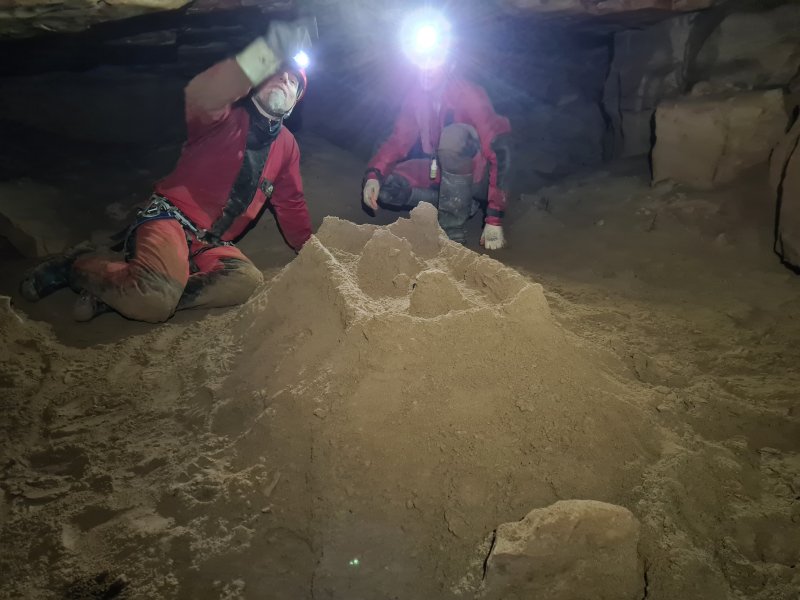 Sand castle in CPP2.
Modelling by Sencer and Judi, lighting by Tarquin, Sencer and Judi
Sand castle in CPP2.
Modelling by Sencer and Judi, lighting by Tarquin, Sencer and Judi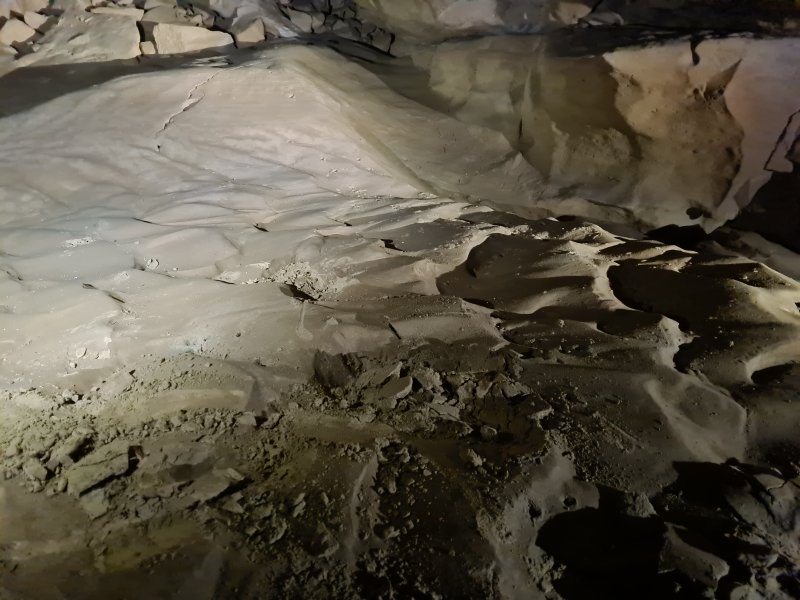 Sand formations in CPP2. Before our visit, these were unprotected.
Lighting by Mark and Judi
Sand formations in CPP2. Before our visit, these were unprotected.
Lighting by Mark and Judi We returned with some conservation tape, and laid it throughout the passage.
Modelling by Judi, lighting by Tarquin and Judi
We returned with some conservation tape, and laid it throughout the passage.
Modelling by Judi, lighting by Tarquin and Judi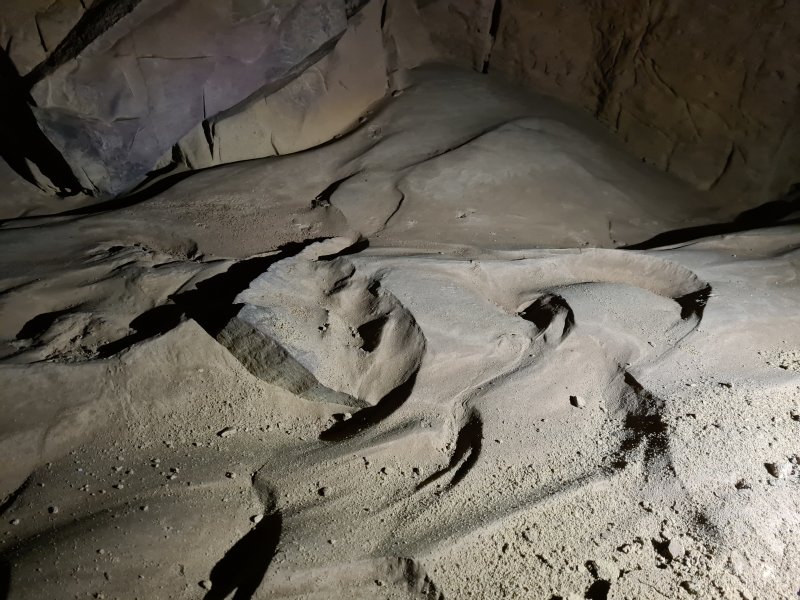 Sand formations in CPP2. These indicate a flow towards The Three Deserts.
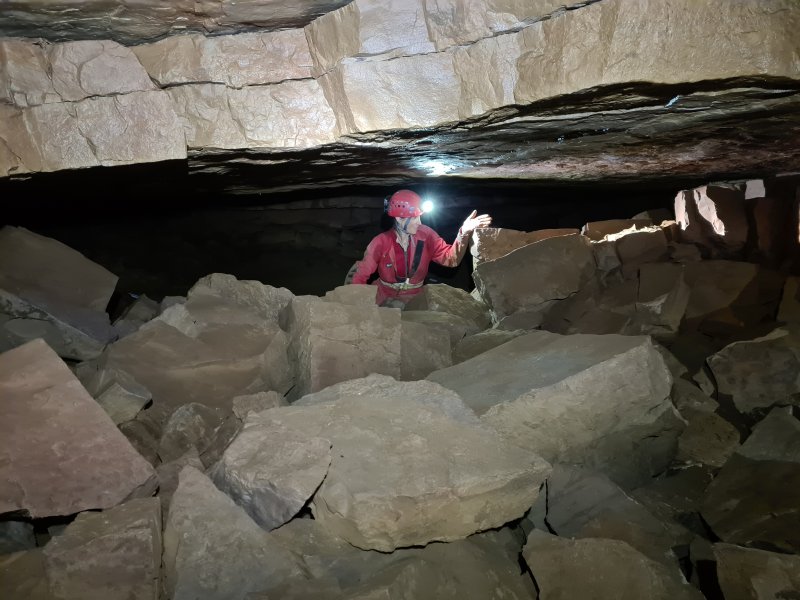 Nearing Desert Junction in CPP2.
Modelling by Judi, lighting by Tarquin and Judi
Nearing Desert Junction in CPP2.
Modelling by Judi, lighting by Tarquin and Judi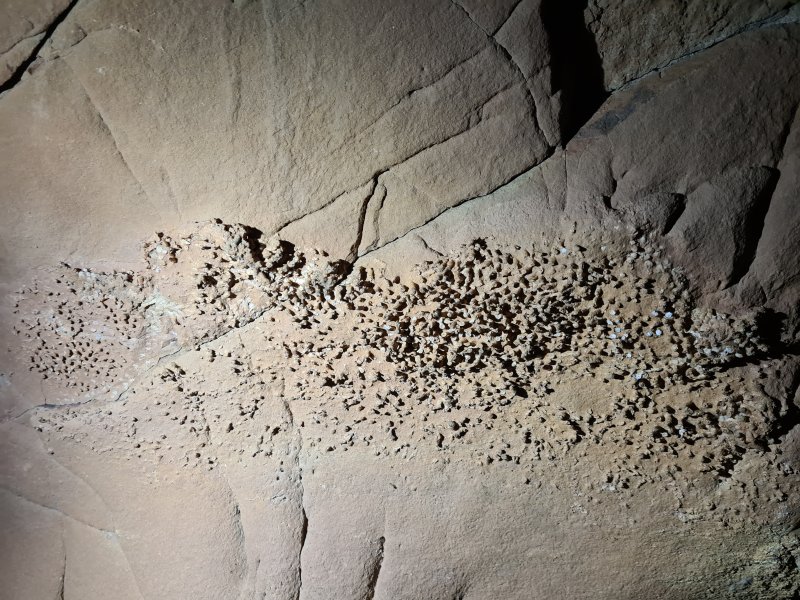 Very large Syringopora fossil in The Chunnel, where a side rift from CPP2 connects. The entire fossil is around 50 cm across.
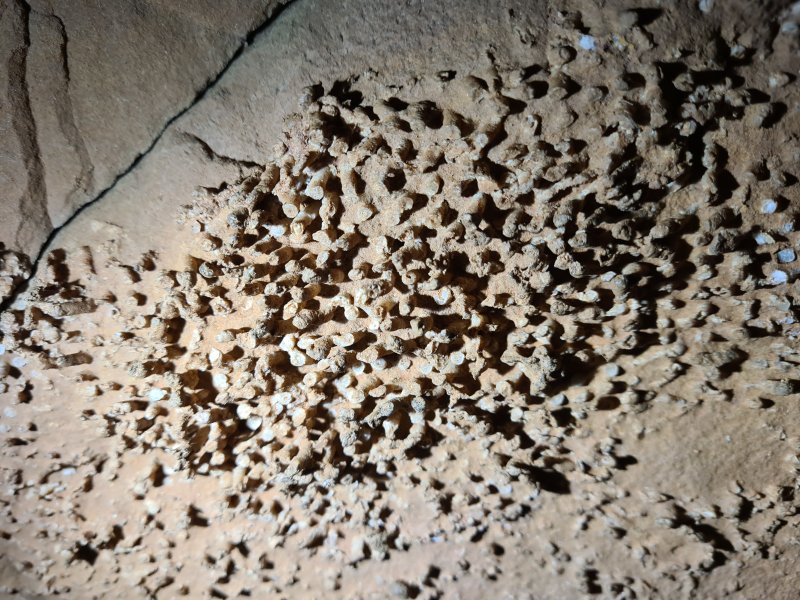 Detail of the fossil.
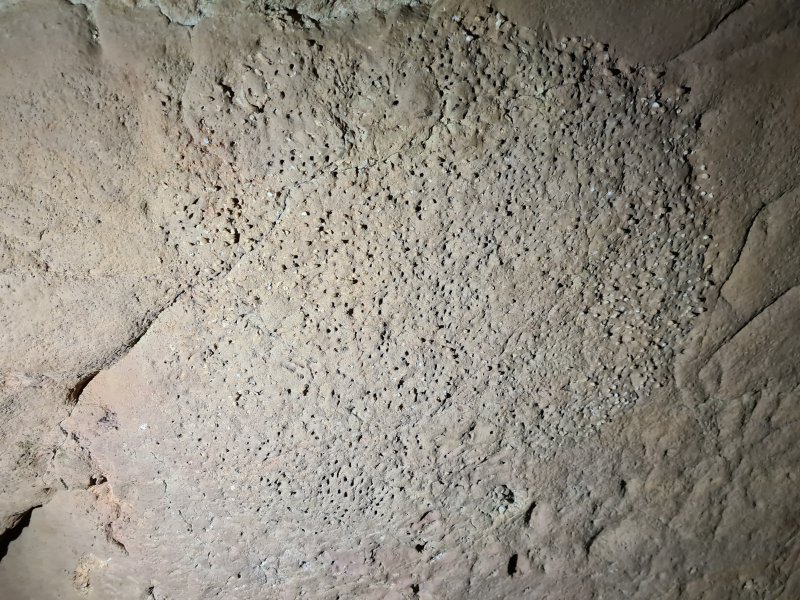 Nearby is another Syringopora fossil that is much larger. This one, sadly, has almost all been weathered away.
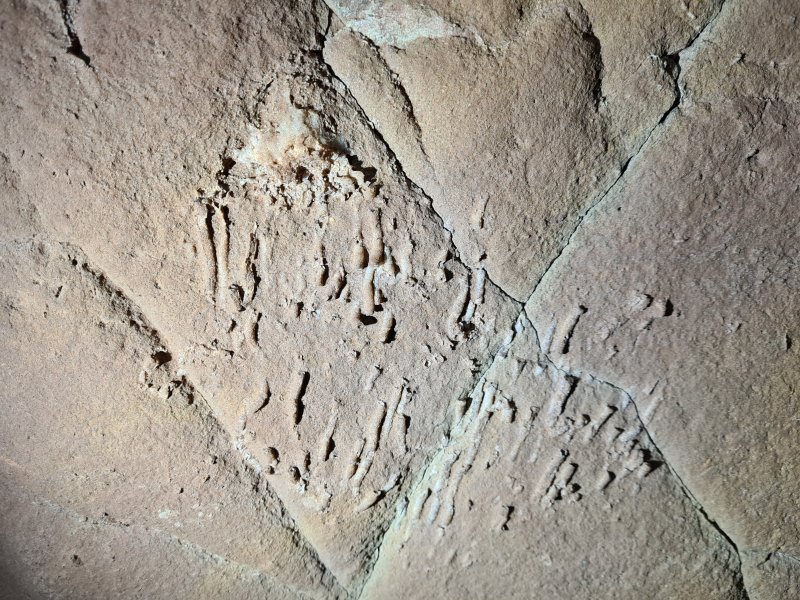 Smaller Syringopora fossil nearby.
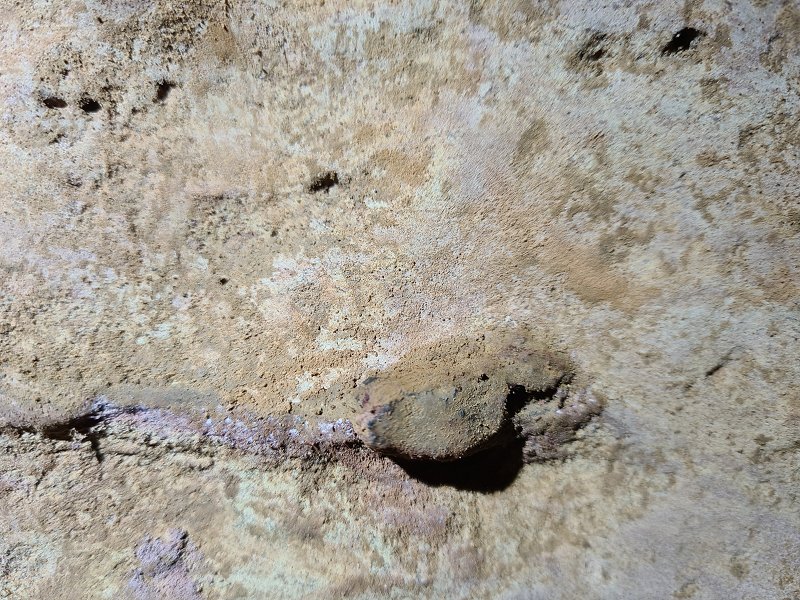 Large nodule, which is probably a fossil bone, below the Downward Dog squeeze in Dog's Grave Passage. This is used as a climbing foothold, so its original state is no longer visible.
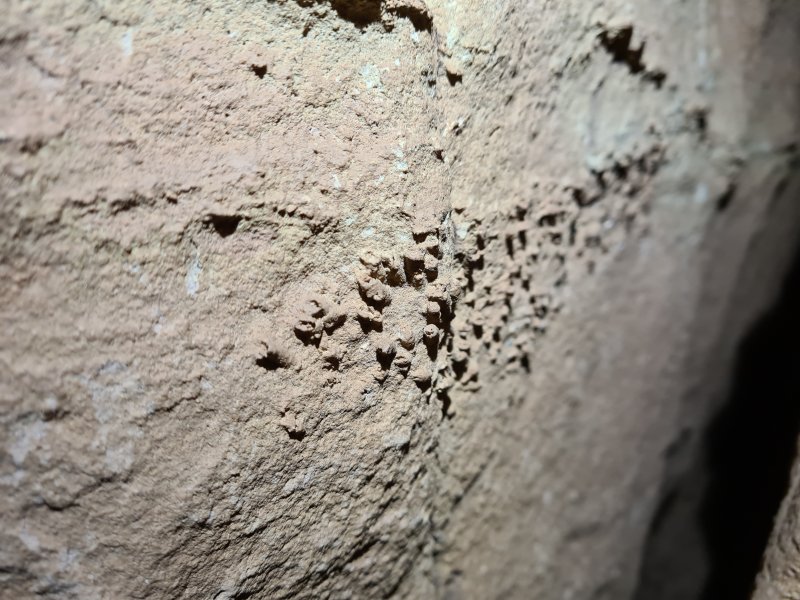 Another Syringopora, this time part way down Dog's Grave Passage.
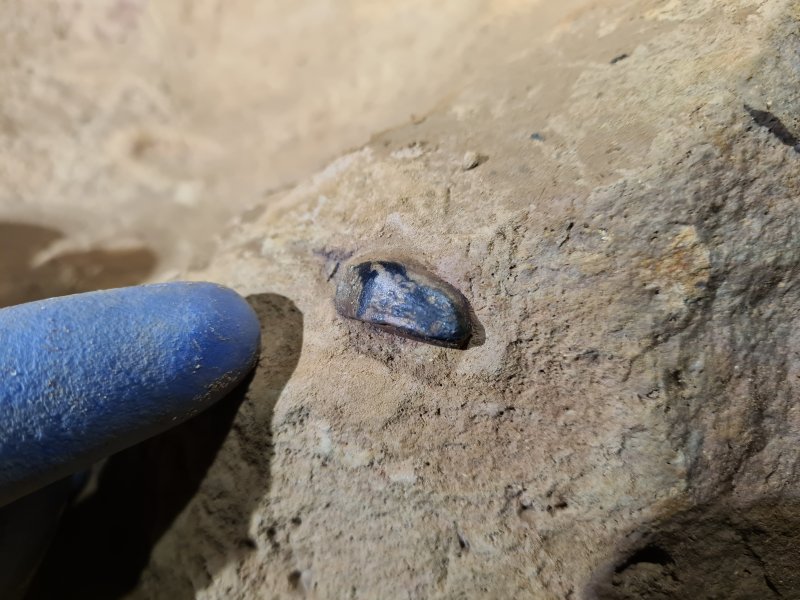 Fossil bone in Dog's Grave Passage. This is almost certainly going to be from a Ctenacanthus proto-shark (early shark).
Modelling by digitus Marki, lighting by Tarquin and Mark
Fossil bone in Dog's Grave Passage. This is almost certainly going to be from a Ctenacanthus proto-shark (early shark).
Modelling by digitus Marki, lighting by Tarquin and Mark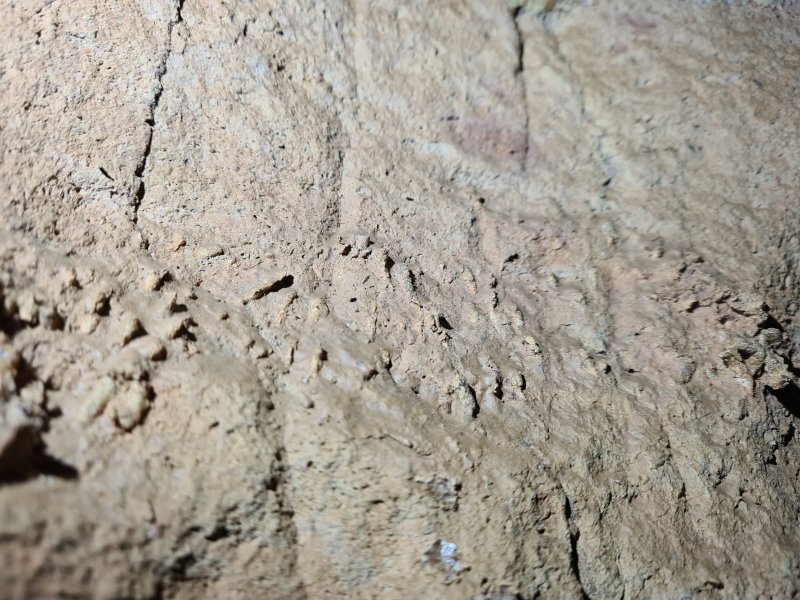 Another Syringopora in Dog's Grave Passage.
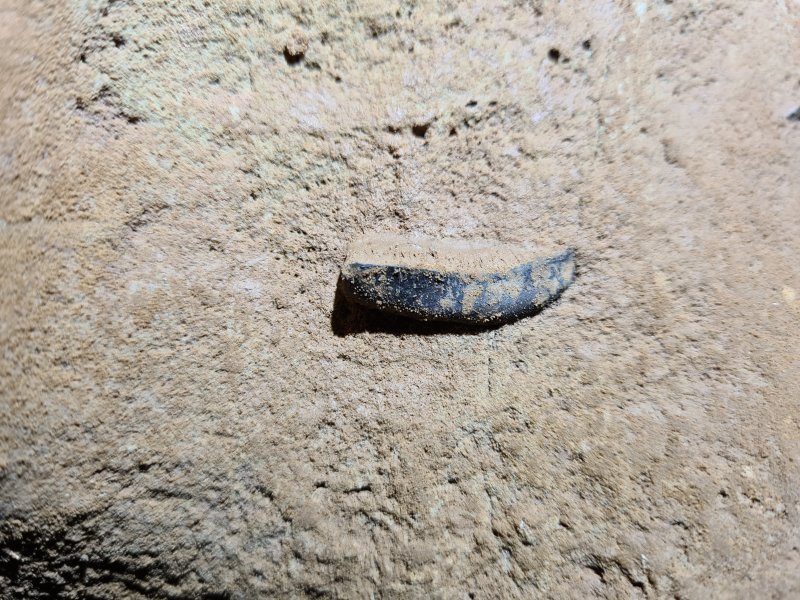 Another bone fossil in Dog's Grave Passage.
 For the first trip, we all camped in Dog's Grave Passage, using the campsite that had been set up for the Remelt Plant digging project. The camp is fairly spacious, with plenty of sleeping spots. However, the toilet facilities are restricted to liquid waste only, and the draught means that tents are suggested. Most camping equipment needs to be brought in on the day, including sleeping bags, dry clothing and food. The extra gear means an awful lot more sweat and energy waste in The Three Deserts. For those of us who are used to long trips, it is easier to do a day trip, so we did not camp on the second trip. However, it is easier for others to camp the night before or after (or both), reducing the caving needed each day, but exchanging it for more work on the way in and out. The nearest safe water source is 20 minutes further into the cave, along some demanding traverses, and the rest of the trip is dry. Dehydration is a major factor, so sweating is a significant concern.
Modelling by Mark and Sencer, lighting by Tarquin, Mark, Sencer and Judi
For the first trip, we all camped in Dog's Grave Passage, using the campsite that had been set up for the Remelt Plant digging project. The camp is fairly spacious, with plenty of sleeping spots. However, the toilet facilities are restricted to liquid waste only, and the draught means that tents are suggested. Most camping equipment needs to be brought in on the day, including sleeping bags, dry clothing and food. The extra gear means an awful lot more sweat and energy waste in The Three Deserts. For those of us who are used to long trips, it is easier to do a day trip, so we did not camp on the second trip. However, it is easier for others to camp the night before or after (or both), reducing the caving needed each day, but exchanging it for more work on the way in and out. The nearest safe water source is 20 minutes further into the cave, along some demanding traverses, and the rest of the trip is dry. Dehydration is a major factor, so sweating is a significant concern.
Modelling by Mark and Sencer, lighting by Tarquin, Mark, Sencer and Judi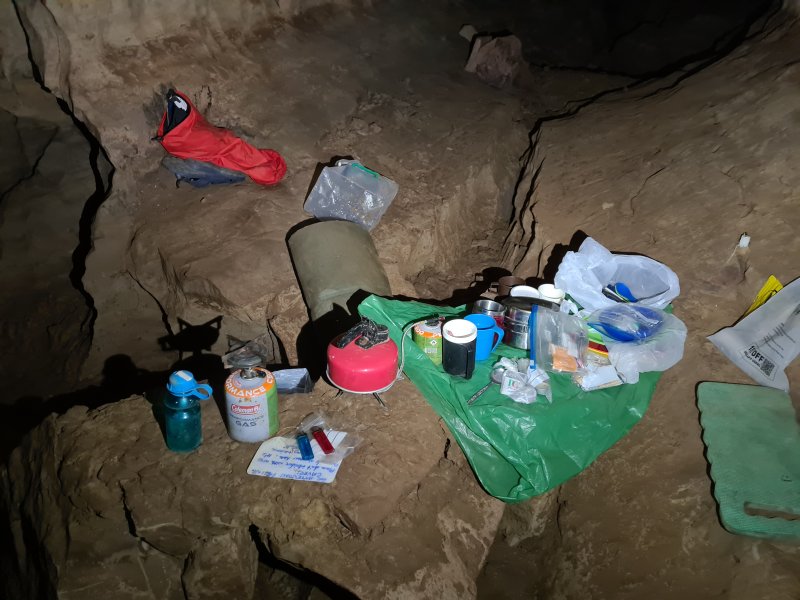 The cooking and seating area.
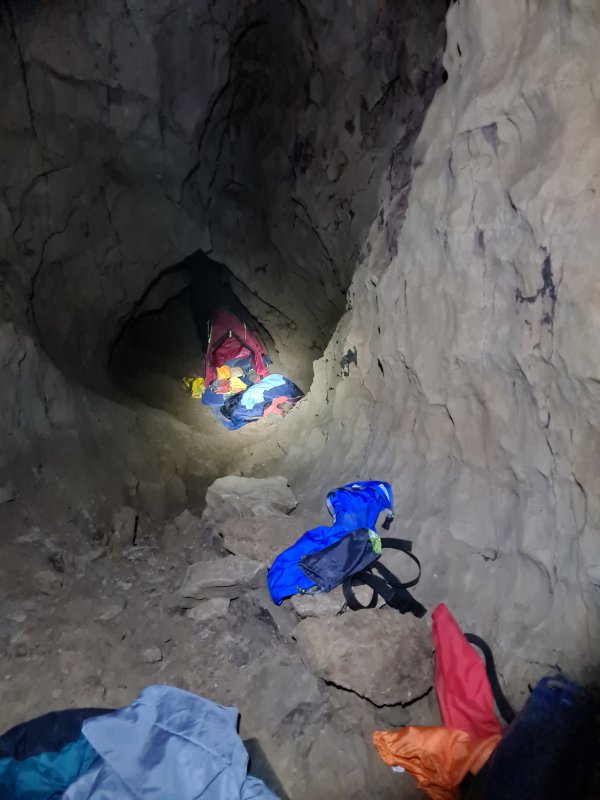 Paul Taylor's tent, which still sees occasional use by visitors. This is set in the secondary sleeping area back along Dog's Grave Passage.
Modelling by an unwitting Judi
Paul Taylor's tent, which still sees occasional use by visitors. This is set in the secondary sleeping area back along Dog's Grave Passage.
Modelling by an unwitting Judi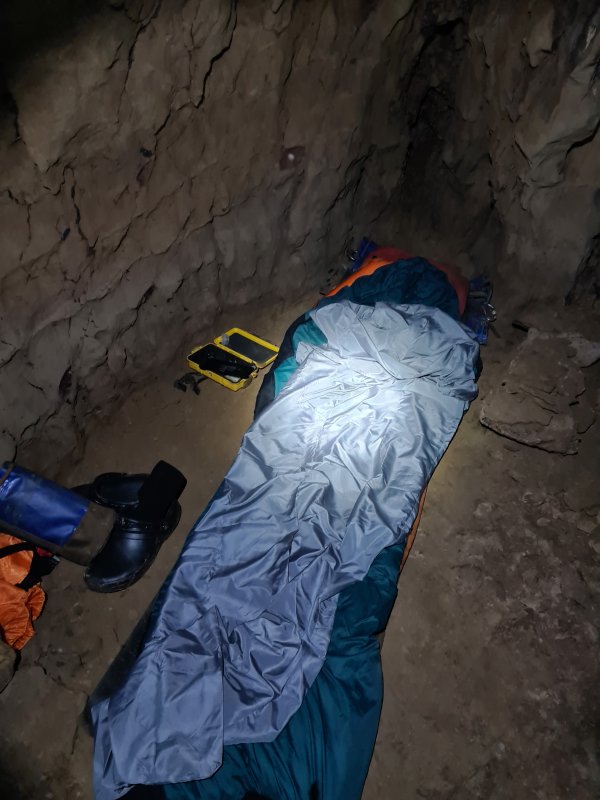 There are other sleeping spots at both sleeping areas, each of which has a comfortable sand floor. Some sleeping mats are left in situ.
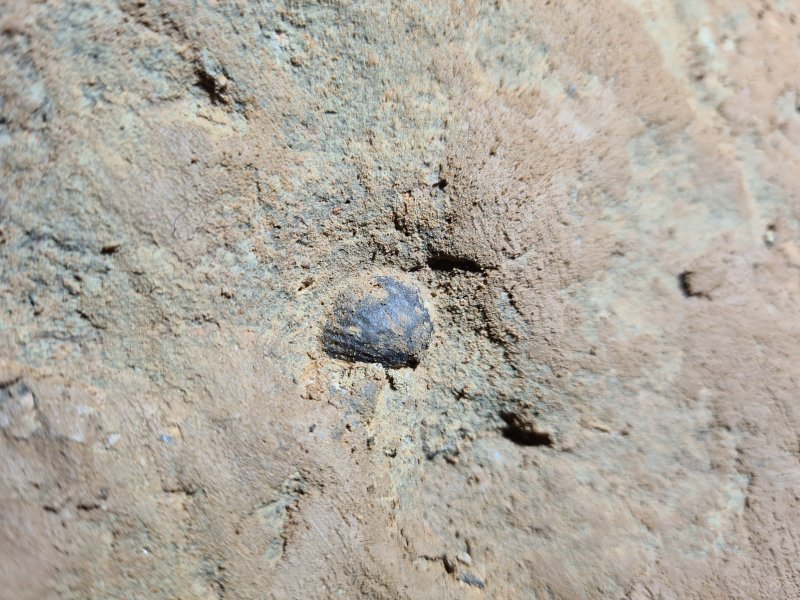 Fossil in Tinkle Passage, just above the water source. This one appears to be a shell, possibly a brachipod.
 Tinkle Passage starts with a climb up above the stream (which immediately flows out and is next seen in Kuwait Passage). From there, it is well decorated, and progress requires carefully avoiding the formations in a narrow rift.
Modelling by Judi, lighting by Tarquin and Judi
Tinkle Passage starts with a climb up above the stream (which immediately flows out and is next seen in Kuwait Passage). From there, it is well decorated, and progress requires carefully avoiding the formations in a narrow rift.
Modelling by Judi, lighting by Tarquin and Judi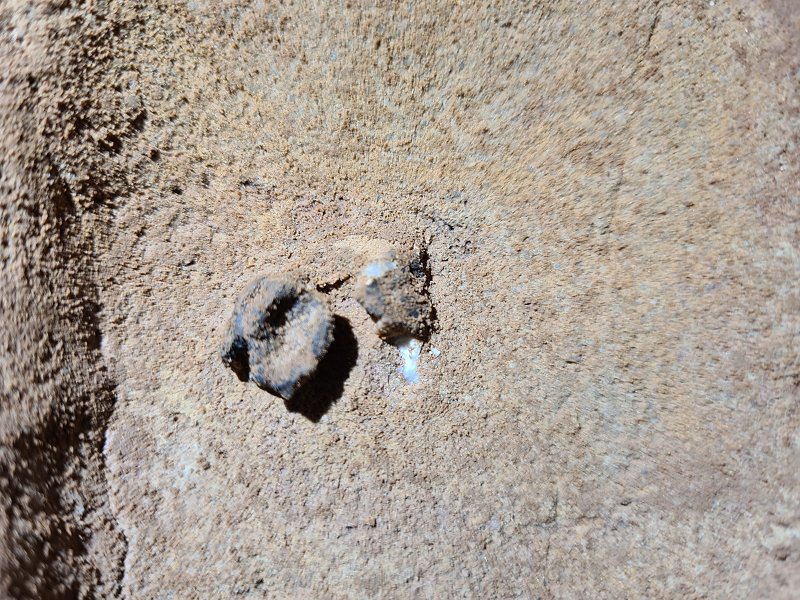 Unknown fossil in Tinkle Passage.
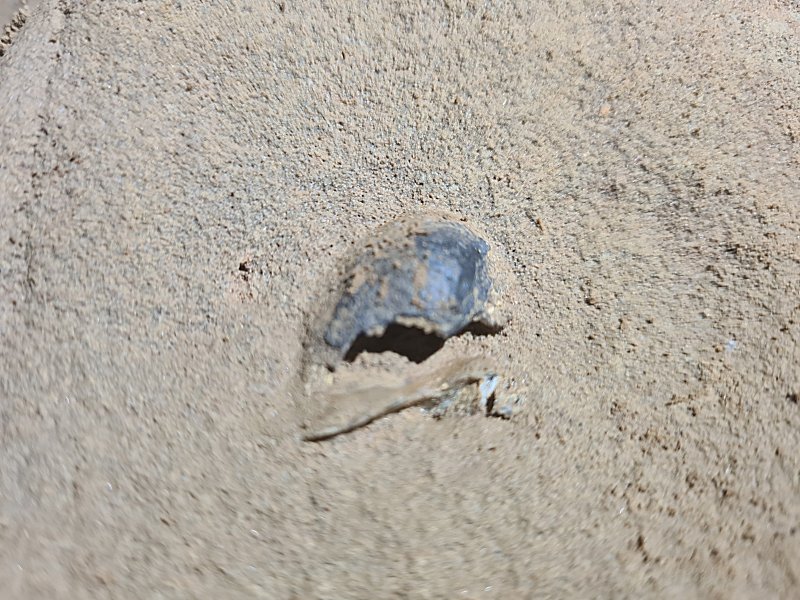 Another fossil, this time probably a shell. Linke many of the fossils, it is coated in manganese.
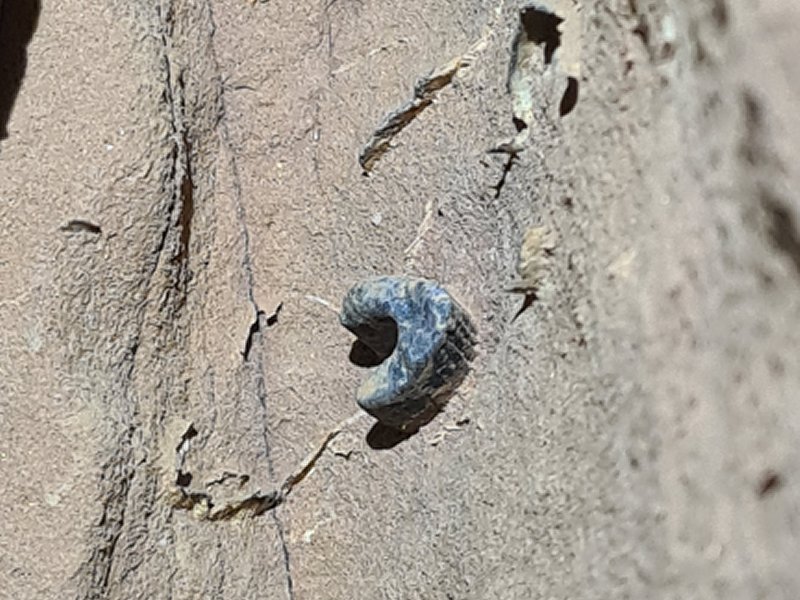 Fossil Ctenacanthus dorsal spine at the top of the climb down at the end of Tinkle Passage. This would have originally held up one of the dorsal fins of a Ctenacanthus shark, with the fin's cartilage sitting in the cup of the U-shape.
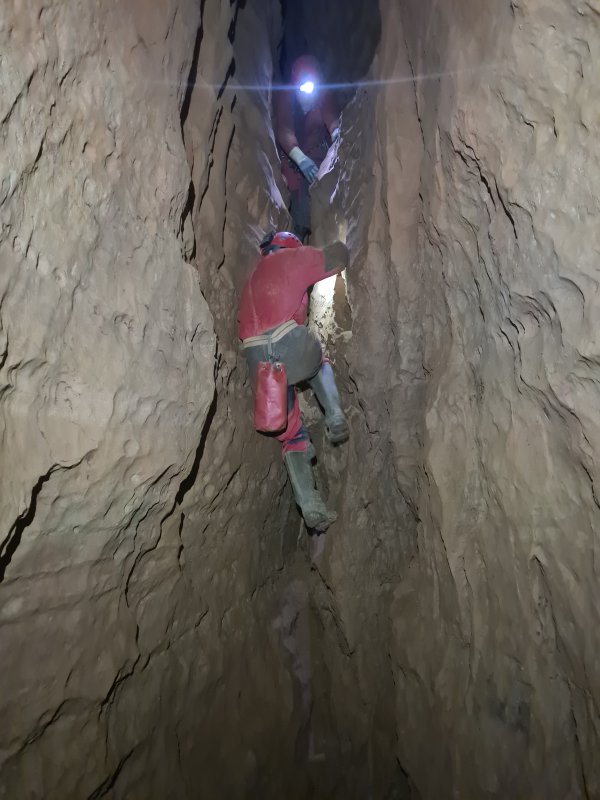 The climb down at the end of Tinkle Passage.
Modelling by Judi and Sencer, lighting by Tarquin, Judi and Sencer
The climb down at the end of Tinkle Passage.
Modelling by Judi and Sencer, lighting by Tarquin, Judi and Sencer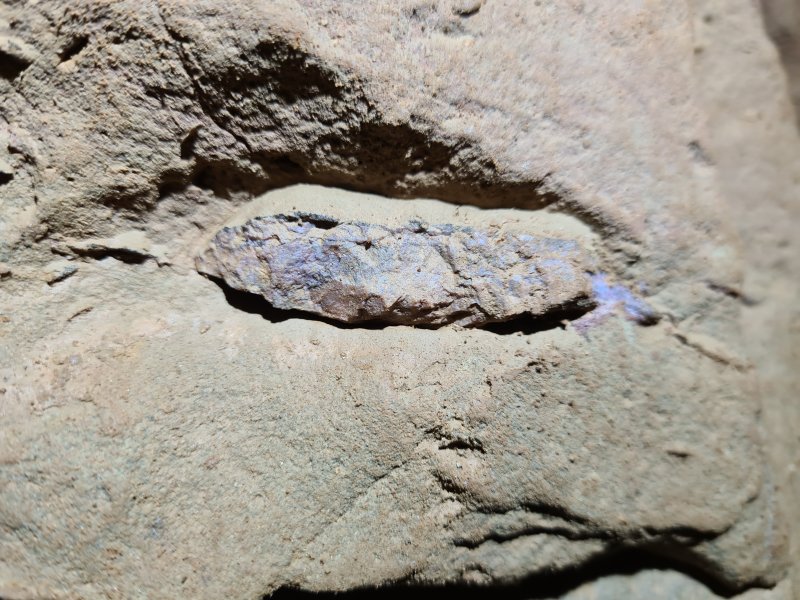 Another possible fossil bone in the chamber below the climb.
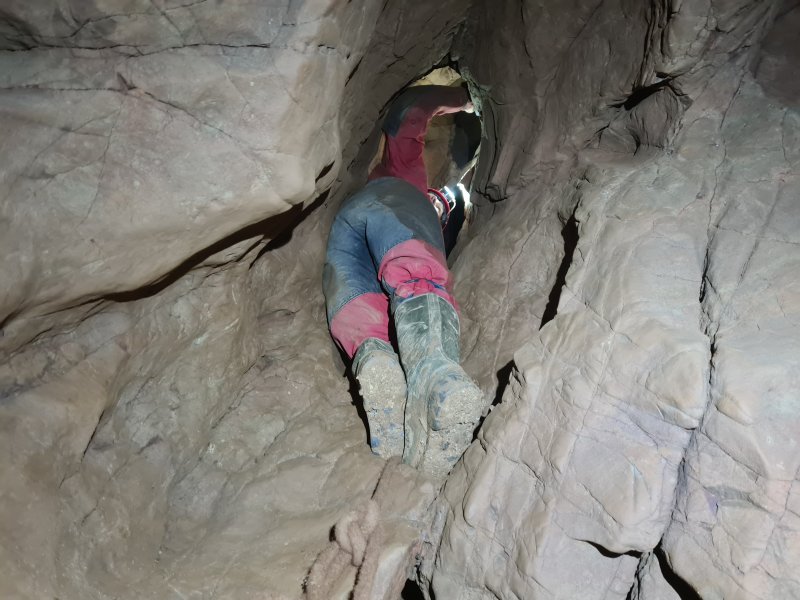 The awkwardly narrow climb up above Snow Garden into Remelt Plant. This has very few useful holds, and is quite slippery.
Modelling by Judi, lighting by Tarquin and Judi
The awkwardly narrow climb up above Snow Garden into Remelt Plant. This has very few useful holds, and is quite slippery.
Modelling by Judi, lighting by Tarquin and Judi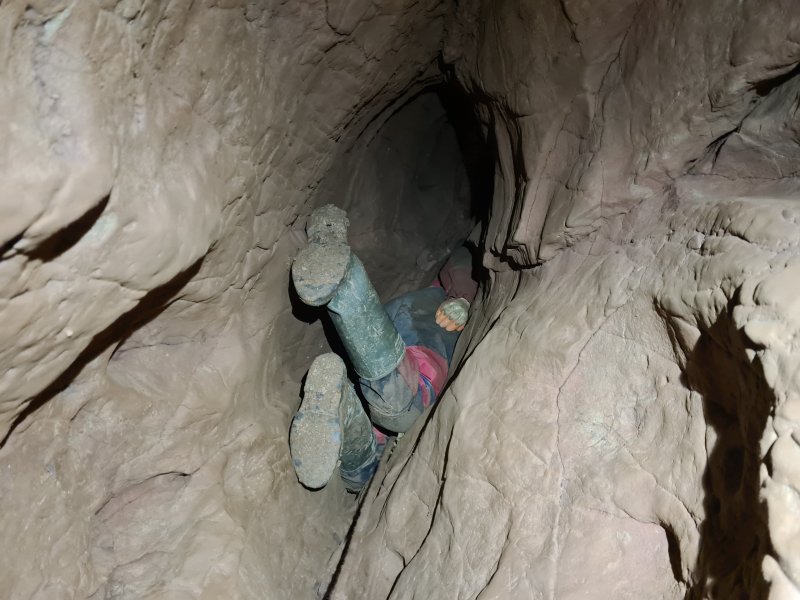 The fish flopping technique may prove useful.
Modelling by Judi, lighting by Tarquin and Judi
The fish flopping technique may prove useful.
Modelling by Judi, lighting by Tarquin and Judi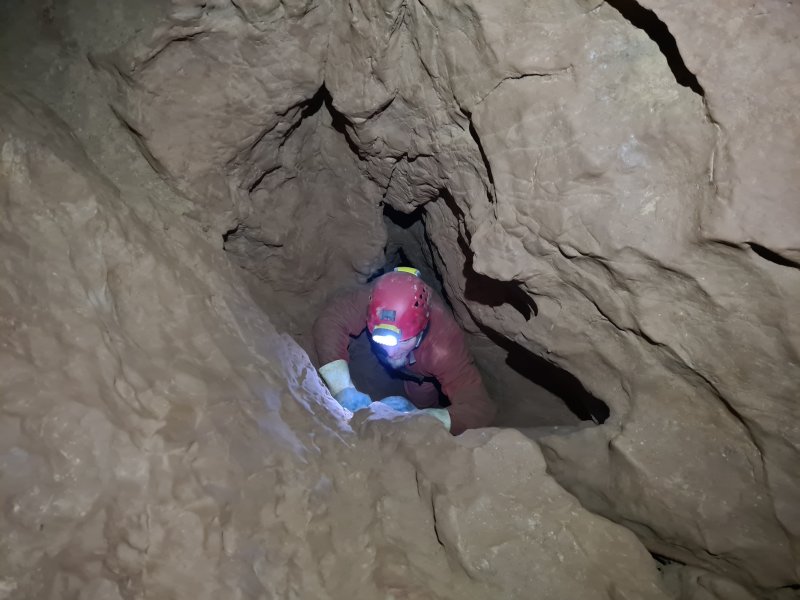 Top of the climb.
Modelling by Sencer, lighting by Tarquin and Sencer
Top of the climb.
Modelling by Sencer, lighting by Tarquin and Sencer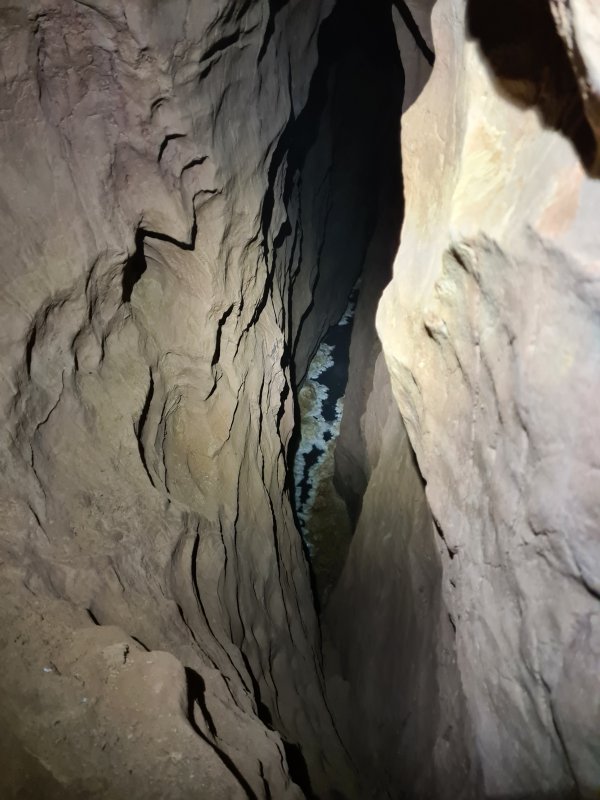 At the top, one direction leads back to a viewpoint over the Snow Garden.
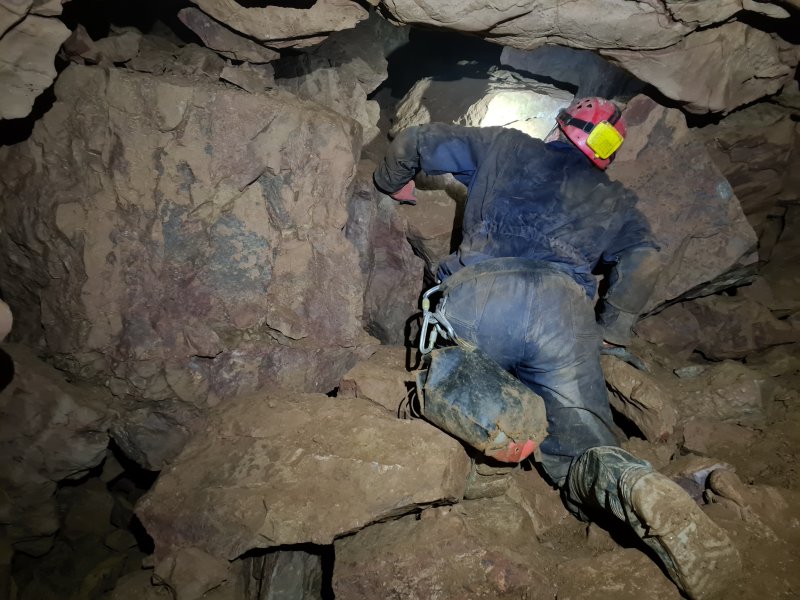 The way into Remelt Plant passes through a heavily faulted zone, where everything is made up from brecciated boulders, with some big gaps below them.
Modelling by Tim, lighting by Tarquin and Tim
The way into Remelt Plant passes through a heavily faulted zone, where everything is made up from brecciated boulders, with some big gaps below them.
Modelling by Tim, lighting by Tarquin and Tim The most obvious way on reaches a choke.
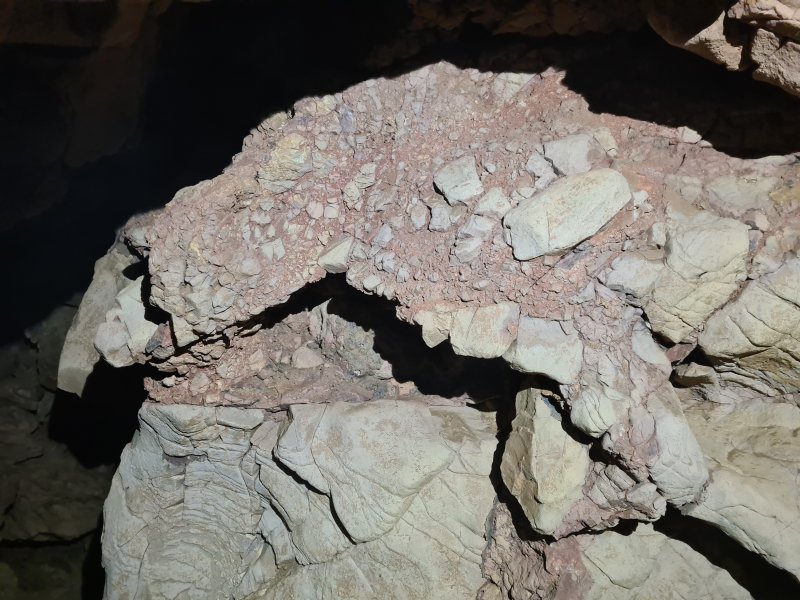 The movement of the fault causes the rock to be crushed into angular fragments, which have then re-cemented into a rock. Superficially, it may look like an alluvial conglomerate, but the rock fragments are distinctively angular instead of being rounded. This fault breccia is easily some of the most impressive in the cave, covering a very wide area.
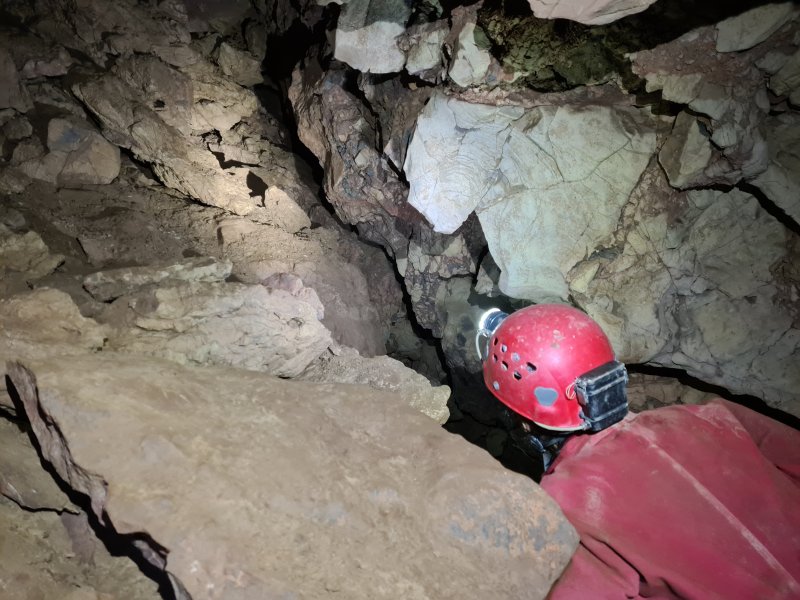 The way on is down to the side, ignoring the main choke.
Modelling by Judi, lighting by Tarquin, Sencer and Judi
The way on is down to the side, ignoring the main choke.
Modelling by Judi, lighting by Tarquin, Sencer and Judi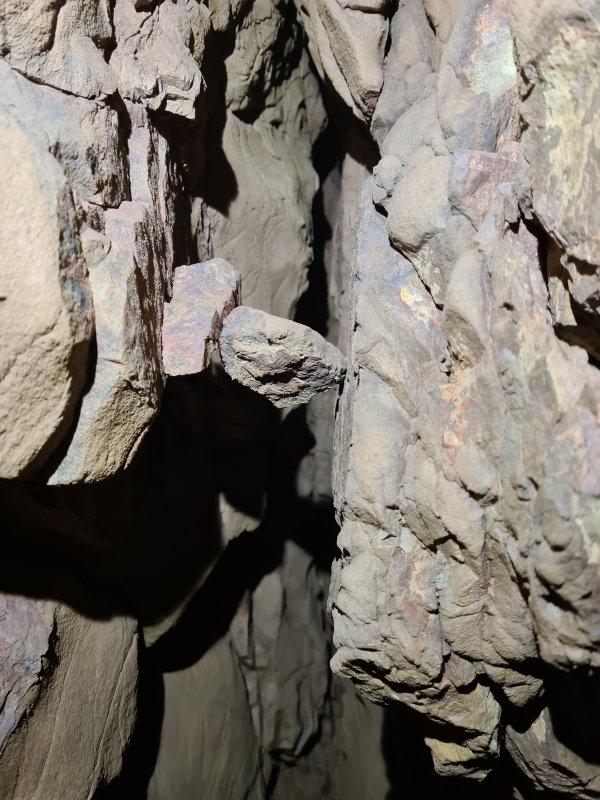 Tiny jammed pebbles in the way on.
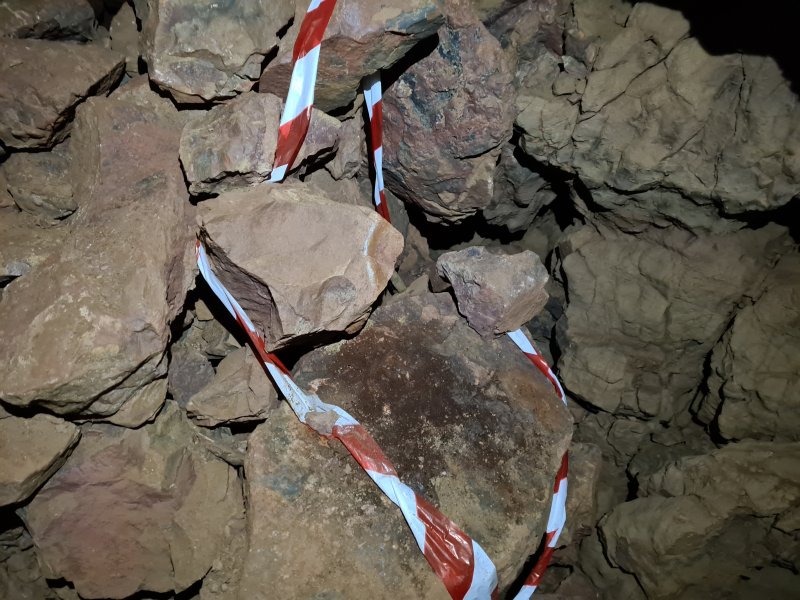 Guano in the way on.
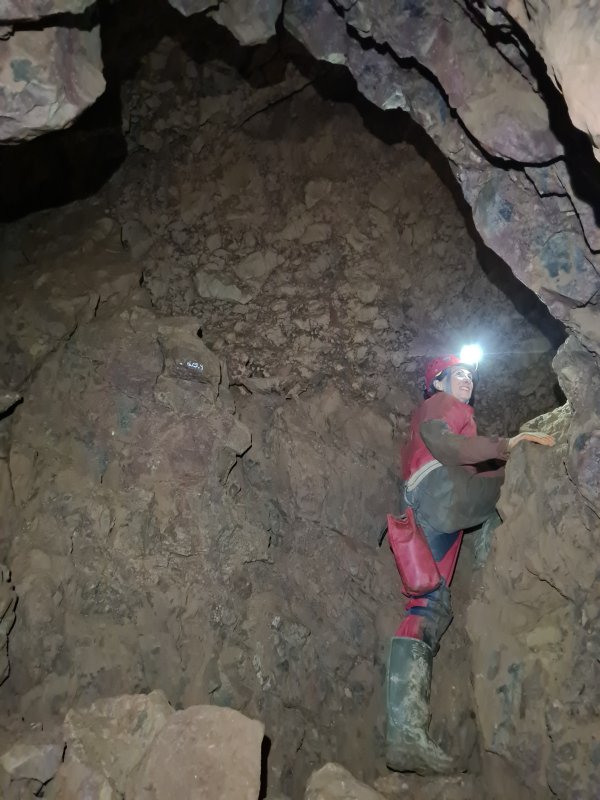 The passage then enlarges and climbs to a junction, with the entire ceiling made up from fault breccia.
Modelling by Judi, lighting by Tarquin and Judi
The passage then enlarges and climbs to a junction, with the entire ceiling made up from fault breccia.
Modelling by Judi, lighting by Tarquin and Judi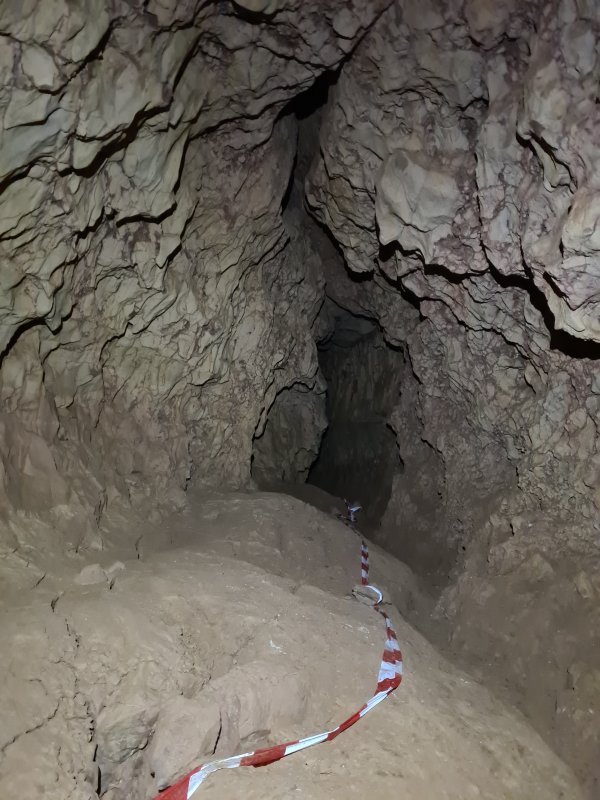 To the left is the route to the Iron Works. This starts deceptively large, but soon reduces to a lengthy squeeze, before reaching the largest chamber in the series.
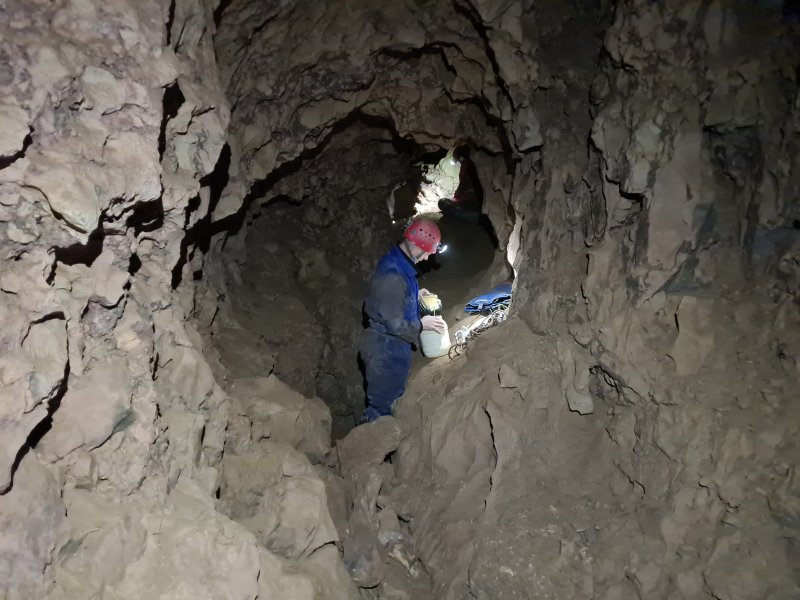 The main way on is to the right, with the ceiling again made up from the extensive fault breccia. This is where we started our survey.
Modelling by Mark and Judi, lighting by Tarquin, Mark and Judi
The main way on is to the right, with the ceiling again made up from the extensive fault breccia. This is where we started our survey.
Modelling by Mark and Judi, lighting by Tarquin, Mark and Judi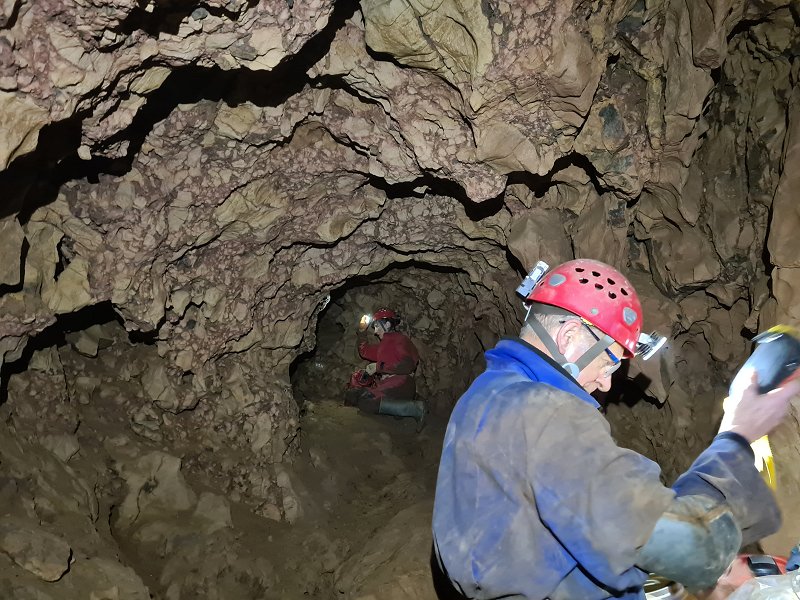 The breccia has distinctly pink and purple matrix, presumably haematite. Beyond here is one of the routes on, clambering down at the end to reach the other route.
Modelling by Mark and Judi, lighting by Tarquin, Mark and Judi
The breccia has distinctly pink and purple matrix, presumably haematite. Beyond here is one of the routes on, clambering down at the end to reach the other route.
Modelling by Mark and Judi, lighting by Tarquin, Mark and Judi Detail of the fault breccia. Incidentally, the wet hair is from sweating. This is a very dry part of the cave, and the effort to reach it is not to be underestimated. Water is a major consideration.
Modelling by Judi, lighting by Tarquin and Judi
Detail of the fault breccia. Incidentally, the wet hair is from sweating. This is a very dry part of the cave, and the effort to reach it is not to be underestimated. Water is a major consideration.
Modelling by Judi, lighting by Tarquin and Judi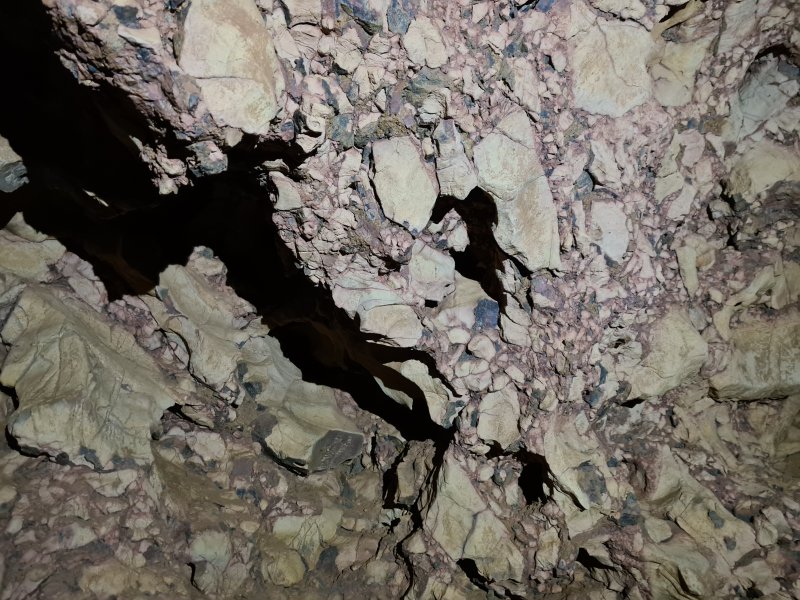 Breccia detail.
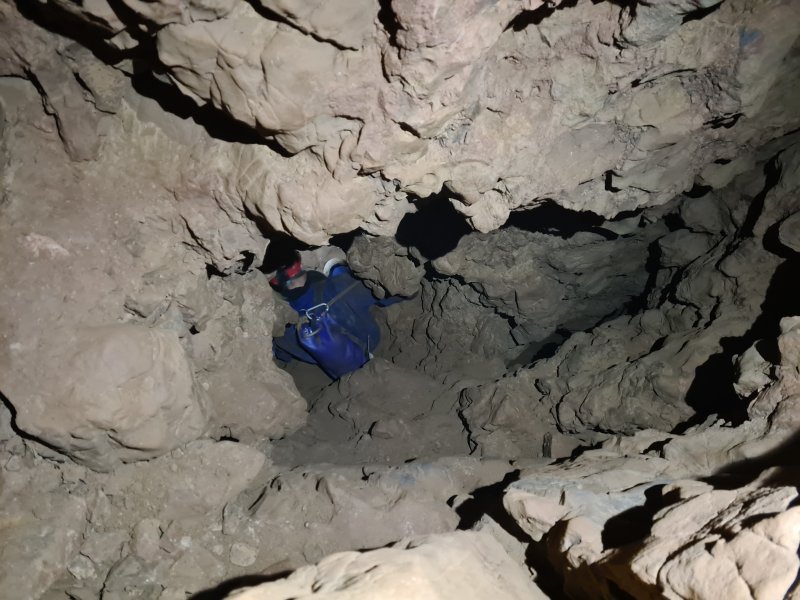 The other way on is down in the floor, into a passage running parallel to the upper passage.
Modelling by Mark, lighting by Tarquin and Mark
The other way on is down in the floor, into a passage running parallel to the upper passage.
Modelling by Mark, lighting by Tarquin and Mark In the lower passage, where one wall is made up from the fault breccia.
Modelling by Judi, lighting by Tarquin and Judi
In the lower passage, where one wall is made up from the fault breccia.
Modelling by Judi, lighting by Tarquin and Judi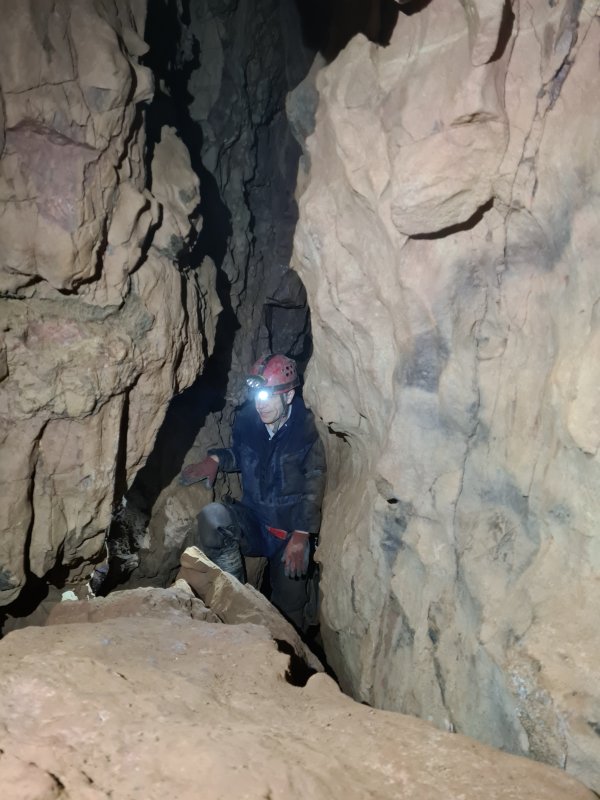 Looking back along the lower passage.
Modelling by Tim, lighting by Tarquin and Tim
Looking back along the lower passage.
Modelling by Tim, lighting by Tarquin and Tim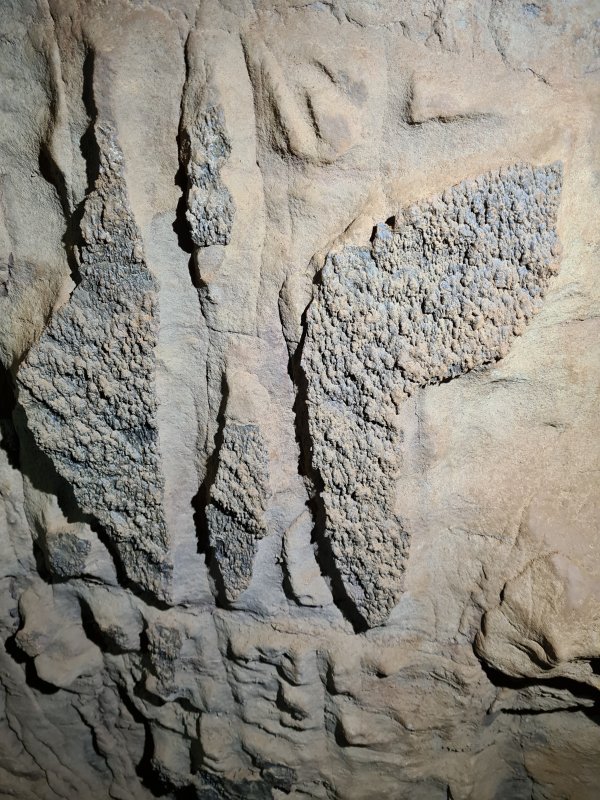 Crusts of probable goethite - a dark form of ochre - on the wall of the lower passage.
 Fossils in the lower passage, probably brachiopod shells coated in manganese or goethite.
Lighting by Tarquin and Mark
Fossils in the lower passage, probably brachiopod shells coated in manganese or goethite.
Lighting by Tarquin and Mark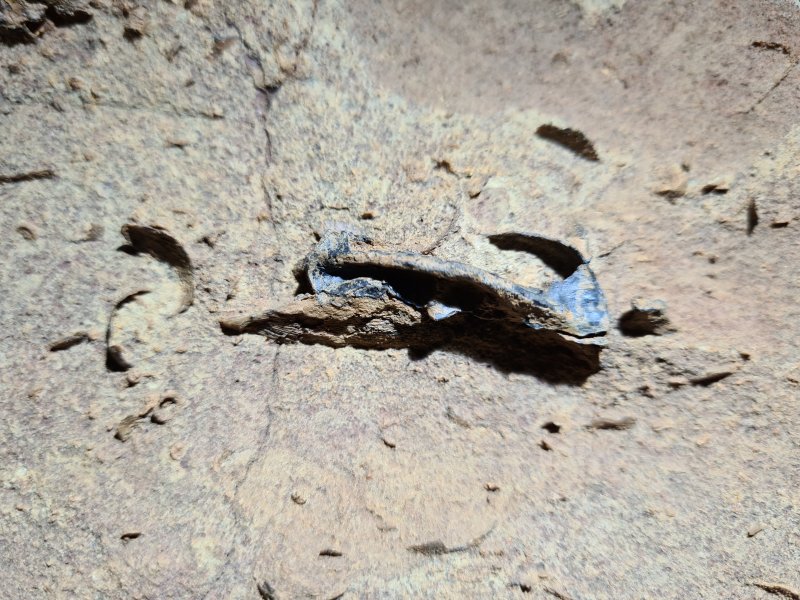 Fossils in the lower passage.
Lighting by Tarquin and Mark
Fossils in the lower passage.
Lighting by Tarquin and Mark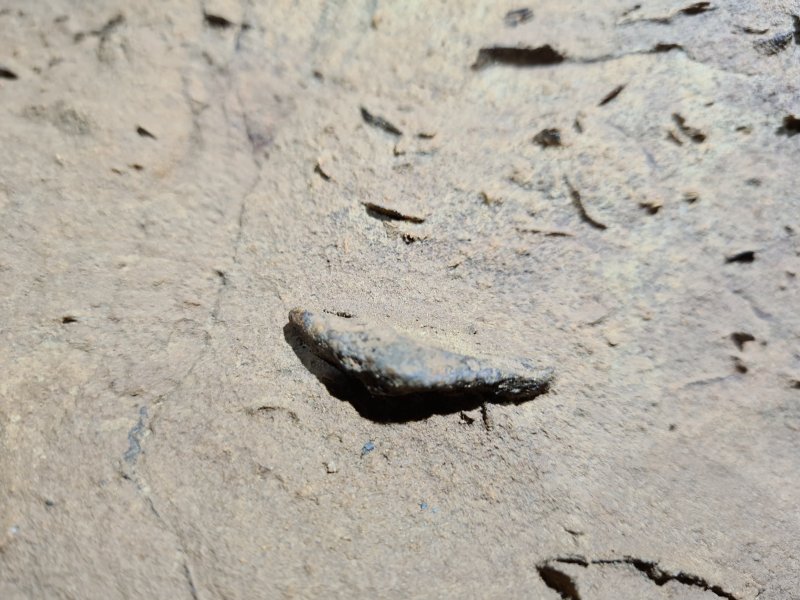 Fossils in the lower passage.
Lighting by Tarquin and Mark
Fossils in the lower passage.
Lighting by Tarquin and Mark The upper and lower passages rejoin as two levels of a very tall rift, with numerous blind avens.
Modelling by Tim, lighting by Tarquin and Tim
The upper and lower passages rejoin as two levels of a very tall rift, with numerous blind avens.
Modelling by Tim, lighting by Tarquin and Tim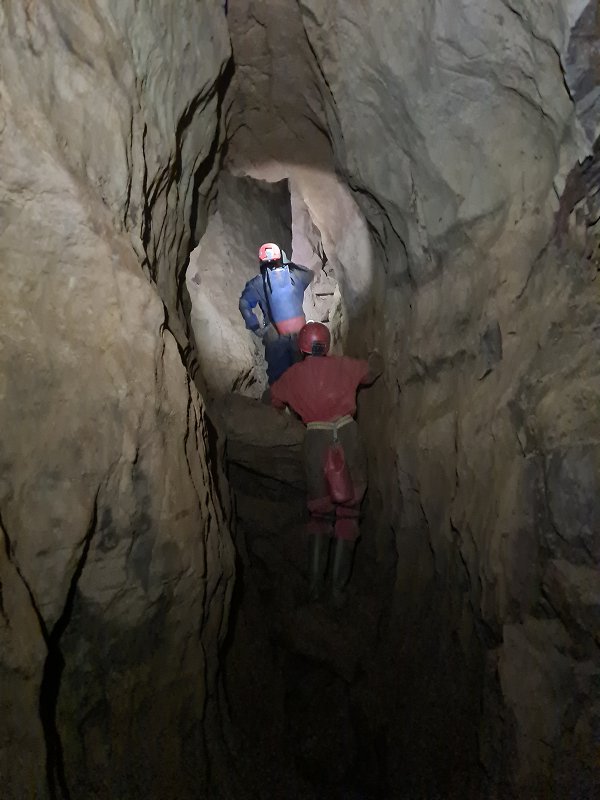 The way on becomes a phreatic tube with more avens.
Modelling by Judi and Mark, lighting by Tarquin, Judi and Mark
The way on becomes a phreatic tube with more avens.
Modelling by Judi and Mark, lighting by Tarquin, Judi and Mark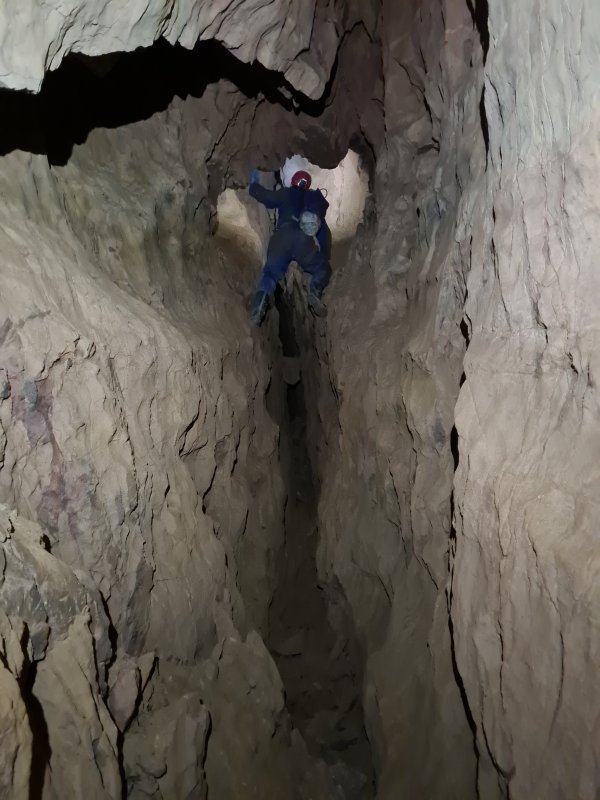 This immediately turns into a tall, keyhole-shaped phreatic riser.
Modelling by Mark, lighting by Tarquin and Mark
This immediately turns into a tall, keyhole-shaped phreatic riser.
Modelling by Mark, lighting by Tarquin and Mark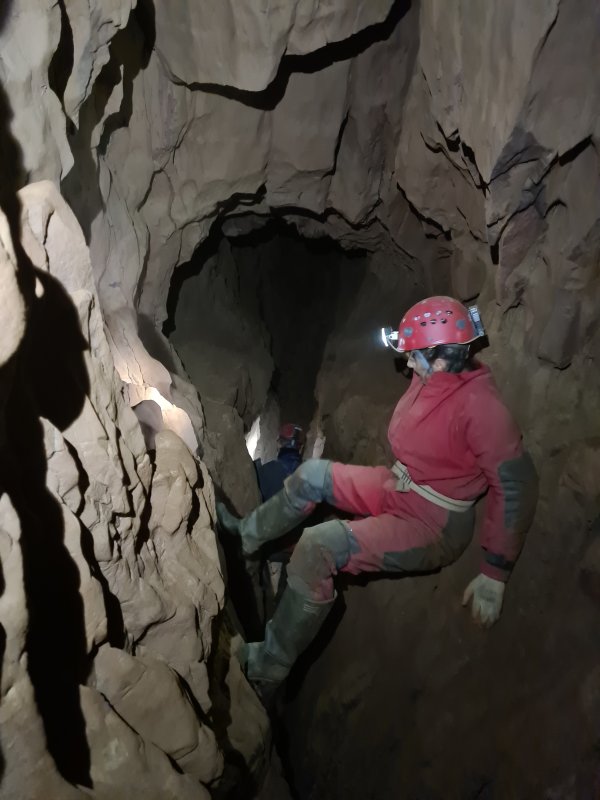 This poses yet more challenges, as the gap is wide enough to require traversing, a theme which continues for much of the next part of the cave.
Modelling by Judi and Mark, lighting by Tarquin, Judi and Mark
This poses yet more challenges, as the gap is wide enough to require traversing, a theme which continues for much of the next part of the cave.
Modelling by Judi and Mark, lighting by Tarquin, Judi and Mark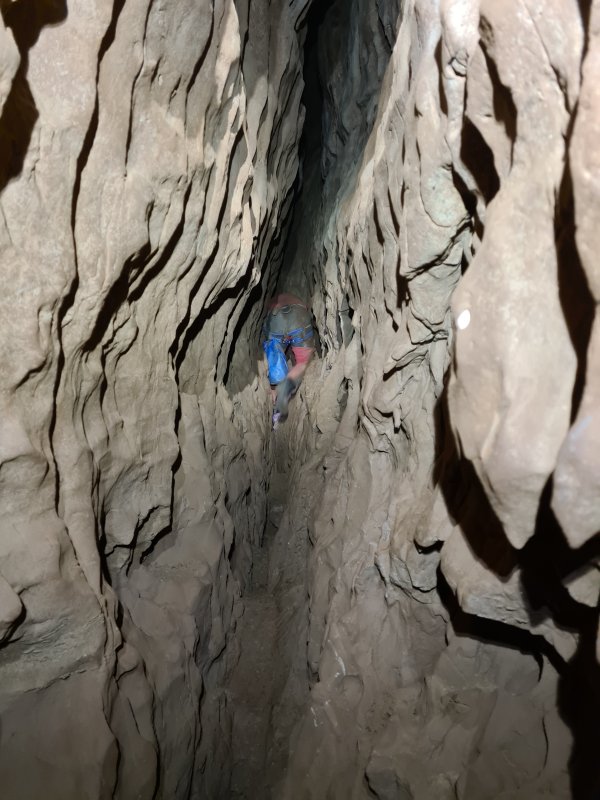 Above the riser, the passage continues as a rift traverse, without a proper floor.
Modelling by Mark, lighting by Tarquin, Judi and Mark
Above the riser, the passage continues as a rift traverse, without a proper floor.
Modelling by Mark, lighting by Tarquin, Judi and Mark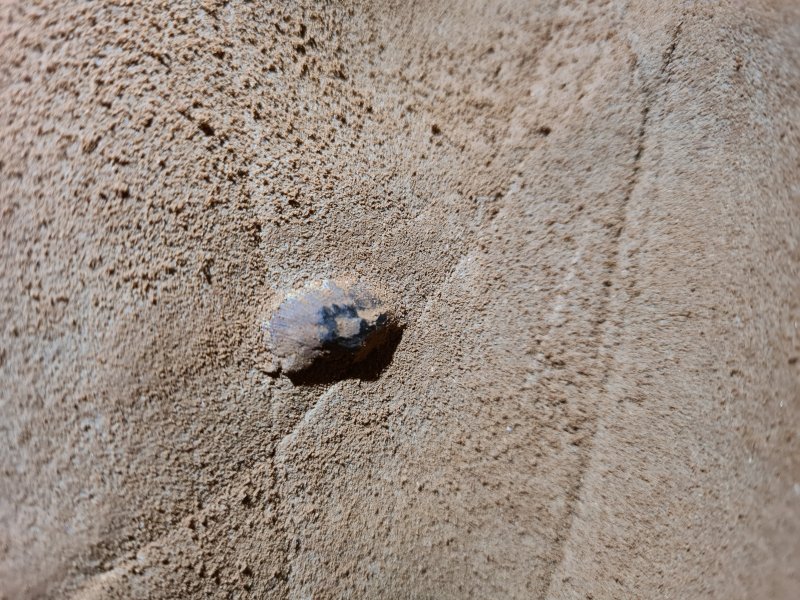 Unidentified fossil in the passage above the riser.
 The passage contines as an awkward traverse to a junction, with Star Shaft II above. And yes, that really is its name.
Modelling by Mark, lighting by Tarquin and Mark
The passage contines as an awkward traverse to a junction, with Star Shaft II above. And yes, that really is its name.
Modelling by Mark, lighting by Tarquin and Mark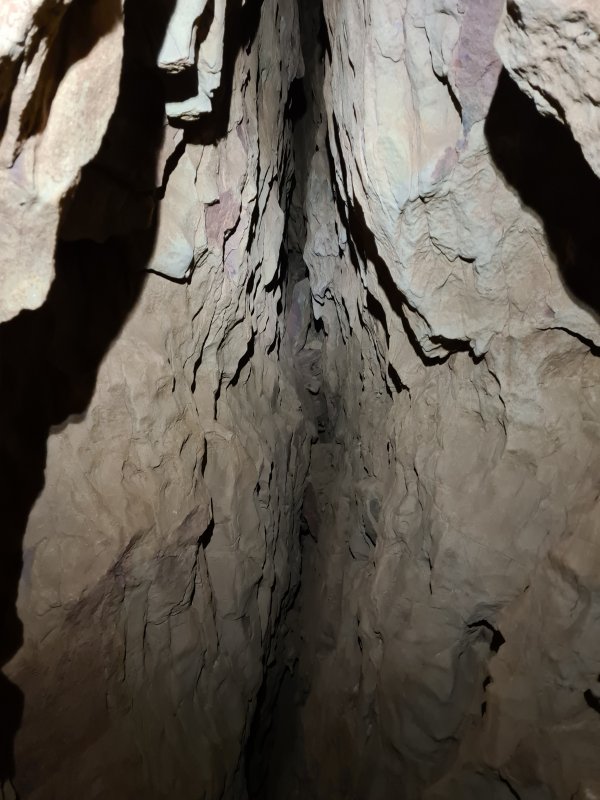 The main way on into the Upper Series of Remelt Plant is ahead, but the passage ahead - seen here - ends too tight, and instead, the way on is to ascend Star Shaft II to continue ahead at a higher level. On the first trip, we were put off by how small it seemed, so we decided to do the Lower Series instead, not realising that it is actually worse.
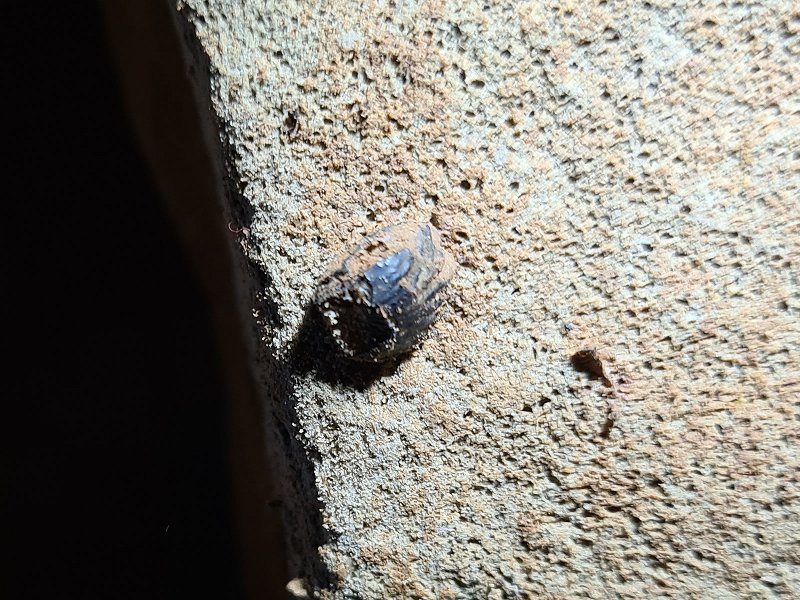 Unidentified fossil at Star Shaft II. The striations could mean that this is the tip of a Ctenacanthus dorsal spine, but it is relatively soft, so it is more likely to be a shell.
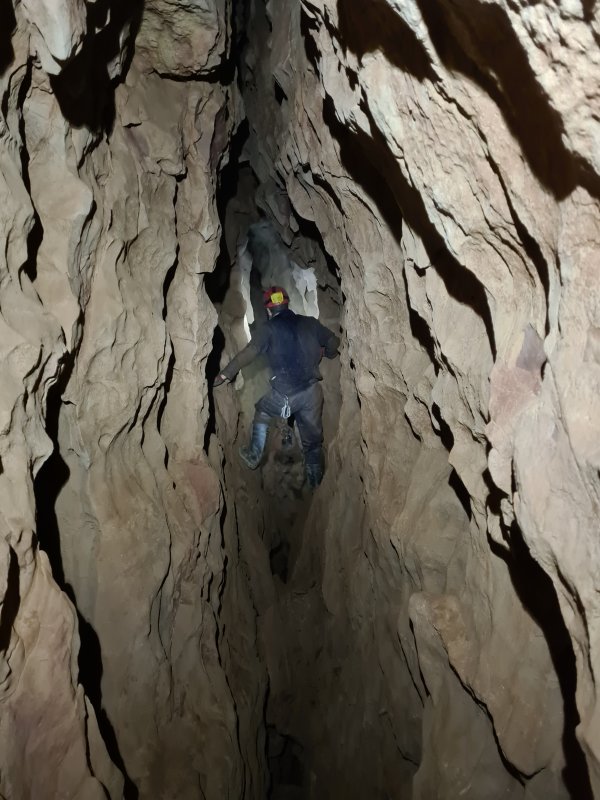 The passage to the left at the junction is Left Wing, which has several holes in the floor, one of which can be free-climbed into the Lower Series.
Modelling by Tim, lighting by Tarquin and Tim
The passage to the left at the junction is Left Wing, which has several holes in the floor, one of which can be free-climbed into the Lower Series.
Modelling by Tim, lighting by Tarquin and Tim Left Wing continues large for a while, with more traversing.
Modelling by Mark, lighting by Tarquin and Mark
Left Wing continues large for a while, with more traversing.
Modelling by Mark, lighting by Tarquin and Mark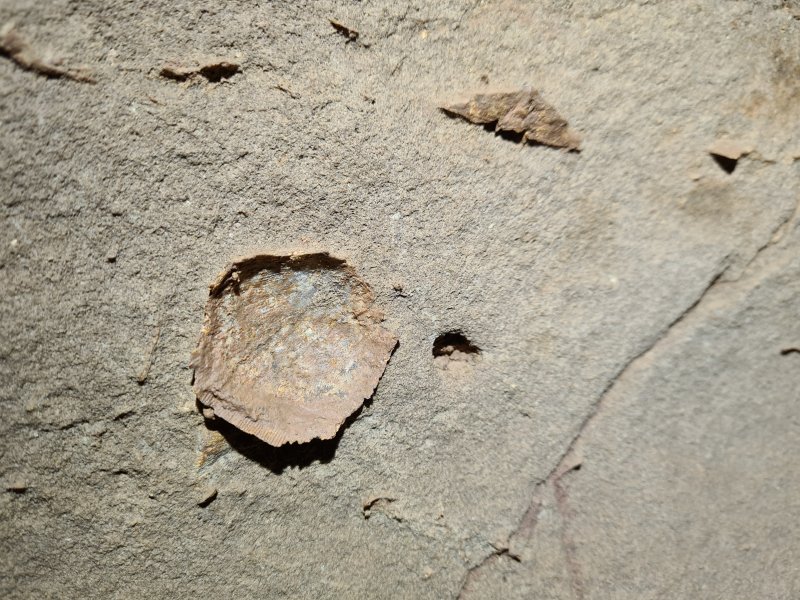 Fossil shells in Left Wing.
 A climb then sets the scene for the smaller continuation of Left Wing. The passage is less than 40 metres long, passing through a tight squeeze to reach a dig, which is only 2 metres away from Bat Remains To Be Seen Passage. This would make a rather excellent little round trip in the series, if it were connected. Apart from the squeeze, it would be an easier route than the normal Upper Series route.
Modelling by Judi and Sencer, lighting by Tarquin, Judi and Sencer
A climb then sets the scene for the smaller continuation of Left Wing. The passage is less than 40 metres long, passing through a tight squeeze to reach a dig, which is only 2 metres away from Bat Remains To Be Seen Passage. This would make a rather excellent little round trip in the series, if it were connected. Apart from the squeeze, it would be an easier route than the normal Upper Series route.
Modelling by Judi and Sencer, lighting by Tarquin, Judi and Sencer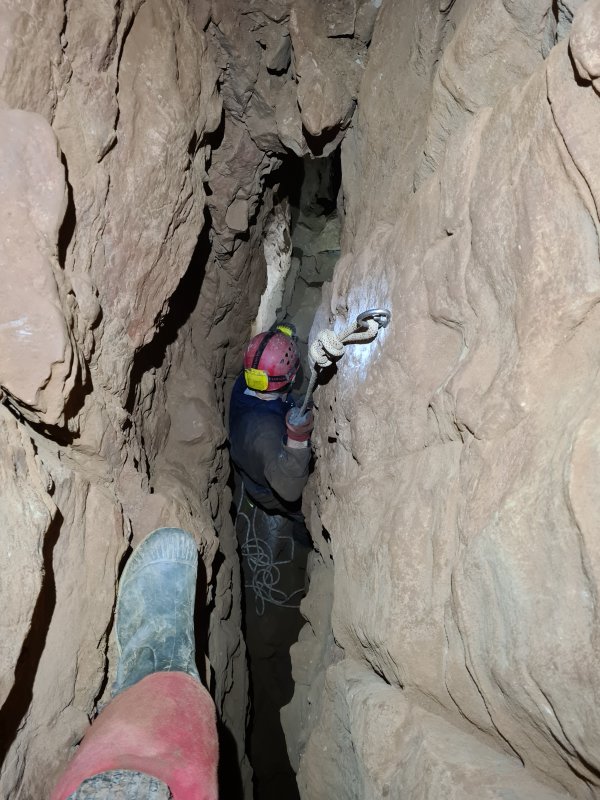 The climb down into Lower Series, which we fitted with a rope.
Modelling by Tarquiin's welly and Tim, lighting by Tarquin and Tim
The climb down into Lower Series, which we fitted with a rope.
Modelling by Tarquiin's welly and Tim, lighting by Tarquin and Tim When we first surveyed this passage, there was no rope, and the climb was awkward for some.
Modelling by Mark, lighting by Tarquin and Mark
When we first surveyed this passage, there was no rope, and the climb was awkward for some.
Modelling by Mark, lighting by Tarquin and Mark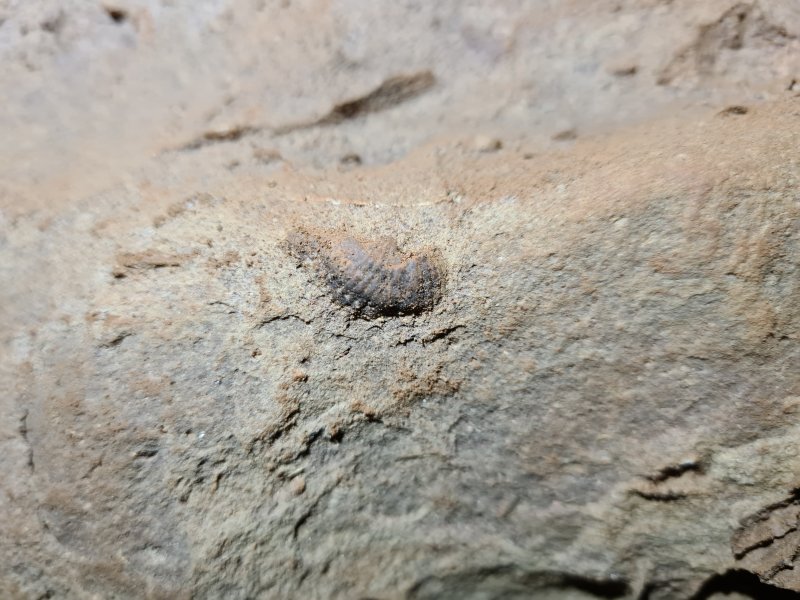 Fossil shell in the Lower Series.
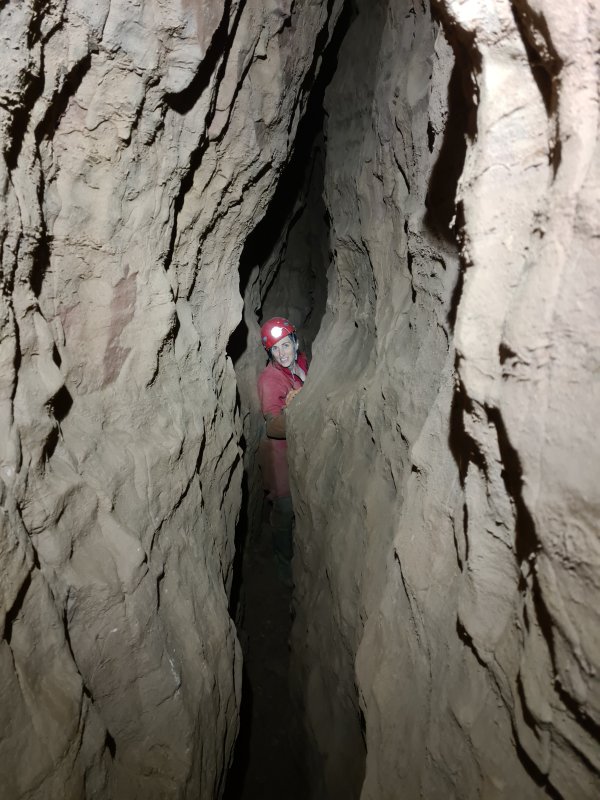 Heading back underneath the way in is a tall rift. This reaches a junction below Star Shaft II, where to the left ends abruptly, and to the right heads out towards the keyhole riser, but becomes too tight before connecting to it.
Modelling by Judi, lighting by Tarquin and Judi
Heading back underneath the way in is a tall rift. This reaches a junction below Star Shaft II, where to the left ends abruptly, and to the right heads out towards the keyhole riser, but becomes too tight before connecting to it.
Modelling by Judi, lighting by Tarquin and Judi The other direction soon reaches an oxbow loop with shattered rock below the climb in Left Wing. To the right closes down, while ahead-left is a funnel that collects any fallen rocks, leading to a rift. The exit from the rift is a technically entertaining squeeze, elevated off the floor. This is the easier of the two squeezes in the Lower Series.
Modelling by Judi
The other direction soon reaches an oxbow loop with shattered rock below the climb in Left Wing. To the right closes down, while ahead-left is a funnel that collects any fallen rocks, leading to a rift. The exit from the rift is a technically entertaining squeeze, elevated off the floor. This is the easier of the two squeezes in the Lower Series.
Modelling by Judi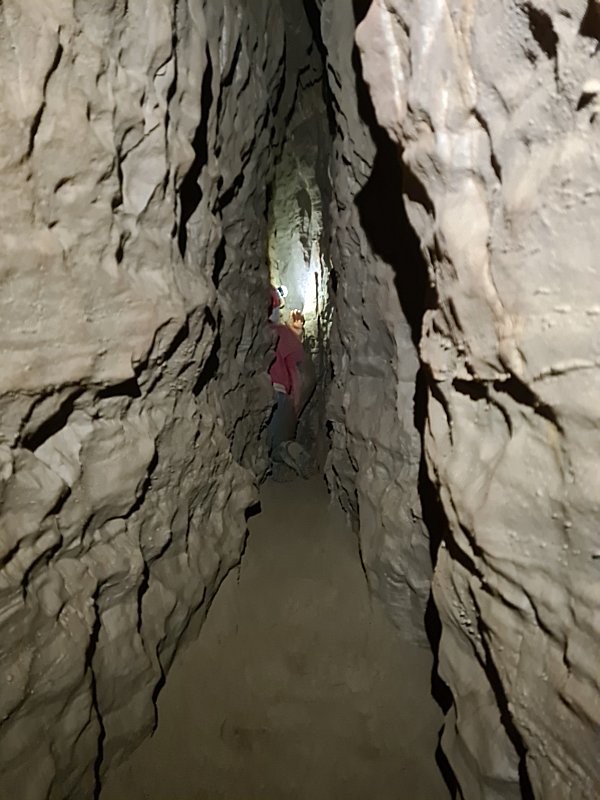 The squeeze reaches a clamber down into a lengthy, winding rift passage, which starts off with a comfortable, sandy floor.
Modelling by Judi, lighting by Tarquin and Judi
The squeeze reaches a clamber down into a lengthy, winding rift passage, which starts off with a comfortable, sandy floor.
Modelling by Judi, lighting by Tarquin and Judi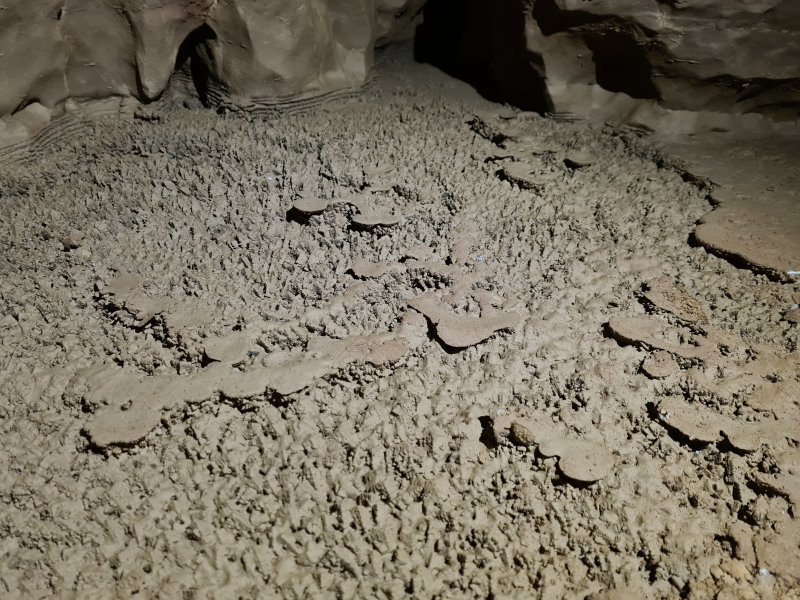 The sand turns to mud, and on a few corners, it is evident that the mud rests on top of what would once have been a beautiful calcite flow, shown by the remains of some dried out crystal pools with lily pads.
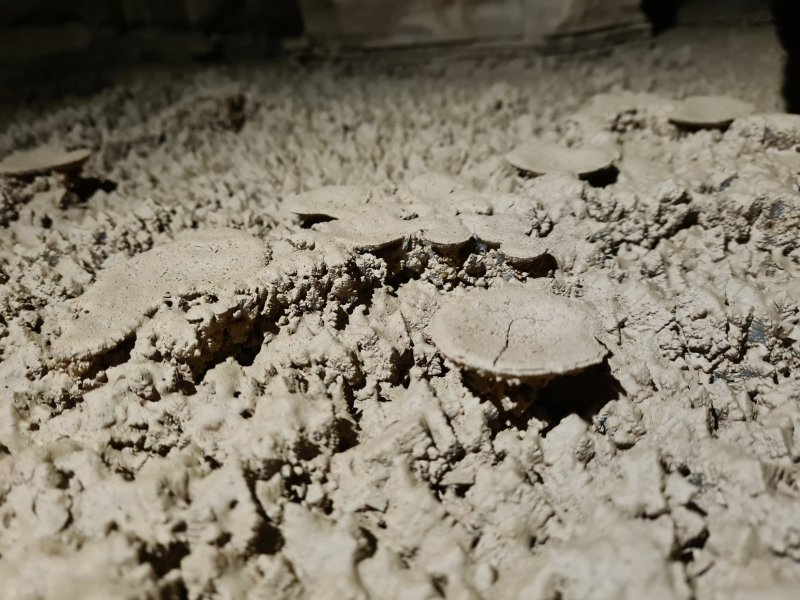 Detail of the crystal pool. The passage then enlarges, and rapidly shrinks at a too tight oxbow. The way on is a tight, blasted squeeze into the continuing passage. This ends too low after 130 metres, with a good draught, just 10 metres away from the side passage in Kuwait Passage. They are at the right heights for each other, and point towards each other, but the draught could not be detected at the other end. This is by far the most likely place to connect a round trip with Kuwait Passage.
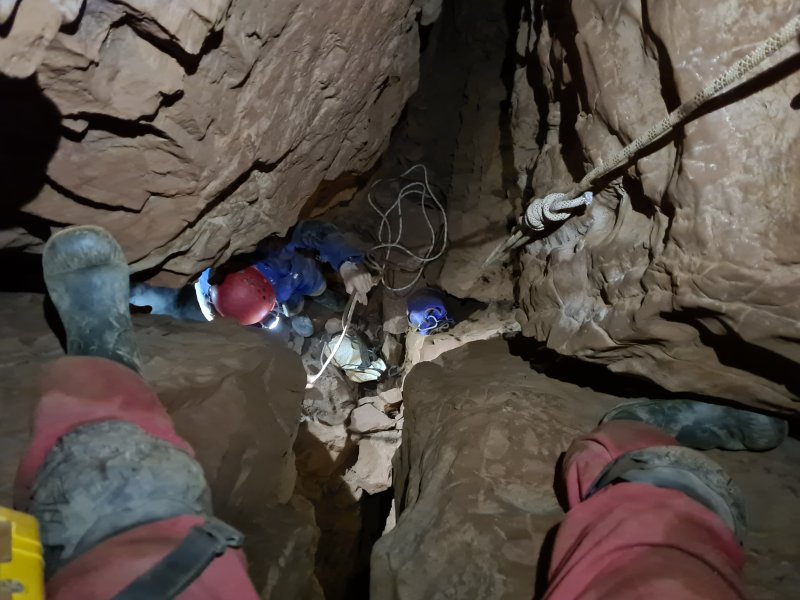 Ascending Star Shaft II, where we replaced the handline with a new one, using a proper anchor instead of a chockstone. It can be free climbed without a rope if needed, with difficulty.
Modelling by Tarquin's appendages and Mark, lighting by Tarquin, Mark and Tim
Ascending Star Shaft II, where we replaced the handline with a new one, using a proper anchor instead of a chockstone. It can be free climbed without a rope if needed, with difficulty.
Modelling by Tarquin's appendages and Mark, lighting by Tarquin, Mark and Tim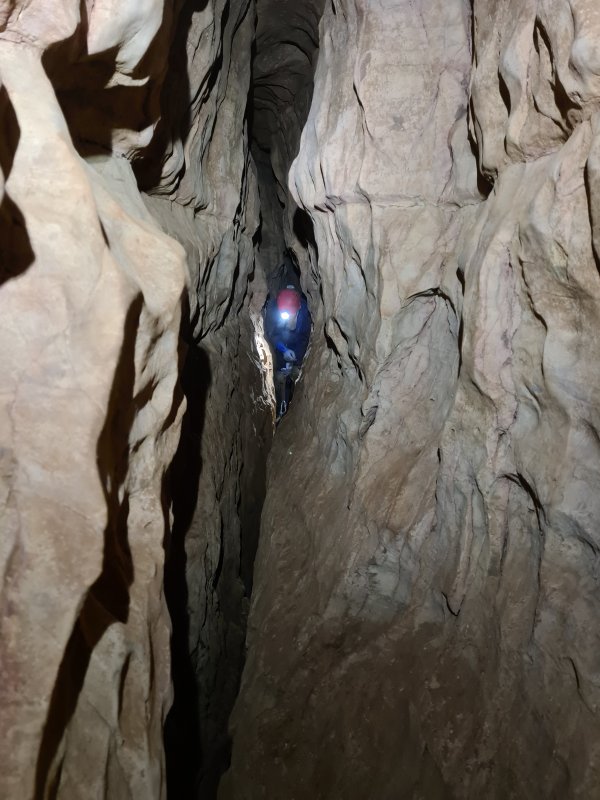 Traversing along above the dead-end rift. Again, there is no real floor here, and traversing involves making yourself wide enough not to fall down the gap. This area is hard work, but it does soon gain a solid floor.
Modelling by Mark, lighting by Tarquin and Mark
Traversing along above the dead-end rift. Again, there is no real floor here, and traversing involves making yourself wide enough not to fall down the gap. This area is hard work, but it does soon gain a solid floor.
Modelling by Mark, lighting by Tarquin and Mark The walls of the passage have unusual pitting patterns, and we were struggling to explain them. My suggestion is that they might be caused by ice crystals, popping off a layer of the rock.
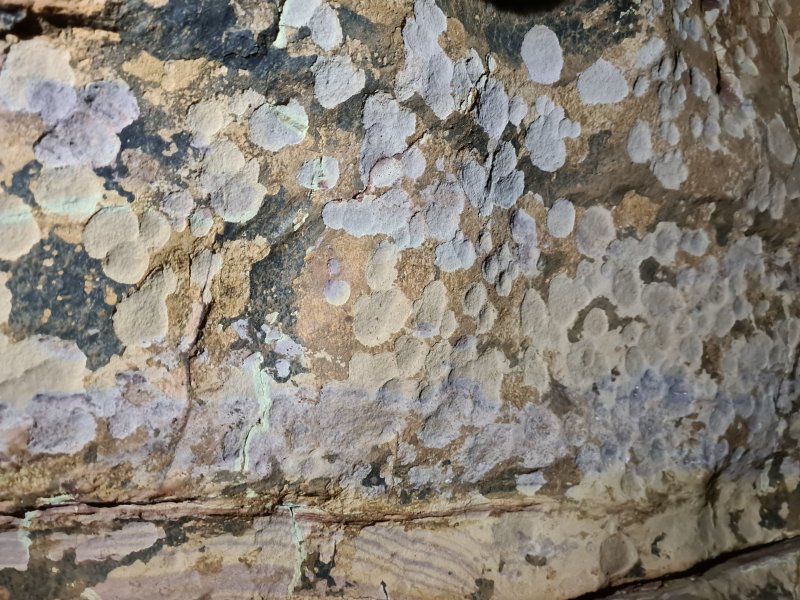 Pitting. These could be craters on a planet.
 Despite looking horribly tight, the passage is actually easily navigable by most cavers. Just lie down and get on with it.
Modelling by Mark, lighting by Tarquin and Mark
Despite looking horribly tight, the passage is actually easily navigable by most cavers. Just lie down and get on with it.
Modelling by Mark, lighting by Tarquin and Mark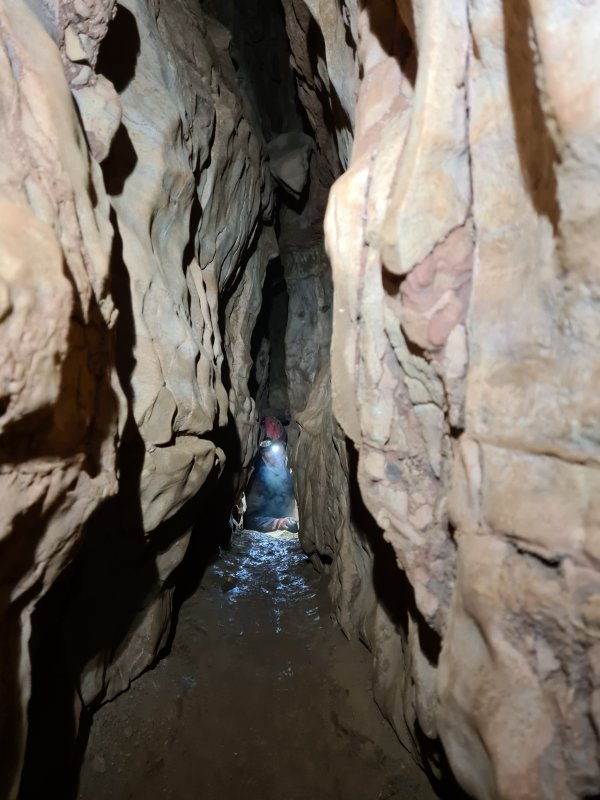 Nearing the end of the narrow part.
Modelling by Tim, lighting by Tarquin and Tim
Nearing the end of the narrow part.
Modelling by Tim, lighting by Tarquin and Tim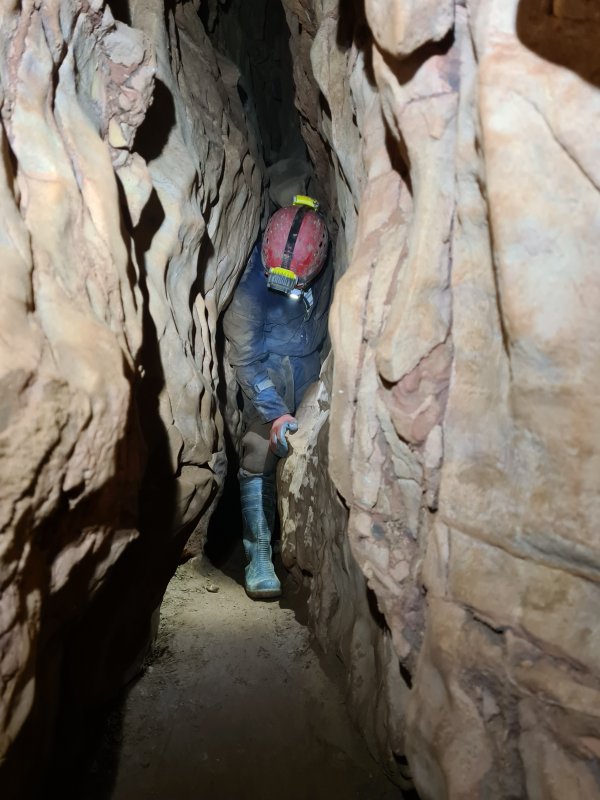 It is soon possible to stand awkwardly.
Modelling by Tim, lighting by Tarquin and Tim
It is soon possible to stand awkwardly.
Modelling by Tim, lighting by Tarquin and Tim Slickensides on the wall of the passage, showing that this pssage is formed on a strike-slip fault.
Modelling by Mark, lighting by Tarquin and Mark
Slickensides on the wall of the passage, showing that this pssage is formed on a strike-slip fault.
Modelling by Mark, lighting by Tarquin and Mark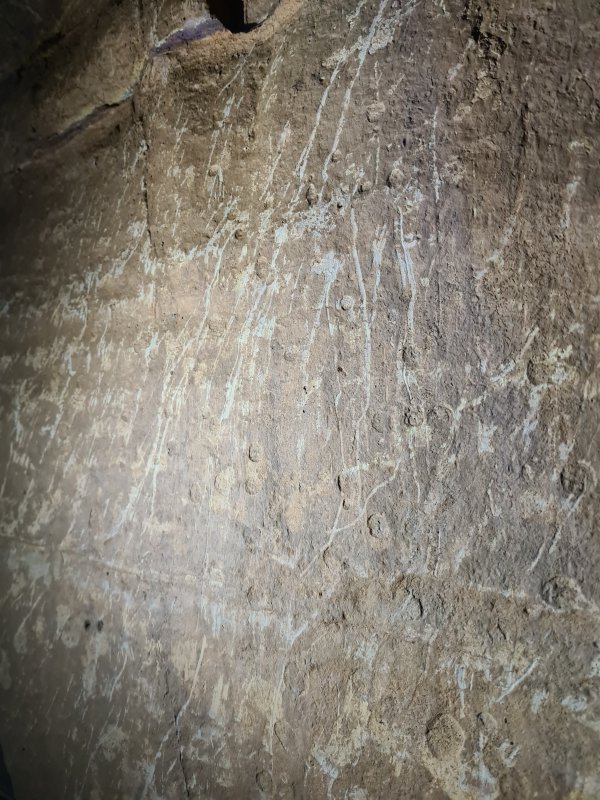 Scratches on the other wall. These might be man-made, but they are above head height.
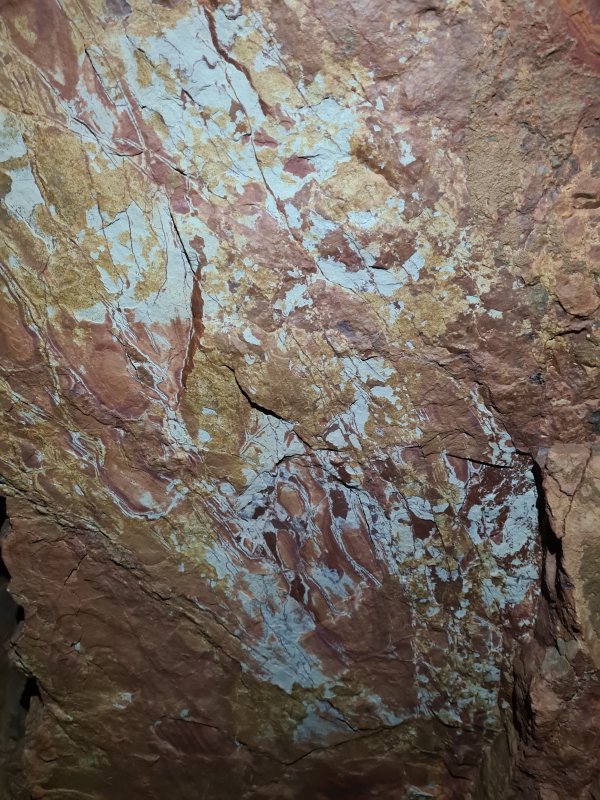 Colourful ceiling, probably different kinds of ochres.
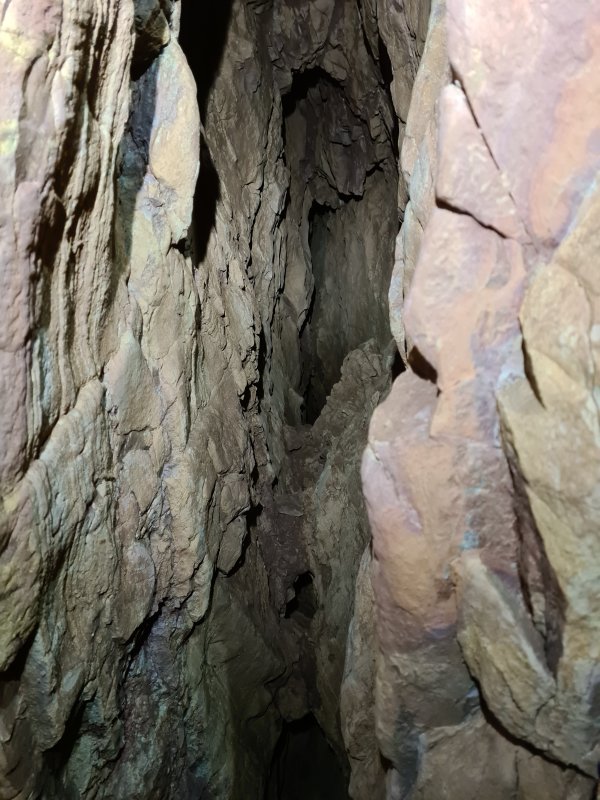 The tallest of a series of avens along the passage. There is no known passage above this.
Lighting by Tarquin and Tim
The tallest of a series of avens along the passage. There is no known passage above this.
Lighting by Tarquin and Tim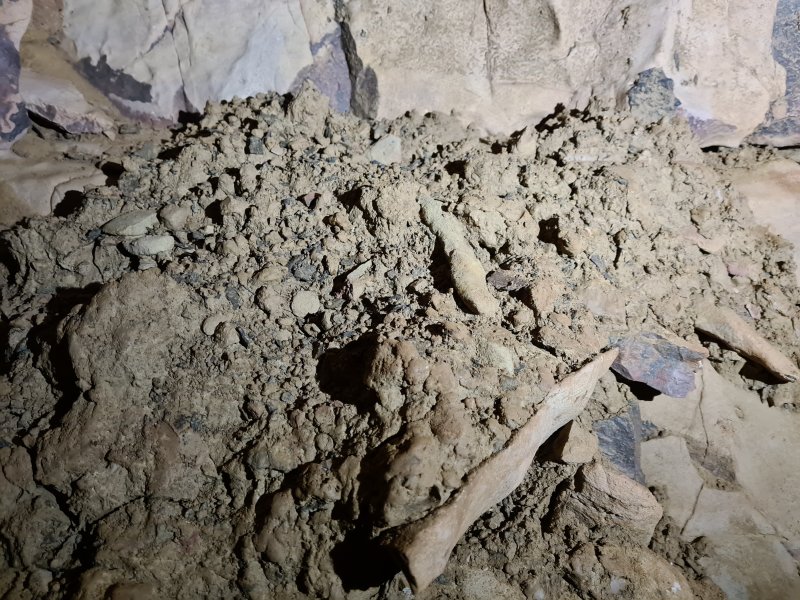 Mud deposits below the avens showing that they were likely to have been inlets, not phreatic uplift.
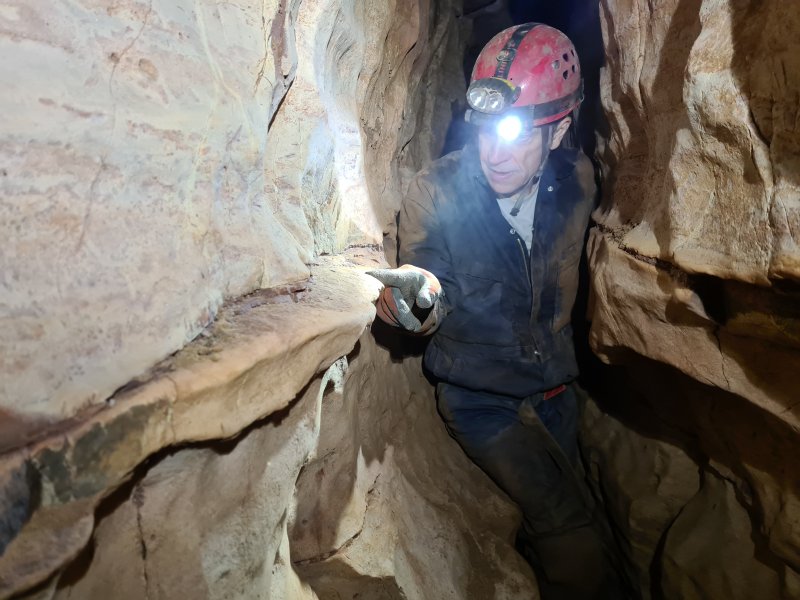 Shelves below the aven. These appear to be chert.
Modelling by Tim, lighting by Tarquin and Tim
Shelves below the aven. These appear to be chert.
Modelling by Tim, lighting by Tarquin and Tim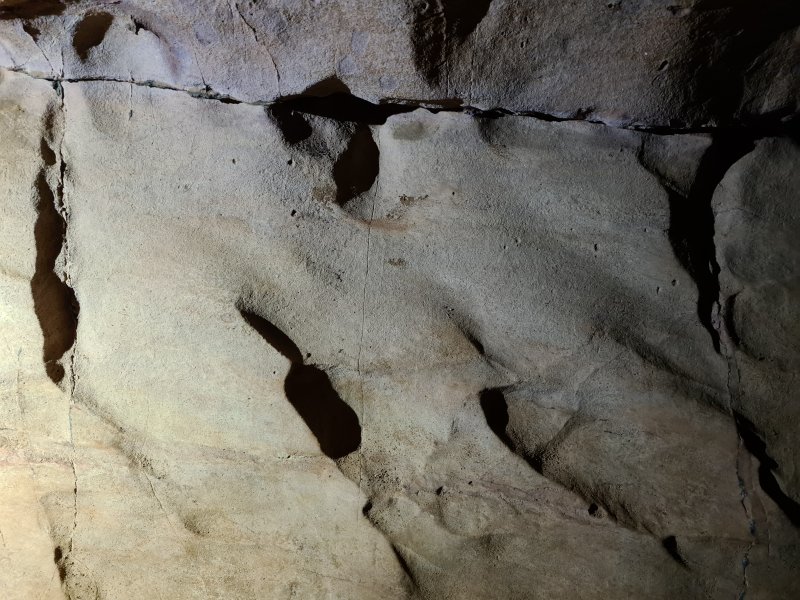 Scallops showing a slow flow into the series.
Lighting by Tim
Scallops showing a slow flow into the series.
Lighting by Tim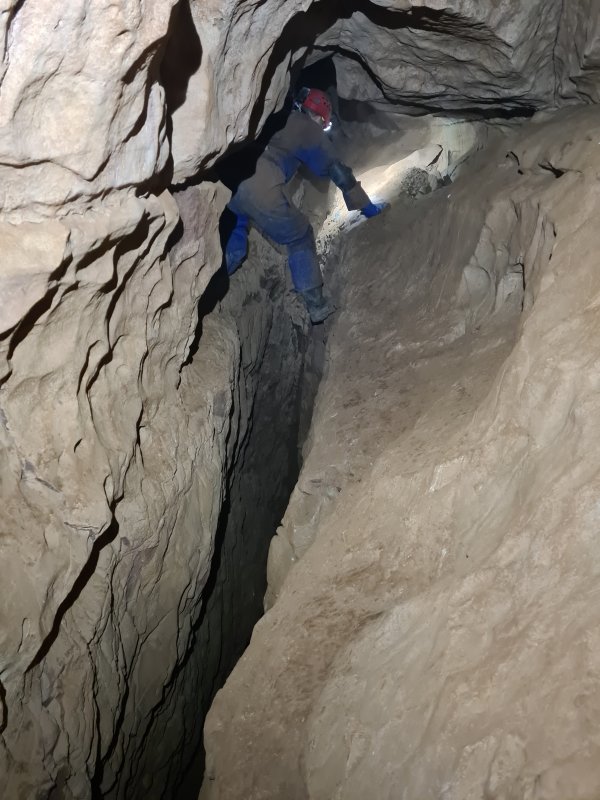 Traverse over a deep hole. This has not yet been surveyed, but apparently leads down only to a short, blind passage.
Modelling by Mark, lighting by Tarquin and Mark
Traverse over a deep hole. This has not yet been surveyed, but apparently leads down only to a short, blind passage.
Modelling by Mark, lighting by Tarquin and Mark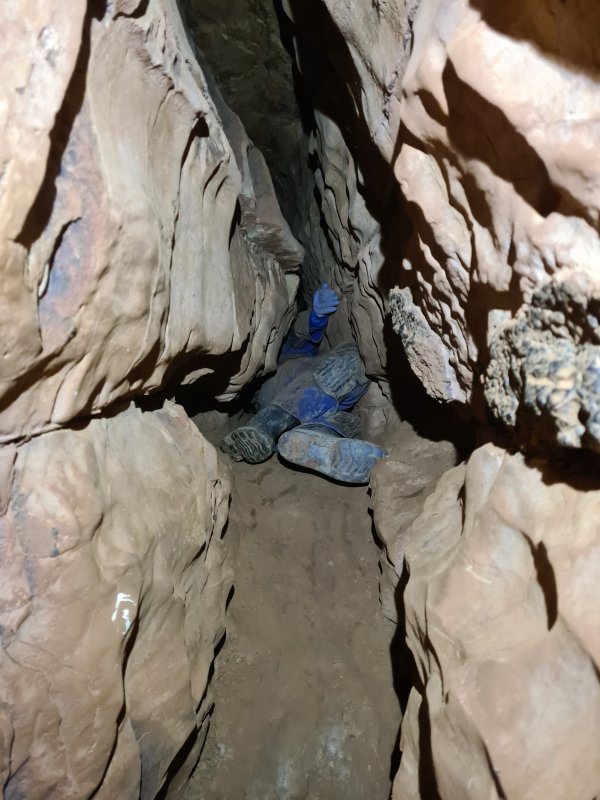 The tightest squeeze in this passage, which is not particularly tight, and could easily be dug larger if needed.
Modelling by Mark, lighting by Tarquin and Mark
The tightest squeeze in this passage, which is not particularly tight, and could easily be dug larger if needed.
Modelling by Mark, lighting by Tarquin and Mark Lumpy deposit on the wall. This appears to be covered in manganese, and is likely to be just a lump of minerals or mud and pebbles.
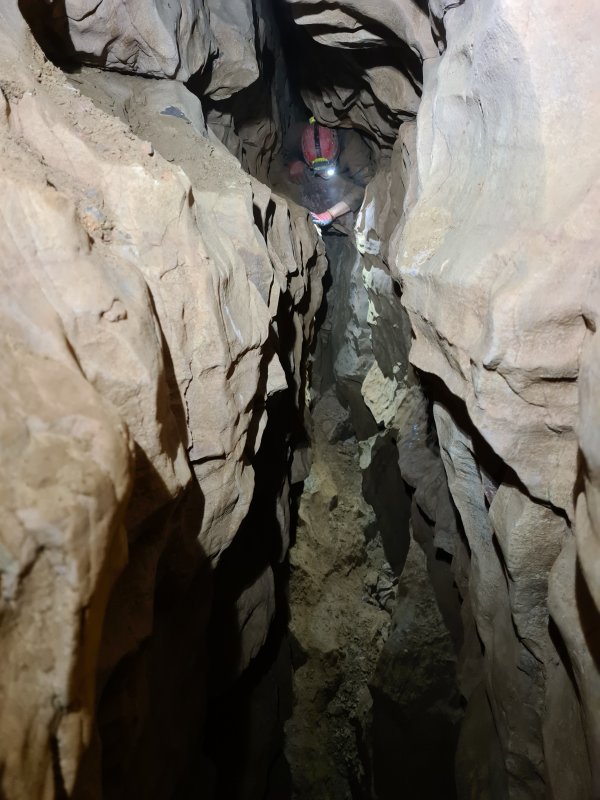 The small section pops out onto a climb down into a brief bit of comfortably sized passage, followed by a climb back up to a continuing smaller passage.
Modelling by Tim, lighting by Tarquin and Tim
The small section pops out onto a climb down into a brief bit of comfortably sized passage, followed by a climb back up to a continuing smaller passage.
Modelling by Tim, lighting by Tarquin and Tim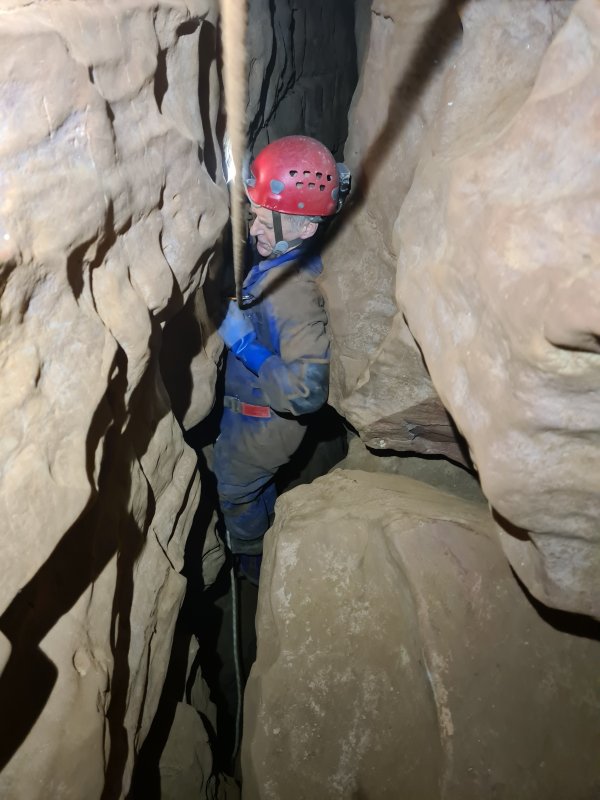 Top of Bat Pitch, where a wriggle through a gap suddenly opens out onto the top of the climb. There are ample ledges that can be used, but the drop is quite far if you get it wrong, so cows tails are suggested.
Modelling by Mark, lighting by Tarquin and Mark
Top of Bat Pitch, where a wriggle through a gap suddenly opens out onto the top of the climb. There are ample ledges that can be used, but the drop is quite far if you get it wrong, so cows tails are suggested.
Modelling by Mark, lighting by Tarquin and Mark Bat Pitch is a major feature, as the passage grows in size dramatically, and several other routes lead off. It is free climbable, but the rope is required for safety, since te total drop is around 13 metres. The rope leading back under the camera is the way into Bat Remains To Be Seen Passage. The holes in the floor drop into Under-Pitch Passage. The way on to the end of Upper Series is ahead, down the next stage of the pitch.
Modelling by Tim and Mark, lighting by Tarquin, Tim and Mark
Bat Pitch is a major feature, as the passage grows in size dramatically, and several other routes lead off. It is free climbable, but the rope is required for safety, since te total drop is around 13 metres. The rope leading back under the camera is the way into Bat Remains To Be Seen Passage. The holes in the floor drop into Under-Pitch Passage. The way on to the end of Upper Series is ahead, down the next stage of the pitch.
Modelling by Tim and Mark, lighting by Tarquin, Tim and Mark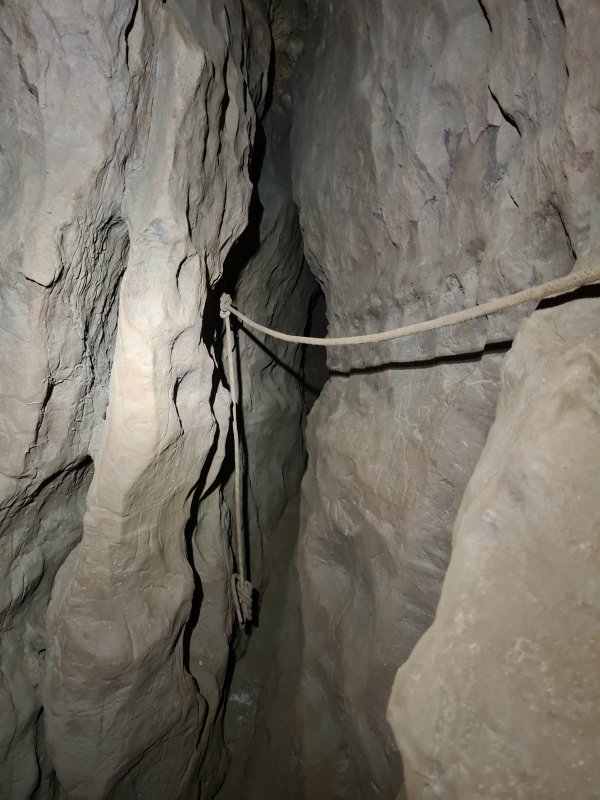 The traverse into Bat Remains To Be Seen Passage.
 The lower section of Bat Pitch.
Modelling by Tim, lighting by Tarquin and Tim
The lower section of Bat Pitch.
Modelling by Tim, lighting by Tarquin and Tim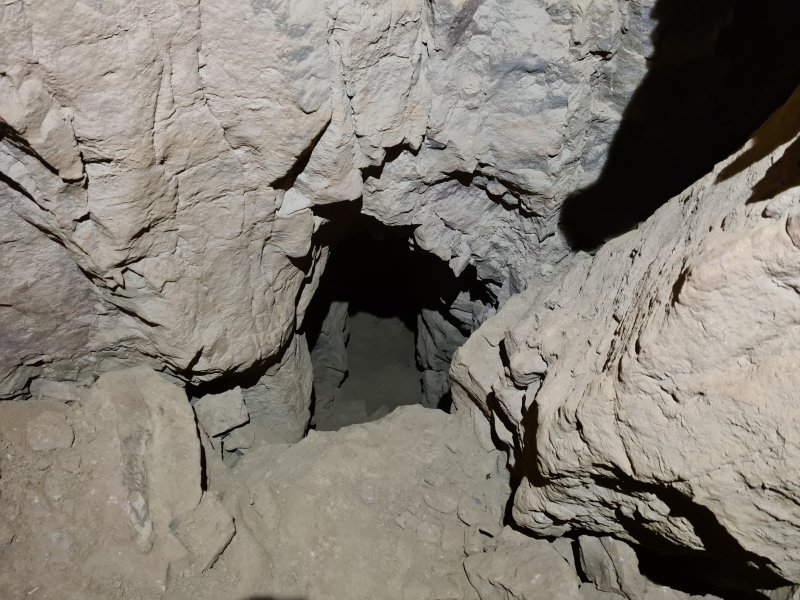 A hole on the side leads into Below-Pitch Passage, which is large and comfortable, but only around 30 metres long.
 Guano at the base of the pitch. This part of the cave is 120 metres underground, and has no known entrances nearby.
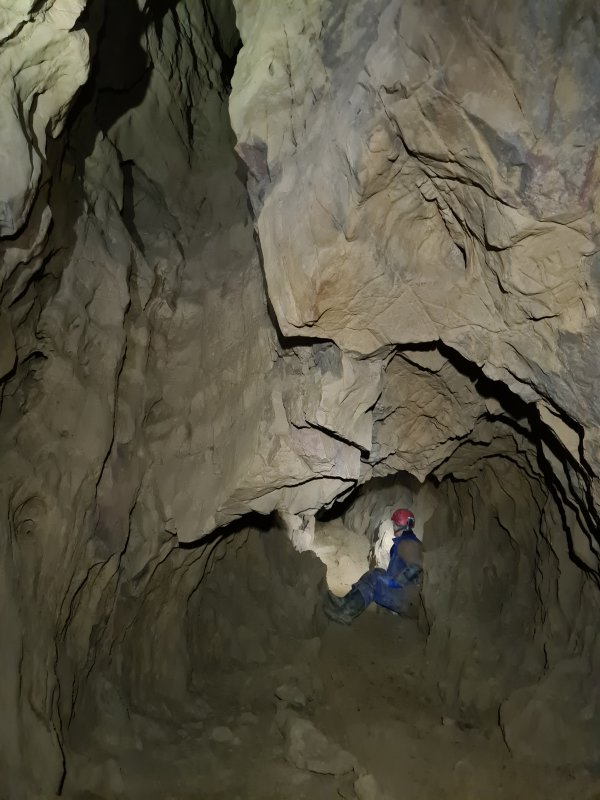 Phreatic riser and tall aven at the base of Bat Pitch.
Modelling by Mark, lighting by Tarquin, Tim and Mark
Phreatic riser and tall aven at the base of Bat Pitch.
Modelling by Mark, lighting by Tarquin, Tim and Mark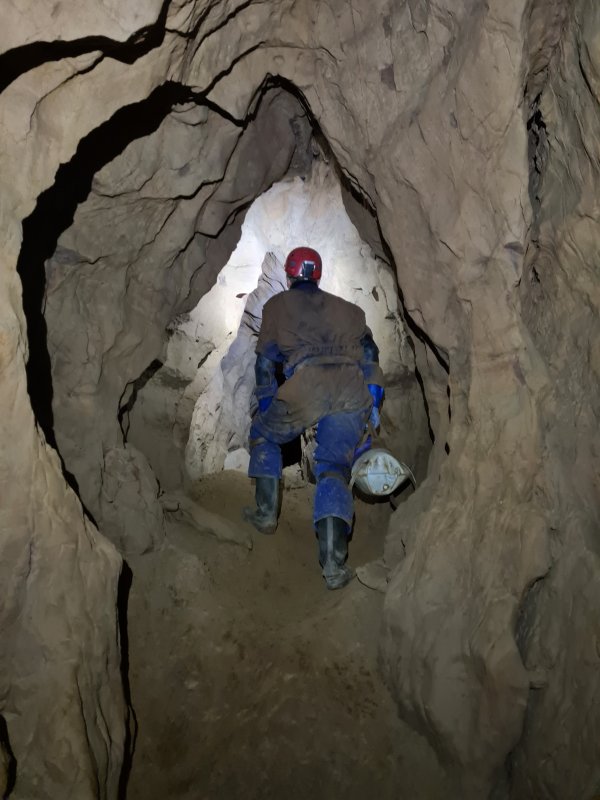 Top of the phreatic riser.
Modelling by Mark, lighting by Tarquin and Mark
Top of the phreatic riser.
Modelling by Mark, lighting by Tarquin and Mark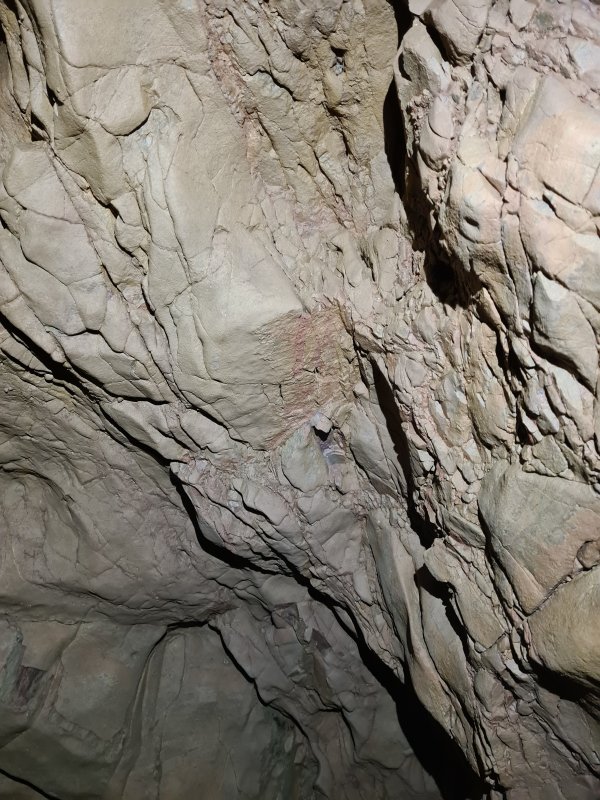 Slickensides in the riser.
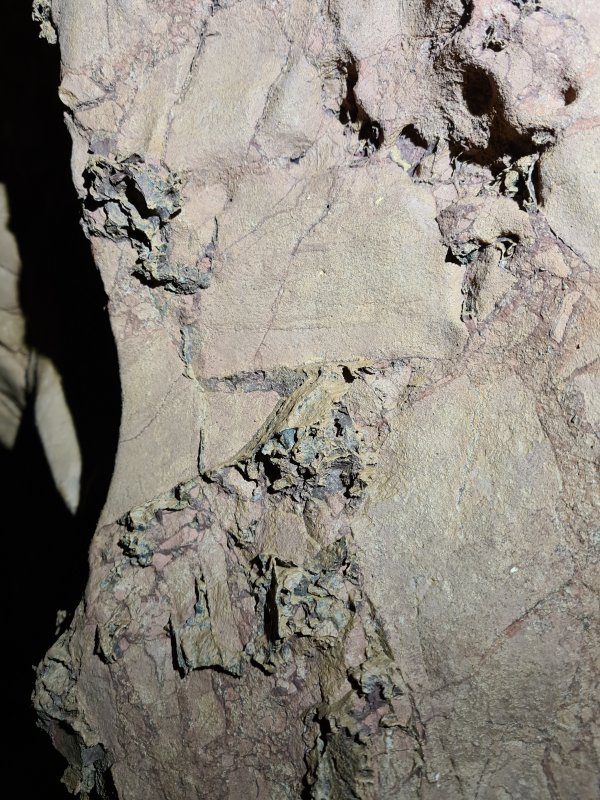 Deposits in the riser, which appear to be goethite.
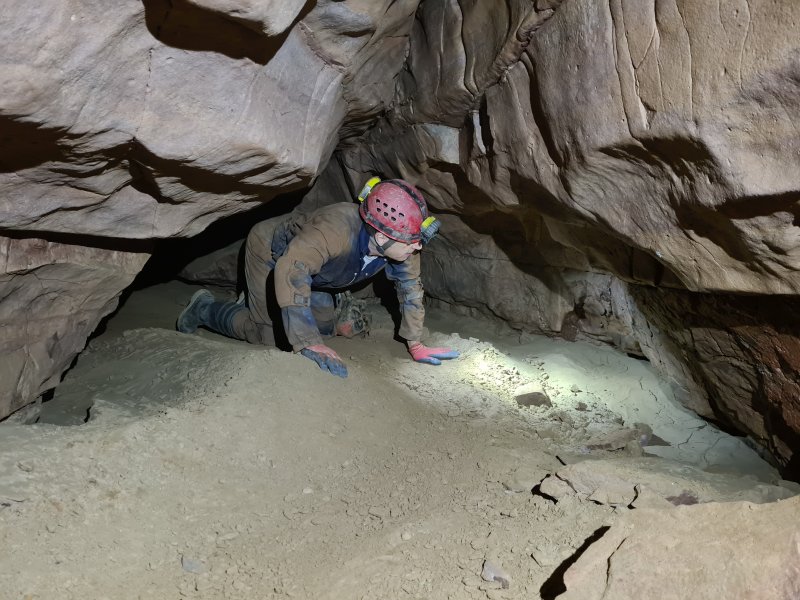 The passage alternates between walking sections and comfortable crawls, where care is needed to avoid damaging the sand formations.
Modelling by Tim, lighting by Tarquin and Tim
The passage alternates between walking sections and comfortable crawls, where care is needed to avoid damaging the sand formations.
Modelling by Tim, lighting by Tarquin and Tim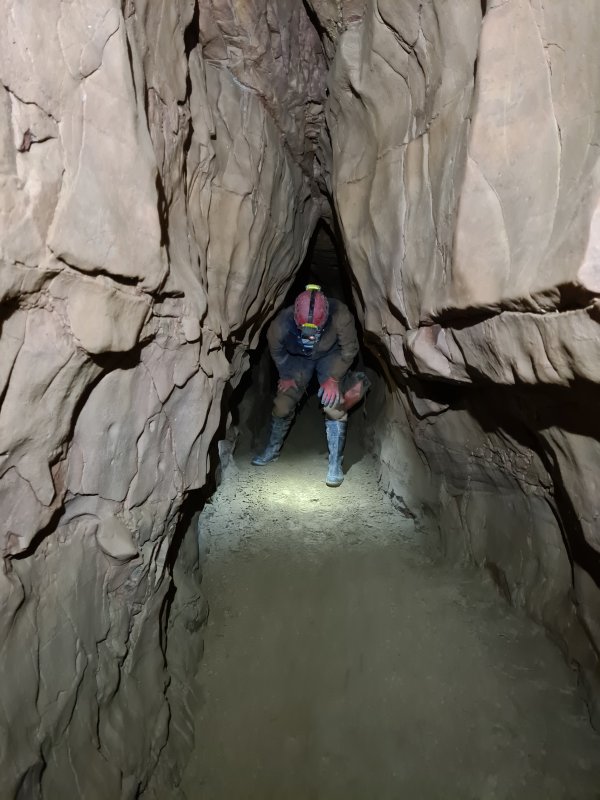 Stooping section.
Modelling by Tim, lighting by Tarquin and Tim
Stooping section.
Modelling by Tim, lighting by Tarquin and Tim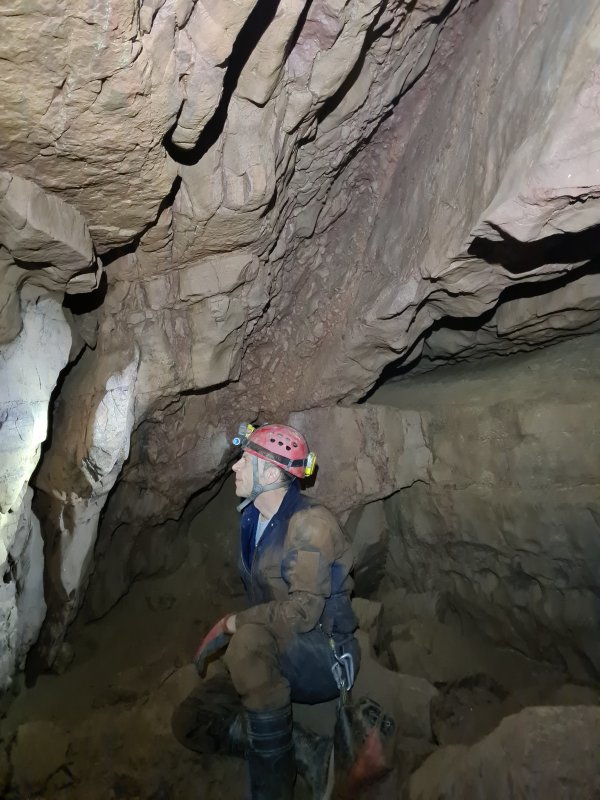 The passage turns an abrupt corner where it encounters a haematite-rich fault. The Lower Series ends almost directly beneath this point.
Modelling by Tim, lighting by Tarquin and Tim
The passage turns an abrupt corner where it encounters a haematite-rich fault. The Lower Series ends almost directly beneath this point.
Modelling by Tim, lighting by Tarquin and Tim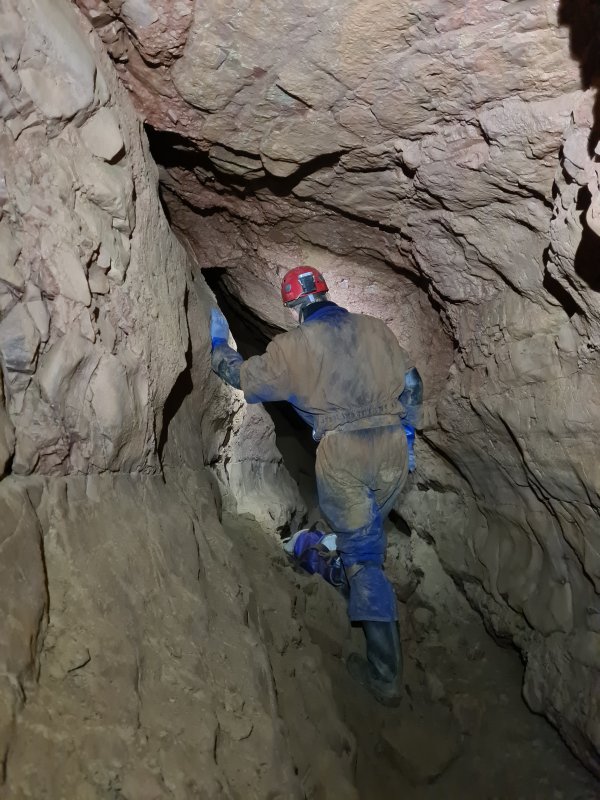 The hading of the fault is clearly visible in the other direction. The Lower Series is offset to the right side by the expected amount, according to the slope of this fault.
Modelling by Mark, lighting by Tarquin and Mark
The hading of the fault is clearly visible in the other direction. The Lower Series is offset to the right side by the expected amount, according to the slope of this fault.
Modelling by Mark, lighting by Tarquin and Mark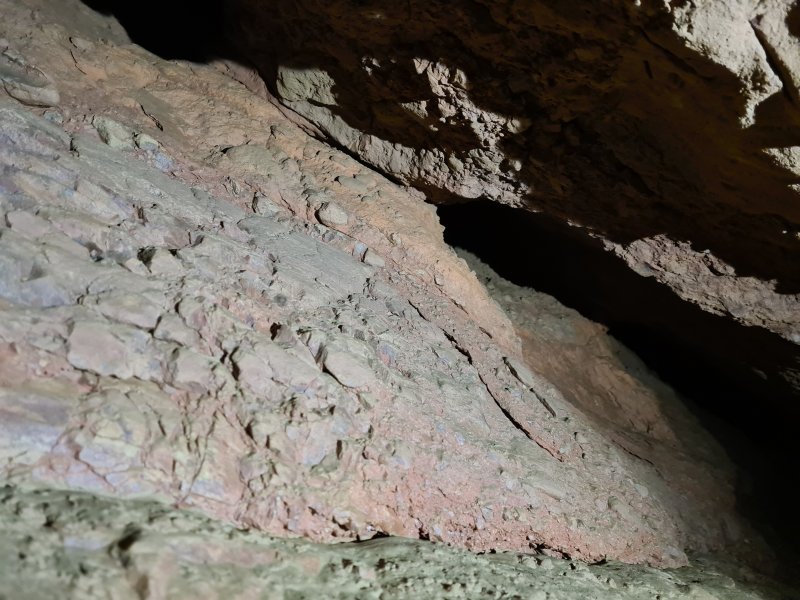 The haematite staining in the fault breccia.
 At the next bend, a passage continues ahead along the fault, reaching a large fault chamber. That chamber sits directly above the side passage from Kuwait Passage (but that passage is offset from the fault). A dig in the floor of that chamber is the closest point to Kuwait Passage.
Lighting by Tarquin, Tim and Mark
At the next bend, a passage continues ahead along the fault, reaching a large fault chamber. That chamber sits directly above the side passage from Kuwait Passage (but that passage is offset from the fault). A dig in the floor of that chamber is the closest point to Kuwait Passage.
Lighting by Tarquin, Tim and Mark Slickensides on the corner.
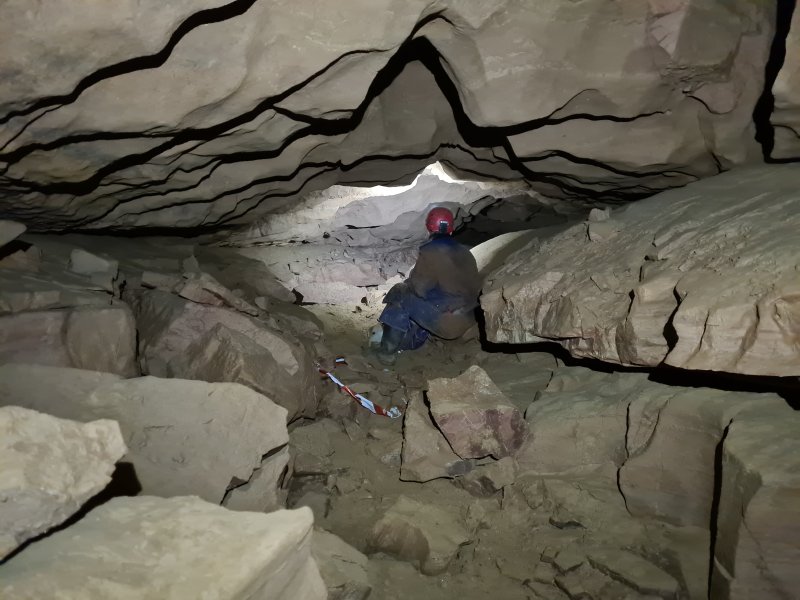 After the corner, the passage is big and comfortable.
Modelling by Mark, lighting by Tarquin and Mark
After the corner, the passage is big and comfortable.
Modelling by Mark, lighting by Tarquin and Mark Bat skeleton in the passage.
Modelling by Billy
Bat skeleton in the passage.
Modelling by Billy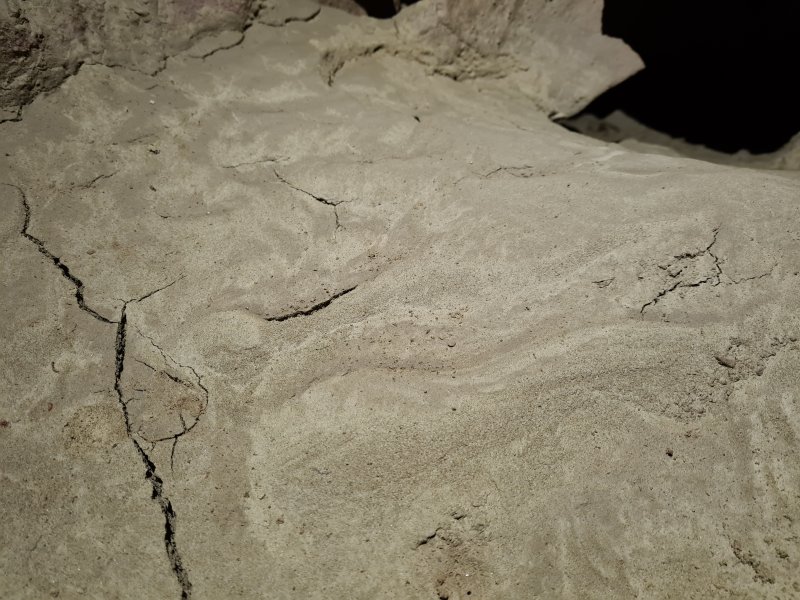 Sand formations.
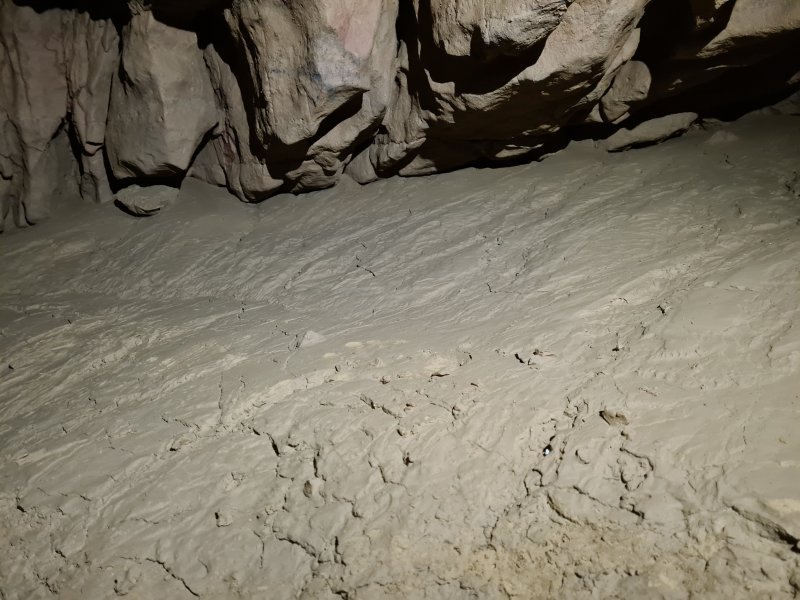 Sand formations.
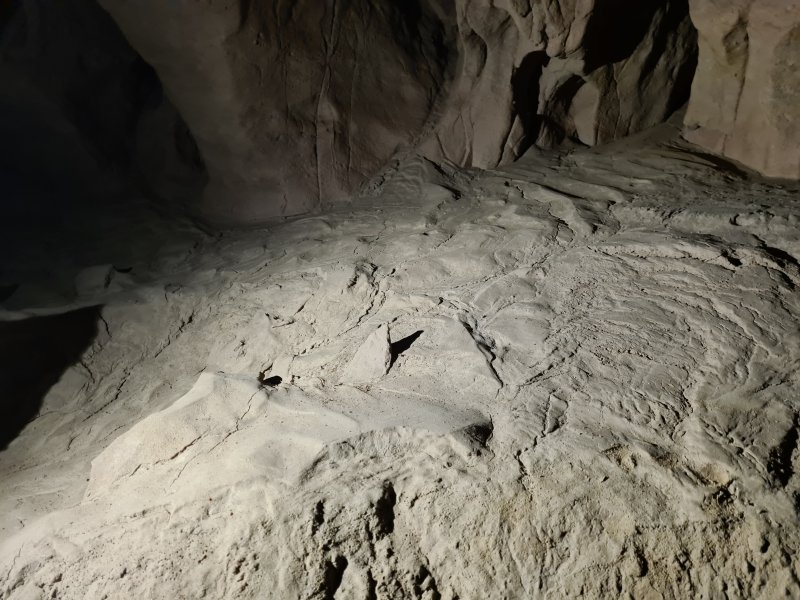 The direction of the ripples indicates a flow further into the series.
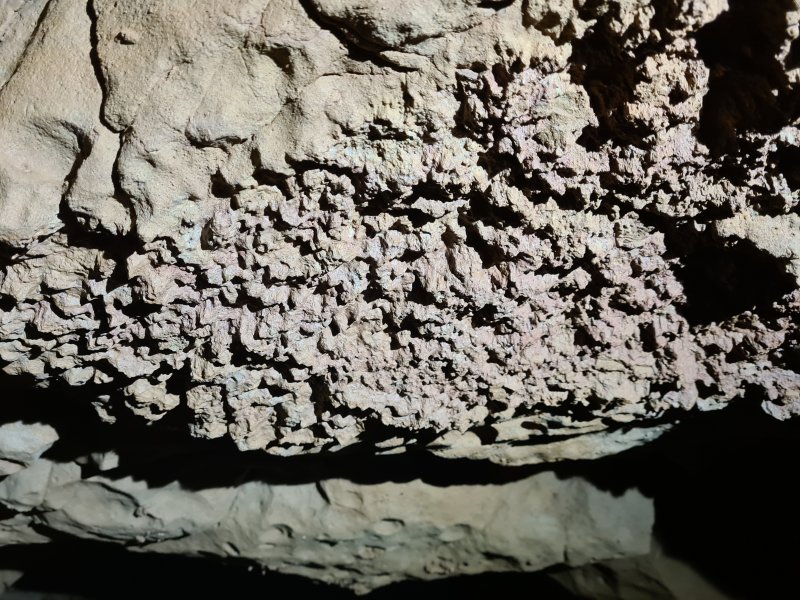 Exposed styolites.
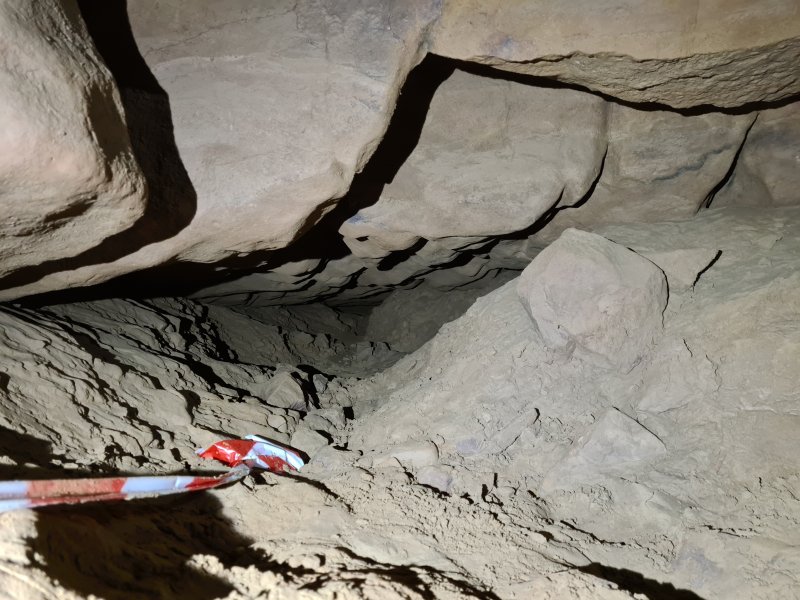 Low side passage on the left, which ends directly over an aven at the end of Kuwait Passage, where the mud-filled oxbow starts. The vertical separation is nearly 20 metres.
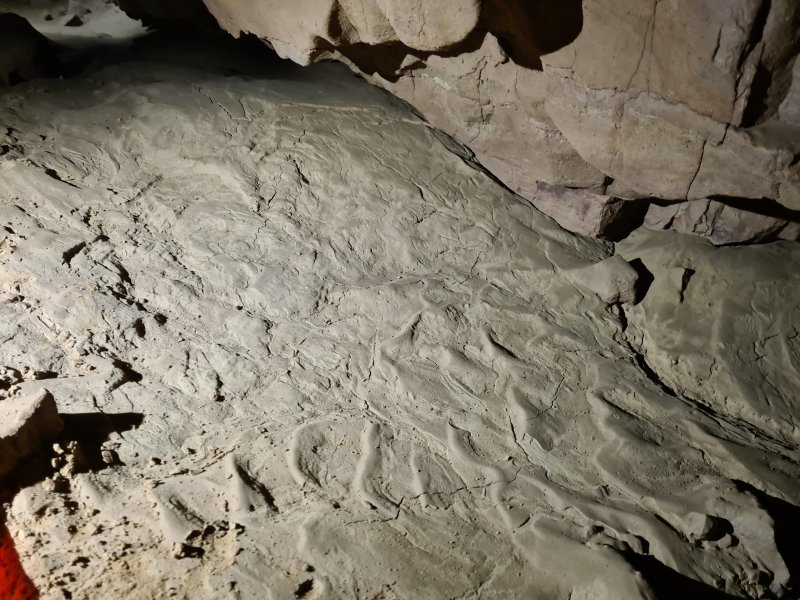 More sand formations, with the ripples continuing to suggest an onwards flow.
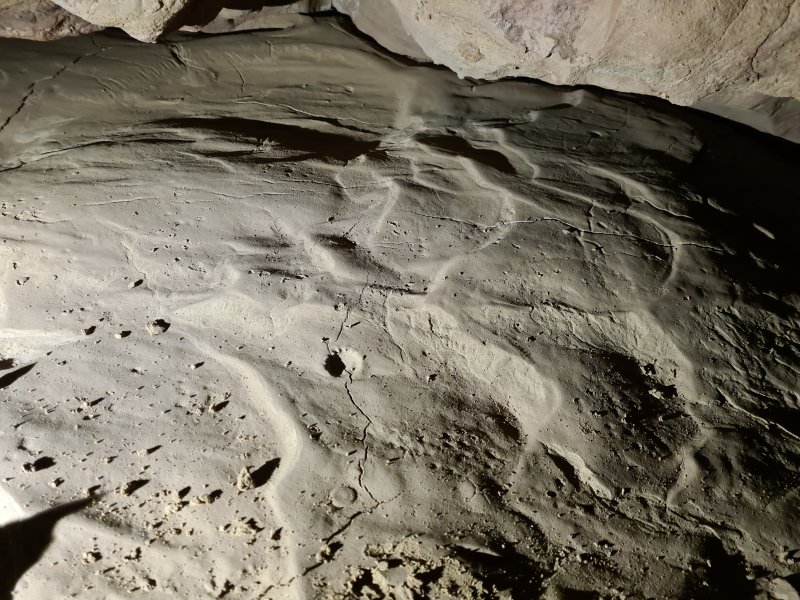 Sand formations.
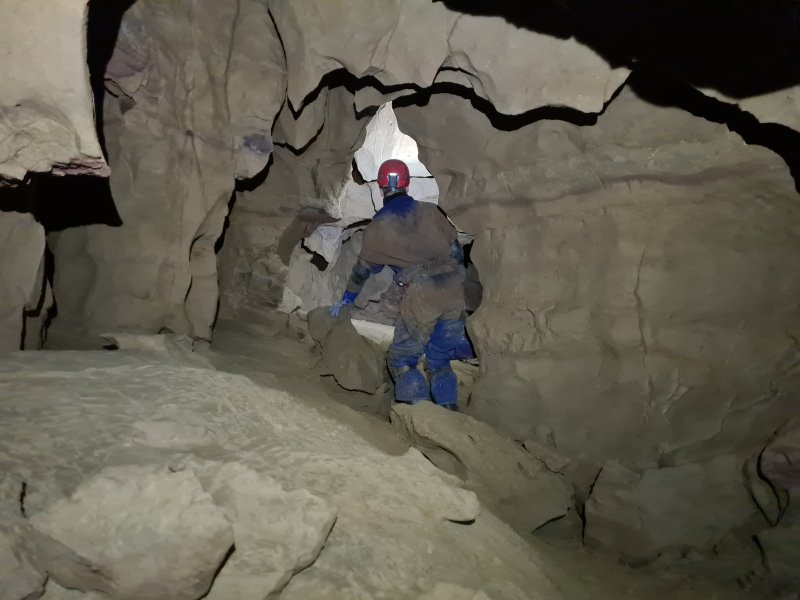 Triangular archway between chambers.
Modelling by Mark, lighting by Tarquin and Mark
Triangular archway between chambers.
Modelling by Mark, lighting by Tarquin and Mark Sand formations.
Lighting by Tim
Sand formations.
Lighting by Tim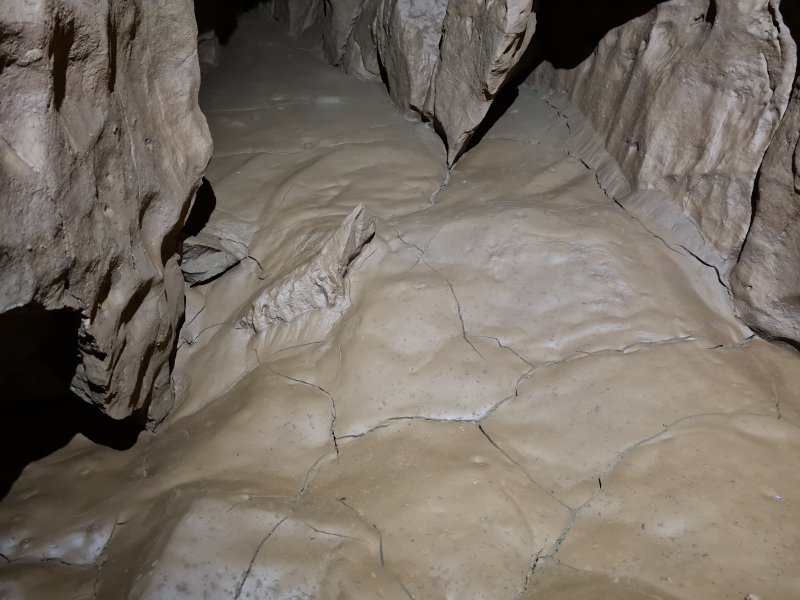 Mud formations. This area has seen water relatively recently.
 Mud formations and guano.
Lighting by Tarquin and Tim
Mud formations and guano.
Lighting by Tarquin and Tim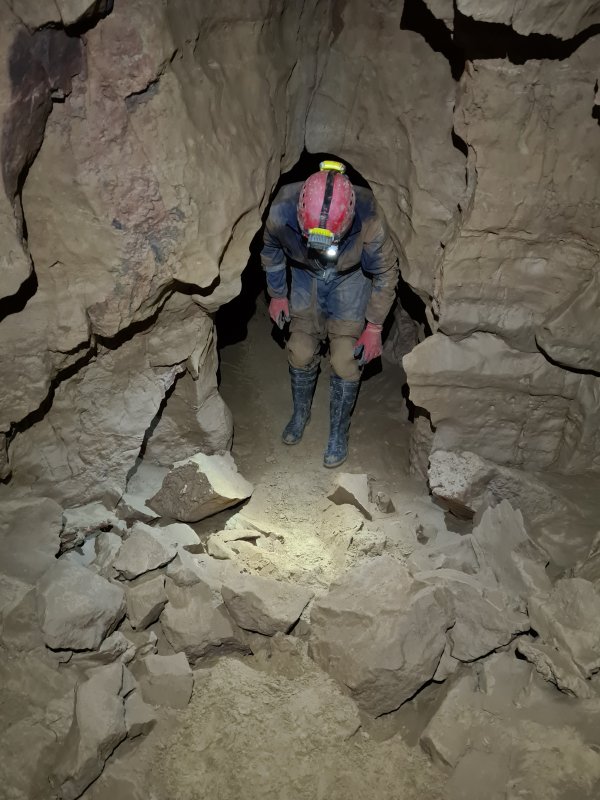 Arched doorway between chambers.
Modelling by Tim, lighting by Tarquin and Tim
Arched doorway between chambers.
Modelling by Tim, lighting by Tarquin and Tim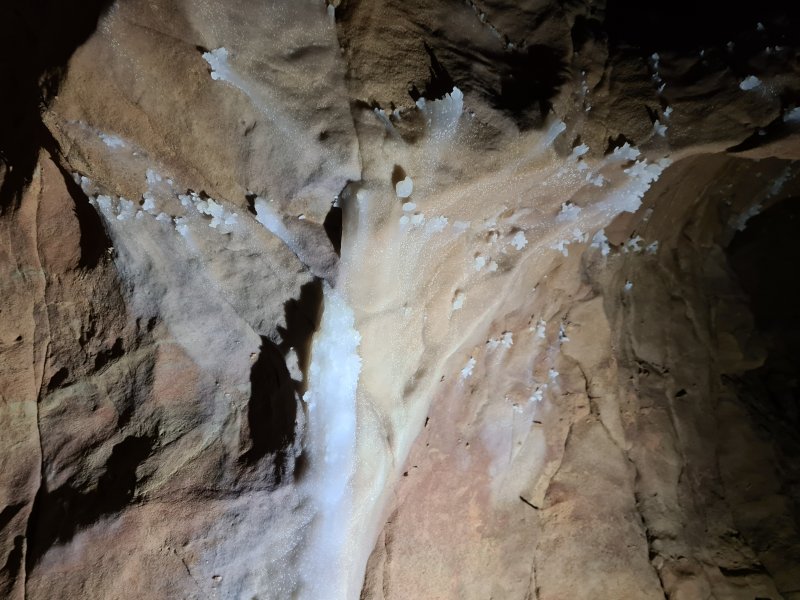 Helictites in the final chamber.
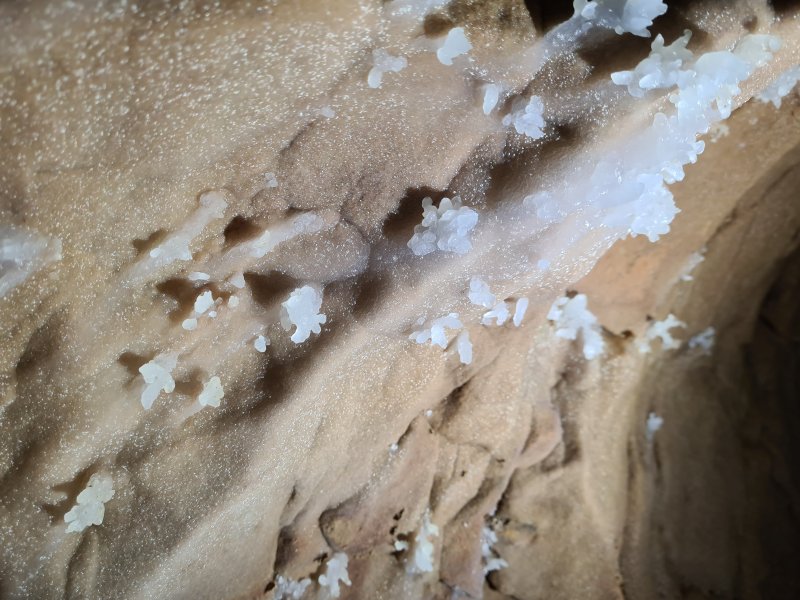 Helictites.
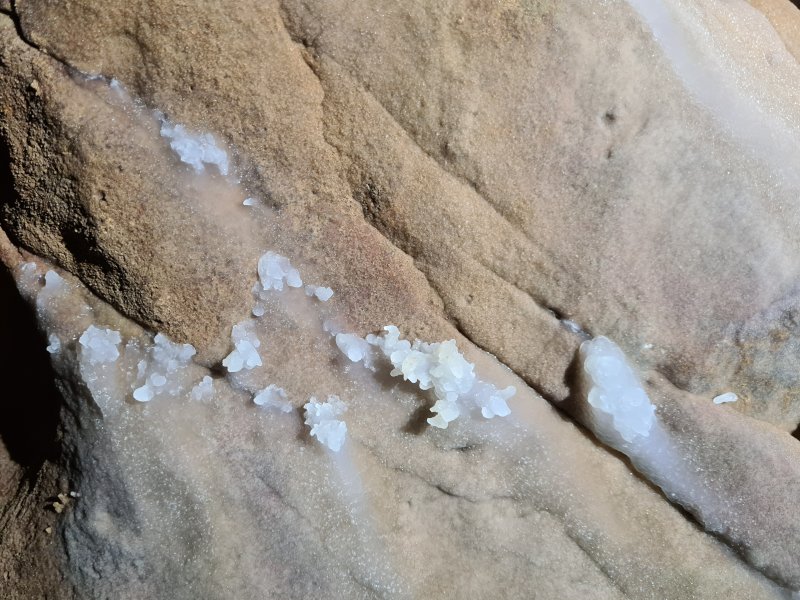 Helictites.
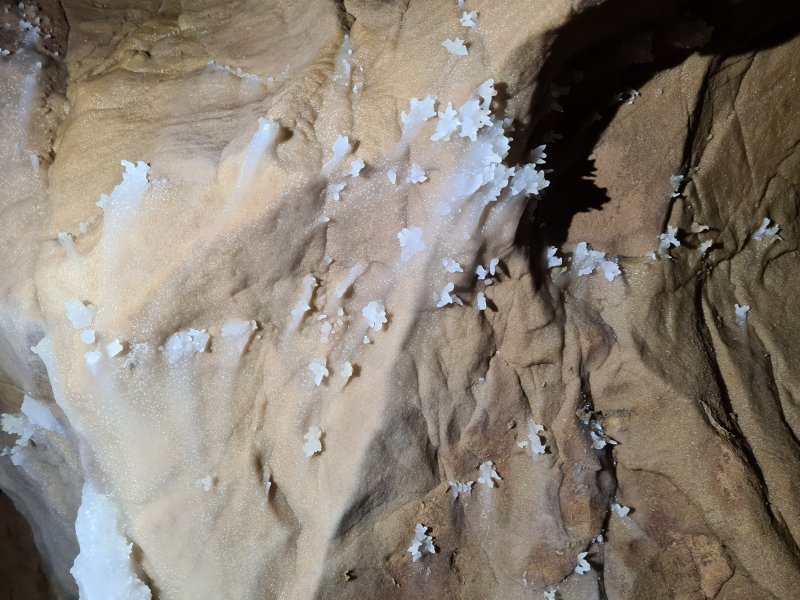 Helictites.
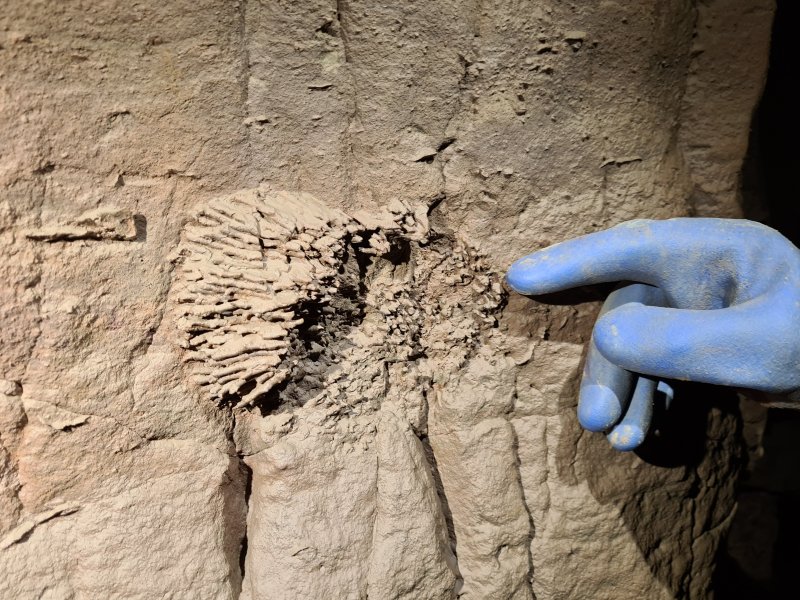 Syringopora fossil in the final chamber.
Modelling by Mark's glove, lighting by Tarquin and Mark
Syringopora fossil in the final chamber.
Modelling by Mark's glove, lighting by Tarquin and Mark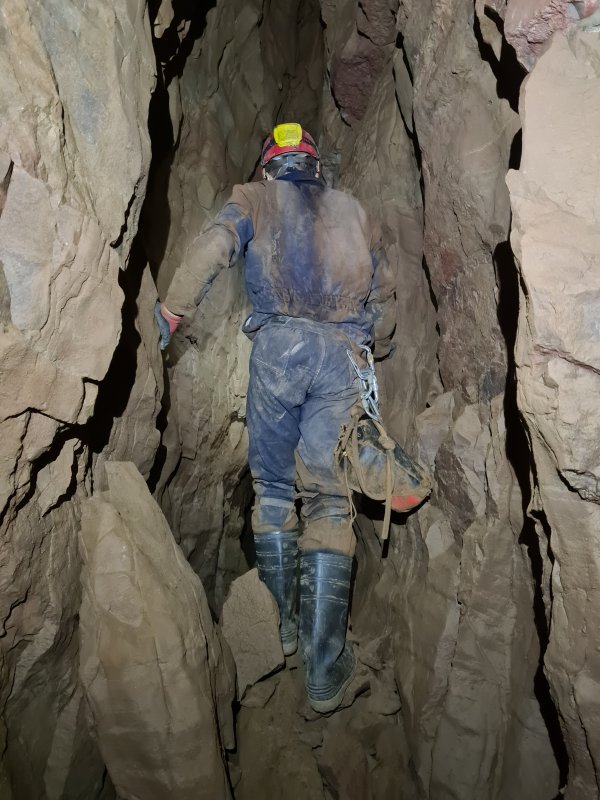 The passage now becomes rifty in style, and this was once the end of the cave. When the rift branches, the left branches end over the top of Kuwait Passage's terminal sump, but 25 metres higher than it.
Modelling by Tim, lighting by Tarquin and Tim
The passage now becomes rifty in style, and this was once the end of the cave. When the rift branches, the left branches end over the top of Kuwait Passage's terminal sump, but 25 metres higher than it.
Modelling by Tim, lighting by Tarquin and Tim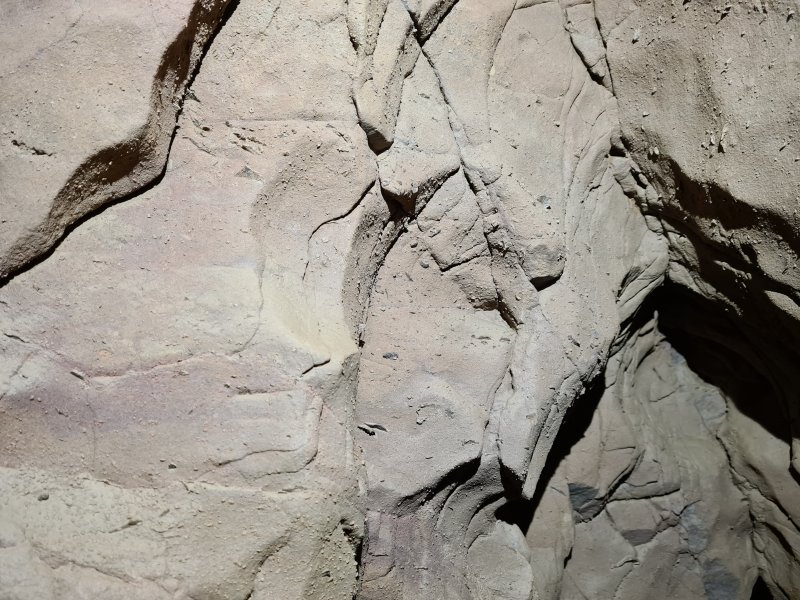 The only rift that actually goes anywhere is the northern branch. It has a visible bed of brachiopod shells.
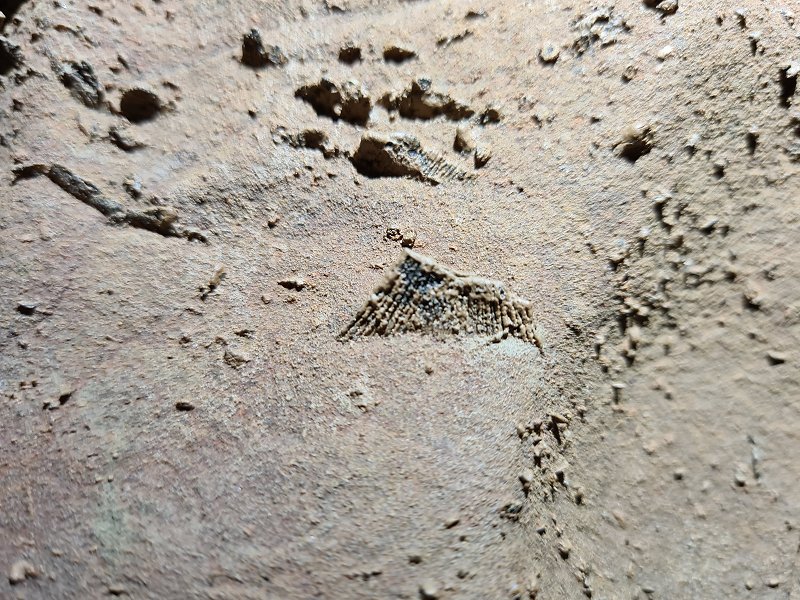 Shell fossils.
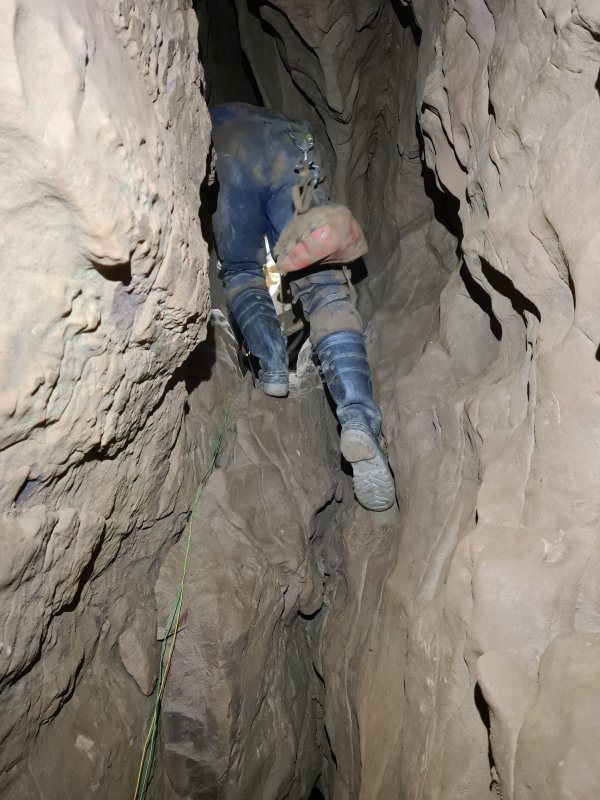 Clambering into the last part of the rifts.
Modelling by Tim, lighting by Tarquin and Tim
Clambering into the last part of the rifts.
Modelling by Tim, lighting by Tarquin and Tim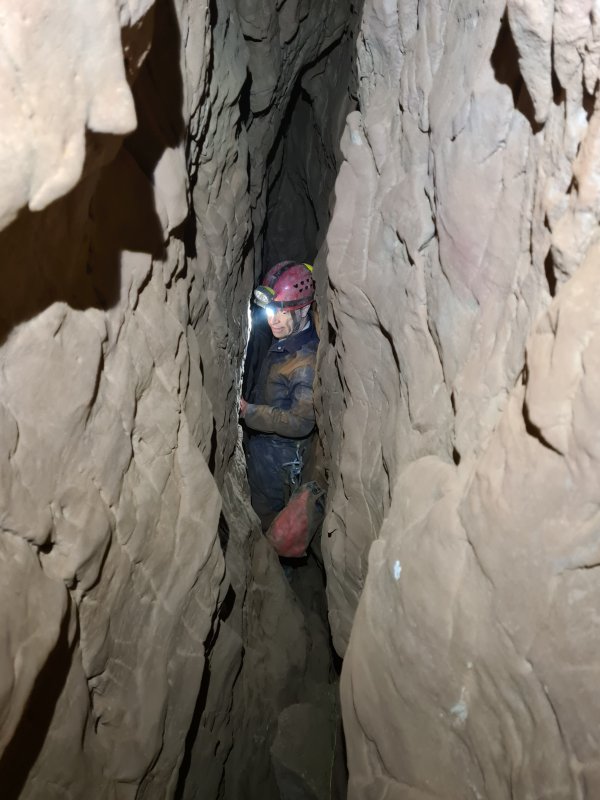 The passage has lost all its glory, and it is back to being awkward. This clamber down is entertaining on the return, having very few holds.
Modelling by Tim, lighting by Tarquin and Tim
The passage has lost all its glory, and it is back to being awkward. This clamber down is entertaining on the return, having very few holds.
Modelling by Tim, lighting by Tarquin and Tim Ctenacanthus dorsal spine fossil in the rift.
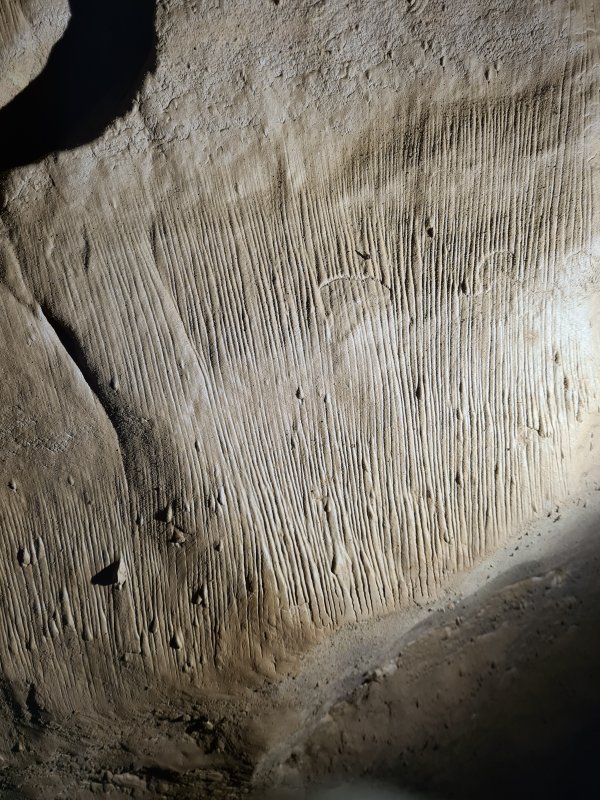 Surge marks, mud formations caused by repeated flooding, in the rift.
 Rocks in the rift, showing the haematite staining (left), and the basic dolomite (right).
Modelling by Tarquin's hand.
Rocks in the rift, showing the haematite staining (left), and the basic dolomite (right).
Modelling by Tarquin's hand.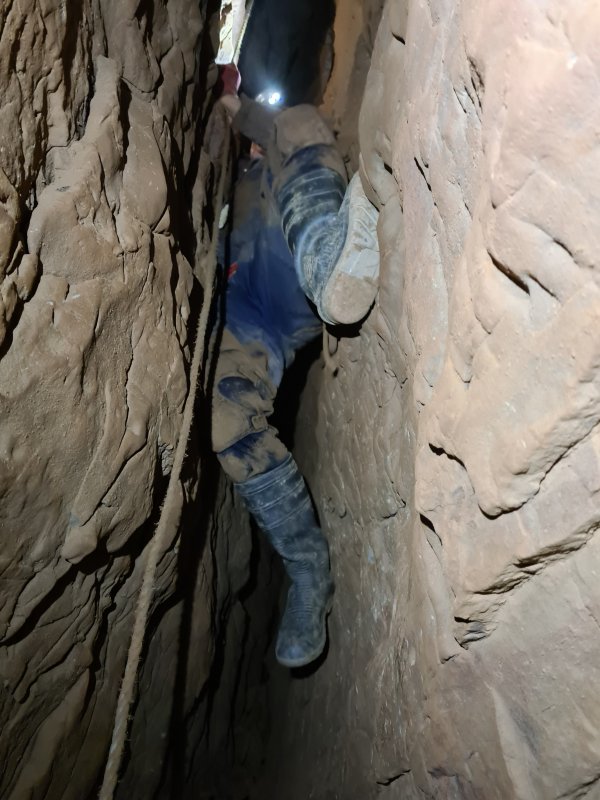 The rift ends at Heat Exchanger, a challenging aven climb, with enough holds, but no space to use them. The name comes from the draught, which would randomly change direction.
Modelling by Tim, lighting by Tarquin and Tim
The rift ends at Heat Exchanger, a challenging aven climb, with enough holds, but no space to use them. The name comes from the draught, which would randomly change direction.
Modelling by Tim, lighting by Tarquin and Tim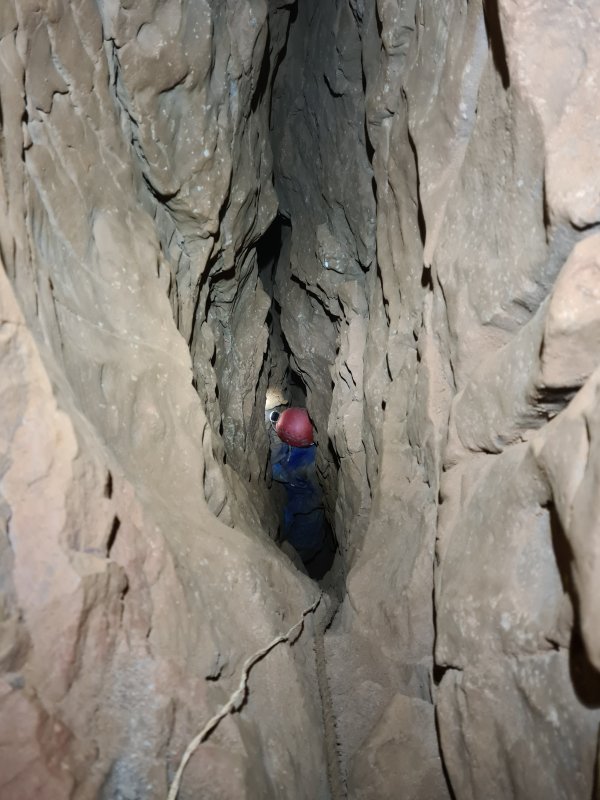 Looking down Heat Exchanger.
Modelling by Mark, lighting by Tarquin and Mark
Looking down Heat Exchanger.
Modelling by Mark, lighting by Tarquin and Mark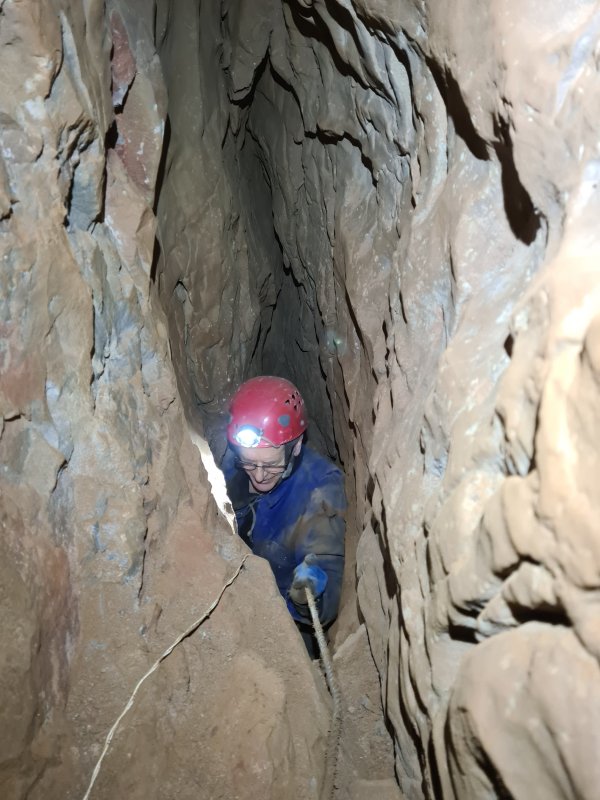 The top of Heat Exchanger. This was the end of the series, for many years.
Modelling by Mark, lighting by Tarquin and Mark
The top of Heat Exchanger. This was the end of the series, for many years.
Modelling by Mark, lighting by Tarquin and Mark A narrow rift was then blasted into a crawl.
Modelling by Tim, lighting by Tarquin and Tim
A narrow rift was then blasted into a crawl.
Modelling by Tim, lighting by Tarquin and Tim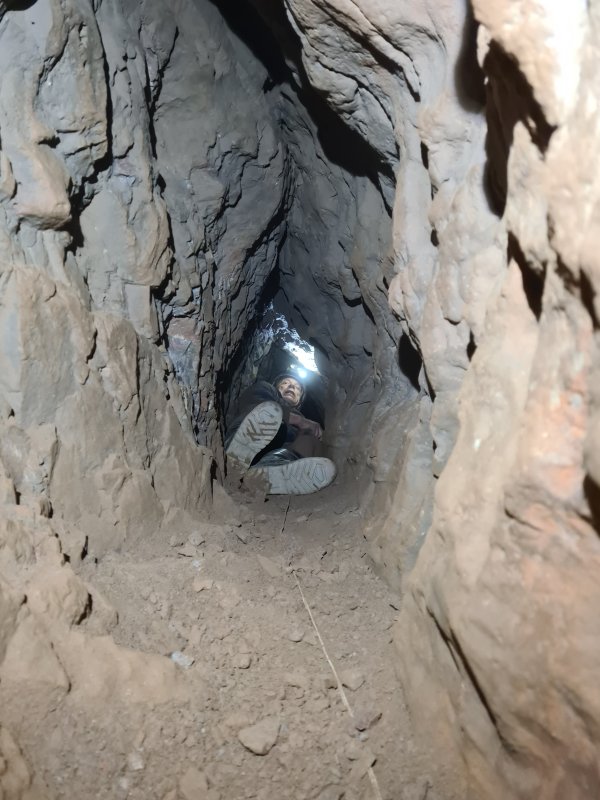 The crawl ends at by far the hardest squeeze in the series. It is an inclined rift leaning at about 30° to the left, gently sloping down onto the head of a 4 metre climb, needing a rotation while up in the air. The hard part is getting back up the climb, and inserting yourself into an ascending rift, throwing bags in front of you without them falling back out of the rift, or getting jammed in the bottom of it. It is not particularly tight, but it makes you wish that the blasting had been continued for another 2 metres.
Modelling by Tim, lighting by Tarquin and Tim
The crawl ends at by far the hardest squeeze in the series. It is an inclined rift leaning at about 30° to the left, gently sloping down onto the head of a 4 metre climb, needing a rotation while up in the air. The hard part is getting back up the climb, and inserting yourself into an ascending rift, throwing bags in front of you without them falling back out of the rift, or getting jammed in the bottom of it. It is not particularly tight, but it makes you wish that the blasting had been continued for another 2 metres.
Modelling by Tim, lighting by Tarquin and Tim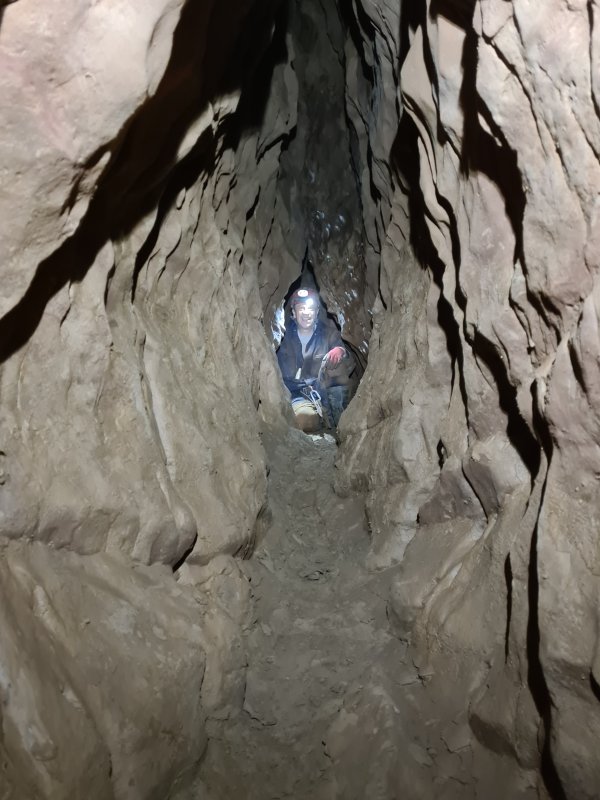 The climb lands in the start of Northern Line, a name that continues to the end of the series. At the bottom of the climb, the passage passes up and down another pair of climbs; this picture is taken from the bottom of the second climb. The climbs are incredibly slippery, with no holds, and returning up the second one, just two metres, may need assistance, but one person will always have to do the climbs unaided.
Modelling by Tim, lighting by Tarquin and Tim
The climb lands in the start of Northern Line, a name that continues to the end of the series. At the bottom of the climb, the passage passes up and down another pair of climbs; this picture is taken from the bottom of the second climb. The climbs are incredibly slippery, with no holds, and returning up the second one, just two metres, may need assistance, but one person will always have to do the climbs unaided.
Modelling by Tim, lighting by Tarquin and Tim Small formations in the tube after the climbs. The scallops clearly show a flow onwards into the passage.
Modelling by Tim, lighting by Tarquin and Tim
Small formations in the tube after the climbs. The scallops clearly show a flow onwards into the passage.
Modelling by Tim, lighting by Tarquin and Tim Helictites.
 Helictites.
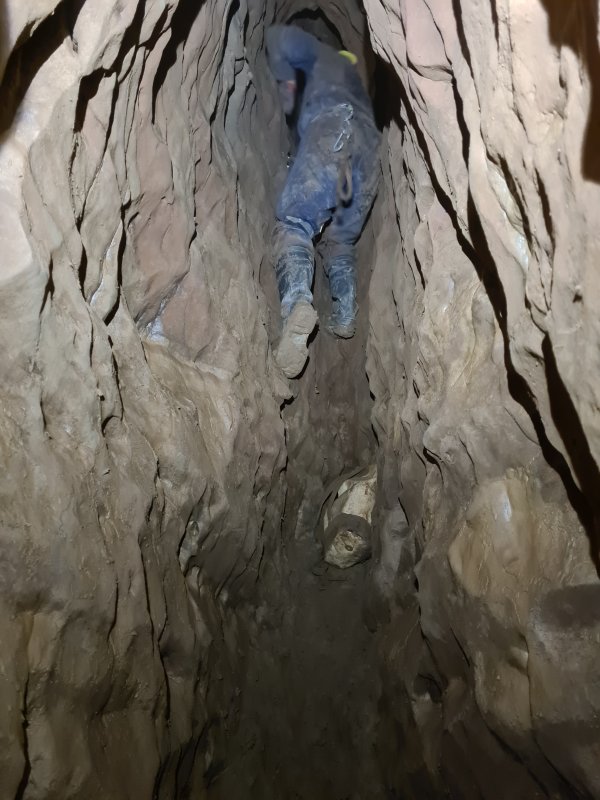 Yet another climb. Once again, this is incredibly slippery, thanks to the damp mud, but at least it does have some holds.
Modelling by Tim, lighting by Tarquin and Tim
Yet another climb. Once again, this is incredibly slippery, thanks to the damp mud, but at least it does have some holds.
Modelling by Tim, lighting by Tarquin and Tim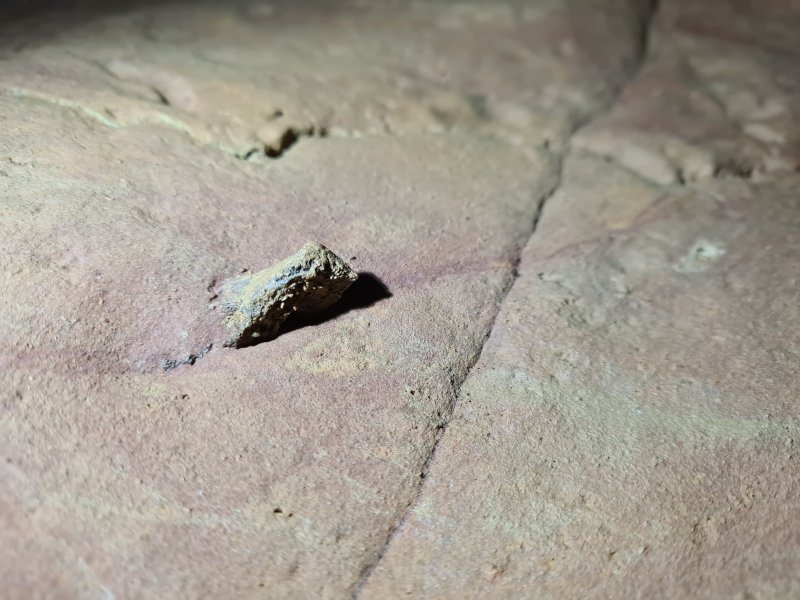 Fossil bone at the top of the climb. While this cannot be identified, it is likely to be from a proto-shark such as a Ctenacanthus, or some other cartilaginous fish. However, none of the bones in this area feature the classic cross section of a dorsal spine.
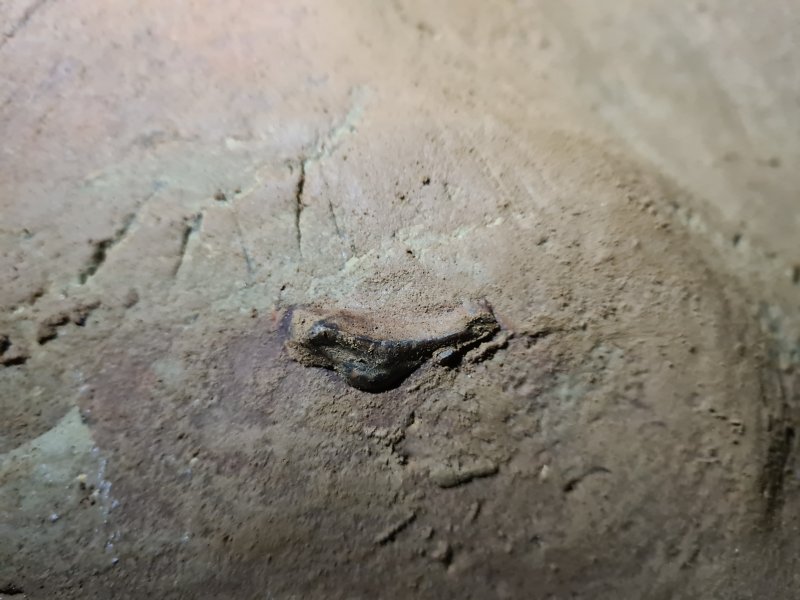 Fossil bone.
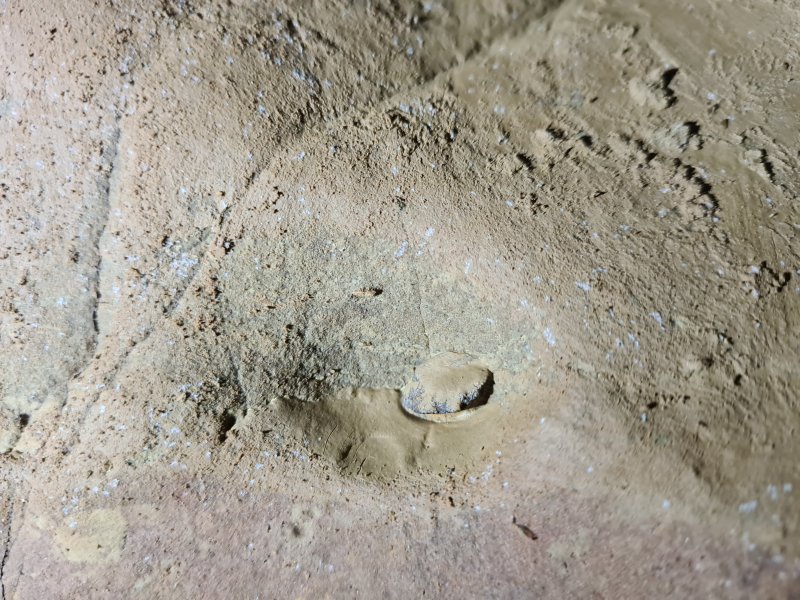 Fossil bone
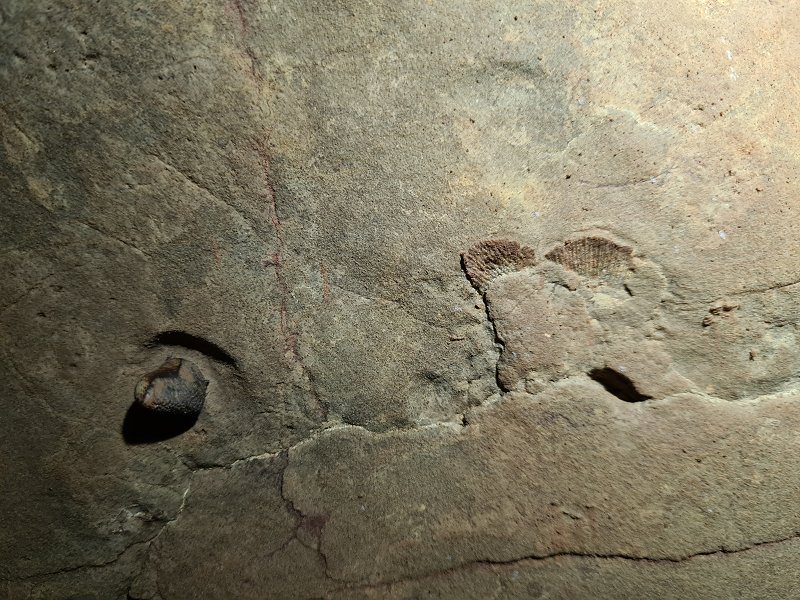 Fossils just after the corner at the top of the climb. The two on the right are shells.
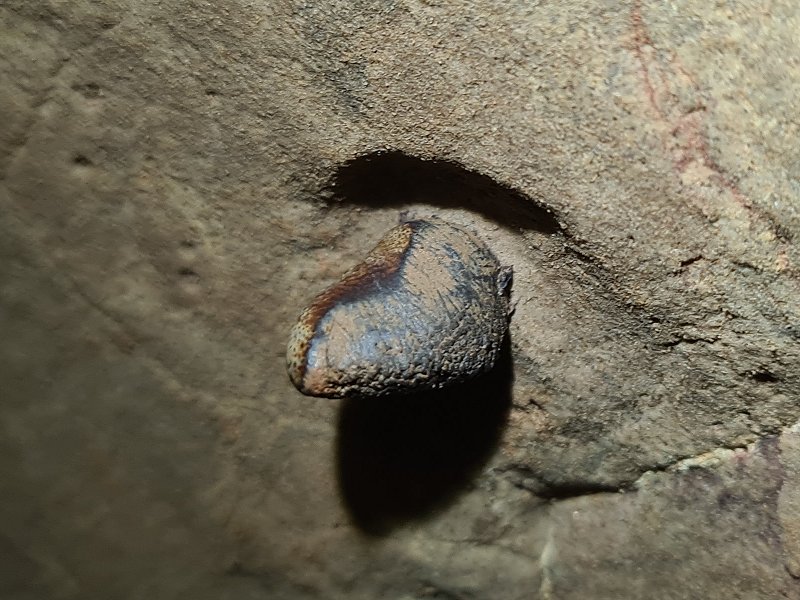 The one on the left, however, is much more special. It appears to be a fossil petalodont tooth, with a dentin side and an enameloid side. It does not appear to be a Ctenacanthus tooth, or a Psammodus tooth (the ones commonly seen elsewhere), and instead matches a Ctenoptychius tooth or a partial Petalorhynchus tooth.
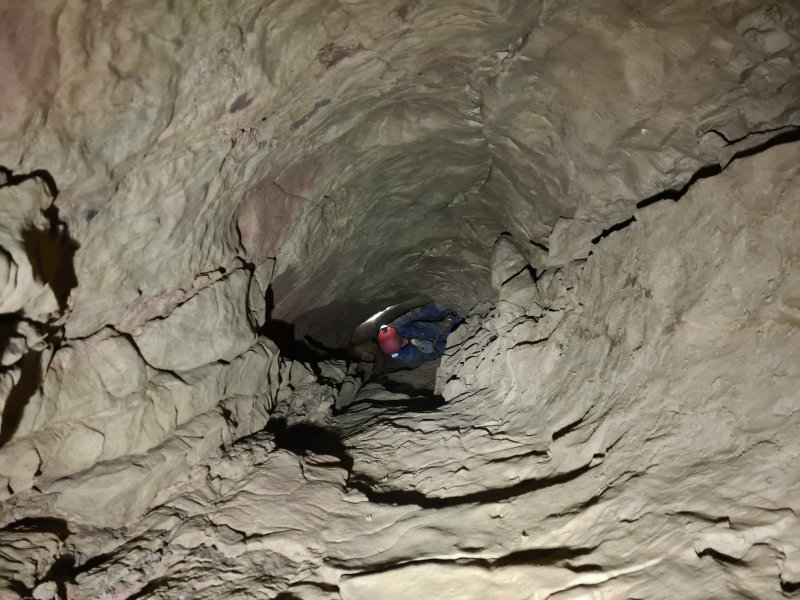 Looking back along the crawling sized tube that follows the greasy climbs. Mark is lying beside the fossils.
Modelling by Mark, lighting by Tarquin and Mark
Looking back along the crawling sized tube that follows the greasy climbs. Mark is lying beside the fossils.
Modelling by Mark, lighting by Tarquin and Mark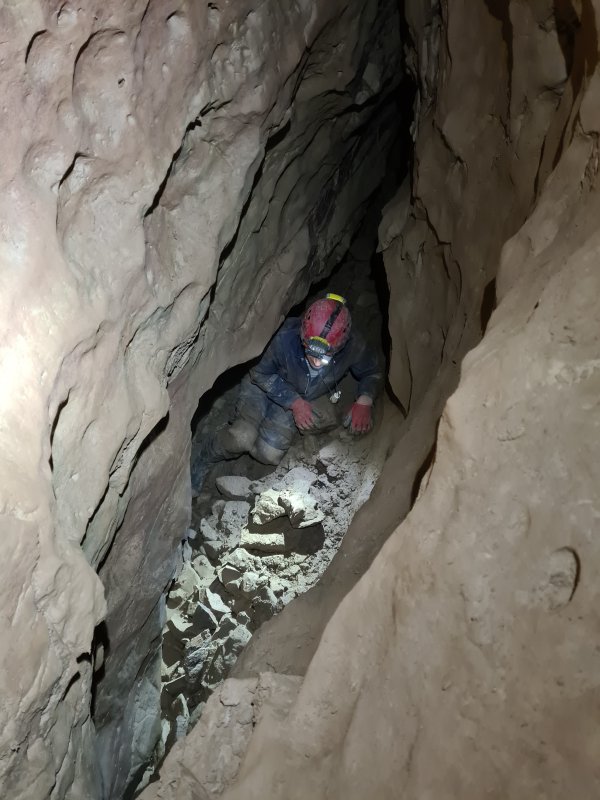 A final climb down reaches a lower bedding. This part of the cave keeps jumping up and down between beddings. The scallops again show a flow onwards into the passage.
Modelling by Tim, lighting by Tarquin and Tim
A final climb down reaches a lower bedding. This part of the cave keeps jumping up and down between beddings. The scallops again show a flow onwards into the passage.
Modelling by Tim, lighting by Tarquin and Tim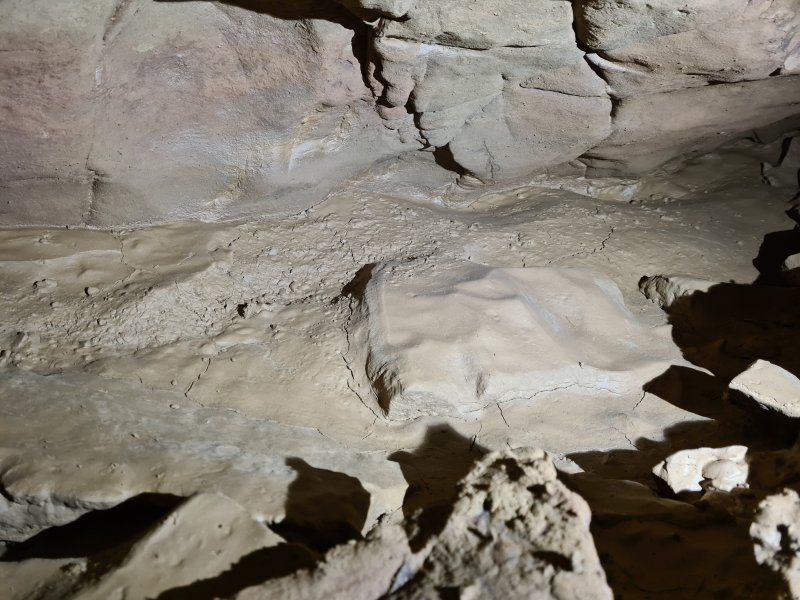 Wet mud formations. This part of the cave saw water not too long ago, but the mud cracks show it is not too recent.
 The passage now takes on its characteristic feel, being a series of phreatic loops sweeping up and down with the steeply dipping beds (around 25°).
Modelling by Tim, lighting by Tarquin and Tim
The passage now takes on its characteristic feel, being a series of phreatic loops sweeping up and down with the steeply dipping beds (around 25°).
Modelling by Tim, lighting by Tarquin and Tim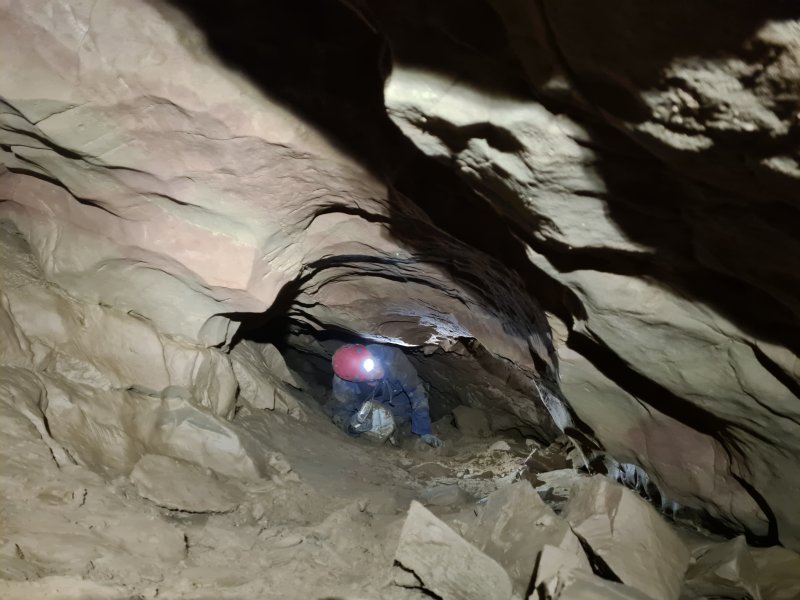 Ascending another riser.
Modelling by Mark, lighting by Tarquin and Mark
Ascending another riser.
Modelling by Mark, lighting by Tarquin and Mark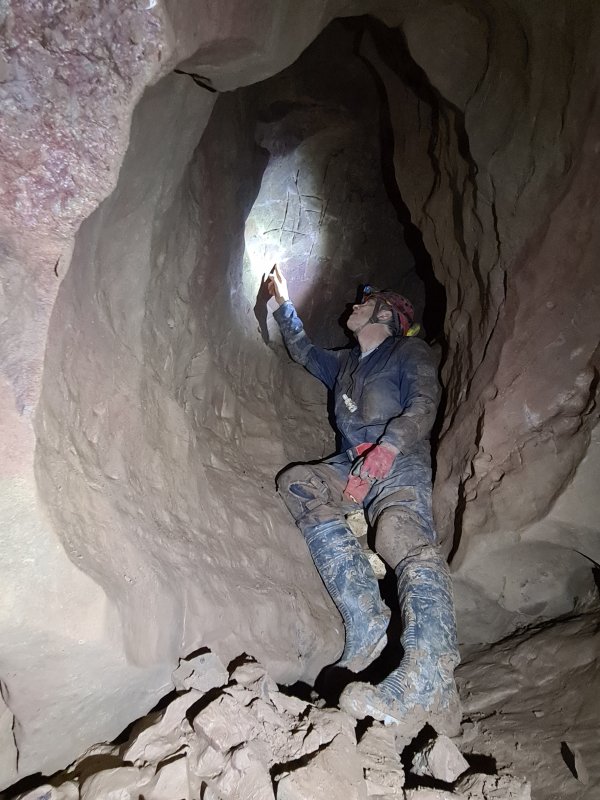 A solutional pocket.
Modelling by Tim, lighting by Tarquin and Tim
A solutional pocket.
Modelling by Tim, lighting by Tarquin and Tim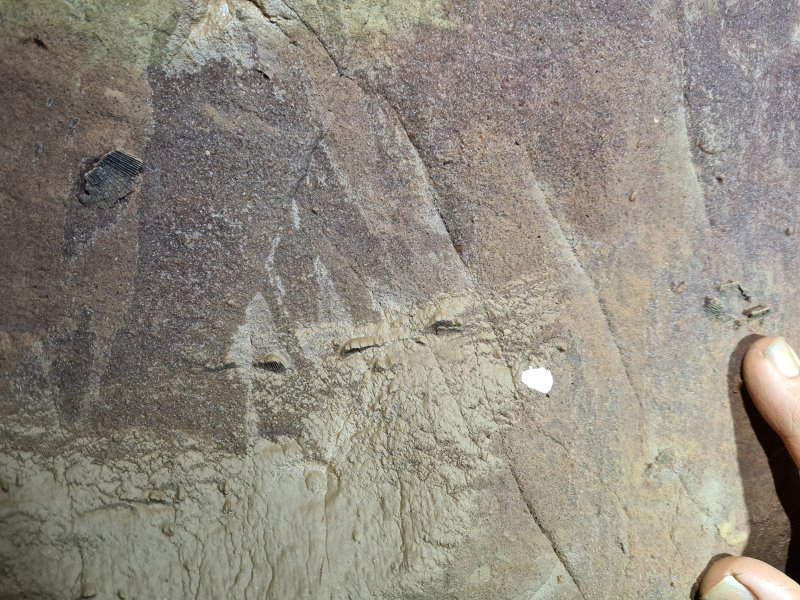 Fossil shells in the pocket.
Modelling by Tim's fingernails, lighting by Tarquin and Tim
Fossil shells in the pocket.
Modelling by Tim's fingernails, lighting by Tarquin and Tim Fossil shells.
 Fossil shells.
 Surveying the next riser.
Modelling by Tim, lighting by Tarquin and Tim
Surveying the next riser.
Modelling by Tim, lighting by Tarquin and Tim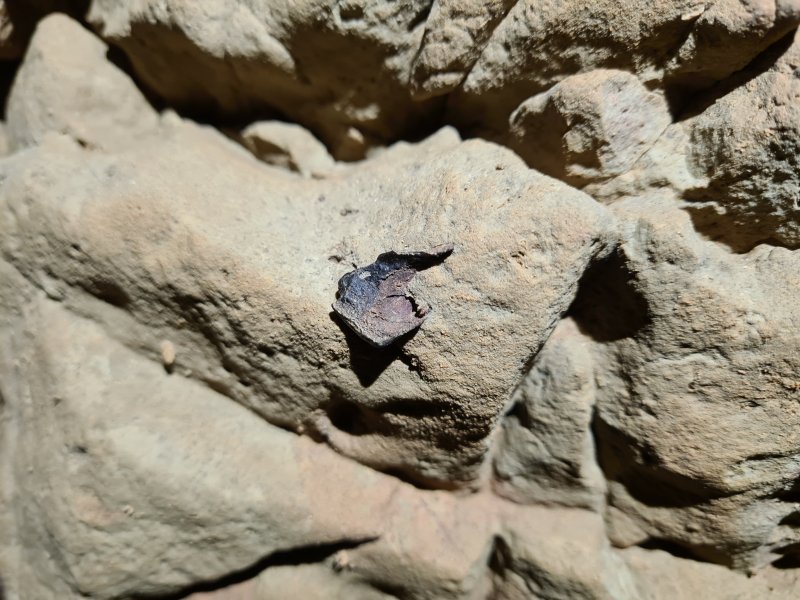 Unknown fossil in the riser.
 Looking back at a small step down.
Modelling by Mark, lighting by Tarquin and Mark
Looking back at a small step down.
Modelling by Mark, lighting by Tarquin and Mark After the step, where there is a ceiling notch.
Modelling by Tim, lighting by Tarquin and Tim
After the step, where there is a ceiling notch.
Modelling by Tim, lighting by Tarquin and Tim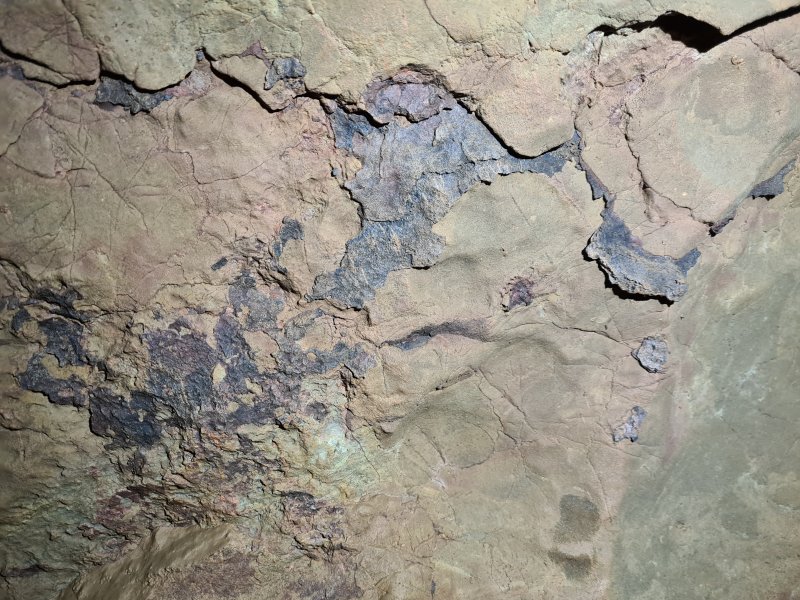 Possible goethite on the wall.
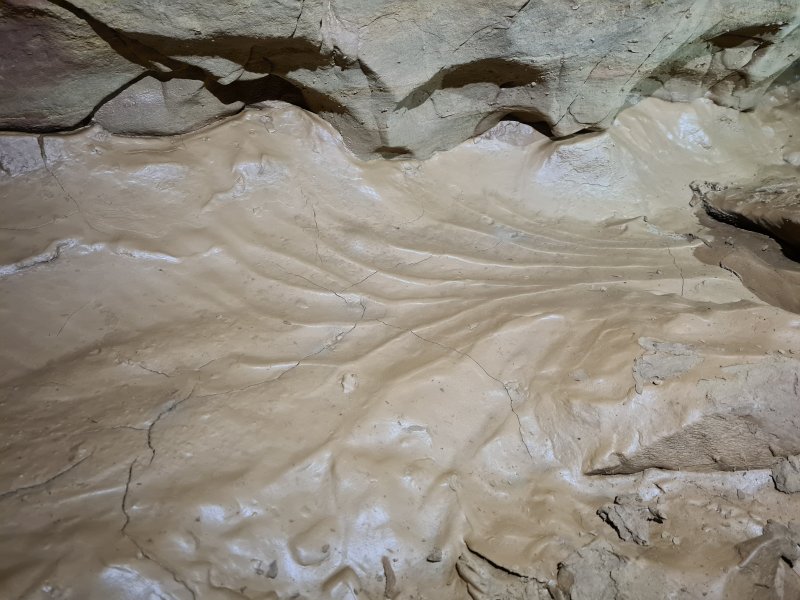 More mud formations.
Lighting by Tarquin and Tim
More mud formations.
Lighting by Tarquin and Tim Another riser, complete with slippery mud.
Modelling by Tim, lighting by Tarquin and Tim
Another riser, complete with slippery mud.
Modelling by Tim, lighting by Tarquin and Tim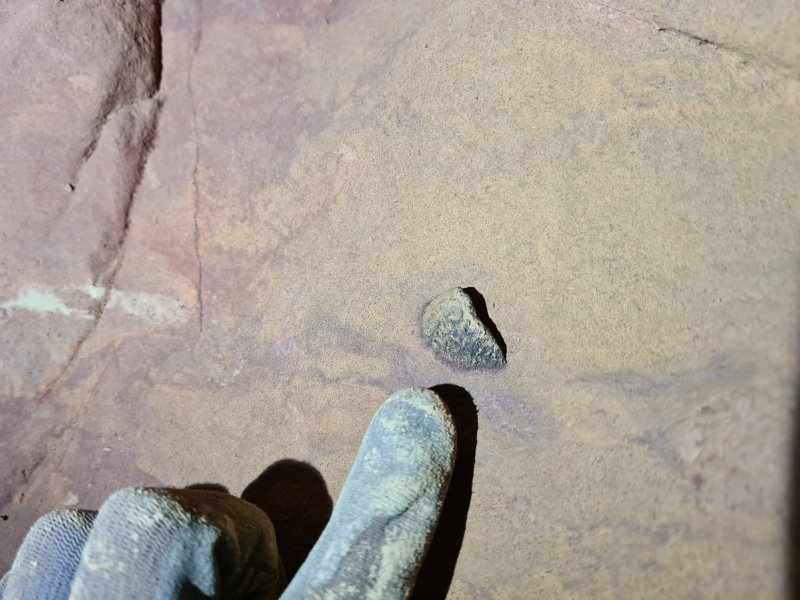 Unidentified fossil bone. Once again, this is likely to be a proto-shark, but it has no identifying features. It could perhaps be a corroded Psammodus tooth plate.
Modelling by Tarquin's glove's stitching
Unidentified fossil bone. Once again, this is likely to be a proto-shark, but it has no identifying features. It could perhaps be a corroded Psammodus tooth plate.
Modelling by Tarquin's glove's stitching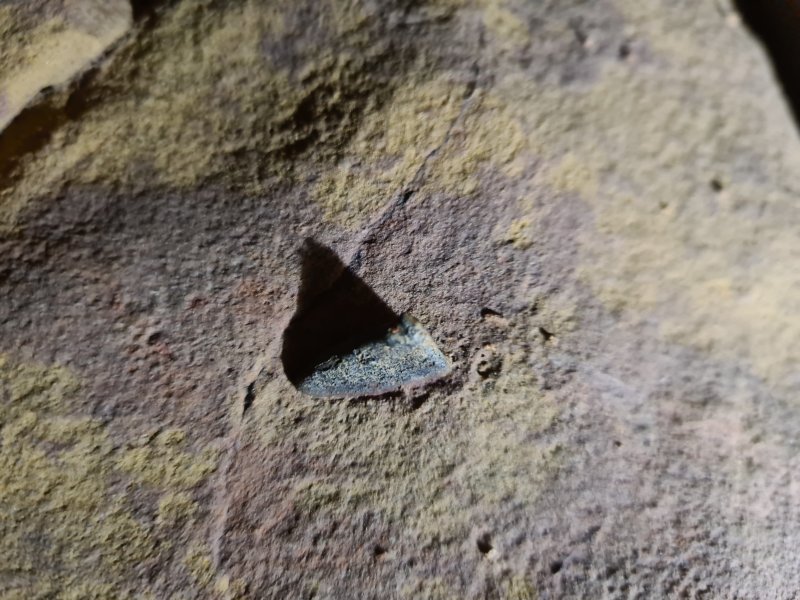 Another fossil bone, which looks very similar to the last one.
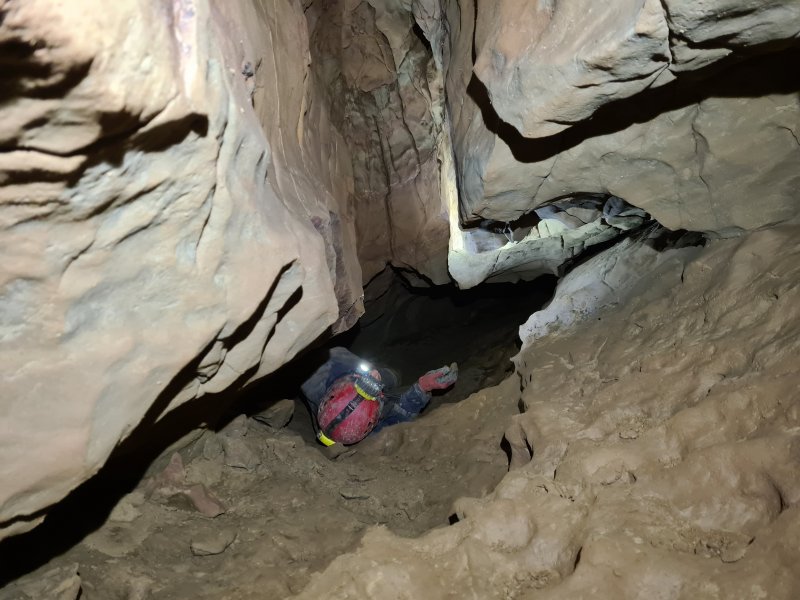 The distinctive notch that briefly develops in the ceiling. The passage often has little avens, but each of them appears to be a solutional pocket, rather than an inlet.
Modelling by Tim, lighting by Tarquin and Tim
The distinctive notch that briefly develops in the ceiling. The passage often has little avens, but each of them appears to be a solutional pocket, rather than an inlet.
Modelling by Tim, lighting by Tarquin and Tim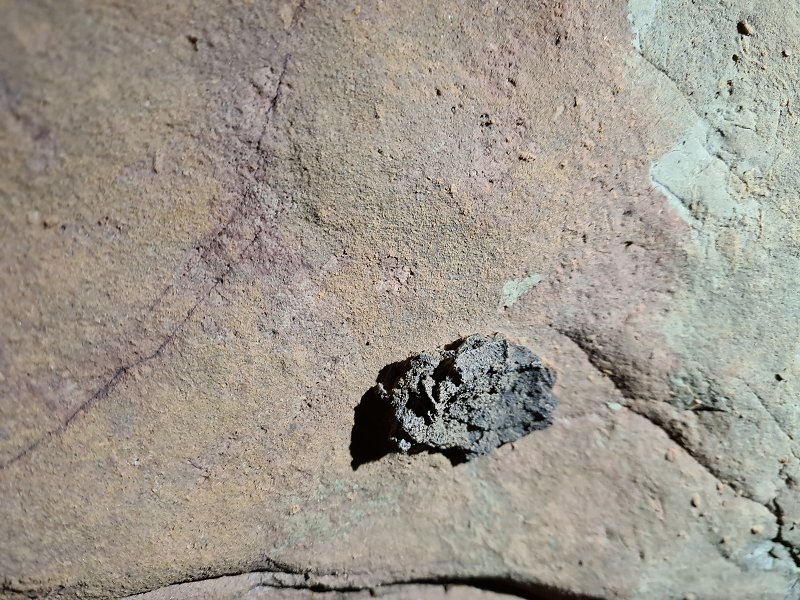 Small crust on the wall, probably more goethite.
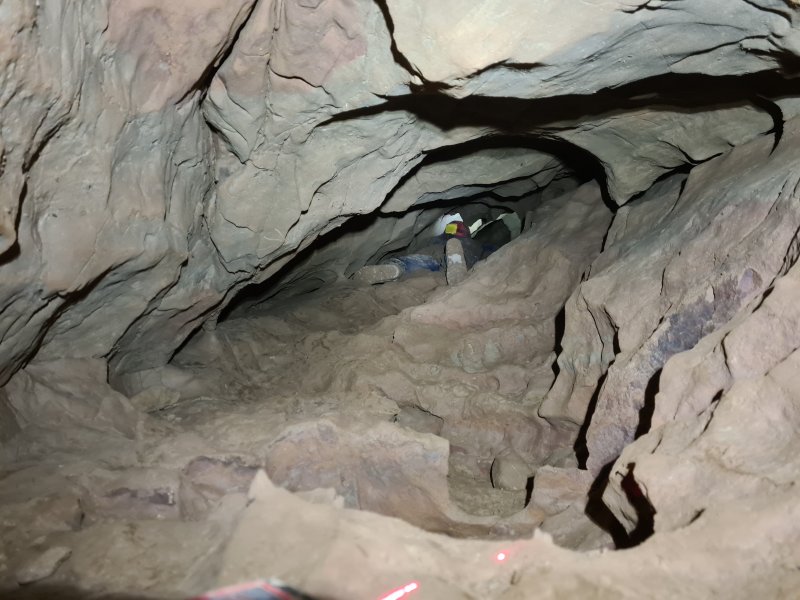 The passage floor becomes uncomfortably knobbly, and the size decreases, as it begins its final rise to the cross rift.
Modelling by a DistoX2 and Tim, lighting by Tarquin, the DistoX2 and Tim
The passage floor becomes uncomfortably knobbly, and the size decreases, as it begins its final rise to the cross rift.
Modelling by a DistoX2 and Tim, lighting by Tarquin, the DistoX2 and Tim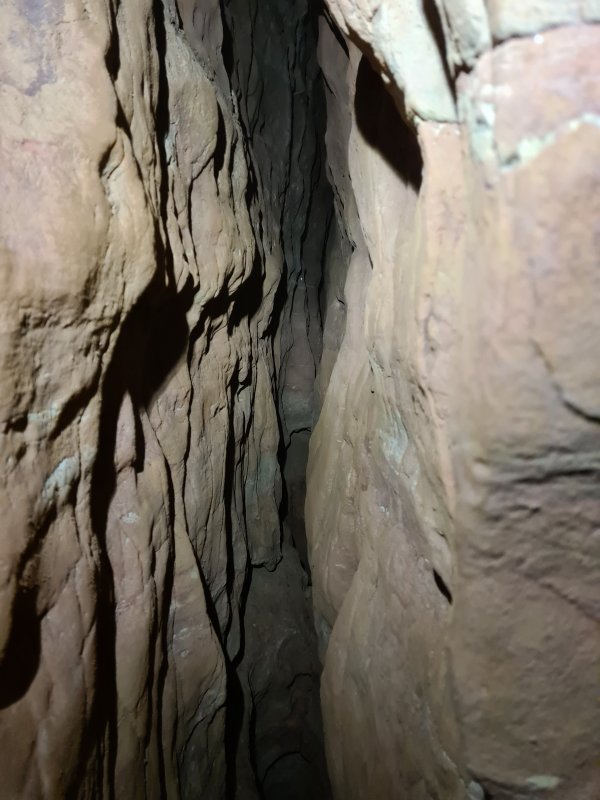 Up to the right, the cross rift is by far the most promising lead, with a noticeable draught. However, it becomes very narrow quite quickly, and soon becomes too narrow for progress. It can be seen to continue at both the higher and lower levels. The rift points back towards the end of Flow Choke Passage, away from the resurgence.
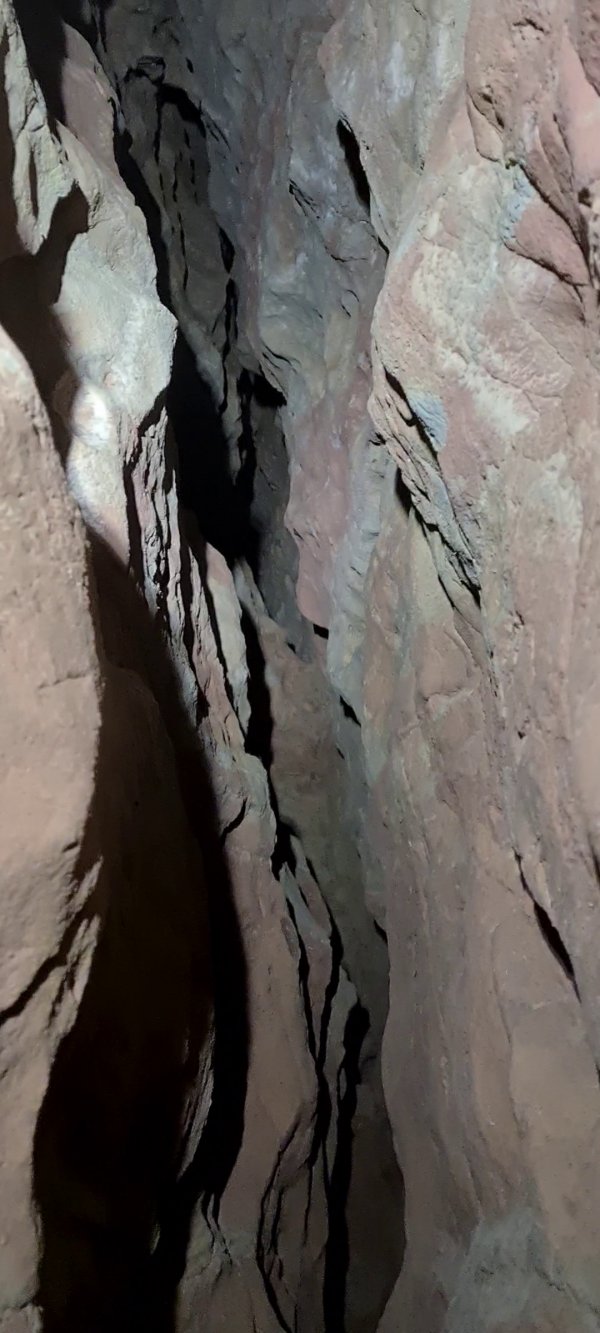 The upper level of the rift, which is too narrow, but continues for a long way.
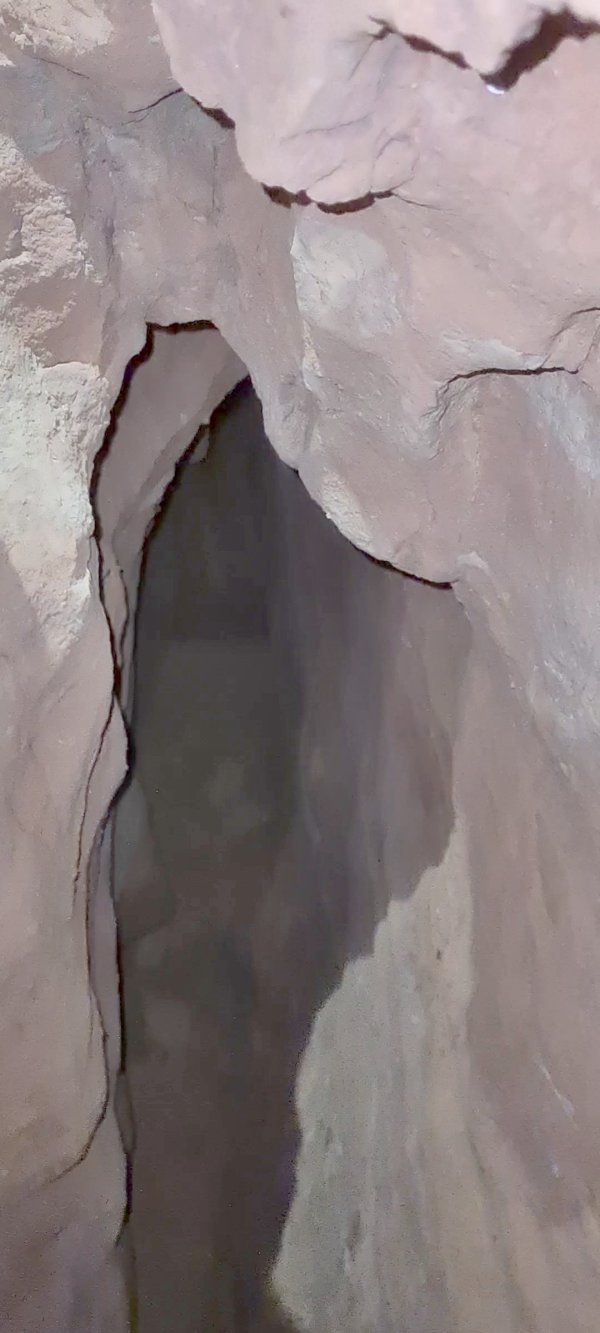 The lower level continues down a hole in the floor, but we did not fancy our chances getting back up if we descended into it, so this enhanced still image from a video is the best I can offer. It would not be navigable except by the tiniest of cavers.
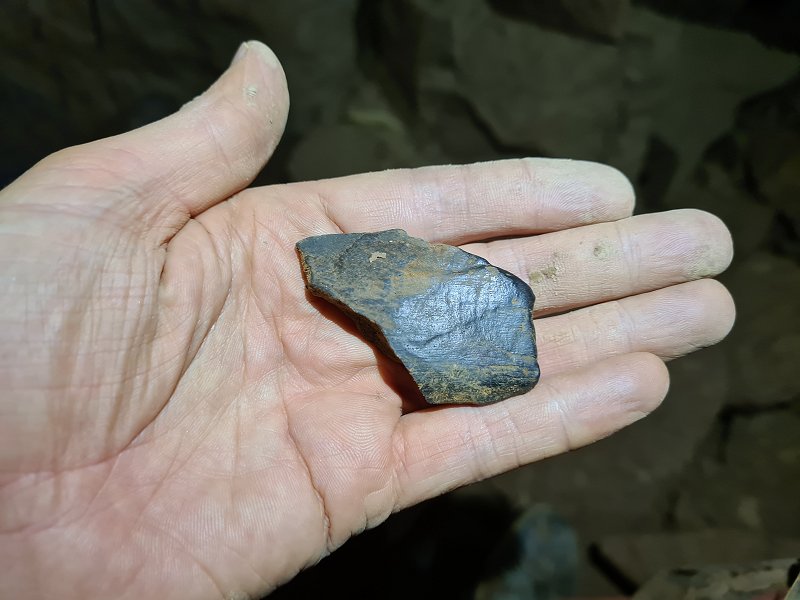 Fossil bone located in the bedding that continues beyond the cross rift. The striations suggest that it was probably a Ctenacanthus dorsal spine, but it has been weathered beyond recognition.
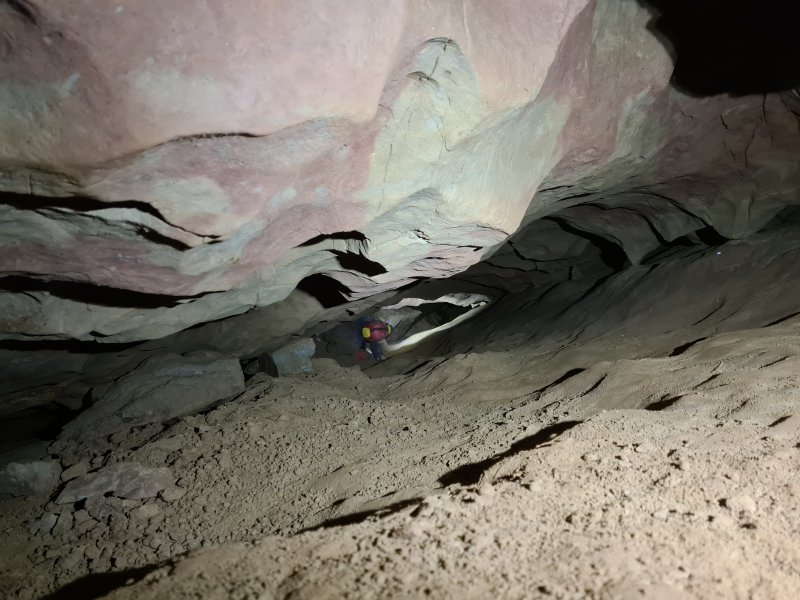 The way on along the original bedding continues lower than before, but soon opens back up to its former size.
Modelling by Tim, lighting by Tarquin and Tim
The way on along the original bedding continues lower than before, but soon opens back up to its former size.
Modelling by Tim, lighting by Tarquin and Tim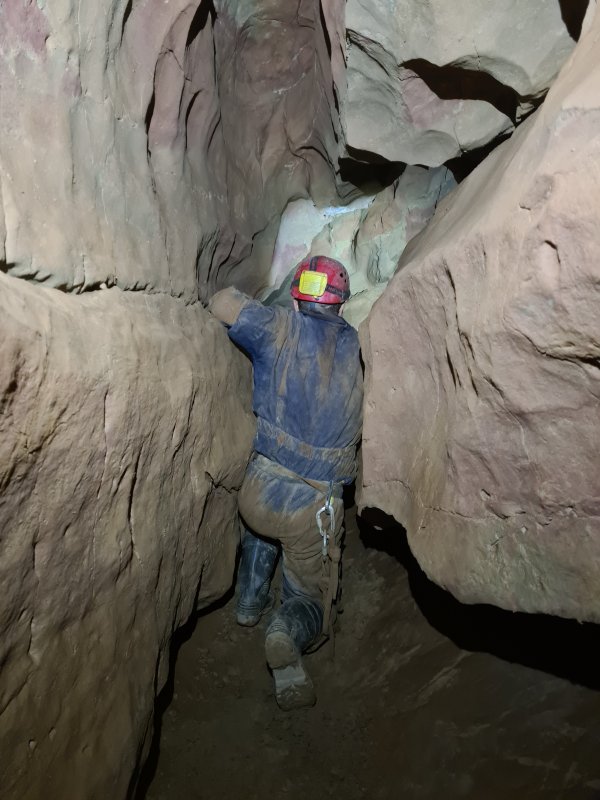 The ceiling then lifts and it turns into a rift instead.
Modelling by Tim, lighting by Tarquin and Tim
The ceiling then lifts and it turns into a rift instead.
Modelling by Tim, lighting by Tarquin and Tim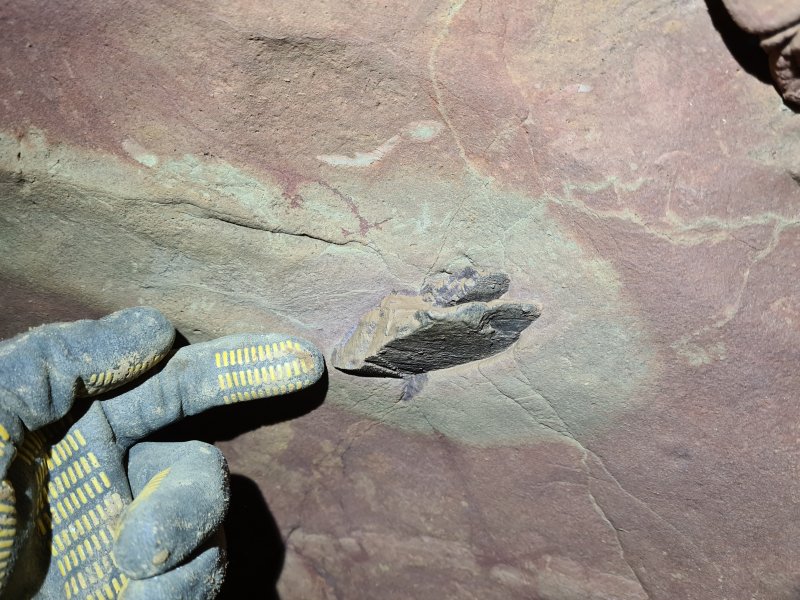 Just before the end of the passage, it turns sharply left, pointing towards the Slaughter Rising. This fossil Ctenacanthus dorsal spine sits on the corner, and is one of the largest known in the cave. This would have been a very big shark. The spine shows the characteristic U shape, which shows it is a dorsal spine that held up a dorsal fin.
Modelling by a Stanley glove on Tarquin's hand
Just before the end of the passage, it turns sharply left, pointing towards the Slaughter Rising. This fossil Ctenacanthus dorsal spine sits on the corner, and is one of the largest known in the cave. This would have been a very big shark. The spine shows the characteristic U shape, which shows it is a dorsal spine that held up a dorsal fin.
Modelling by a Stanley glove on Tarquin's hand Beautifully textured surface of the spine. The texture is formed from miniature granules running laterally, but aligned longitudinally to create longitudinal stripes. Smaller spines have no granules.
 Stub of a dorsal spine, with the U shaped cross section just visible.
Modelling by Tarquin's fingertip
Stub of a dorsal spine, with the U shaped cross section just visible.
Modelling by Tarquin's fingertip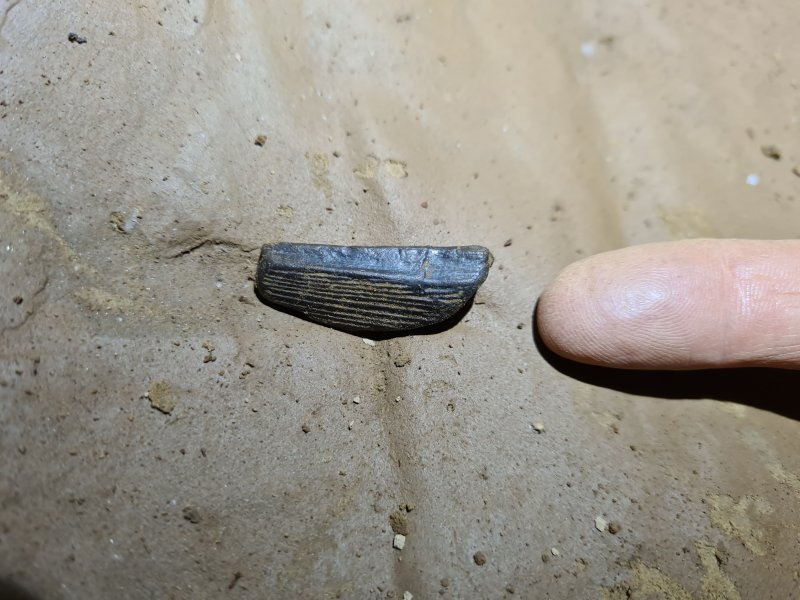 Tip of a dorsal spine found smothered in mud nearby. The striations clearly show that this is also a ctenacanthus dorsal spine, this time a much smaller one. These sharks had two dorsal fins, so presumably this is the smaller fin to the rear.
Modelling by Tarquin's other fingertip
Tip of a dorsal spine found smothered in mud nearby. The striations clearly show that this is also a ctenacanthus dorsal spine, this time a much smaller one. These sharks had two dorsal fins, so presumably this is the smaller fin to the rear.
Modelling by Tarquin's other fingertip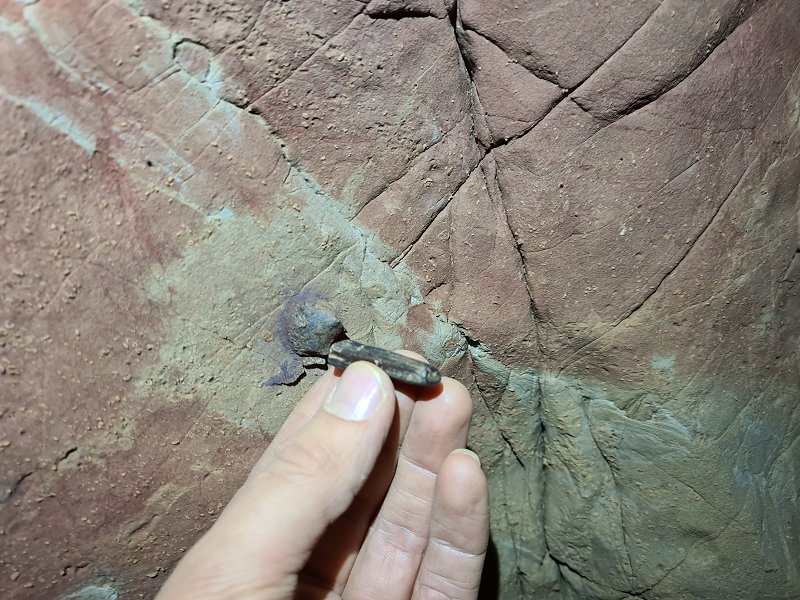 The two fossils may have originally been the same fossil, before they were eroded into separate pieces.
Modelling by a bit more of Tarquin's hand
The two fossils may have originally been the same fossil, before they were eroded into separate pieces.
Modelling by a bit more of Tarquin's hand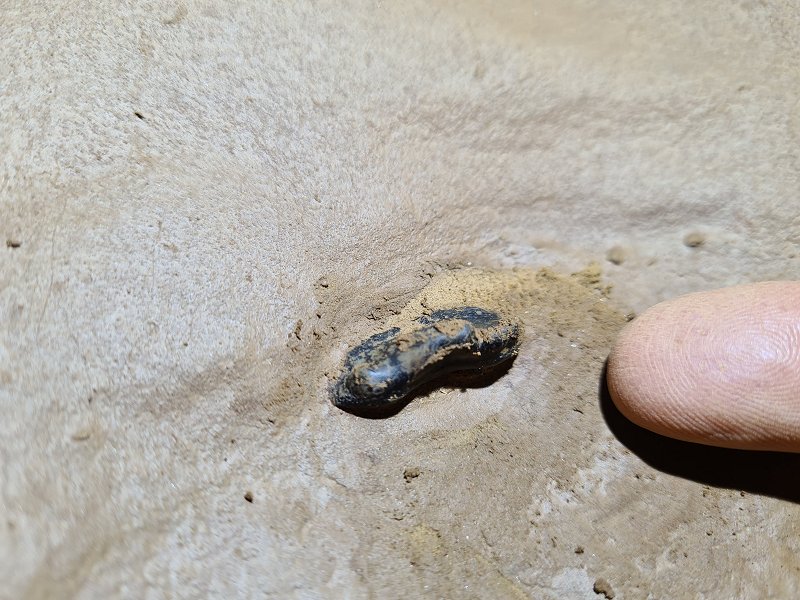 Unidentified fossil bone in the same area.
Modelling by Tarquin's pointy thing
Unidentified fossil bone in the same area.
Modelling by Tarquin's pointy thing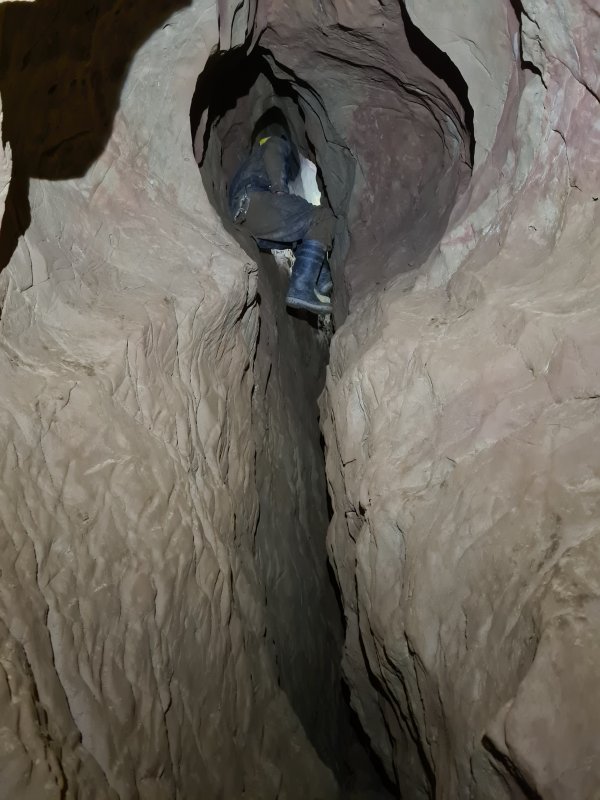 The passage them ramps up a keyhole shaped riser, and immediately becomes too tight.
Modelling by Tim, lighting by Tarquin and Tim
The passage them ramps up a keyhole shaped riser, and immediately becomes too tight.
Modelling by Tim, lighting by Tarquin and Tim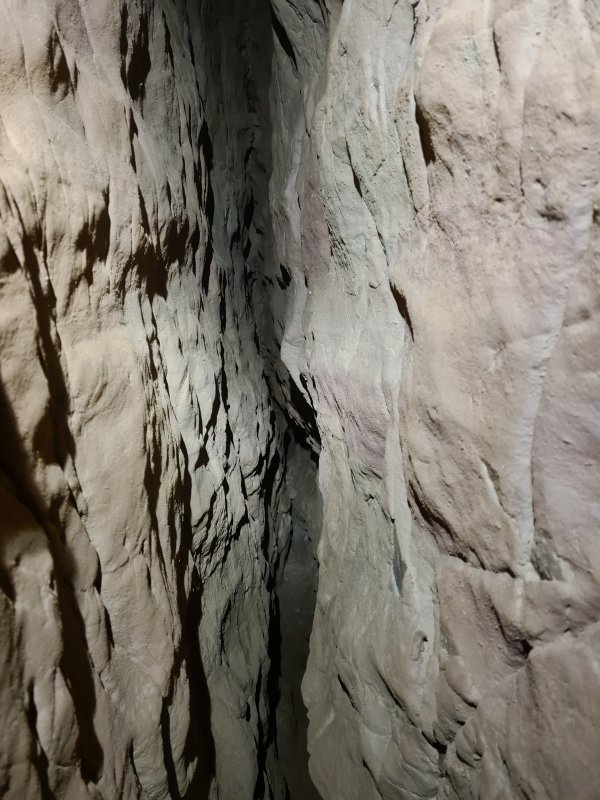 The passage visibly continues in the slot of the keyhole, but is too tight.
 Aven above the top of the keyhole. Also too tight.
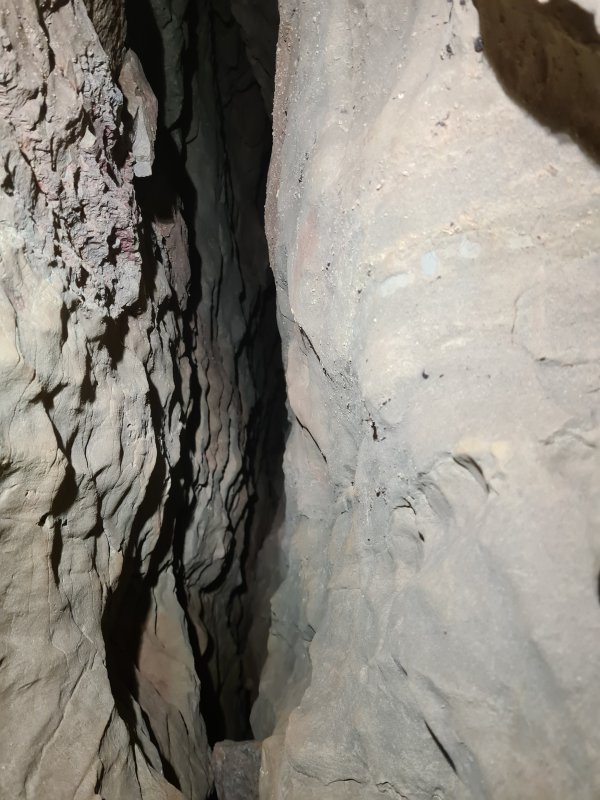 The top part of the keyhole also pinches into a very narrow rift, which continues far too tight.
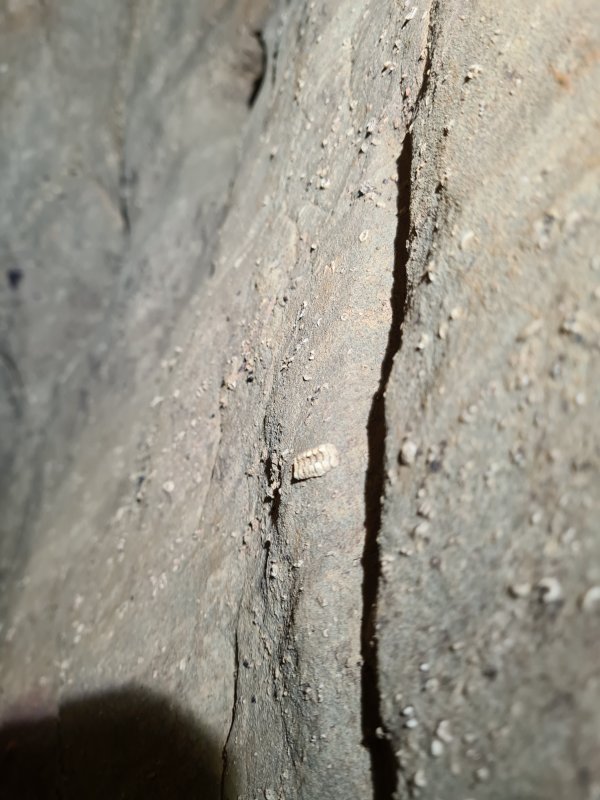 The top of the rift is full of fossils. This part is a set of crinoid fragments.
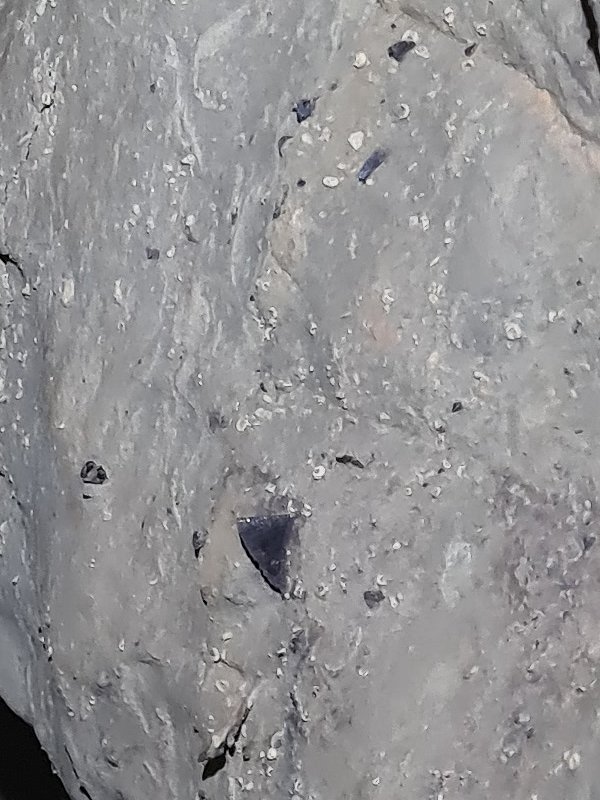 More unidentified fossil bones in the top of the top of the rift. The largest could perhaps be a tooth plate (such as a Psammodus) but appears to be too thin.