Slaughter Stream Cave Pirate Passage trip 19/09/2021
Unless otherwise stated, camera, setups, lighting, edits and gallery effects by Tarquin. Modelling and lighting at various points will be Mark Tringham and Adam Fletcher.
This was a surveying trip aimed at obtaining cross sections and correcting a few little mistakes in the first half of Pirate Passage. The gallery is intended to assist in assessing the speleogenesis (cave development) of this part of the cave, and is therefore somewhat lengthy. The second part of Pirate Passage is covered in a later gallery.
This rather ridiculous passage is some 2.3 km long, with no significant side passages. The first 1.8 km had been surveyed to grade 5c over just 2 one-day trips, a staggering rate of progress. At the time, the last 100 metres of sandy squeeze was left unsurveyed because most of the surveying team could not fit. The remaining passage was then pushed but not surveyed because it got extremely small and muddy, preventing a return with a surveying team.
Over this first trip, we had rechecked the data, and found only a couple of tiny mistakes (left and right dimensions being swapped, and a side passage misplaced). That is pretty phenomenal for such a fast paced survey. What surprised us was the reatively enjoyable nature of the passage, which is often described in disparaging terms.
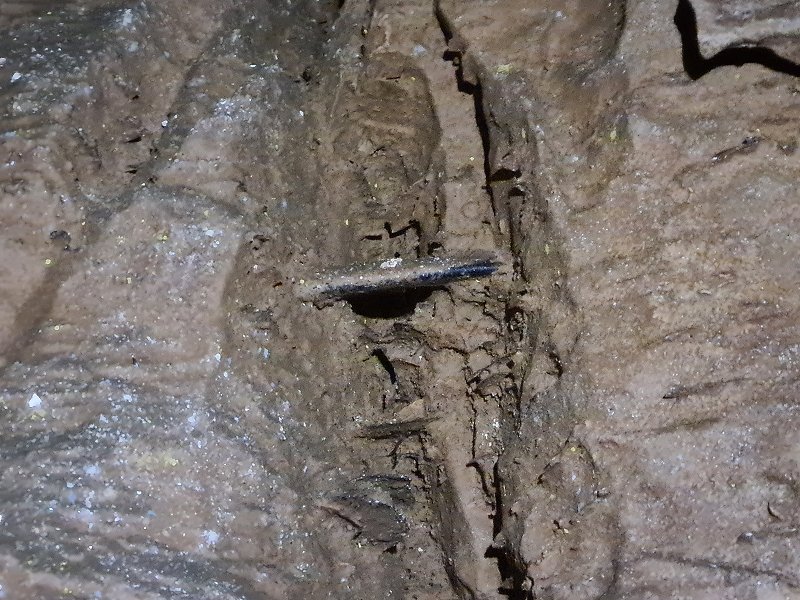
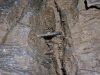 Below the last pitch in the entrance series, this flat piece of rock is wedged up on the wall. We are not sure what it is; it could be a wedged flat cobblestone, but it really looks like a fossil bone.
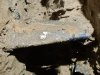 It appears quite similar to one of the Ctenacanthus (proto-shark) dorsal spines, but has no ridges on it, which would have been expected. It also sits in the bed that is absolutely full of fossil shells, not the bed that normally contains the shark fossils. The smudge is a fingerprint, from checking for ridges. It is at least 3 metres up the wall, so taking this photo required a pair of shoulders to stand on.
Physical assistance by Adam
It appears quite similar to one of the Ctenacanthus (proto-shark) dorsal spines, but has no ridges on it, which would have been expected. It also sits in the bed that is absolutely full of fossil shells, not the bed that normally contains the shark fossils. The smudge is a fingerprint, from checking for ridges. It is at least 3 metres up the wall, so taking this photo required a pair of shoulders to stand on.
Physical assistance by Adam Trout at East Stream Junction, the junction of Main Stream Passage 1 and East Stream Passage.
Modelling by Speckles
Trout at East Stream Junction, the junction of Main Stream Passage 1 and East Stream Passage.
Modelling by Speckles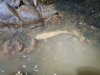 This is a very sizable blanched brown trout; a trout that grew up in a cave, and as a result of not being exposed to sunlight has never developed the characteristic brown colouring. It has chosen to sit in the stream that sometimes carries sewage pollution whenever Welsh Water randomly pollute the streamway, and seemed to be very slow and sluggish. And I cannot blame it. By the time we got back, it had switched to the cleaner stream
Modelling by Speckles, lighting by Tarquin and Adam
This is a very sizable blanched brown trout; a trout that grew up in a cave, and as a result of not being exposed to sunlight has never developed the characteristic brown colouring. It has chosen to sit in the stream that sometimes carries sewage pollution whenever Welsh Water randomly pollute the streamway, and seemed to be very slow and sluggish. And I cannot blame it. By the time we got back, it had switched to the cleaner stream
Modelling by Speckles, lighting by Tarquin and Adam The passage starts with a climb out of Dryslade Passage.
Modelling by Mark and Adam, lighting by Tarquin, Mark and Adam
The passage starts with a climb out of Dryslade Passage.
Modelling by Mark and Adam, lighting by Tarquin, Mark and Adam The start is initially uninspiring, about 50 metres of crawling.
Modelling by Mark, lighting by Tarquin and Mark
The start is initially uninspiring, about 50 metres of crawling.
Modelling by Mark, lighting by Tarquin and Mark Initial crawl.
Modelling by Mark, lighting by Tarquin and Mark
Initial crawl.
Modelling by Mark, lighting by Tarquin and Mark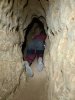 Initial crawl.
Modelling by Mark, lighting by Tarquin and Mark
Initial crawl.
Modelling by Mark, lighting by Tarquin and Mark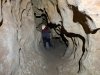 Reaching the base of Star Shaft 1. There is nowhere on the survey called Star Shaft 2. Go figure. Anyway, the passage ahead ends within just a few metres.
Modelling by Mark, lighting by Tarquin and Mark
Reaching the base of Star Shaft 1. There is nowhere on the survey called Star Shaft 2. Go figure. Anyway, the passage ahead ends within just a few metres.
Modelling by Mark, lighting by Tarquin and Mark Climbing up the bottom section of Star Shaft 1. The climb is a total of 20 metres, but it is ascended in a couple of steps.
Modelling by Adam, lighting by Tarquin and Adam
Climbing up the bottom section of Star Shaft 1. The climb is a total of 20 metres, but it is ascended in a couple of steps.
Modelling by Adam, lighting by Tarquin and Adam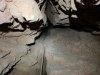 Star Shaft 1 has a rather awkward squeeze about 5 metres up, which takes some time to pass.
Lighting by Tarquin and Adam
Star Shaft 1 has a rather awkward squeeze about 5 metres up, which takes some time to pass.
Lighting by Tarquin and Adam Just above the squeeze is a sandy ledge, where the sand conceals a side passage which can be used to bypass the top portion of the shaft. This was written about as the "easier" route, but it looks really small.
 The top portion of Star Shaft 1 is also pretty tight, requiring a couple of tight thrutches, relying on jammed rocks for footholds.
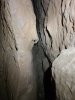 At the top is this cross rift, which is the star of Star Shaft 1.
 Heading back over the way in is a dead end dig called Extenuating Circumstances, the longest side passage in Pirate Passage (and that's not saying much), at just under 200 metres. This is the most promising site in this part of the cave, as it is on a development level above the current streamway, with no obvious destination. The majority of Pirate Passage, which is a very well developed passage, is formed on this level. The dig passes over the streamway, and heads into a large, blank area, mostly as a crawling sized passage, with the sand fill occasionally needing to be dug out to reach the next open section. The nearest development at this level is Chunnel. This part of the cave points towards the part of Dog's Grave between the stream near the camp and Snow Garden, and is likely to be formed on the same fault.
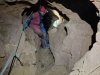 The main passage continues in the same direction as before, and is a much larger passage than before.
Modelling by Mark and Adam, lighting by Tarquin, Mark and Adam
The main passage continues in the same direction as before, and is a much larger passage than before.
Modelling by Mark and Adam, lighting by Tarquin, Mark and Adam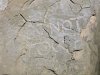 Do Not Touch ... something.
 The traverses begin almost immediately, and this part of the passage is quite demanding. It definitely needs you to be very confident over traverses.
Modelling by Mark and Adam, lighting by Tarquin and Mark
The traverses begin almost immediately, and this part of the passage is quite demanding. It definitely needs you to be very confident over traverses.
Modelling by Mark and Adam, lighting by Tarquin and Mark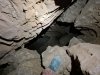 The deep slot in the floor. The bottom of it is likely to be the passage seen part way up Star Shaft 1.
Modelling by Tarquin's clodhopper
The deep slot in the floor. The bottom of it is likely to be the passage seen part way up Star Shaft 1.
Modelling by Tarquin's clodhopper A rift on the right descends to the alternative route from Star Shaft 1.
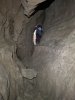 Solid floor, but not for long. That climb up is the start of the next traverses.
Modelling by Mark, lighting by Tarquin and Mark
Solid floor, but not for long. That climb up is the start of the next traverses.
Modelling by Mark, lighting by Tarquin and Mark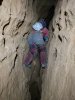 This traverse is shallower, but still takes some effort.
Modelling by Mark, lighting by Tarquin and Mark
This traverse is shallower, but still takes some effort.
Modelling by Mark, lighting by Tarquin and Mark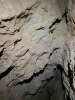 The passage is clearly fault controlled, with a wide band of fault breccia in the ceiling.
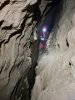 Sloping traverse.
Modelling by Mark, lighting by Tarquin and Mark
Sloping traverse.
Modelling by Mark, lighting by Tarquin and Mark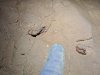 Fossils up on the wall. This passage is absolutely full of fossils, and appropriately for a passage called Pirate Passage, most of them are proto-shark fossils. This particular one is not recognisable.
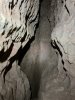 The first little corner. The passage jumps sideways to pick up another branch of the same fault.
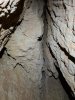 Brecciation in the second branch.
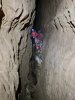 After the fault branches rejoin, the traverse becomes very deep, with almost no holds.
Modelling by Mark and Adam, lighting by Tarquin, Mark and Adam
After the fault branches rejoin, the traverse becomes very deep, with almost no holds.
Modelling by Mark and Adam, lighting by Tarquin, Mark and Adam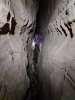 Really deep!
Modelling by Mark and Adam, lighting by Tarquin, Mark and Adam
Really deep!
Modelling by Mark and Adam, lighting by Tarquin, Mark and Adam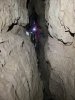 Nearly the end of the traverses. This section ends at a split, where there is a tiny side passage dropping down on the right, which nearly becomes an oxbow before it closes down. It actually threatened to be a side passage for a moment. But of course not!
Modelling by Mark and Adam, lighting by Tarquin, Mark and Adam
Nearly the end of the traverses. This section ends at a split, where there is a tiny side passage dropping down on the right, which nearly becomes an oxbow before it closes down. It actually threatened to be a side passage for a moment. But of course not!
Modelling by Mark and Adam, lighting by Tarquin, Mark and Adam The traverse then ends in a little chamber.
Modelling by Adam, lighting by Tarquin, Mark and Adam
The traverse then ends in a little chamber.
Modelling by Adam, lighting by Tarquin, Mark and Adam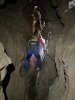 The way on looks like a traverse, but this is just a little step over a narrow section. It is largely walking beyond here.
Modelling by Adam and Mark, lighting by Tarquin, Adam and Mark
The way on looks like a traverse, but this is just a little step over a narrow section. It is largely walking beyond here.
Modelling by Adam and Mark, lighting by Tarquin, Adam and Mark Not exactly easy, but also not a challenge.
Modelling by Adam and Mark, lighting by Tarquin, Adam and Mark
Not exactly easy, but also not a challenge.
Modelling by Adam and Mark, lighting by Tarquin, Adam and Mark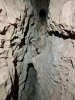 Distinct white band of breccia in the ceiling.
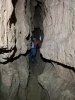 A tiny side passage showed a small error on the old survey, which turned out to be the side passage beind misplaced slightly. It was easily corrected. Another error in the same area turned out to be the left and right measurements being swapped, such that the drawing was backwards. These are tiny errors considering the amount of surveying!
Modelling by Adam, lighting by Tarquin and Adam
A tiny side passage showed a small error on the old survey, which turned out to be the side passage beind misplaced slightly. It was easily corrected. Another error in the same area turned out to be the left and right measurements being swapped, such that the drawing was backwards. These are tiny errors considering the amount of surveying!
Modelling by Adam, lighting by Tarquin and Adam Just before the first major corner.
Modelling by Mark, lighting by Tarquin and Adam
Just before the first major corner.
Modelling by Mark, lighting by Tarquin and Adam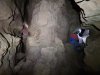 The first major corner, with the way on seen on the left here. The passage gets renamed at this point to Minaret Passage, but it's really the same passage as before.
Modelling by Mark and Adam, lighting by Tarquin, Mark and Adam
The first major corner, with the way on seen on the left here. The passage gets renamed at this point to Minaret Passage, but it's really the same passage as before.
Modelling by Mark and Adam, lighting by Tarquin, Mark and Adam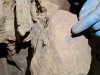 Superb fossil bone passing through the rock. The very obvious lines on it show that this is a dorsal spine from a Ctenacanthus proto-shark (early shark), the bone that sat in front of one of the dorsal fins to hold them upright. The full bone is normally about 25 cm long. The lines are formed along the length of the bone in this type of shark (unlike the Gyranathus where they are diagonal). The bone has a U-shaped cross section, with the groove holding the cartilage of the fin.
Modelling by Mark's digits, lighting by Tarquin and Mark
Superb fossil bone passing through the rock. The very obvious lines on it show that this is a dorsal spine from a Ctenacanthus proto-shark (early shark), the bone that sat in front of one of the dorsal fins to hold them upright. The full bone is normally about 25 cm long. The lines are formed along the length of the bone in this type of shark (unlike the Gyranathus where they are diagonal). The bone has a U-shaped cross section, with the groove holding the cartilage of the fin.
Modelling by Mark's digits, lighting by Tarquin and Mark Tiny fossil nearby, of unknown origin. It is probably another bone from the same shark. Ctenacanthus looked like a modern shark, about 1.6 metres long. Most of the skeleton was cartilage, but the jaw and a few of the shoulder bones were regular bone, like the dorsal spines. In modern sharks, the entire skeleton is cartilage, with only the jaw being bone. Ctenacanthus had normal teeth similar to a mackerel shark, with the central cusp (spike), but with two cusplets (smaller spikes) on either side instead of one. No Ctenacanthus teeth were identified in the passage.
Modelling by Tarquin's possibly-empty glove
Tiny fossil nearby, of unknown origin. It is probably another bone from the same shark. Ctenacanthus looked like a modern shark, about 1.6 metres long. Most of the skeleton was cartilage, but the jaw and a few of the shoulder bones were regular bone, like the dorsal spines. In modern sharks, the entire skeleton is cartilage, with only the jaw being bone. Ctenacanthus had normal teeth similar to a mackerel shark, with the central cusp (spike), but with two cusplets (smaller spikes) on either side instead of one. No Ctenacanthus teeth were identified in the passage.
Modelling by Tarquin's possibly-empty glove Lunch at the corner.
Modelling by Adam and portions of Mark, lighting by Tarquin, Adam and Mark
Lunch at the corner.
Modelling by Adam and portions of Mark, lighting by Tarquin, Adam and Mark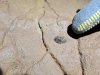 Possible Psammodus tooth plate in the ceiling of Minaret Passage. This has some fine dimples in it. Psammodus was another proto-shark that instead of having standard shark teeth had flat plates with dimples in them, for crushing shellfish.
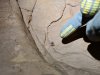 Unknown fossil nearby.
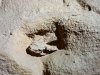 Fossil Ctenacanthus dorsal spine, with its distinctive U-shaped cross section, in Minaret Passage. This sits opposite a side passage, which at significantly less than 20 metres long, is the second longest side passage in Pirate Passage (!).
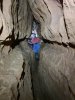 Minaret Passage
Modelling by Adam and Mark, lighting by Tarquin, Adam and Mark
Minaret Passage
Modelling by Adam and Mark, lighting by Tarquin, Adam and Mark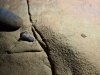 Beautifully preserved Ctenacanthus dorsal spine, with deep grooves, at the end of Minaret Passage. This is very short, so it is likely to have been a young shark. The posterior (rear) dorsal fin is smaller than the anterior (front) fin, but normally about half the length. This bone is extremely small, even for a posterior fin.
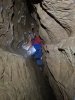 At the end of Minaret Passage, it turns left, and gets renamed to The Road To Mecca (misspelled as Meca on the old survey). Again, this is the same passage. The start is a very brief traverse.
Modelling by Adam, lighting by Tarquin and Mark
At the end of Minaret Passage, it turns left, and gets renamed to The Road To Mecca (misspelled as Meca on the old survey). Again, this is the same passage. The start is a very brief traverse.
Modelling by Adam, lighting by Tarquin and Mark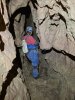 Approaching an aven in The Road To Mecca
Modelling by Adam and Mark, lighting by Tarquin, Adam and Mark
Approaching an aven in The Road To Mecca
Modelling by Adam and Mark, lighting by Tarquin, Adam and Mark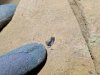 Unknown fossil.
Modelling by Tarquin's left fingers
Unknown fossil.
Modelling by Tarquin's left fingers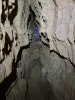 Walking passage.
Modelling by Mark and hints of Adam, lighting by Tarquin, Mark and Adam
Walking passage.
Modelling by Mark and hints of Adam, lighting by Tarquin, Mark and Adam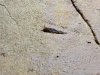 Another unknown fossil. It could be the edge of a spine.
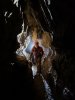 The Road To Mecca.
Modelling by Adam and Mark, lighting by Tarquin, Adam and Mark
The Road To Mecca.
Modelling by Adam and Mark, lighting by Tarquin, Adam and Mark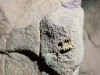 A portion of crinoid (sea lily), a relative of the starfish which is still around. They look like little palm trees, with this being part of the stalk, but can actually detach from a surface and crawl around the sea floor. They were in beds that had wery few other fossils.
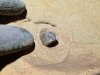 Another probable Psammodus tooth plate, with obvious dimples.
Modelling by Tarquin
Another probable Psammodus tooth plate, with obvious dimples.
Modelling by Tarquin Fantastic Psammodus tooth plate with the dimples being very obvious.
 Tooth plate in situ.
Modelling by Mark and partial Adam, lighting by Tarquin, Mark and Adam
Tooth plate in situ.
Modelling by Mark and partial Adam, lighting by Tarquin, Mark and Adam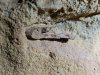 Another very obvious ctenacanthus dorsal spine.
 The passage lowers and becomes a comfortable sandy crawl.
Modelling by Adam, lighting by Tarquin and Adam
The passage lowers and becomes a comfortable sandy crawl.
Modelling by Adam, lighting by Tarquin and Adam Untouched sand ripples in an alcove.
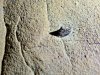 Unknown fossil bone near the sand ripples.
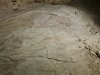 Sandbank. This passage has likely not seen water for at least 12000 years, so it is lovely to be able to see untouched sandbanks like this.
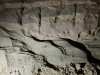 Sandbanks.
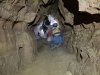 The last part of the sand crawl.
Modelling by Adam, lighting by Tarquin and Adam
The last part of the sand crawl.
Modelling by Adam, lighting by Tarquin and Adam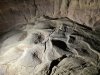 The ripples show flow direction. In a few places this is messed up by eddies, but the main directional flow was towards the Main Stream. In the last stages, this passage drained in the opposite direction, as the water found a new route.
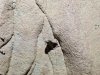 Another unknown fossil.
 Cenecanthus dorsal spine where the sand crawl ends.
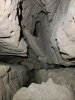 The passage now changes completely, where a seasonal streamway comes in from the side, and sinks into the floor. The sink is too narrow, and the water reappears in Echo Passage about 75 metres away.
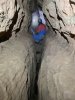 The only way on is upstream. Except this was completely dry, so it's more like up-bed. The traverses have returned.
Modelling by Adam, lighting by Tarquin and Adam
The only way on is upstream. Except this was completely dry, so it's more like up-bed. The traverses have returned.
Modelling by Adam, lighting by Tarquin and Adam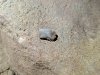 Smooth fossil that was in the wall, but dislodged as soon as it was touched. This has now lost its manganese coating, and it appears to be grey inside. The standard shark fossils are normally brown or black inside.
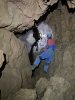 This part of the passage is called Black Rubble Rift.
Modelling by Adam, lighting by Tarquin and Adam
This part of the passage is called Black Rubble Rift.
Modelling by Adam, lighting by Tarquin and Adam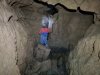 This is the biggest part of the passage that we saw. Apparently there is a far taller section in the later half, but we did not get that far.
Modelling by Adam, lighting by Tarquin and Adam
This is the biggest part of the passage that we saw. Apparently there is a far taller section in the later half, but we did not get that far.
Modelling by Adam, lighting by Tarquin and Adam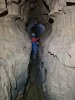 Narrower section beyond.
Modelling by Adam, lighting by Tarquin and Adam
Narrower section beyond.
Modelling by Adam, lighting by Tarquin and Adam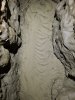 Sand ripples in the floor. These get erased when someone passes, then recreated when the stream flows.
 Pebble floor, the more normal substrate.
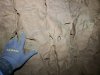 Cluster of assorted bone fossils.
Modelling by the hand of Tarquin
Cluster of assorted bone fossils.
Modelling by the hand of Tarquin Fossil bone fragment.
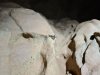 Fossil bone fragment.
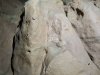 Fossil bone fragments.
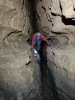 Just before the next left bend.
Modelling by Adam, lighting by Tarquin and Adam
Just before the next left bend.
Modelling by Adam, lighting by Tarquin and Adam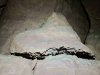 Fracture along stylolites. This is a jagged line - actually a two dimensional jagged plane - where the rock pressure has caused the main rock to dissolve, leaving behind only the impurities (clay).
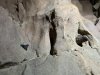 Ctenacanthus dorsal spine (right), and an unnown fossil on the left bend. The fossil on the left looks a bit like a shark tooth, but is not really spiky enough for a Ctenacanthus, so it it is probably something else that has been eroded into that shape.
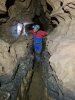 After the left corner.
Modelling by Adam, lighting by Tarquin and Adam
After the left corner.
Modelling by Adam, lighting by Tarquin and Adam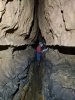 Before the right corner.
Modelling by Adam, lighting by Tarquin and Adam
Before the right corner.
Modelling by Adam, lighting by Tarquin and Adam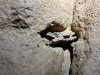 Crushed Ctenacanthus dorsal spine at the right corner.
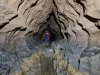 After the right corner.
Modelling by Adam, lighting by Tarquin and Adam
After the right corner.
Modelling by Adam, lighting by Tarquin and Adam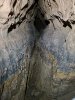 Approaching the seasonal duck.
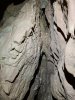 Tiny line of breccia in the ceiling.
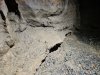 False floor, some kind of sediment crust on top of pebbles.
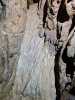 Mud formations created by repeated flooding and draining.
 Just before the seasonal duck. The floor here heads downhill quite substantially.
Modelling by Adam, lighting by Tarquin and Adam
Just before the seasonal duck. The floor here heads downhill quite substantially.
Modelling by Adam, lighting by Tarquin and Adam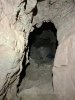 Dig on the side just before the seasonal duck. This looks like someone was trying to dig a bypass to the duck, but there is no passage for it to connect to.
 The seasonal duck. It was completely dry. However, with rain before the next trip, this had turned into a stream, which made it a damp crawl. It was not a duck, since the floor slopes down enough for the water not to rise significantly in moderate flow. However, in winter, it can become a duck, if the flow is strong enough to cause it to pond up more.
Modelling by Adam, lighting by Tarquin and Adam
The seasonal duck. It was completely dry. However, with rain before the next trip, this had turned into a stream, which made it a damp crawl. It was not a duck, since the floor slopes down enough for the water not to rise significantly in moderate flow. However, in winter, it can become a duck, if the flow is strong enough to cause it to pond up more.
Modelling by Adam, lighting by Tarquin and Adam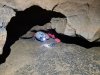 The upstream side of the seasonal duck.
Modelling by Adam, lighting by Tarquin and Adam
The upstream side of the seasonal duck.
Modelling by Adam, lighting by Tarquin and Adam Worm and wormcast from the colony at the seasonal duck.
Modelling by Mudmuncher
Worm and wormcast from the colony at the seasonal duck.
Modelling by Mudmuncher Dried flood scum at the seasonal duck.
 Upstream of the duck, the passage becomes stooping sized again. We took a look a short distance along the passage then had to return. Another trip was needed for the section beyond here.
 Below the last pitch in the entrance series, this flat piece of rock is wedged up on the wall. We are not sure what it is; it could be a wedged flat cobblestone, but it really looks like a fossil bone.
 It appears quite similar to one of the Ctenacanthus (proto-shark) dorsal spines, but has no ridges on it, which would have been expected. It also sits in the bed that is absolutely full of fossil shells, not the bed that normally contains the shark fossils. The smudge is a fingerprint, from checking for ridges. It is at least 3 metres up the wall, so taking this photo required a pair of shoulders to stand on.
Physical assistance by Adam
It appears quite similar to one of the Ctenacanthus (proto-shark) dorsal spines, but has no ridges on it, which would have been expected. It also sits in the bed that is absolutely full of fossil shells, not the bed that normally contains the shark fossils. The smudge is a fingerprint, from checking for ridges. It is at least 3 metres up the wall, so taking this photo required a pair of shoulders to stand on.
Physical assistance by Adam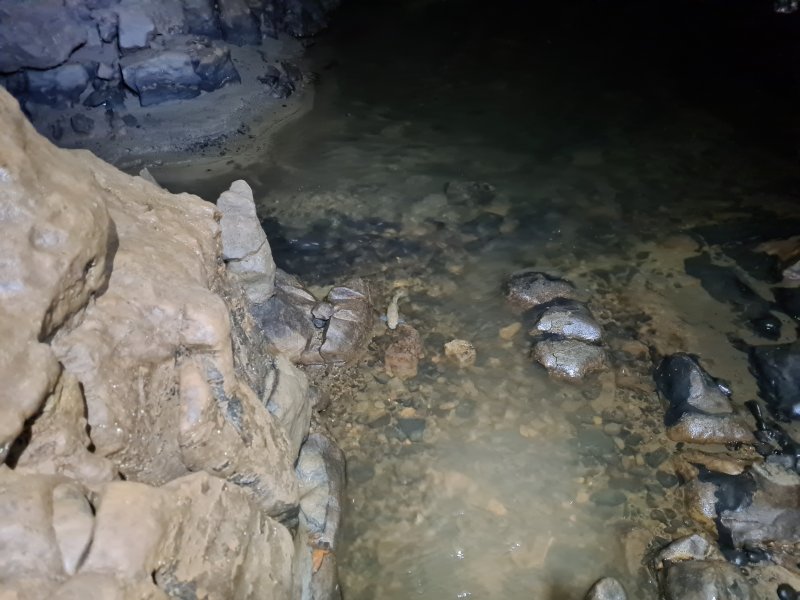 Trout at East Stream Junction, the junction of Main Stream Passage 1 and East Stream Passage.
Modelling by Speckles
Trout at East Stream Junction, the junction of Main Stream Passage 1 and East Stream Passage.
Modelling by Speckles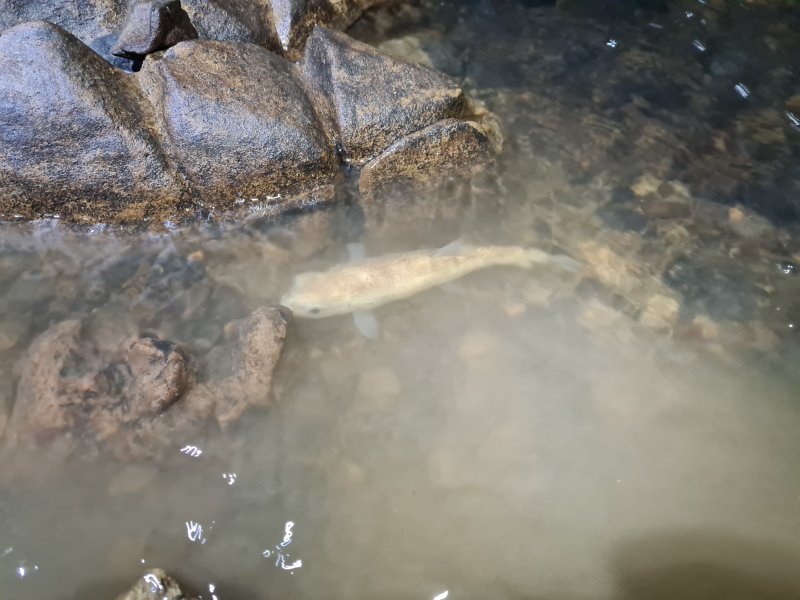 This is a very sizable blanched brown trout; a trout that grew up in a cave, and as a result of not being exposed to sunlight has never developed the characteristic brown colouring. It has chosen to sit in the stream that sometimes carries sewage pollution whenever Welsh Water randomly pollute the streamway, and seemed to be very slow and sluggish. And I cannot blame it. By the time we got back, it had switched to the cleaner stream
Modelling by Speckles, lighting by Tarquin and Adam
This is a very sizable blanched brown trout; a trout that grew up in a cave, and as a result of not being exposed to sunlight has never developed the characteristic brown colouring. It has chosen to sit in the stream that sometimes carries sewage pollution whenever Welsh Water randomly pollute the streamway, and seemed to be very slow and sluggish. And I cannot blame it. By the time we got back, it had switched to the cleaner stream
Modelling by Speckles, lighting by Tarquin and Adam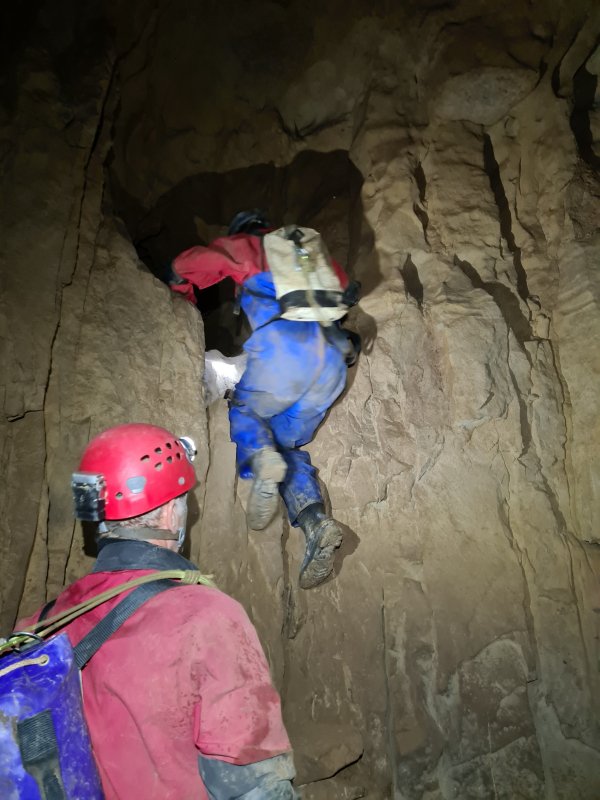 The passage starts with a climb out of Dryslade Passage.
Modelling by Mark and Adam, lighting by Tarquin, Mark and Adam
The passage starts with a climb out of Dryslade Passage.
Modelling by Mark and Adam, lighting by Tarquin, Mark and Adam The start is initially uninspiring, about 50 metres of crawling.
Modelling by Mark, lighting by Tarquin and Mark
The start is initially uninspiring, about 50 metres of crawling.
Modelling by Mark, lighting by Tarquin and Mark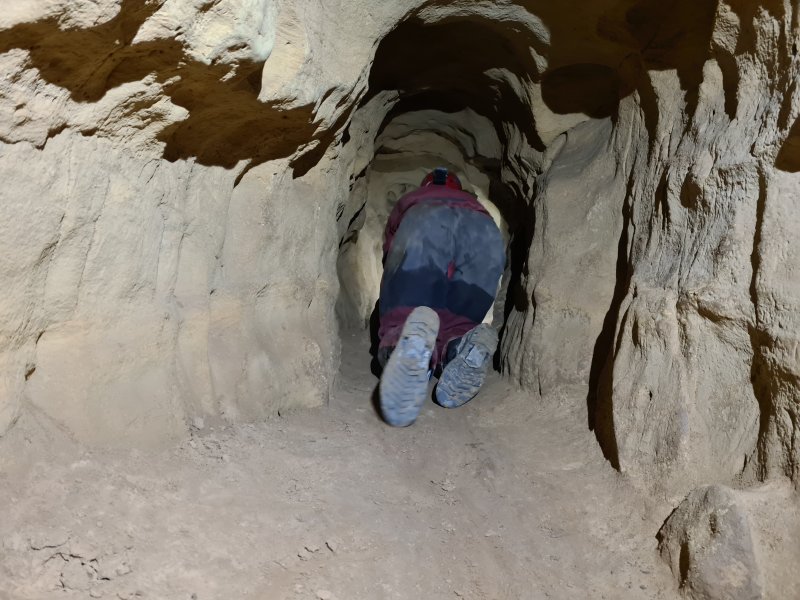 Initial crawl.
Modelling by Mark, lighting by Tarquin and Mark
Initial crawl.
Modelling by Mark, lighting by Tarquin and Mark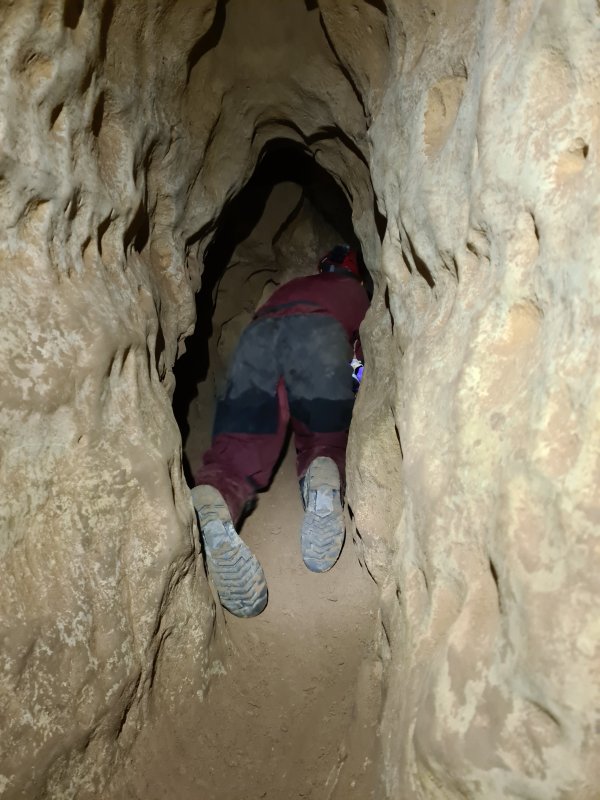 Initial crawl.
Modelling by Mark, lighting by Tarquin and Mark
Initial crawl.
Modelling by Mark, lighting by Tarquin and Mark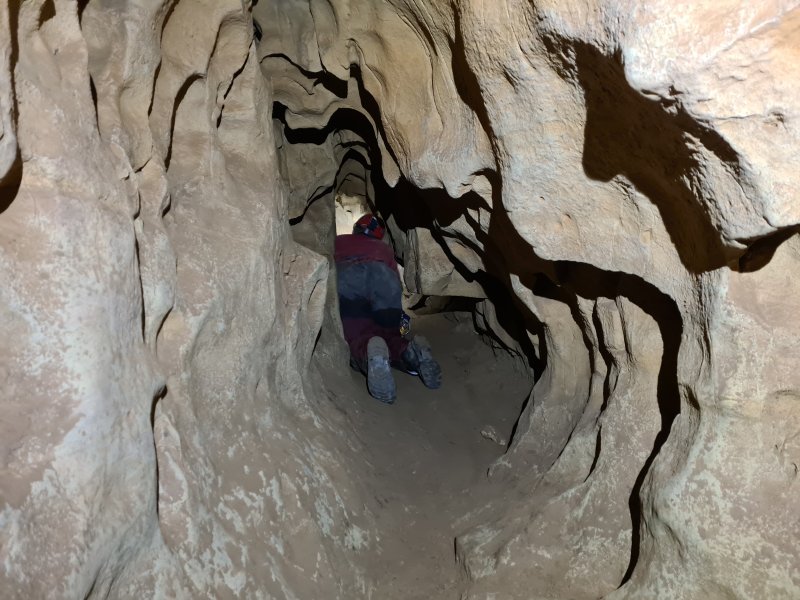 Reaching the base of Star Shaft 1. There is nowhere on the survey called Star Shaft 2. Go figure. Anyway, the passage ahead ends within just a few metres.
Modelling by Mark, lighting by Tarquin and Mark
Reaching the base of Star Shaft 1. There is nowhere on the survey called Star Shaft 2. Go figure. Anyway, the passage ahead ends within just a few metres.
Modelling by Mark, lighting by Tarquin and Mark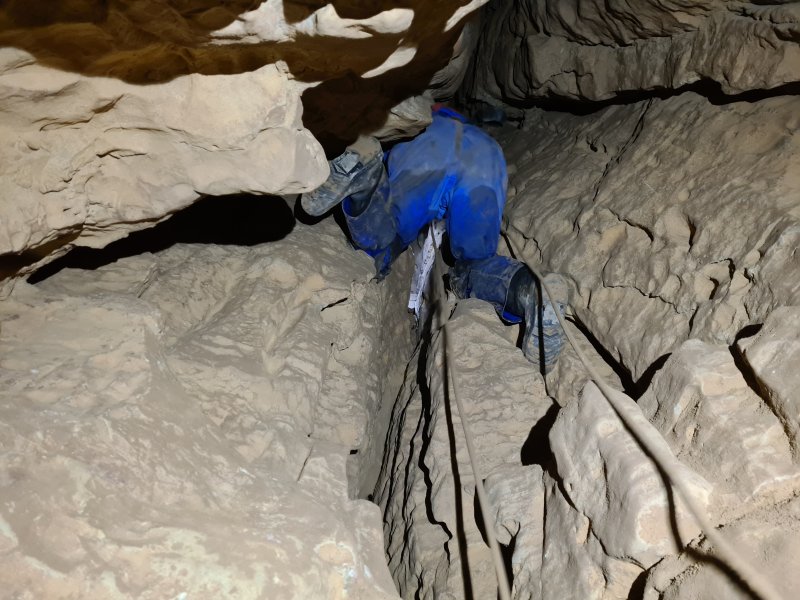 Climbing up the bottom section of Star Shaft 1. The climb is a total of 20 metres, but it is ascended in a couple of steps.
Modelling by Adam, lighting by Tarquin and Adam
Climbing up the bottom section of Star Shaft 1. The climb is a total of 20 metres, but it is ascended in a couple of steps.
Modelling by Adam, lighting by Tarquin and Adam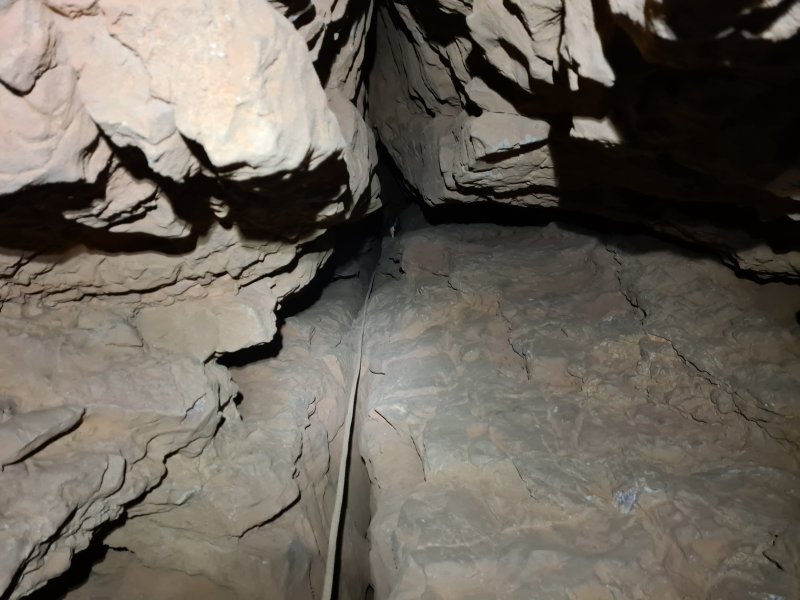 Star Shaft 1 has a rather awkward squeeze about 5 metres up, which takes some time to pass.
Lighting by Tarquin and Adam
Star Shaft 1 has a rather awkward squeeze about 5 metres up, which takes some time to pass.
Lighting by Tarquin and Adam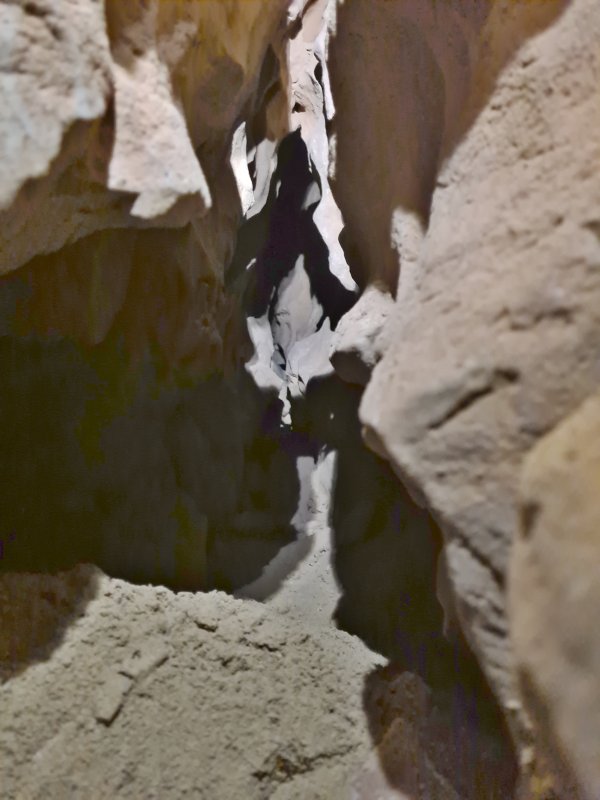 Just above the squeeze is a sandy ledge, where the sand conceals a side passage which can be used to bypass the top portion of the shaft. This was written about as the "easier" route, but it looks really small.
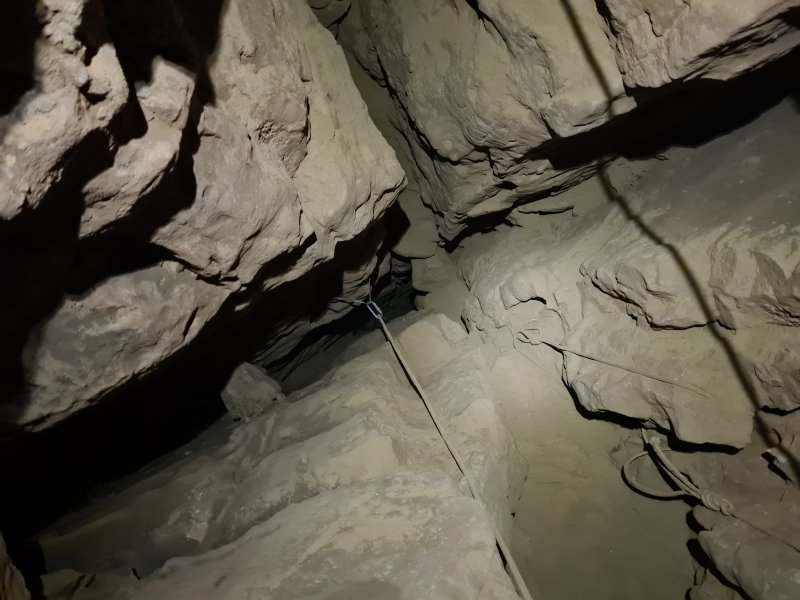 The top portion of Star Shaft 1 is also pretty tight, requiring a couple of tight thrutches, relying on jammed rocks for footholds.
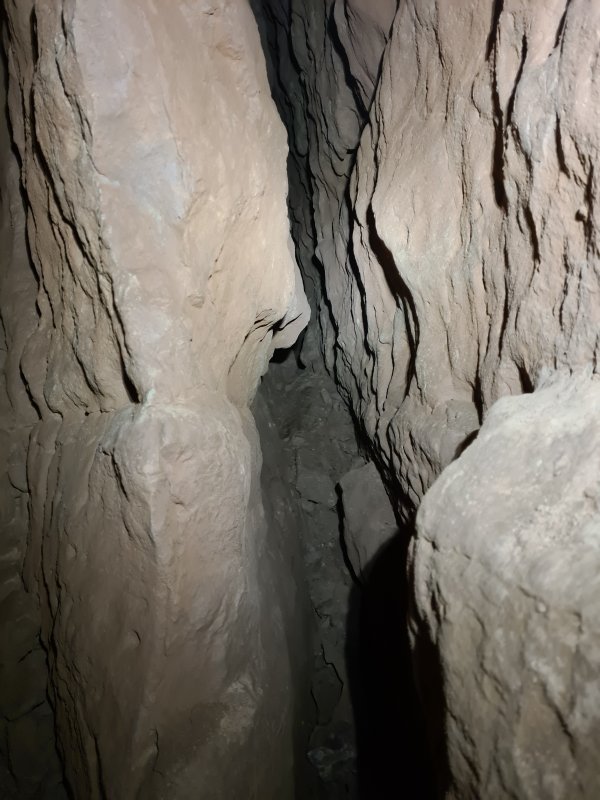 At the top is this cross rift, which is the star of Star Shaft 1.
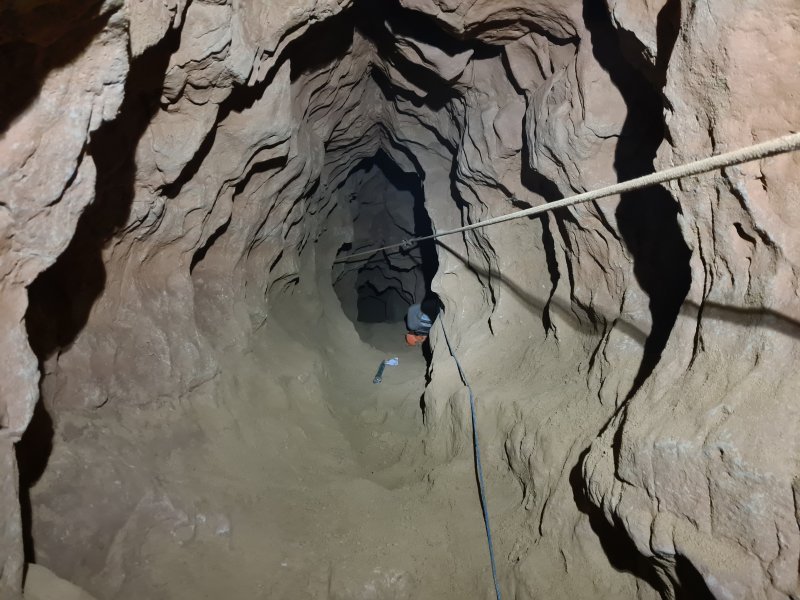 Heading back over the way in is a dead end dig called Extenuating Circumstances, the longest side passage in Pirate Passage (and that's not saying much), at just under 200 metres. This is the most promising site in this part of the cave, as it is on a development level above the current streamway, with no obvious destination. The majority of Pirate Passage, which is a very well developed passage, is formed on this level. The dig passes over the streamway, and heads into a large, blank area, mostly as a crawling sized passage, with the sand fill occasionally needing to be dug out to reach the next open section. The nearest development at this level is Chunnel. This part of the cave points towards the part of Dog's Grave between the stream near the camp and Snow Garden, and is likely to be formed on the same fault.
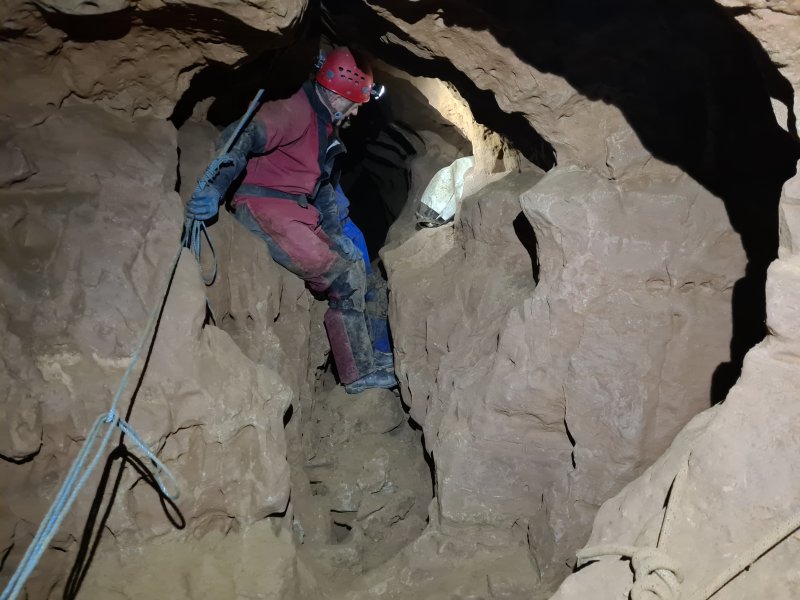 The main passage continues in the same direction as before, and is a much larger passage than before.
Modelling by Mark and Adam, lighting by Tarquin, Mark and Adam
The main passage continues in the same direction as before, and is a much larger passage than before.
Modelling by Mark and Adam, lighting by Tarquin, Mark and Adam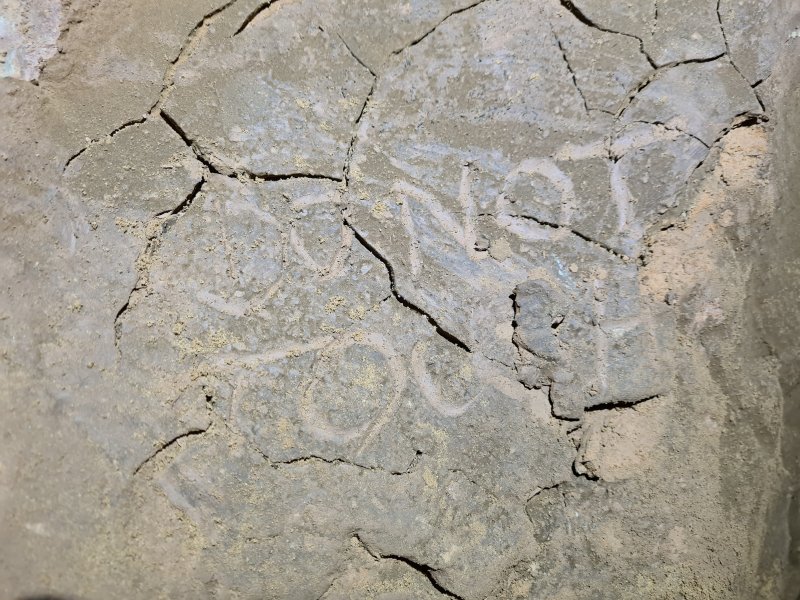 Do Not Touch ... something.
 The traverses begin almost immediately, and this part of the passage is quite demanding. It definitely needs you to be very confident over traverses.
Modelling by Mark and Adam, lighting by Tarquin and Mark
The traverses begin almost immediately, and this part of the passage is quite demanding. It definitely needs you to be very confident over traverses.
Modelling by Mark and Adam, lighting by Tarquin and Mark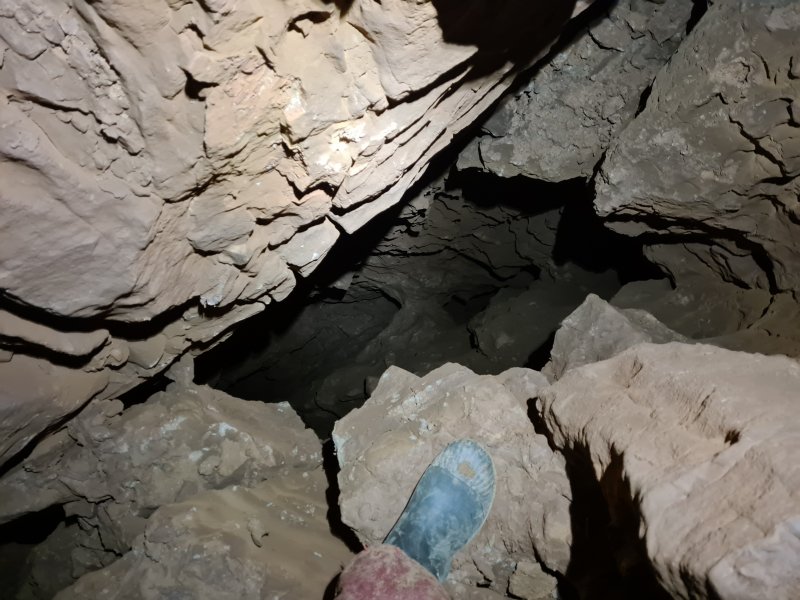 The deep slot in the floor. The bottom of it is likely to be the passage seen part way up Star Shaft 1.
Modelling by Tarquin's clodhopper
The deep slot in the floor. The bottom of it is likely to be the passage seen part way up Star Shaft 1.
Modelling by Tarquin's clodhopper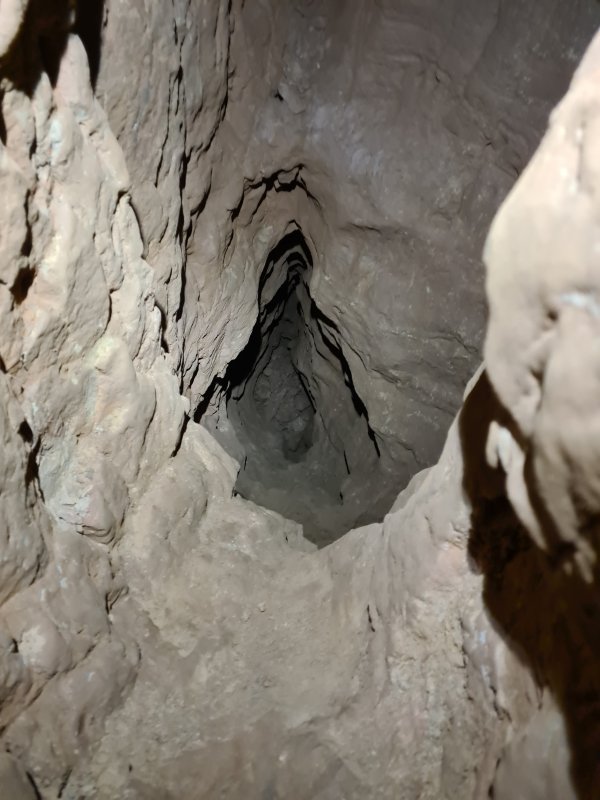 A rift on the right descends to the alternative route from Star Shaft 1.
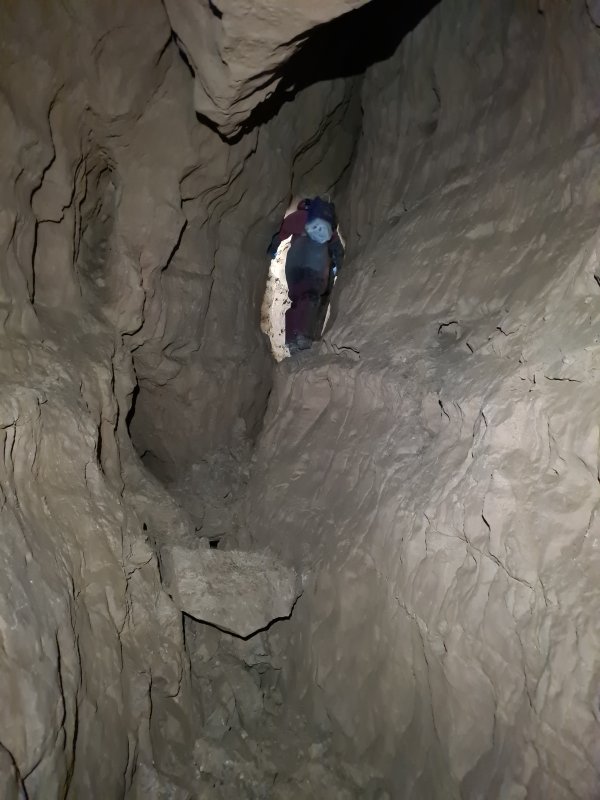 Solid floor, but not for long. That climb up is the start of the next traverses.
Modelling by Mark, lighting by Tarquin and Mark
Solid floor, but not for long. That climb up is the start of the next traverses.
Modelling by Mark, lighting by Tarquin and Mark This traverse is shallower, but still takes some effort.
Modelling by Mark, lighting by Tarquin and Mark
This traverse is shallower, but still takes some effort.
Modelling by Mark, lighting by Tarquin and Mark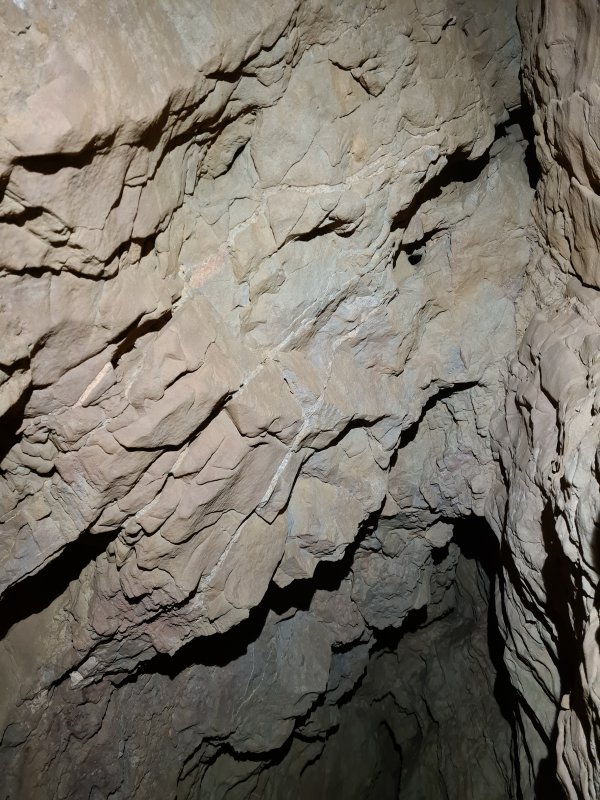 The passage is clearly fault controlled, with a wide band of fault breccia in the ceiling.
 Sloping traverse.
Modelling by Mark, lighting by Tarquin and Mark
Sloping traverse.
Modelling by Mark, lighting by Tarquin and Mark Fossils up on the wall. This passage is absolutely full of fossils, and appropriately for a passage called Pirate Passage, most of them are proto-shark fossils. This particular one is not recognisable.
 The first little corner. The passage jumps sideways to pick up another branch of the same fault.
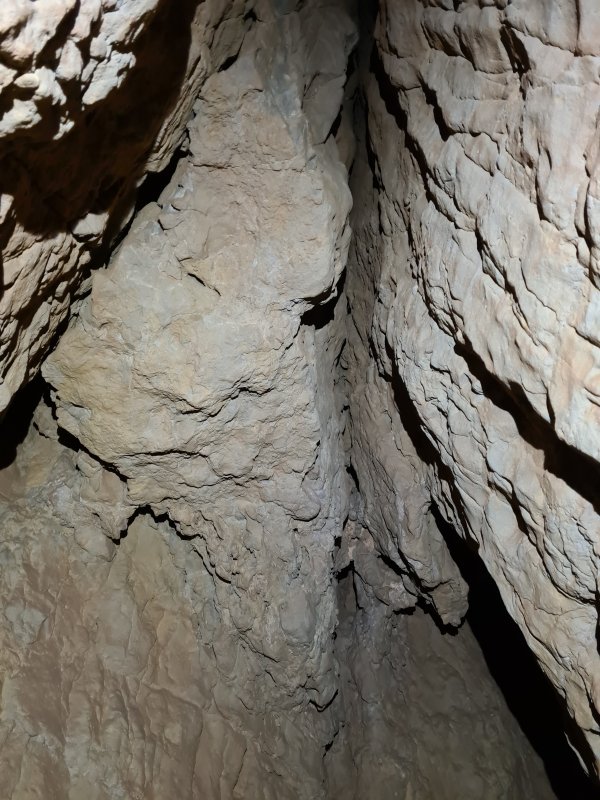 Brecciation in the second branch.
 After the fault branches rejoin, the traverse becomes very deep, with almost no holds.
Modelling by Mark and Adam, lighting by Tarquin, Mark and Adam
After the fault branches rejoin, the traverse becomes very deep, with almost no holds.
Modelling by Mark and Adam, lighting by Tarquin, Mark and Adam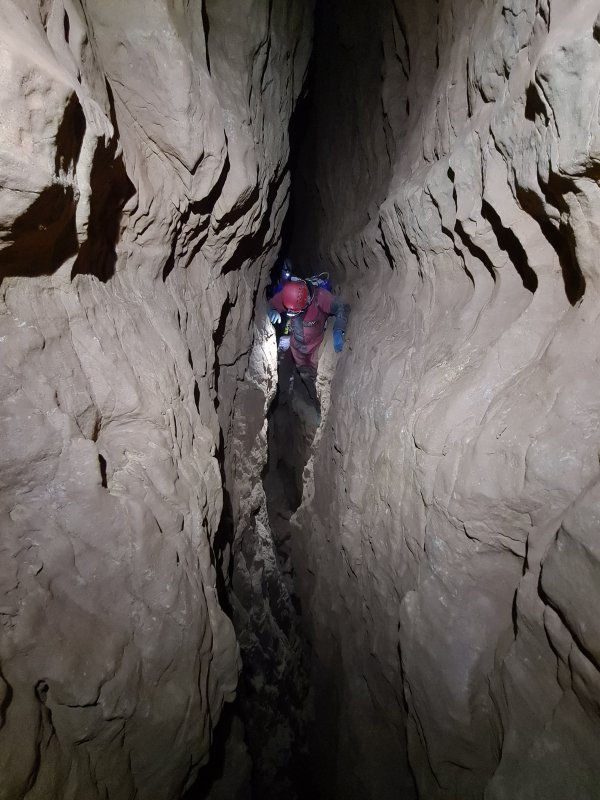 Really deep!
Modelling by Mark and Adam, lighting by Tarquin, Mark and Adam
Really deep!
Modelling by Mark and Adam, lighting by Tarquin, Mark and Adam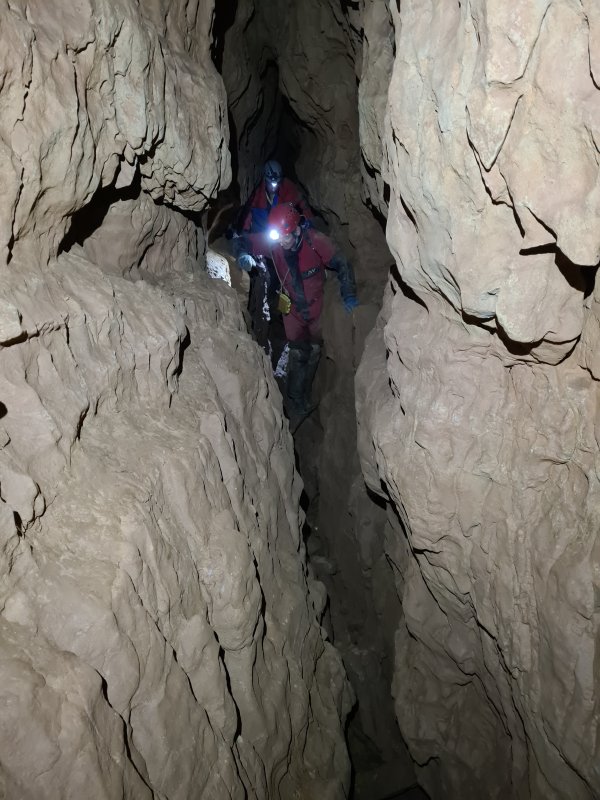 Nearly the end of the traverses. This section ends at a split, where there is a tiny side passage dropping down on the right, which nearly becomes an oxbow before it closes down. It actually threatened to be a side passage for a moment. But of course not!
Modelling by Mark and Adam, lighting by Tarquin, Mark and Adam
Nearly the end of the traverses. This section ends at a split, where there is a tiny side passage dropping down on the right, which nearly becomes an oxbow before it closes down. It actually threatened to be a side passage for a moment. But of course not!
Modelling by Mark and Adam, lighting by Tarquin, Mark and Adam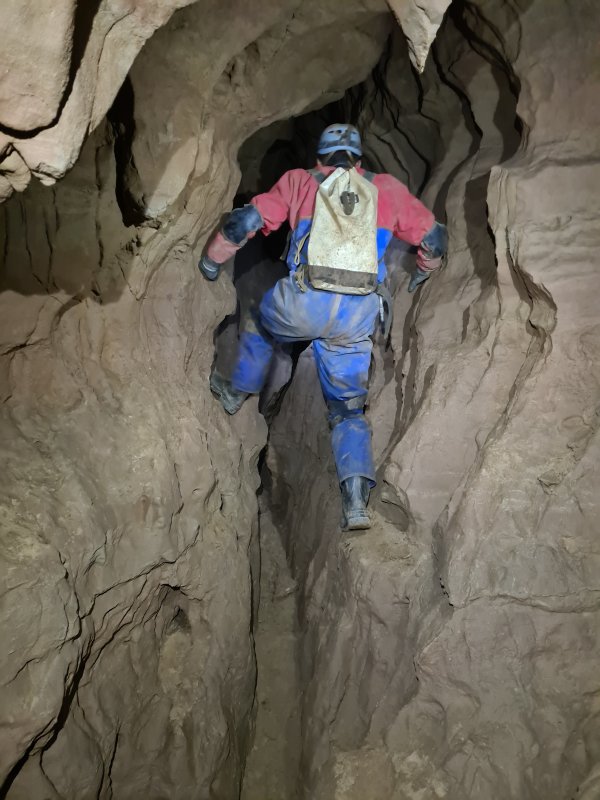 The traverse then ends in a little chamber.
Modelling by Adam, lighting by Tarquin, Mark and Adam
The traverse then ends in a little chamber.
Modelling by Adam, lighting by Tarquin, Mark and Adam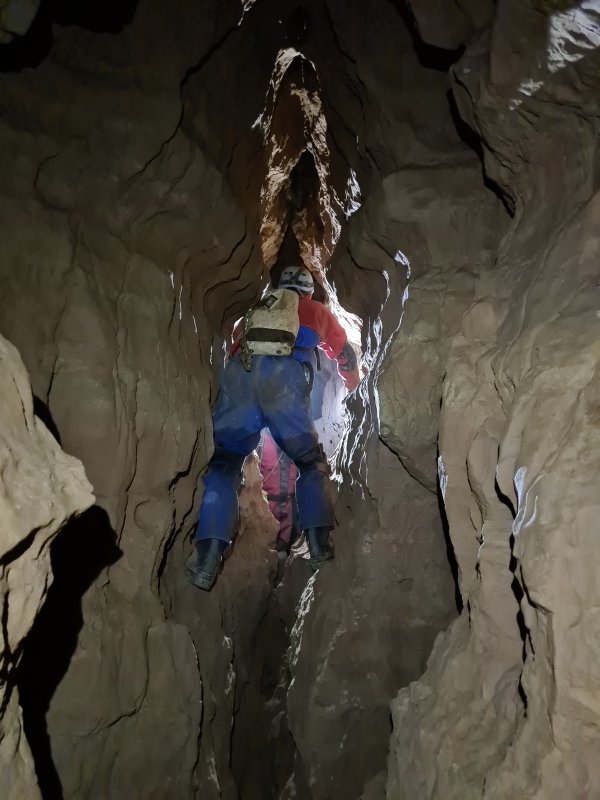 The way on looks like a traverse, but this is just a little step over a narrow section. It is largely walking beyond here.
Modelling by Adam and Mark, lighting by Tarquin, Adam and Mark
The way on looks like a traverse, but this is just a little step over a narrow section. It is largely walking beyond here.
Modelling by Adam and Mark, lighting by Tarquin, Adam and Mark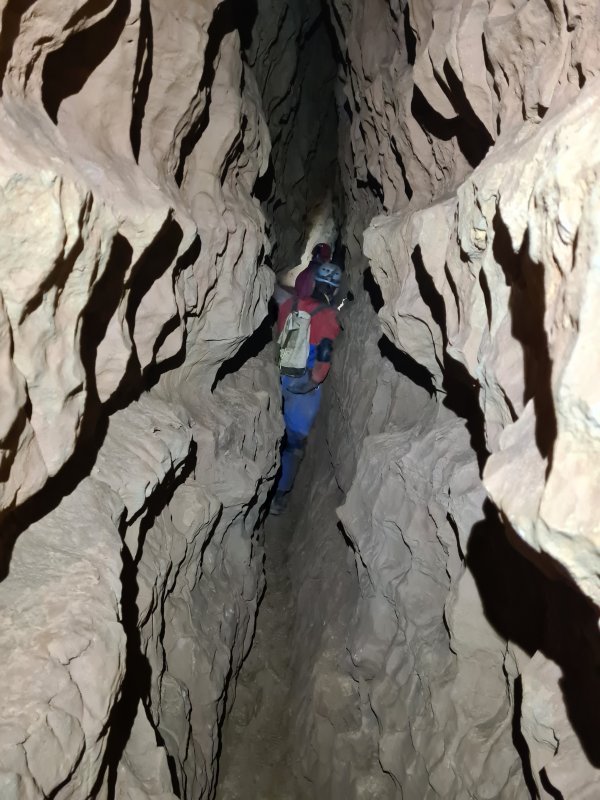 Not exactly easy, but also not a challenge.
Modelling by Adam and Mark, lighting by Tarquin, Adam and Mark
Not exactly easy, but also not a challenge.
Modelling by Adam and Mark, lighting by Tarquin, Adam and Mark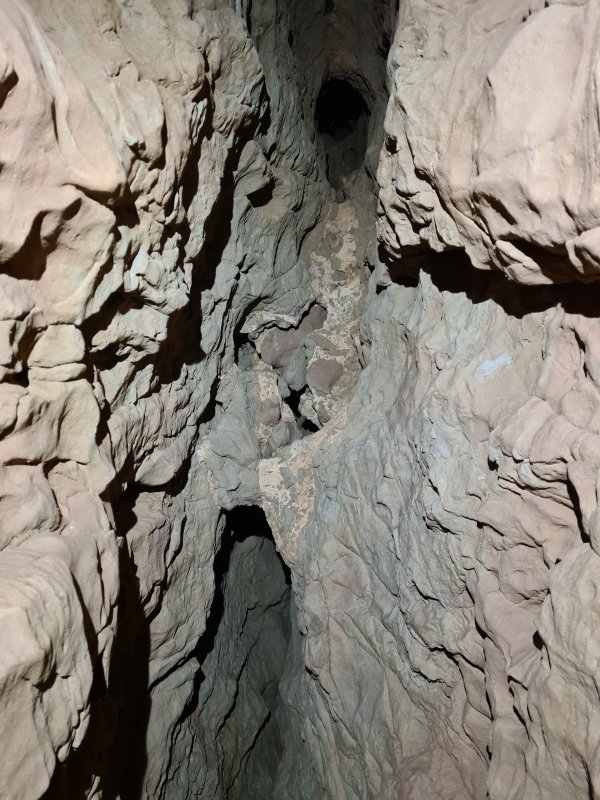 Distinct white band of breccia in the ceiling.
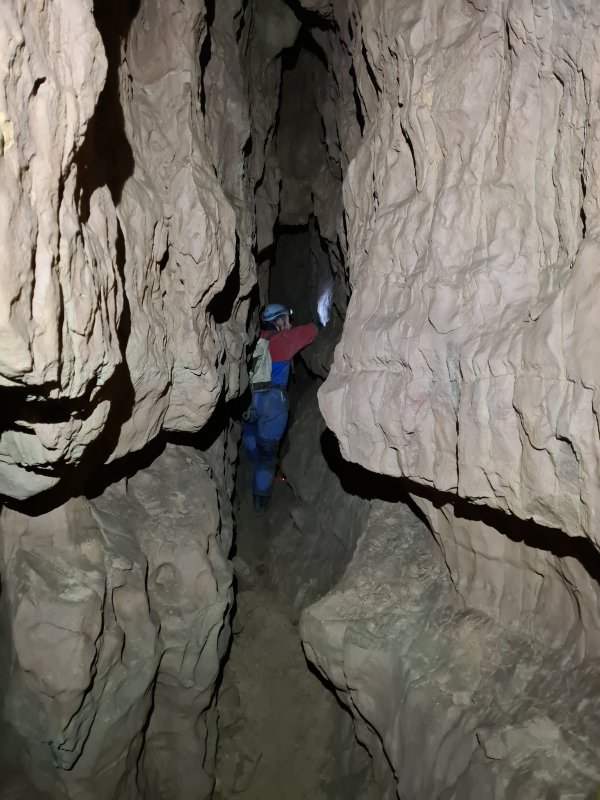 A tiny side passage showed a small error on the old survey, which turned out to be the side passage beind misplaced slightly. It was easily corrected. Another error in the same area turned out to be the left and right measurements being swapped, such that the drawing was backwards. These are tiny errors considering the amount of surveying!
Modelling by Adam, lighting by Tarquin and Adam
A tiny side passage showed a small error on the old survey, which turned out to be the side passage beind misplaced slightly. It was easily corrected. Another error in the same area turned out to be the left and right measurements being swapped, such that the drawing was backwards. These are tiny errors considering the amount of surveying!
Modelling by Adam, lighting by Tarquin and Adam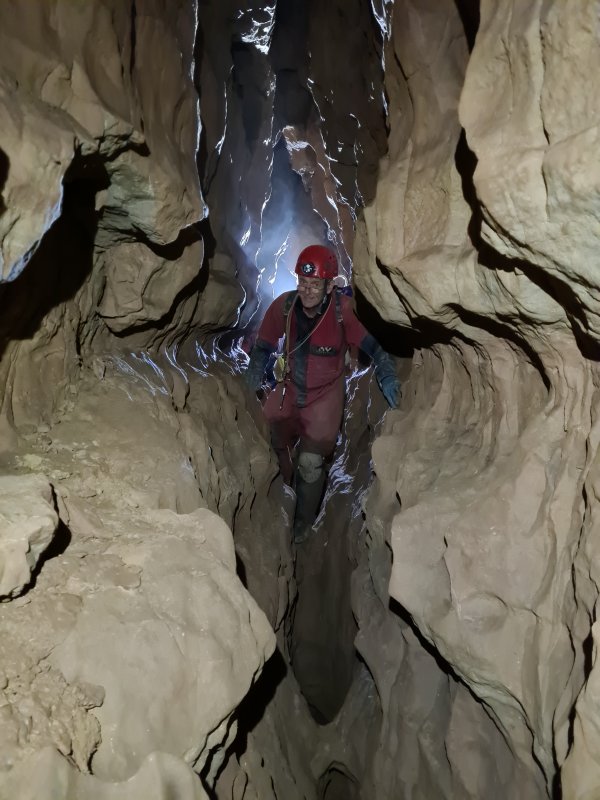 Just before the first major corner.
Modelling by Mark, lighting by Tarquin and Adam
Just before the first major corner.
Modelling by Mark, lighting by Tarquin and Adam The first major corner, with the way on seen on the left here. The passage gets renamed at this point to Minaret Passage, but it's really the same passage as before.
Modelling by Mark and Adam, lighting by Tarquin, Mark and Adam
The first major corner, with the way on seen on the left here. The passage gets renamed at this point to Minaret Passage, but it's really the same passage as before.
Modelling by Mark and Adam, lighting by Tarquin, Mark and Adam Superb fossil bone passing through the rock. The very obvious lines on it show that this is a dorsal spine from a Ctenacanthus proto-shark (early shark), the bone that sat in front of one of the dorsal fins to hold them upright. The full bone is normally about 25 cm long. The lines are formed along the length of the bone in this type of shark (unlike the Gyranathus where they are diagonal). The bone has a U-shaped cross section, with the groove holding the cartilage of the fin.
Modelling by Mark's digits, lighting by Tarquin and Mark
Superb fossil bone passing through the rock. The very obvious lines on it show that this is a dorsal spine from a Ctenacanthus proto-shark (early shark), the bone that sat in front of one of the dorsal fins to hold them upright. The full bone is normally about 25 cm long. The lines are formed along the length of the bone in this type of shark (unlike the Gyranathus where they are diagonal). The bone has a U-shaped cross section, with the groove holding the cartilage of the fin.
Modelling by Mark's digits, lighting by Tarquin and Mark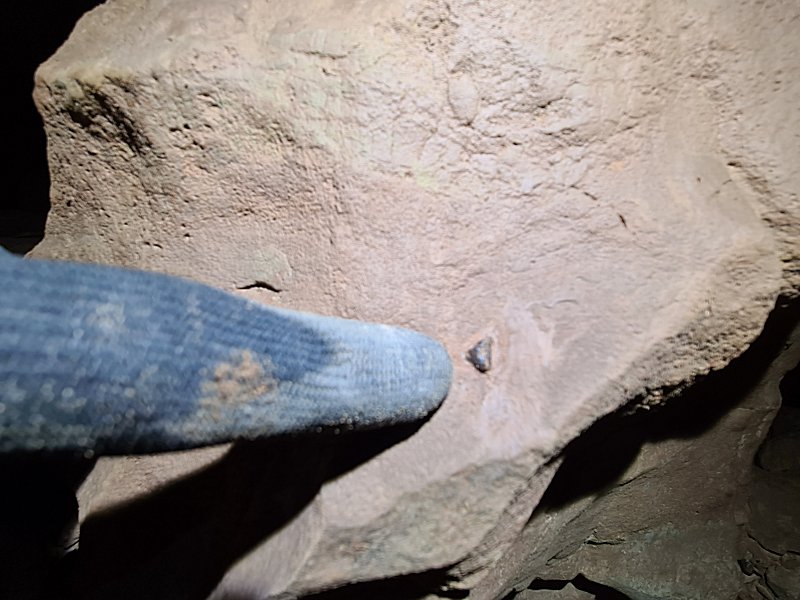 Tiny fossil nearby, of unknown origin. It is probably another bone from the same shark. Ctenacanthus looked like a modern shark, about 1.6 metres long. Most of the skeleton was cartilage, but the jaw and a few of the shoulder bones were regular bone, like the dorsal spines. In modern sharks, the entire skeleton is cartilage, with only the jaw being bone. Ctenacanthus had normal teeth similar to a mackerel shark, with the central cusp (spike), but with two cusplets (smaller spikes) on either side instead of one. No Ctenacanthus teeth were identified in the passage.
Modelling by Tarquin's possibly-empty glove
Tiny fossil nearby, of unknown origin. It is probably another bone from the same shark. Ctenacanthus looked like a modern shark, about 1.6 metres long. Most of the skeleton was cartilage, but the jaw and a few of the shoulder bones were regular bone, like the dorsal spines. In modern sharks, the entire skeleton is cartilage, with only the jaw being bone. Ctenacanthus had normal teeth similar to a mackerel shark, with the central cusp (spike), but with two cusplets (smaller spikes) on either side instead of one. No Ctenacanthus teeth were identified in the passage.
Modelling by Tarquin's possibly-empty glove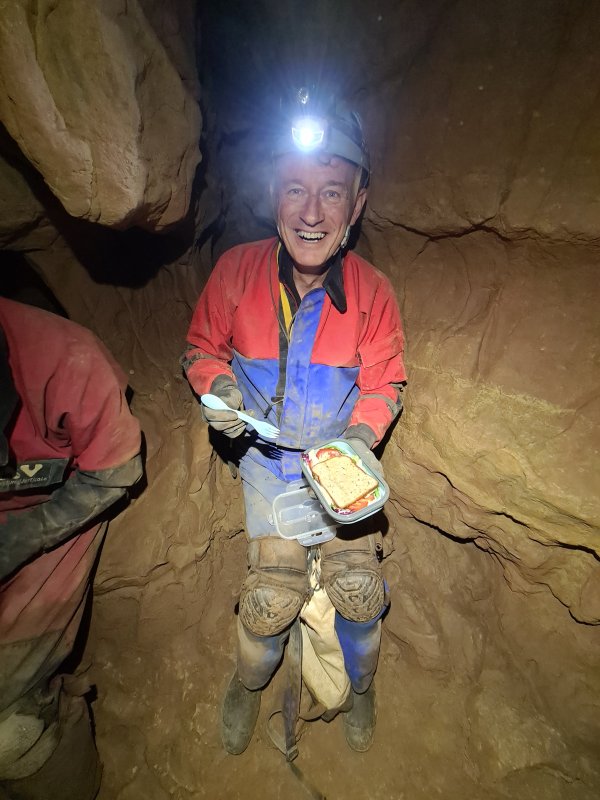 Lunch at the corner.
Modelling by Adam and portions of Mark, lighting by Tarquin, Adam and Mark
Lunch at the corner.
Modelling by Adam and portions of Mark, lighting by Tarquin, Adam and Mark Possible Psammodus tooth plate in the ceiling of Minaret Passage. This has some fine dimples in it. Psammodus was another proto-shark that instead of having standard shark teeth had flat plates with dimples in them, for crushing shellfish.
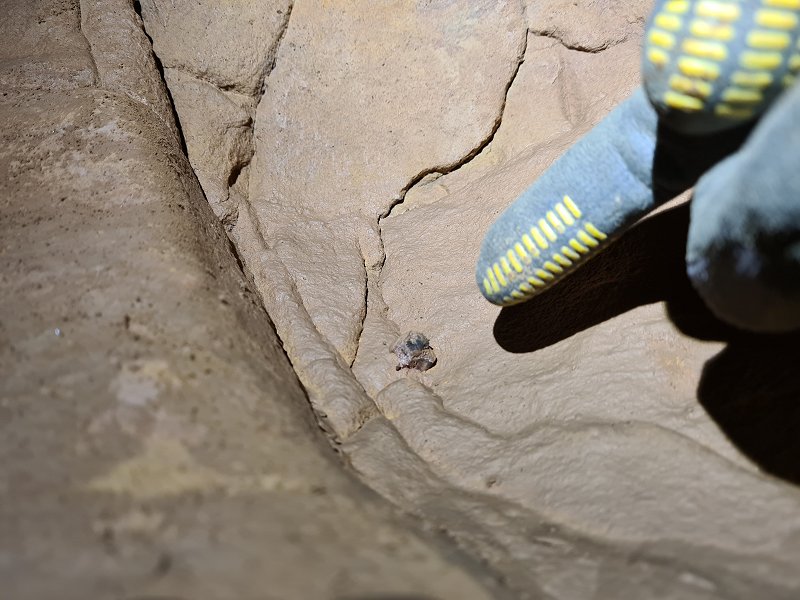 Unknown fossil nearby.
 Fossil Ctenacanthus dorsal spine, with its distinctive U-shaped cross section, in Minaret Passage. This sits opposite a side passage, which at significantly less than 20 metres long, is the second longest side passage in Pirate Passage (!).
 Minaret Passage
Modelling by Adam and Mark, lighting by Tarquin, Adam and Mark
Minaret Passage
Modelling by Adam and Mark, lighting by Tarquin, Adam and Mark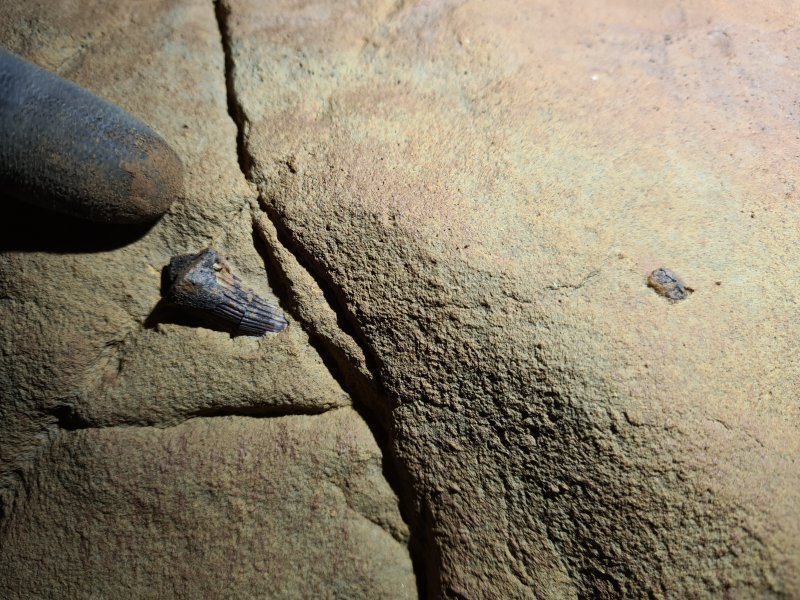 Beautifully preserved Ctenacanthus dorsal spine, with deep grooves, at the end of Minaret Passage. This is very short, so it is likely to have been a young shark. The posterior (rear) dorsal fin is smaller than the anterior (front) fin, but normally about half the length. This bone is extremely small, even for a posterior fin.
 At the end of Minaret Passage, it turns left, and gets renamed to The Road To Mecca (misspelled as Meca on the old survey). Again, this is the same passage. The start is a very brief traverse.
Modelling by Adam, lighting by Tarquin and Mark
At the end of Minaret Passage, it turns left, and gets renamed to The Road To Mecca (misspelled as Meca on the old survey). Again, this is the same passage. The start is a very brief traverse.
Modelling by Adam, lighting by Tarquin and Mark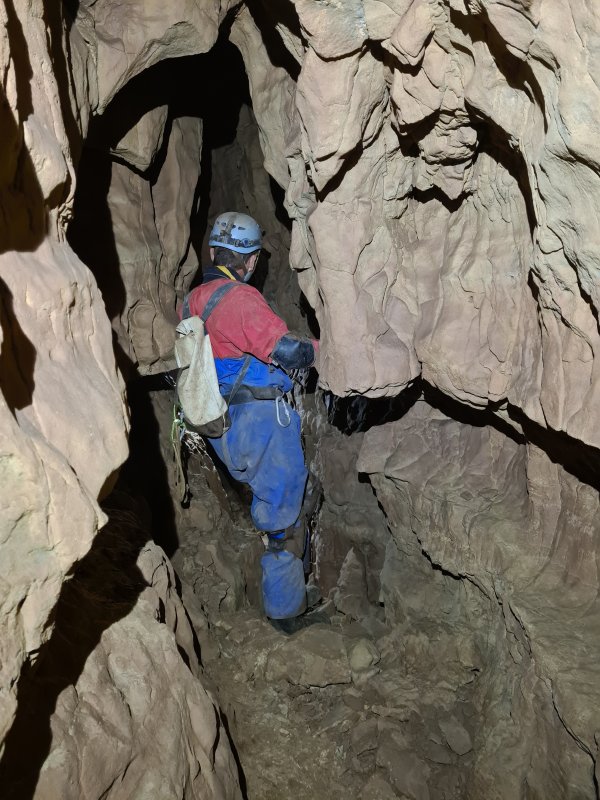 Approaching an aven in The Road To Mecca
Modelling by Adam and Mark, lighting by Tarquin, Adam and Mark
Approaching an aven in The Road To Mecca
Modelling by Adam and Mark, lighting by Tarquin, Adam and Mark Unknown fossil.
Modelling by Tarquin's left fingers
Unknown fossil.
Modelling by Tarquin's left fingers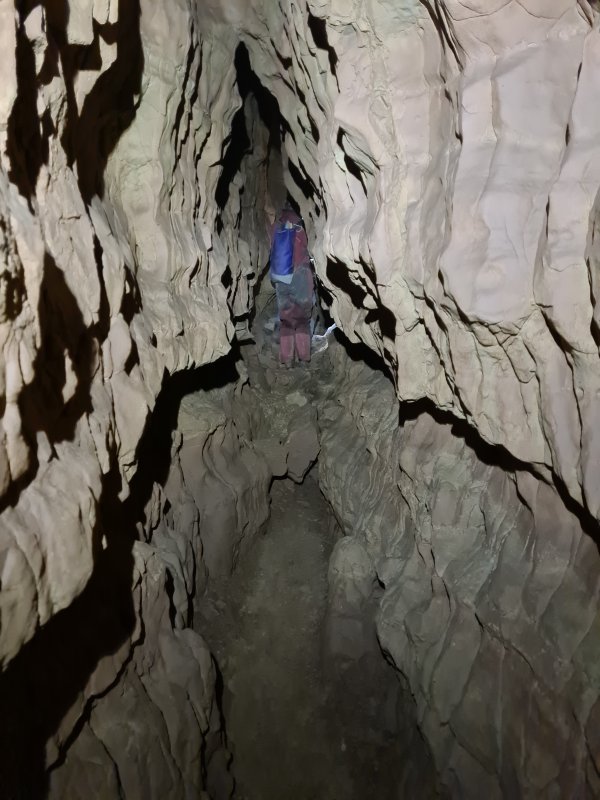 Walking passage.
Modelling by Mark and hints of Adam, lighting by Tarquin, Mark and Adam
Walking passage.
Modelling by Mark and hints of Adam, lighting by Tarquin, Mark and Adam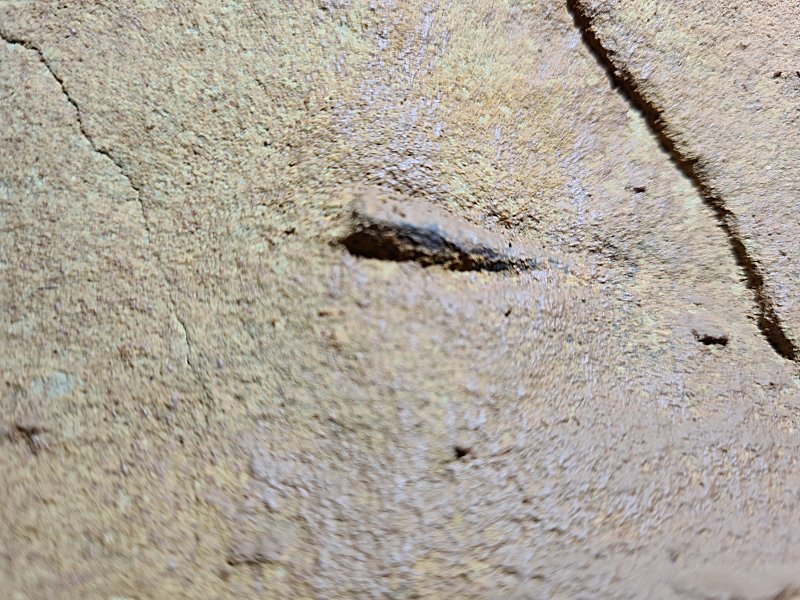 Another unknown fossil. It could be the edge of a spine.
 The Road To Mecca.
Modelling by Adam and Mark, lighting by Tarquin, Adam and Mark
The Road To Mecca.
Modelling by Adam and Mark, lighting by Tarquin, Adam and Mark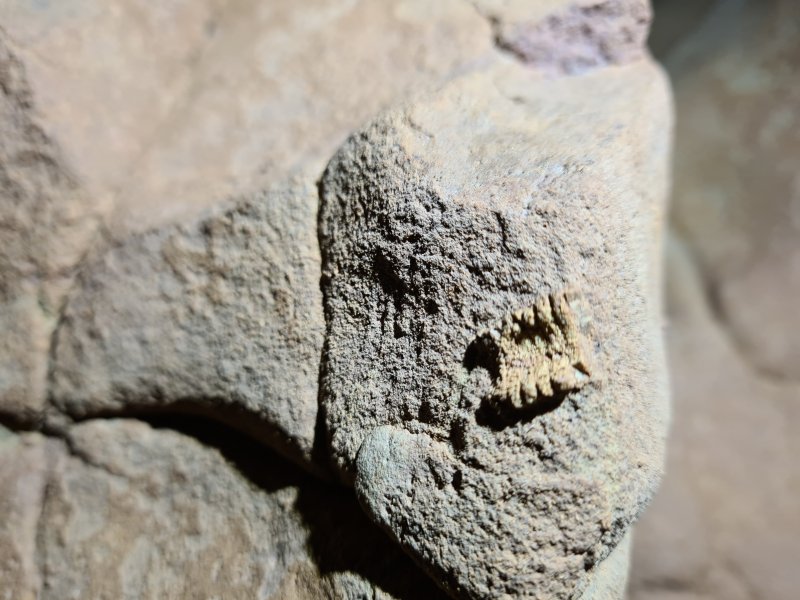 A portion of crinoid (sea lily), a relative of the starfish which is still around. They look like little palm trees, with this being part of the stalk, but can actually detach from a surface and crawl around the sea floor. They were in beds that had wery few other fossils.
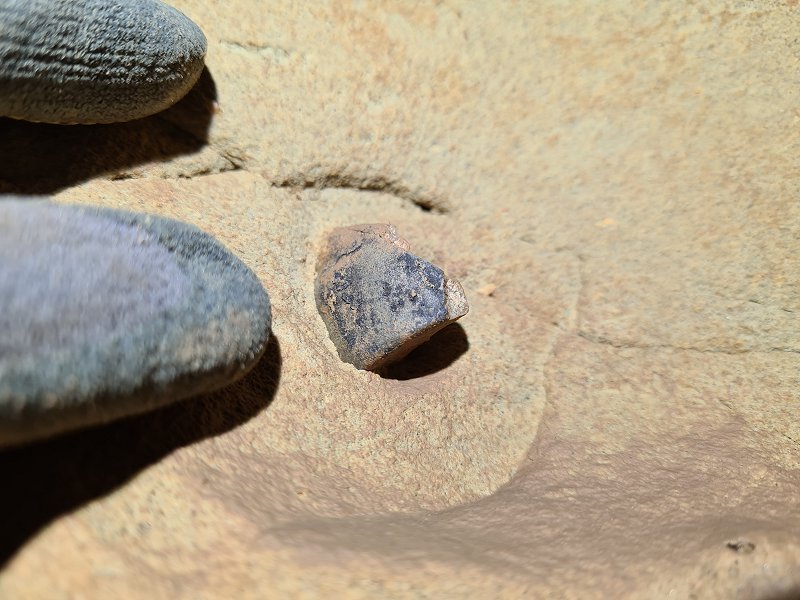 Another probable Psammodus tooth plate, with obvious dimples.
Modelling by Tarquin
Another probable Psammodus tooth plate, with obvious dimples.
Modelling by Tarquin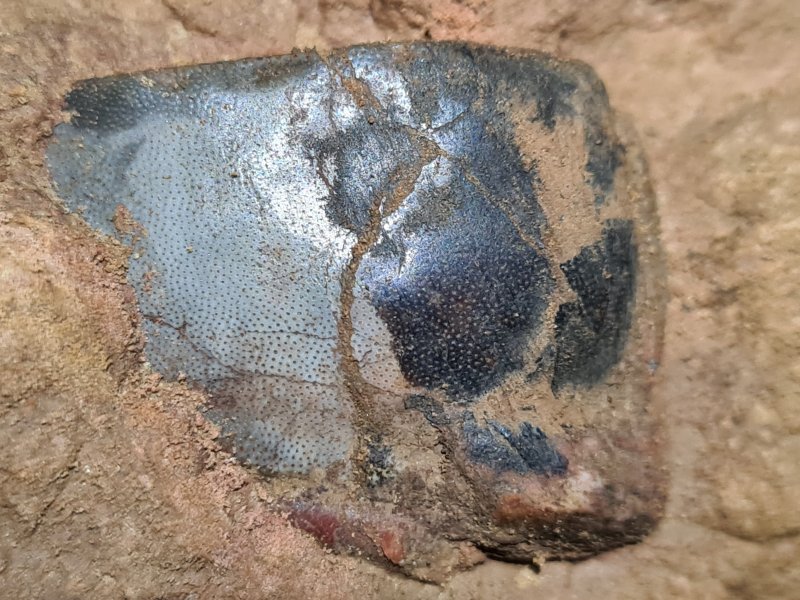 Fantastic Psammodus tooth plate with the dimples being very obvious.
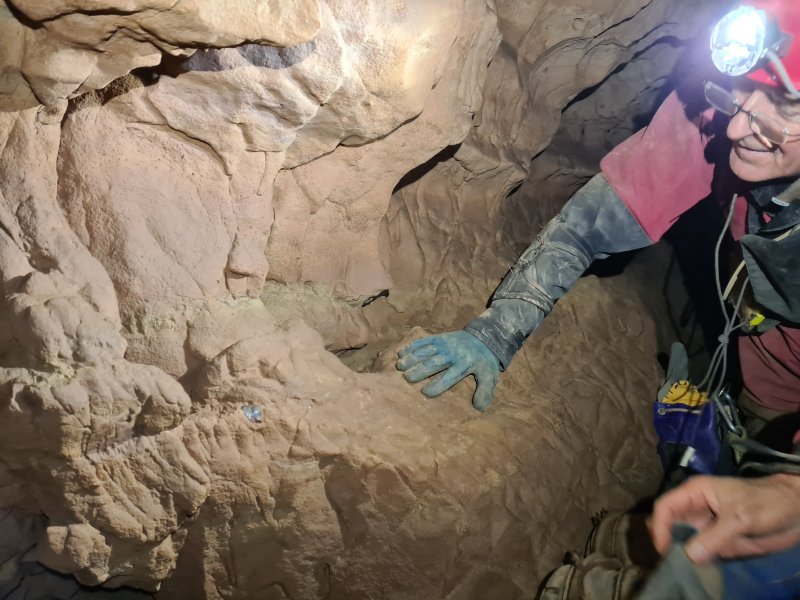 Tooth plate in situ.
Modelling by Mark and partial Adam, lighting by Tarquin, Mark and Adam
Tooth plate in situ.
Modelling by Mark and partial Adam, lighting by Tarquin, Mark and Adam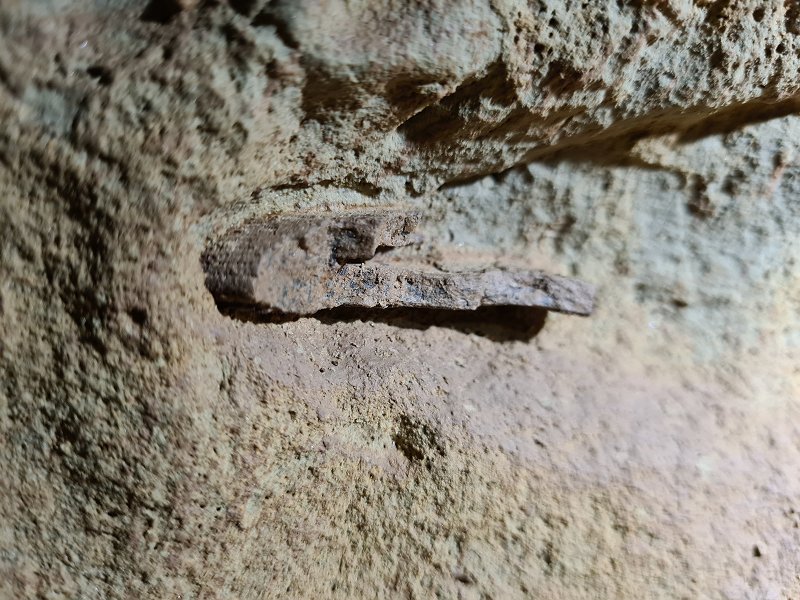 Another very obvious ctenacanthus dorsal spine.
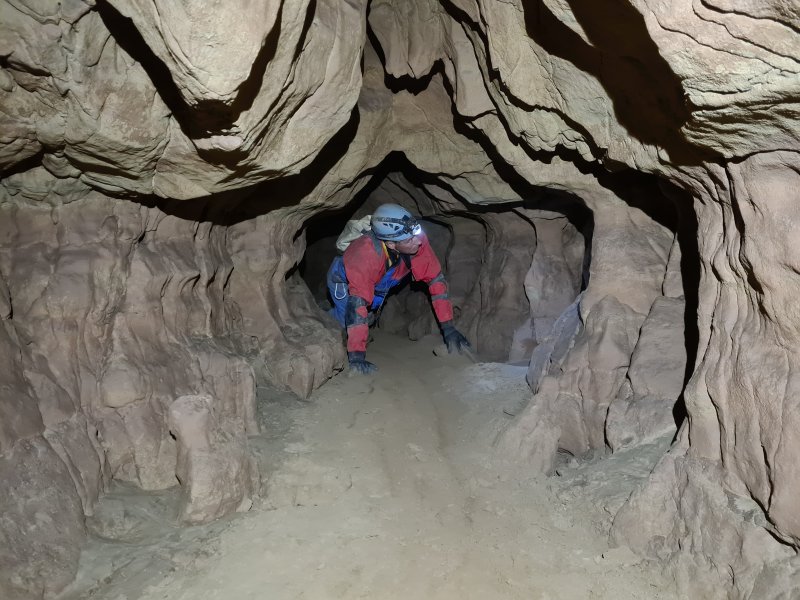 The passage lowers and becomes a comfortable sandy crawl.
Modelling by Adam, lighting by Tarquin and Adam
The passage lowers and becomes a comfortable sandy crawl.
Modelling by Adam, lighting by Tarquin and Adam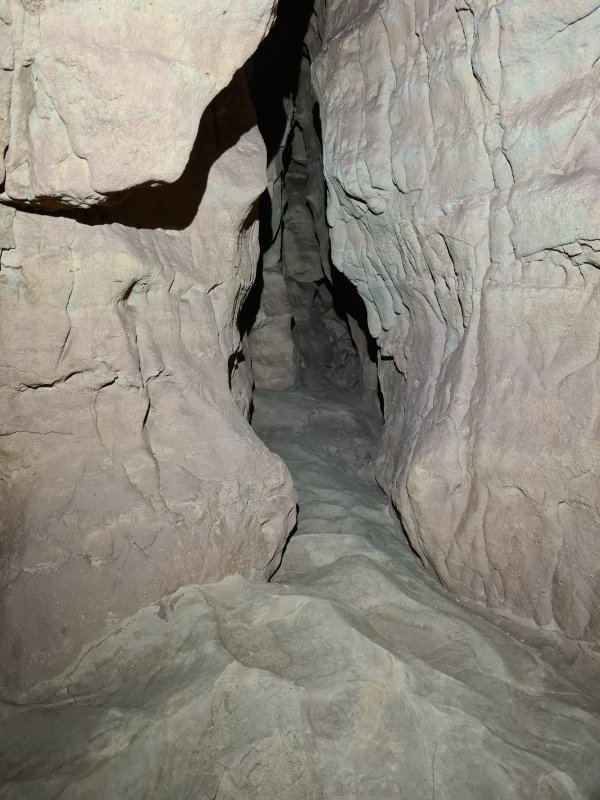 Untouched sand ripples in an alcove.
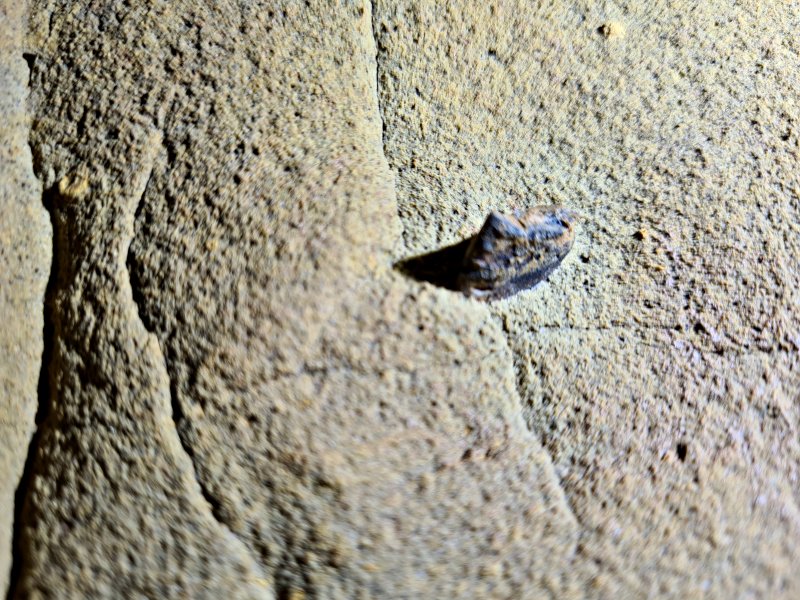 Unknown fossil bone near the sand ripples.
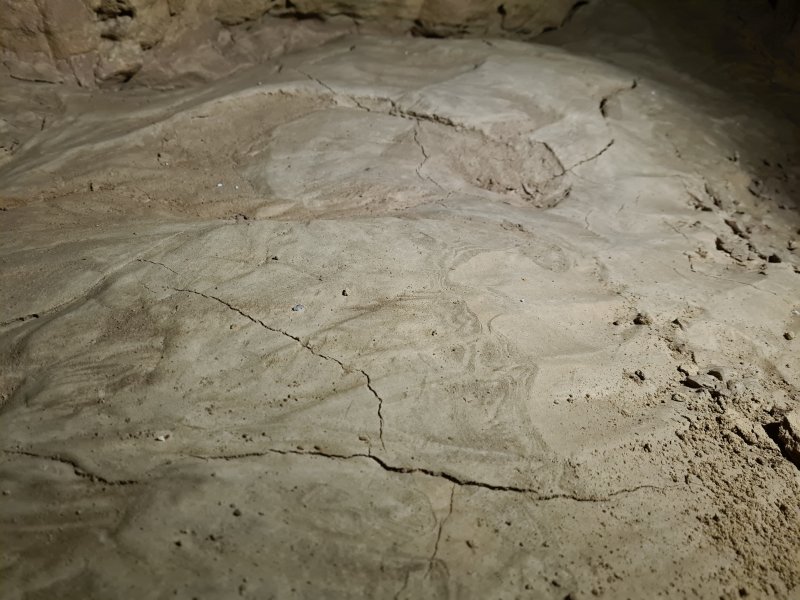 Sandbank. This passage has likely not seen water for at least 12000 years, so it is lovely to be able to see untouched sandbanks like this.
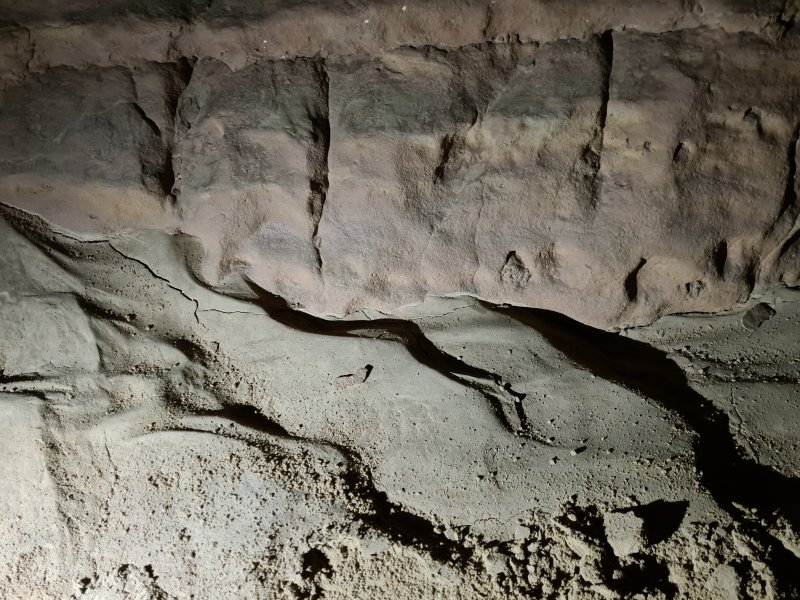 Sandbanks.
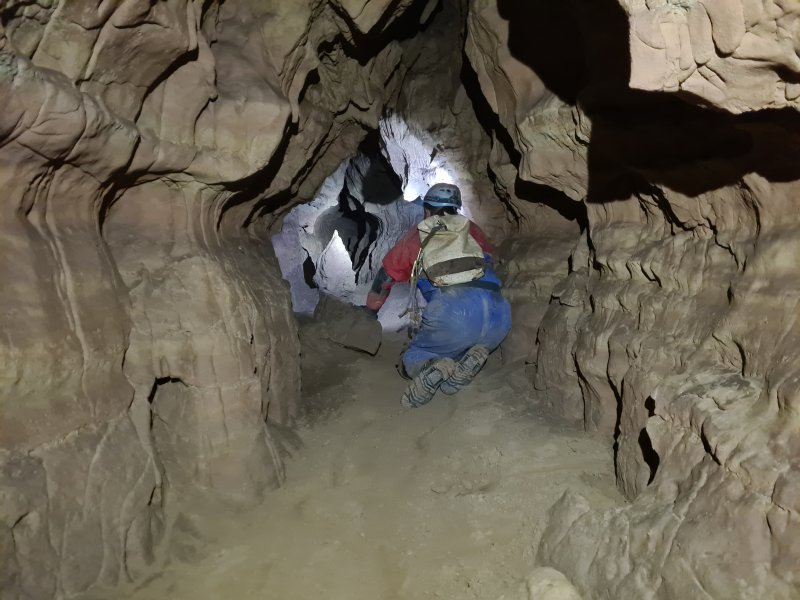 The last part of the sand crawl.
Modelling by Adam, lighting by Tarquin and Adam
The last part of the sand crawl.
Modelling by Adam, lighting by Tarquin and Adam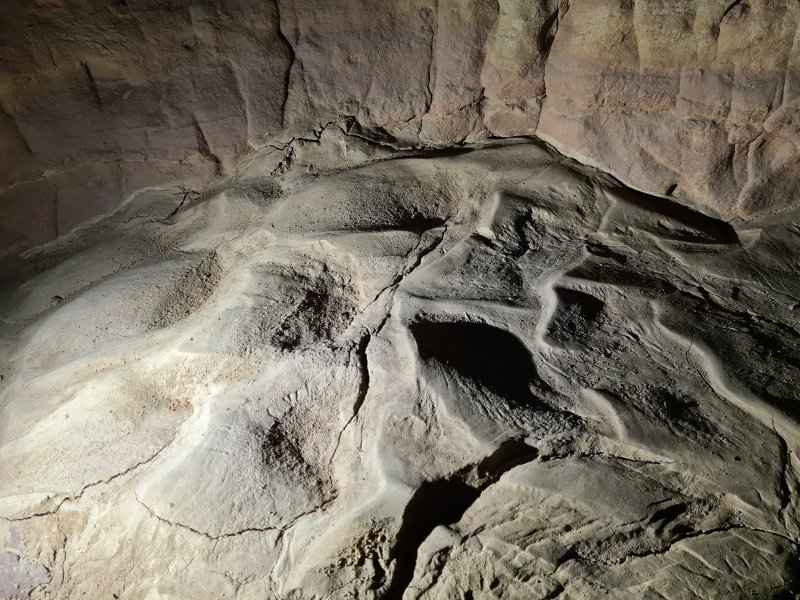 The ripples show flow direction. In a few places this is messed up by eddies, but the main directional flow was towards the Main Stream. In the last stages, this passage drained in the opposite direction, as the water found a new route.
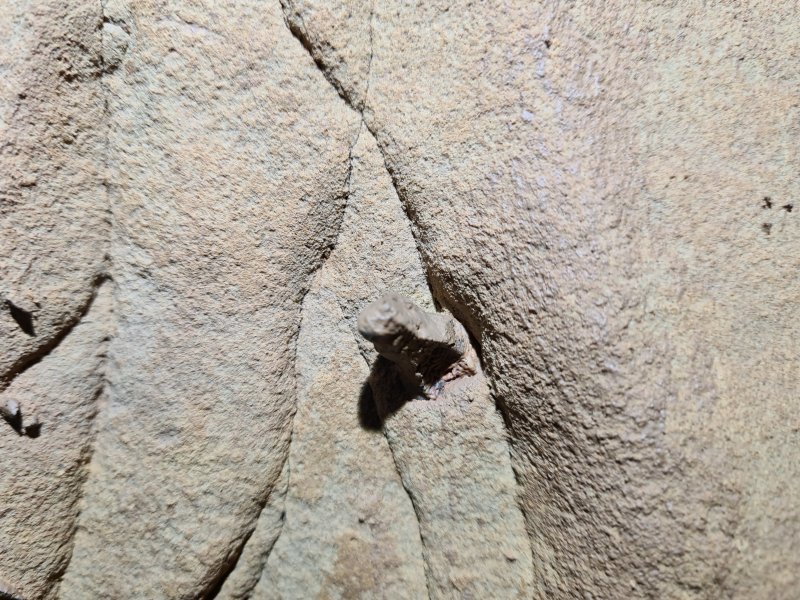 Another unknown fossil.
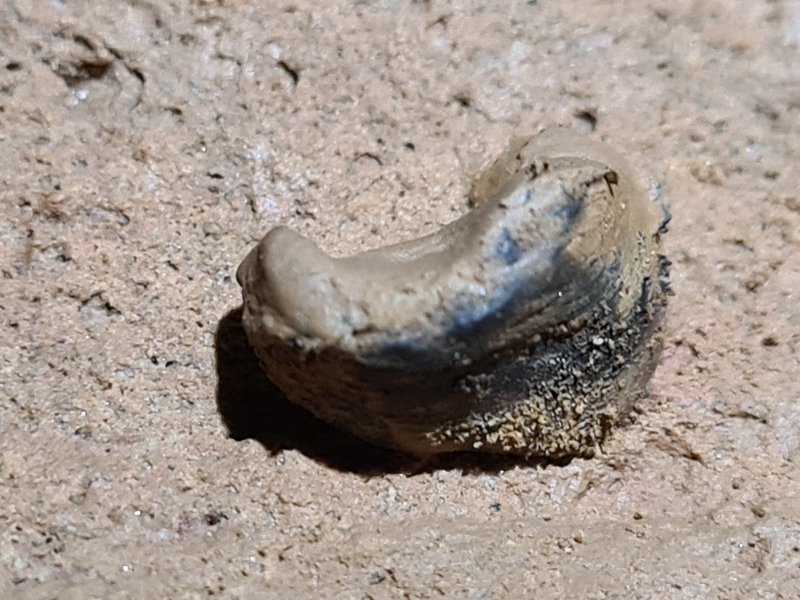 Cenecanthus dorsal spine where the sand crawl ends.
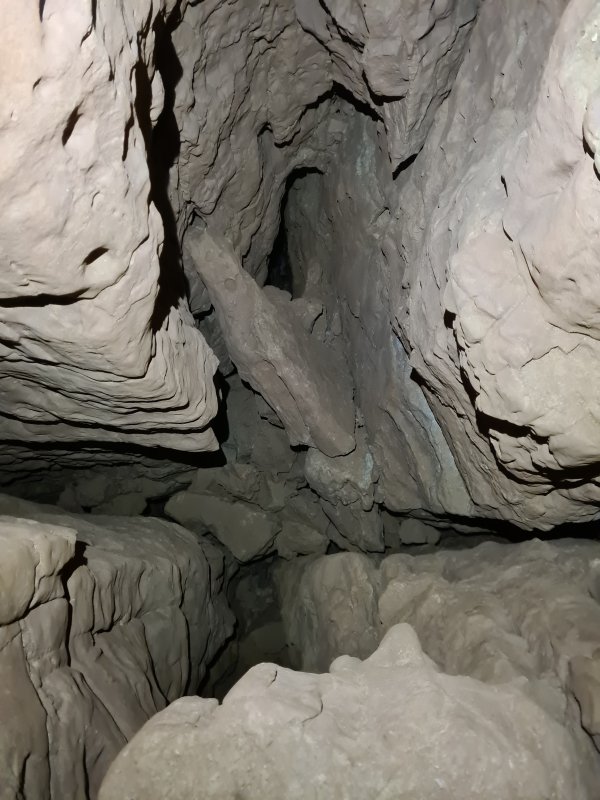 The passage now changes completely, where a seasonal streamway comes in from the side, and sinks into the floor. The sink is too narrow, and the water reappears in Echo Passage about 75 metres away.
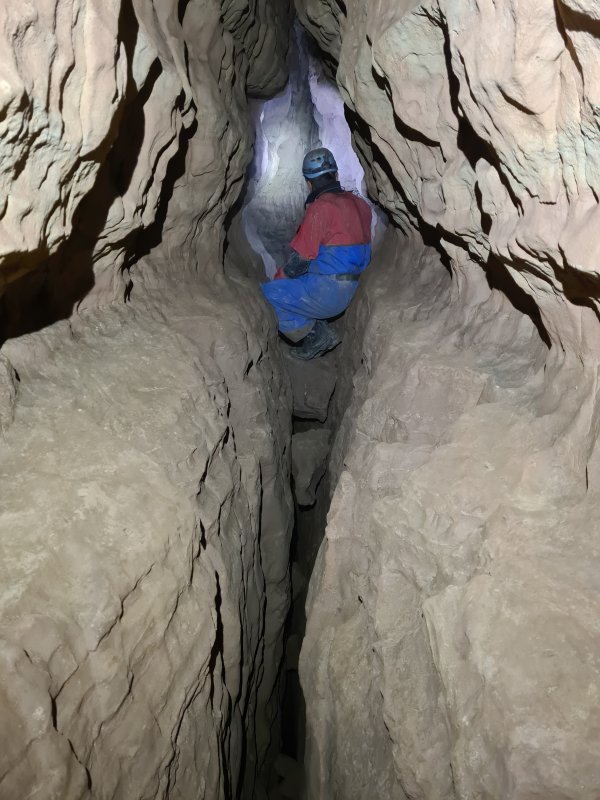 The only way on is upstream. Except this was completely dry, so it's more like up-bed. The traverses have returned.
Modelling by Adam, lighting by Tarquin and Adam
The only way on is upstream. Except this was completely dry, so it's more like up-bed. The traverses have returned.
Modelling by Adam, lighting by Tarquin and Adam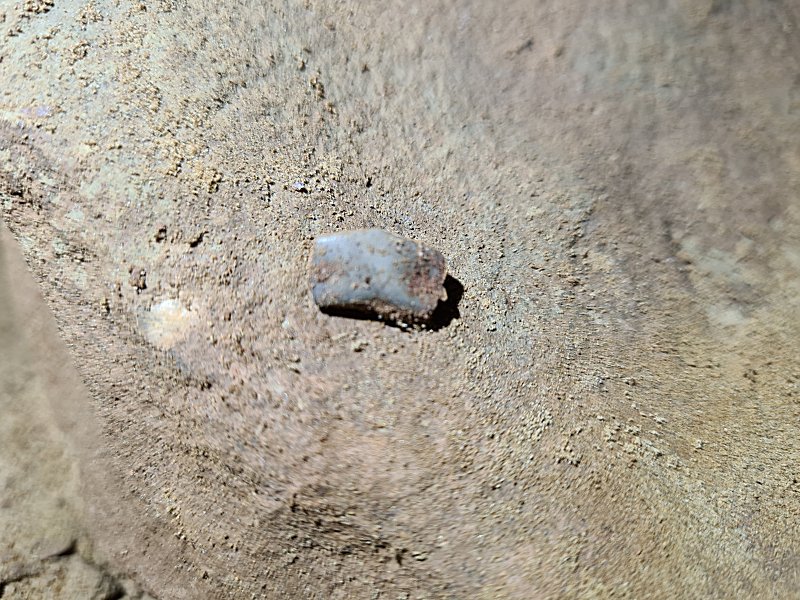 Smooth fossil that was in the wall, but dislodged as soon as it was touched. This has now lost its manganese coating, and it appears to be grey inside. The standard shark fossils are normally brown or black inside.
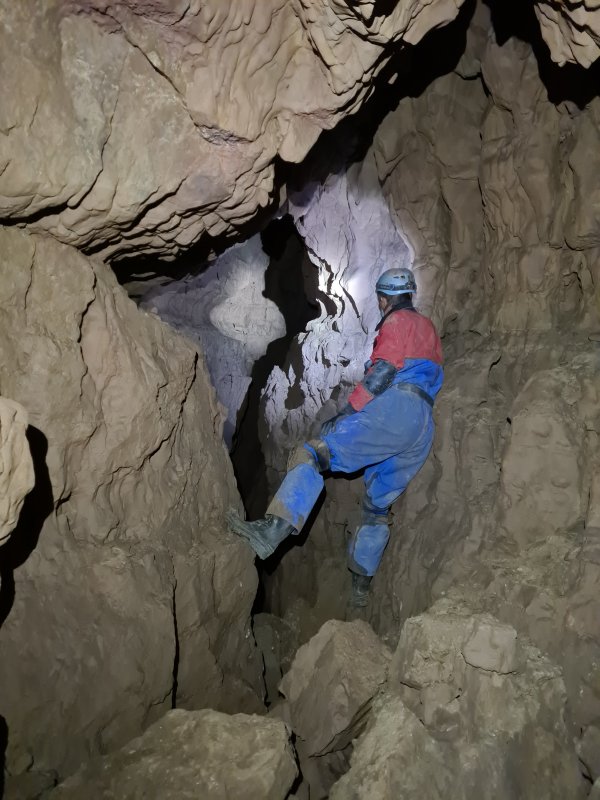 This part of the passage is called Black Rubble Rift.
Modelling by Adam, lighting by Tarquin and Adam
This part of the passage is called Black Rubble Rift.
Modelling by Adam, lighting by Tarquin and Adam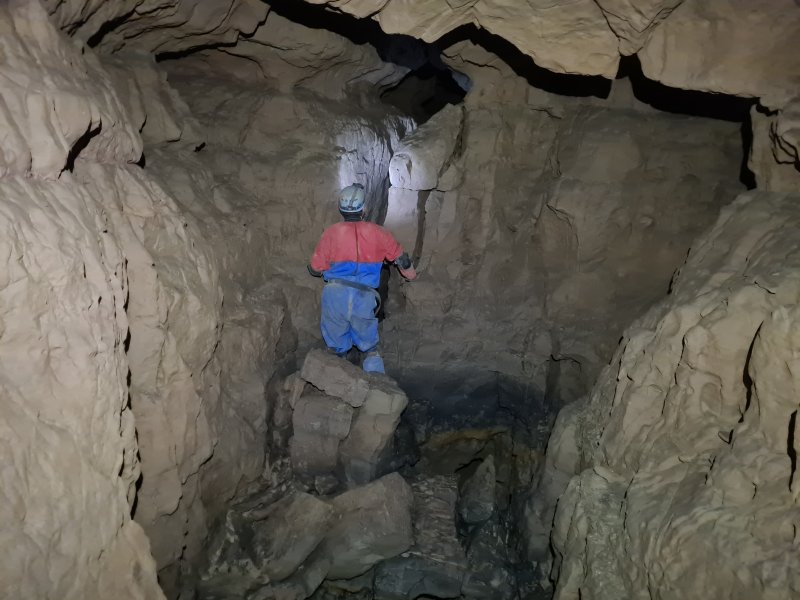 This is the biggest part of the passage that we saw. Apparently there is a far taller section in the later half, but we did not get that far.
Modelling by Adam, lighting by Tarquin and Adam
This is the biggest part of the passage that we saw. Apparently there is a far taller section in the later half, but we did not get that far.
Modelling by Adam, lighting by Tarquin and Adam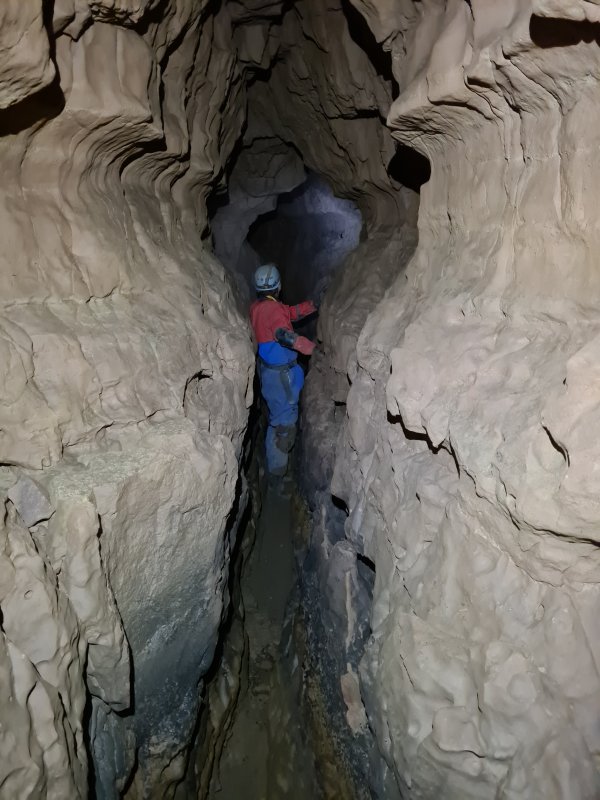 Narrower section beyond.
Modelling by Adam, lighting by Tarquin and Adam
Narrower section beyond.
Modelling by Adam, lighting by Tarquin and Adam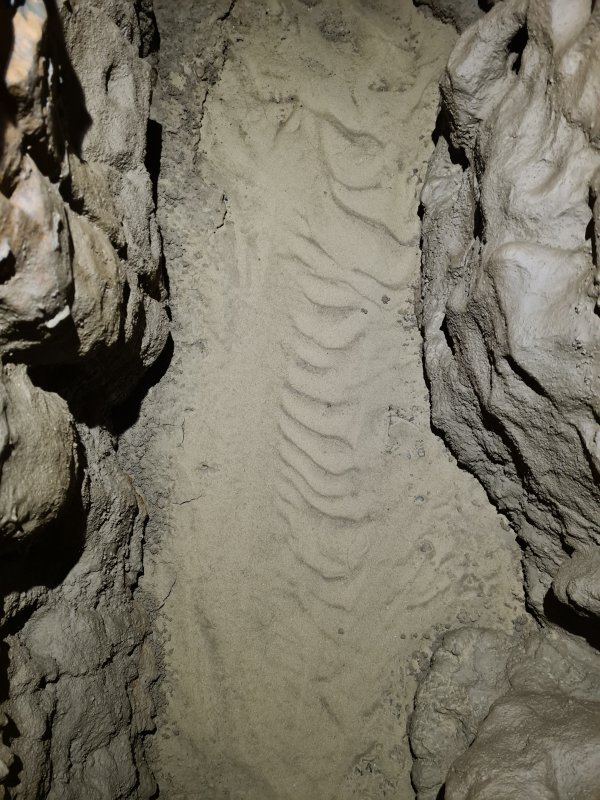 Sand ripples in the floor. These get erased when someone passes, then recreated when the stream flows.
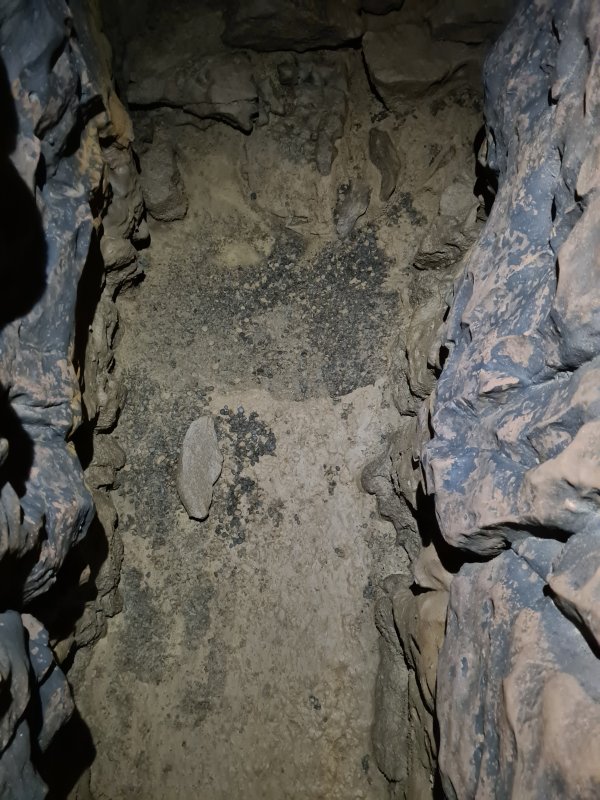 Pebble floor, the more normal substrate.
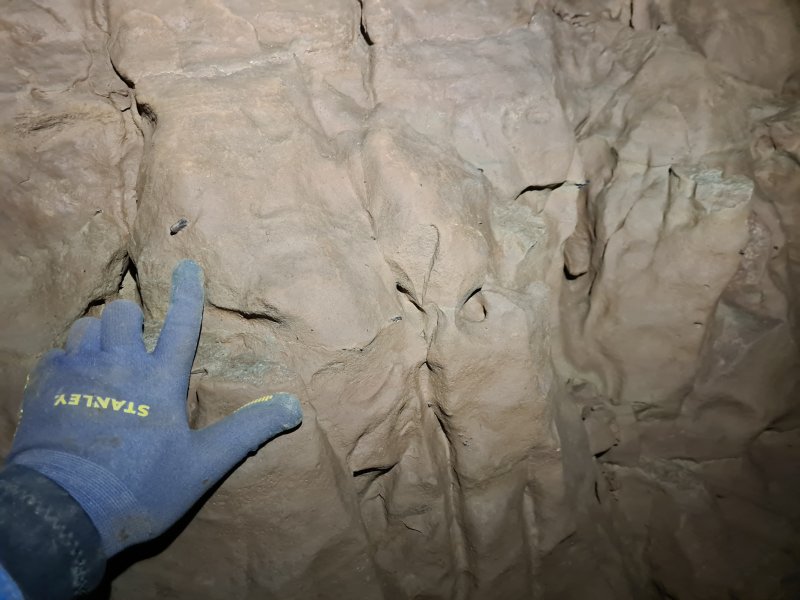 Cluster of assorted bone fossils.
Modelling by the hand of Tarquin
Cluster of assorted bone fossils.
Modelling by the hand of Tarquin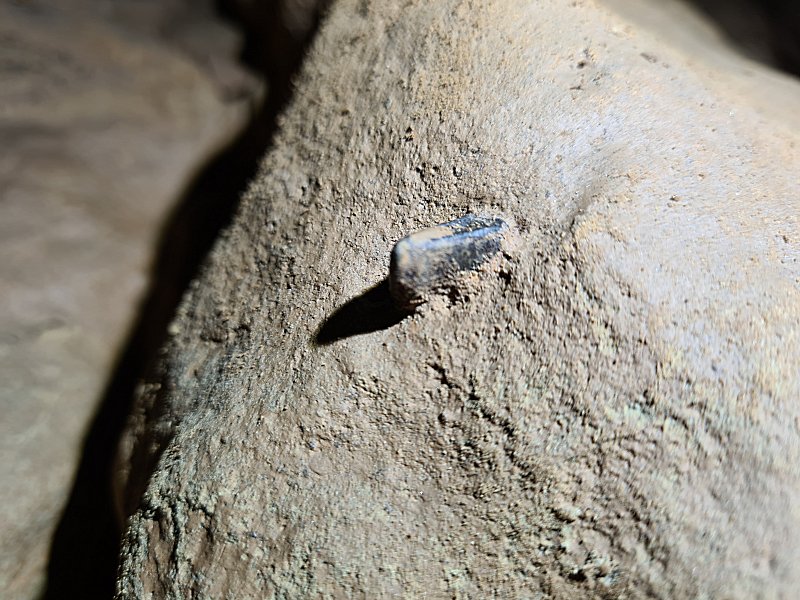 Fossil bone fragment.
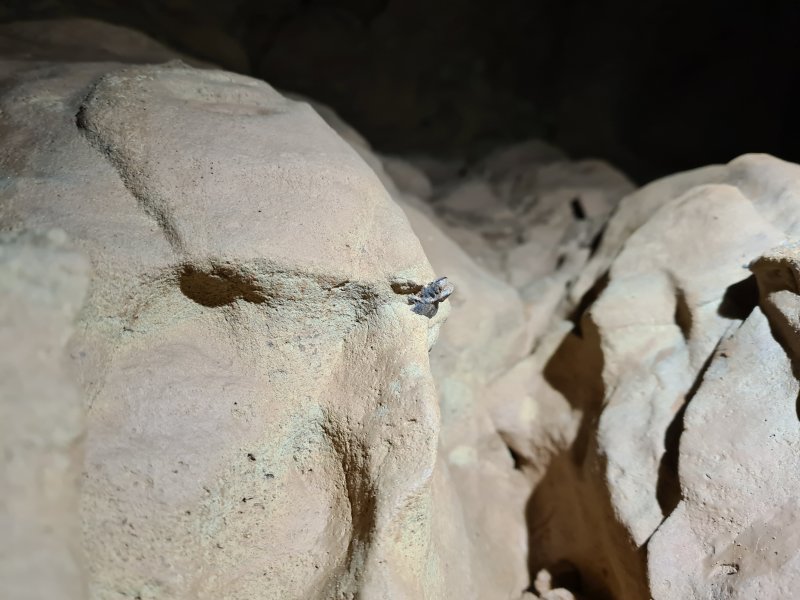 Fossil bone fragment.
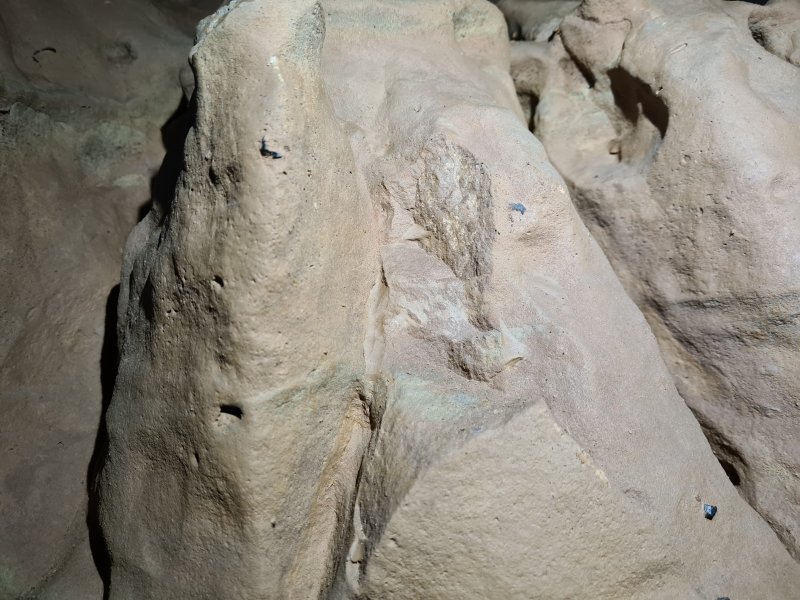 Fossil bone fragments.
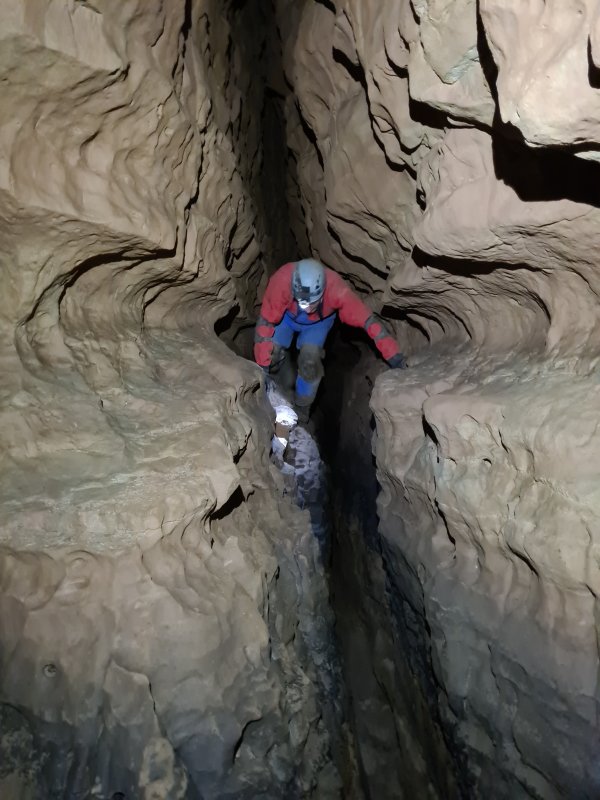 Just before the next left bend.
Modelling by Adam, lighting by Tarquin and Adam
Just before the next left bend.
Modelling by Adam, lighting by Tarquin and Adam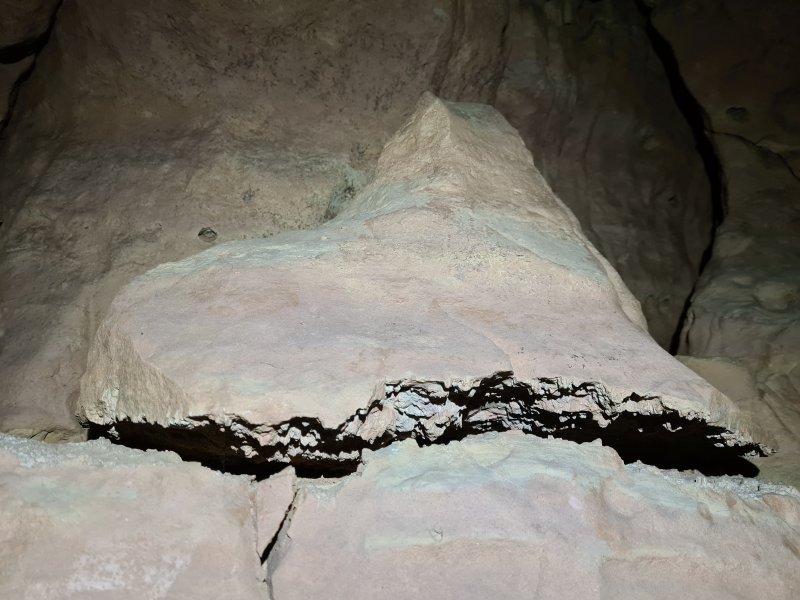 Fracture along stylolites. This is a jagged line - actually a two dimensional jagged plane - where the rock pressure has caused the main rock to dissolve, leaving behind only the impurities (clay).
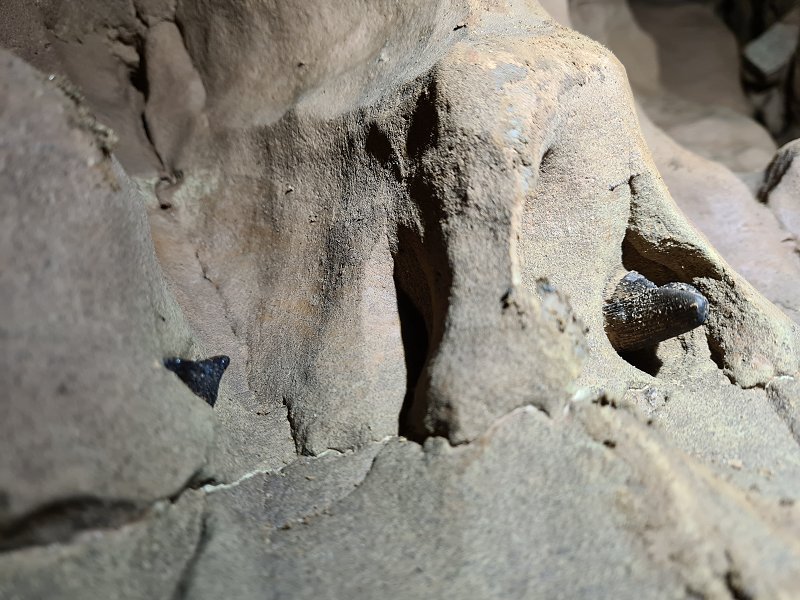 Ctenacanthus dorsal spine (right), and an unnown fossil on the left bend. The fossil on the left looks a bit like a shark tooth, but is not really spiky enough for a Ctenacanthus, so it it is probably something else that has been eroded into that shape.
 After the left corner.
Modelling by Adam, lighting by Tarquin and Adam
After the left corner.
Modelling by Adam, lighting by Tarquin and Adam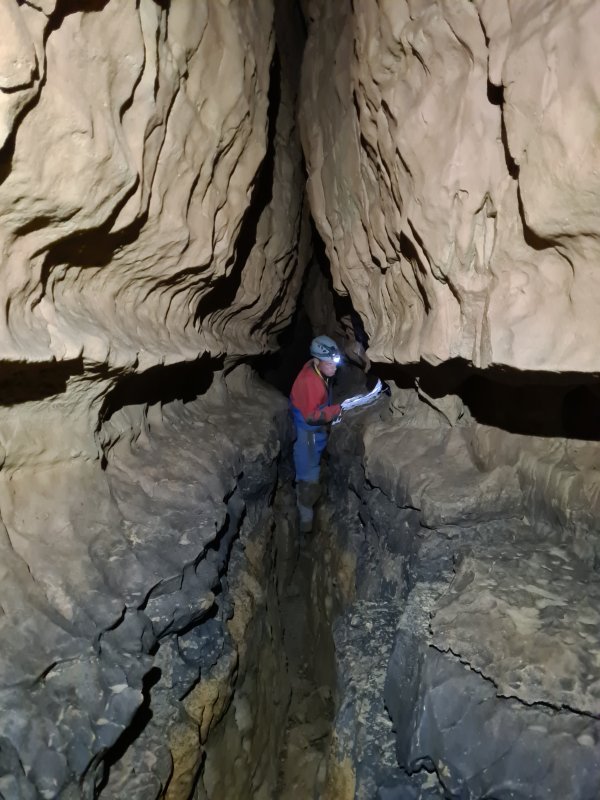 Before the right corner.
Modelling by Adam, lighting by Tarquin and Adam
Before the right corner.
Modelling by Adam, lighting by Tarquin and Adam Crushed Ctenacanthus dorsal spine at the right corner.
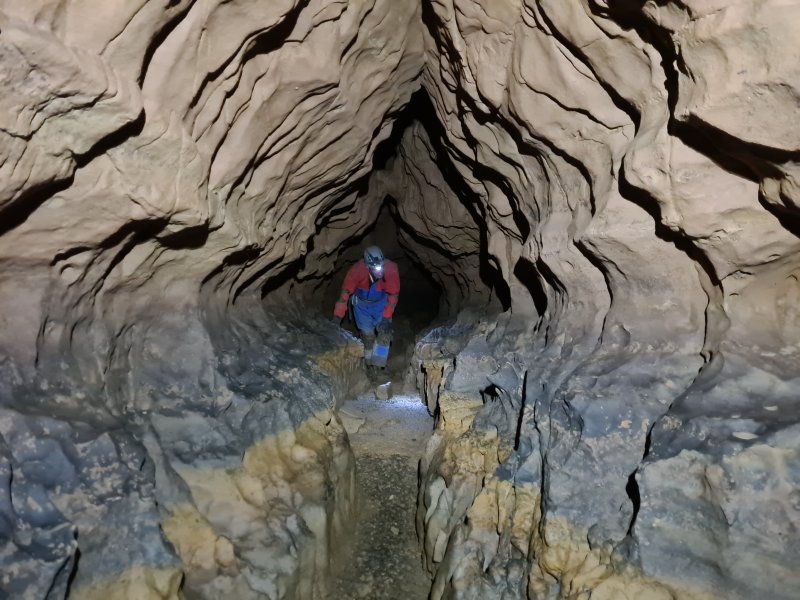 After the right corner.
Modelling by Adam, lighting by Tarquin and Adam
After the right corner.
Modelling by Adam, lighting by Tarquin and Adam Approaching the seasonal duck.
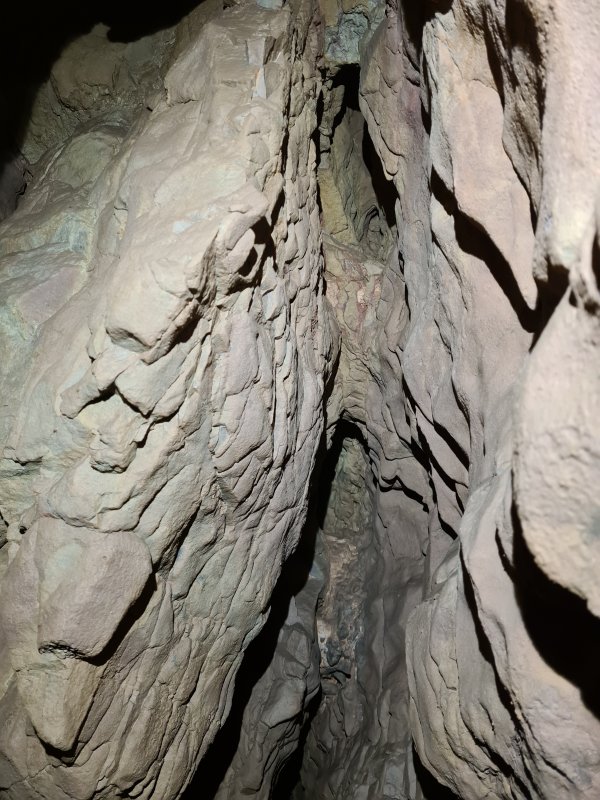 Tiny line of breccia in the ceiling.
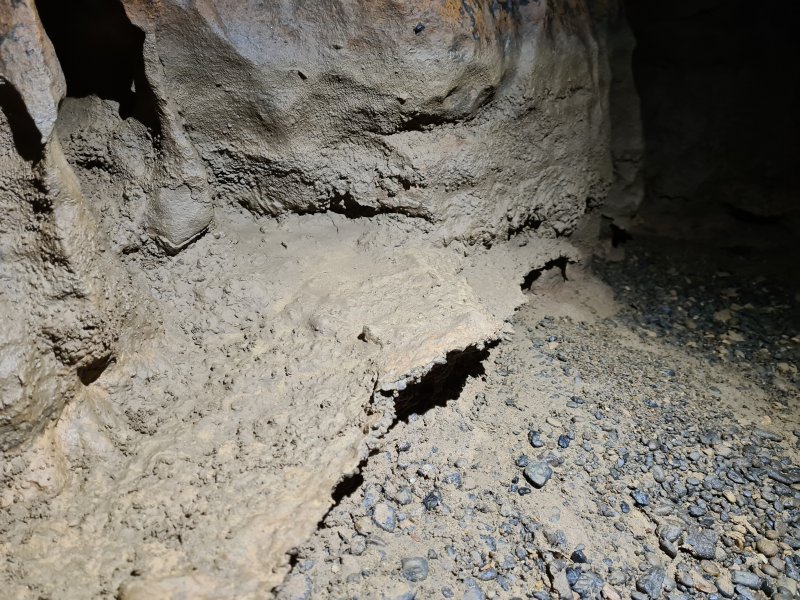 False floor, some kind of sediment crust on top of pebbles.
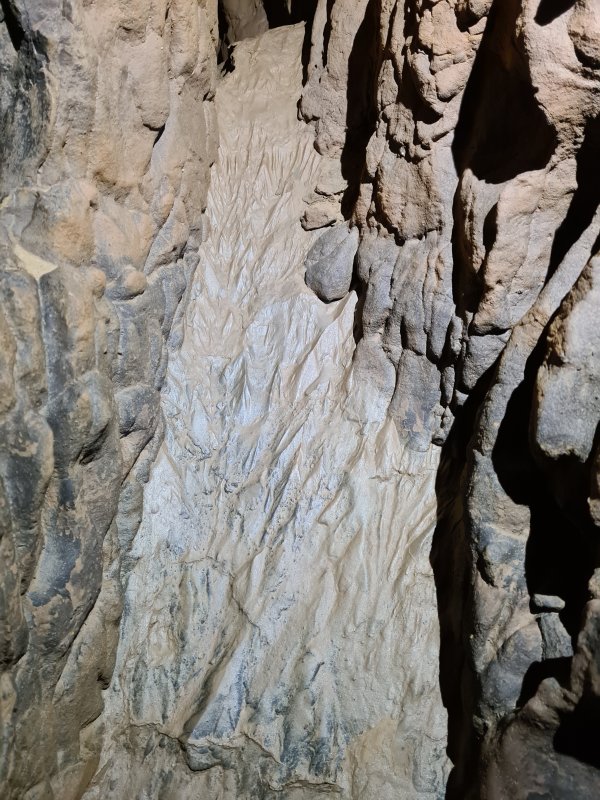 Mud formations created by repeated flooding and draining.
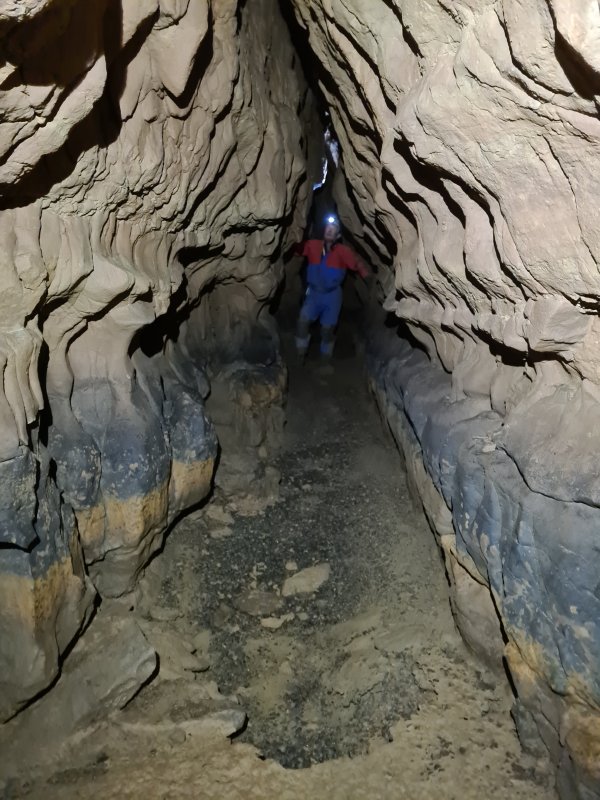 Just before the seasonal duck. The floor here heads downhill quite substantially.
Modelling by Adam, lighting by Tarquin and Adam
Just before the seasonal duck. The floor here heads downhill quite substantially.
Modelling by Adam, lighting by Tarquin and Adam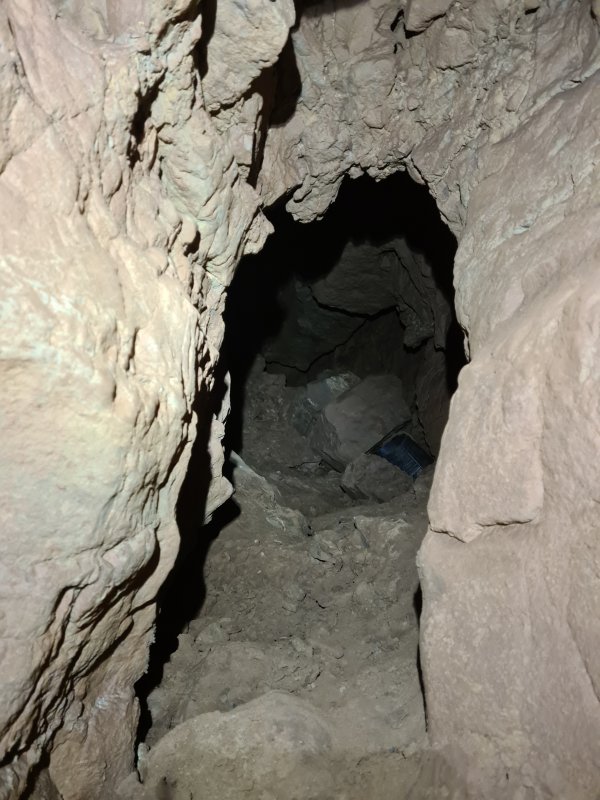 Dig on the side just before the seasonal duck. This looks like someone was trying to dig a bypass to the duck, but there is no passage for it to connect to.
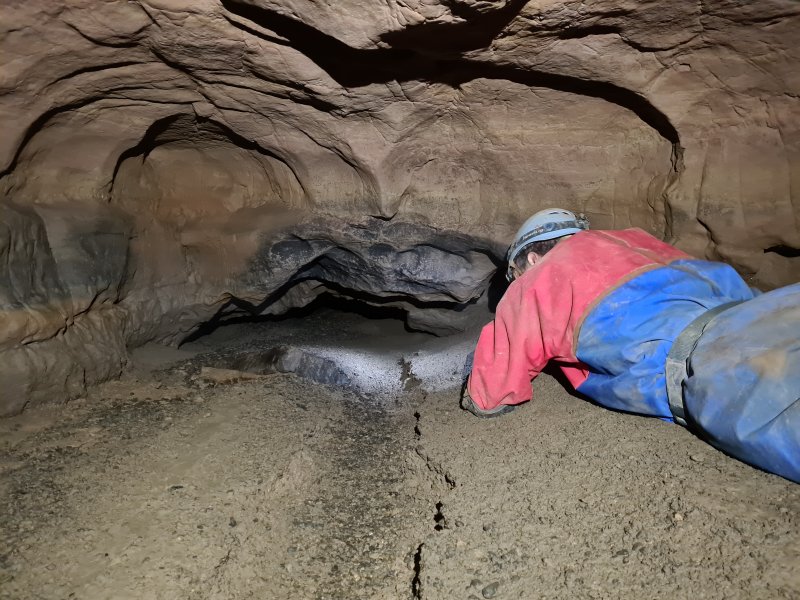 The seasonal duck. It was completely dry. However, with rain before the next trip, this had turned into a stream, which made it a damp crawl. It was not a duck, since the floor slopes down enough for the water not to rise significantly in moderate flow. However, in winter, it can become a duck, if the flow is strong enough to cause it to pond up more.
Modelling by Adam, lighting by Tarquin and Adam
The seasonal duck. It was completely dry. However, with rain before the next trip, this had turned into a stream, which made it a damp crawl. It was not a duck, since the floor slopes down enough for the water not to rise significantly in moderate flow. However, in winter, it can become a duck, if the flow is strong enough to cause it to pond up more.
Modelling by Adam, lighting by Tarquin and Adam The upstream side of the seasonal duck.
Modelling by Adam, lighting by Tarquin and Adam
The upstream side of the seasonal duck.
Modelling by Adam, lighting by Tarquin and Adam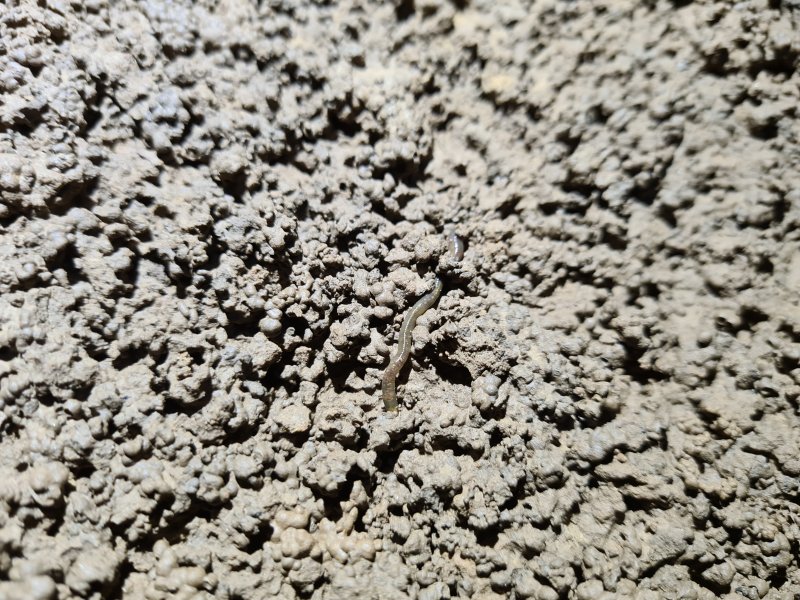 Worm and wormcast from the colony at the seasonal duck.
Modelling by Mudmuncher
Worm and wormcast from the colony at the seasonal duck.
Modelling by Mudmuncher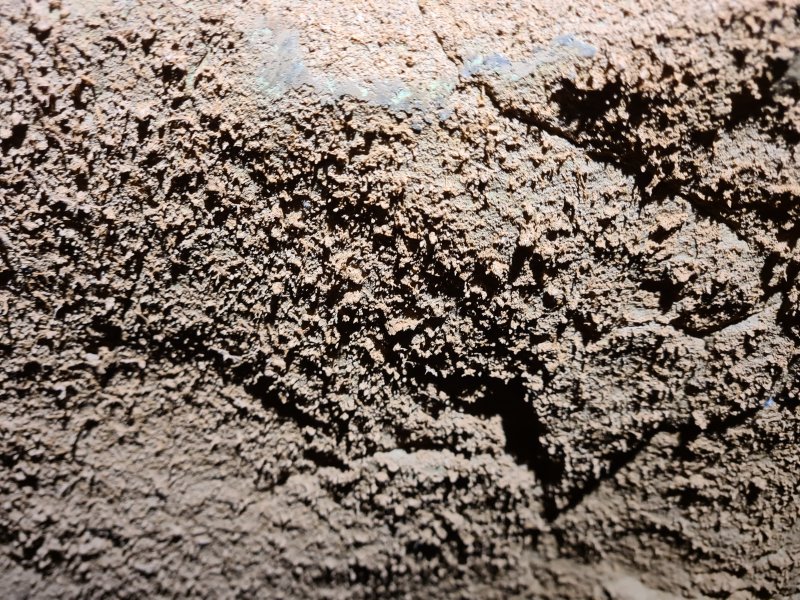 Dried flood scum at the seasonal duck.
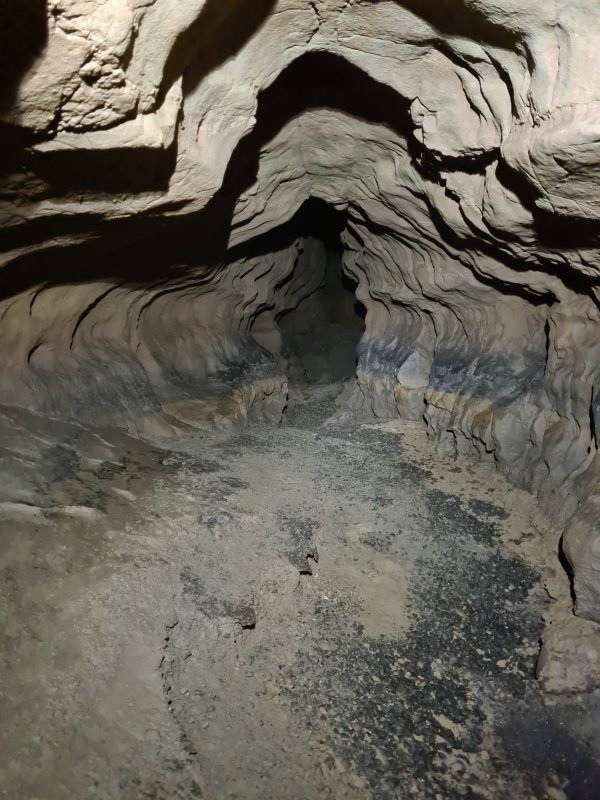 Upstream of the duck, the passage becomes stooping sized again. We took a look a short distance along the passage then had to return. Another trip was needed for the section beyond here.