Slaughter Stream Cave Kuwait Passage trip 25/06/2021
Unless otherwise stated, camera, setups, lighting, edits and gallery effects by Tarquin. Modelling and lighting at various points will be Mark Tringham and Adam Fletcher.
This was a surveying trip aimed at part of Kuwait Passage. The gallery is intended to assist in assessing the speleogenesis (cave development) of this part of the cave, and is therefore somewhat lengthy. The remaining part of Kuwait Passage was photographed extensively in a subsequent gallery.
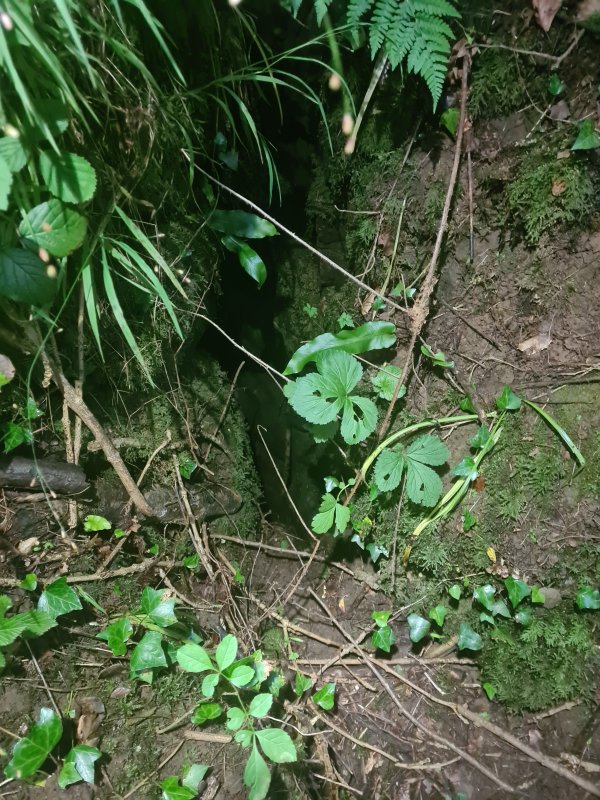
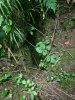 The nearest cave entrance from the main Wet Sink Entrance is Dry Sink. This has a couple of openings, including this almost invisible dry slot.
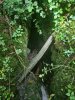 The main Dry Sink is full of debris, and has not been connected to the main cave. However, its water supplies several of the inlets in the cave, the first of which is just before the entrance series reaches the main streamway at Cross Stream Junction. Rather humorously, the Wet Sink entrance is dry except in extreme floods, while the Dry Sink entrance is always wet.
Lighting by Tarquin, Mark and Sol
The main Dry Sink is full of debris, and has not been connected to the main cave. However, its water supplies several of the inlets in the cave, the first of which is just before the entrance series reaches the main streamway at Cross Stream Junction. Rather humorously, the Wet Sink entrance is dry except in extreme floods, while the Dry Sink entrance is always wet.
Lighting by Tarquin, Mark and Sol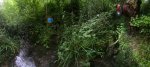 Immediately above the Dry Sink entrance is an outflow from the local sewage treatment works (to the right of the blue sign). In most conditions, this is completely dry. However, in severe floods every few years, this can outflow effluent (partially treated sewage) into the sink. This used to happen regularly, but for many years had remained dry. Early in 2021, it had outflowed. This intentional vadalism is done because in the past, it used to flow to the nearby streams, and had killed cattle who drank it. Apparently, dumping it into a cave takes it out of sight, and is therefore OK, even though karst aquifers provide no natural filtration, and the effluent then emerges unfiltered into the River Wye Area Of Outstanding Natural Beauty where it affects the fish and river tourism instead. There is no getting away from this fact in the cave, though the subsequent floods usually remove most of the obvious traces. The water in the cave must not be used for drinking, and any cuts must be cleaned. It is a real shame, because the cave is one of the finest river caves in the area, and does not deserve this abuse. The water treatment architects, and the planners who authorised this, should be ashamed of themselves.
Modelling by Mark and Adam, lighting by Tarquin, Sol and Mark
Immediately above the Dry Sink entrance is an outflow from the local sewage treatment works (to the right of the blue sign). In most conditions, this is completely dry. However, in severe floods every few years, this can outflow effluent (partially treated sewage) into the sink. This used to happen regularly, but for many years had remained dry. Early in 2021, it had outflowed. This intentional vadalism is done because in the past, it used to flow to the nearby streams, and had killed cattle who drank it. Apparently, dumping it into a cave takes it out of sight, and is therefore OK, even though karst aquifers provide no natural filtration, and the effluent then emerges unfiltered into the River Wye Area Of Outstanding Natural Beauty where it affects the fish and river tourism instead. There is no getting away from this fact in the cave, though the subsequent floods usually remove most of the obvious traces. The water in the cave must not be used for drinking, and any cuts must be cleaned. It is a real shame, because the cave is one of the finest river caves in the area, and does not deserve this abuse. The water treatment architects, and the planners who authorised this, should be ashamed of themselves.
Modelling by Mark and Adam, lighting by Tarquin, Sol and Mark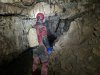 Looking downstream from Cross Stream Junction, the main river cave. This section is known as Main Stream Passage 1. The water is already tainted at this point, from the last inlet in the entrance series.
Modelling by Mark, lighting by Tarquin and Mark
Looking downstream from Cross Stream Junction, the main river cave. This section is known as Main Stream Passage 1. The water is already tainted at this point, from the last inlet in the entrance series.
Modelling by Mark, lighting by Tarquin and Mark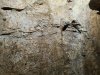 Fossil brachyopod shells, which stick out of the wall visibly in a few distinct beds within the cave. Strangely, the fossils are quite soft, and may bend or snap off easily when touched. Brachopods (meaning "arm foot") are similar to bivalve molluscs like mussels, but somewhat flatter, and with a hinge at the end instead of the side of the shell.
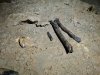 Bones on a mudbank. These are rather large, with the tooth on the left appearing to be from a horse or cow. An inlet on the right here also comes from Dry Sink.
 An early oxbow. This has an inlet, which appears to have a cleaner water source, though the actual source is not known.
Modelling by Adam, lighting by Tarquin and Adam
An early oxbow. This has an inlet, which appears to have a cleaner water source, though the actual source is not known.
Modelling by Adam, lighting by Tarquin and Adam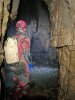 An inlet aven, where most of the Dry Sink water enters. On the way in we could not smell anything unusual here, but on the way out, we did notice there was a somewhat earthy smell, hardly surprising considering the sink is almost directly above, and the water has just come from the surface. There was no noticeable smell anywhere else in the cave.
Modelling by Mark, lighting by Tarquin and Mark
An inlet aven, where most of the Dry Sink water enters. On the way in we could not smell anything unusual here, but on the way out, we did notice there was a somewhat earthy smell, hardly surprising considering the sink is almost directly above, and the water has just come from the surface. There was no noticeable smell anywhere else in the cave.
Modelling by Mark, lighting by Tarquin and Mark A mushroom-like rock formation in the stream. This is adorned with what appears to be the remains of a sanitary towel. These are the most commonly seen pollution (why are they being flushed anyway?...), as they do not decompose like other items. The cleaning crew of cavers will take care of these items on a subsequent trip - these pictures were taken to assist with the process.
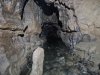 The first major inlet on the left is the lengthy East Stream Passage. This passes beyond the entrance series, and seems to have a different water source, but is not used for drinking, to be on the safe side.
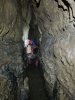 The stream gets a little deeper, thigh deep at one point, and it is impossible to keep your feet dry.
Modelling by Mark, lighting by Tarquin and Mark
The stream gets a little deeper, thigh deep at one point, and it is impossible to keep your feet dry.
Modelling by Mark, lighting by Tarquin and Mark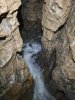 The stream then charges off along a narrow rift into Sump 1.
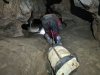 Instead, we take Dryslade Passage, a dry oxbow that bypasses the sump.
Modelling by Mark, lighting by Tarquin and Mark
Instead, we take Dryslade Passage, a dry oxbow that bypasses the sump.
Modelling by Mark, lighting by Tarquin and Mark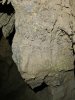 Like a lot of the early cave, Dryslade Passage is adorned with rich yellow patches, which are also often seen in other caves. These look like lichens (which would require daylight) but they are actually bacterial mats. They are hydrophobic; meaning that they repel water, causing it to bead up on the surface and reflect light, so they appear to glisten. They feed on rotting vegitation in flood waters, and will be well fed in here.
 Up on the walls of Dryslade Passage is a very visible flood line, with bits of vegitation. The white fragments appear like immature helictites, and are insultingly known as Shitites. These are likely to be pieces of toilet tissue that have stuck to the walls during a previous outflow. Don't touch the formations.
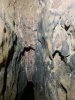 Fault breccia ("brechee-a") in Dryslade Passage. This is made from re-cemented fragments of rock that were originally shattered by movement of a fault. They are easily distinguished from a conglomerate by looking for the sharply angled pieces of stone, where a conglomerate would have rounded cobbles.
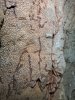 Vermiculation - little bunches of powdered clay. While these can form naturally (for example, where water dribbles over a surface), these are almost certainly bacterial in origin, with the bacteria slowly moving and clumping fragments of clay. In this case, the clay appears to be haematite, a red form of ochre.
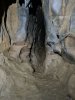 A torturously tight tube on one side is Kamasutra 2 (yes, that is how it is spelled on the survey, instead of "Karma Sutra 2"). This has been followed for about 100 m, nearly forming an oxbow.
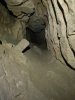 The end of Coal Seam Passage, which forms the round trip from The Chunnel. It does not appear to follow a coal seam.
 The canyon of Dryslade Passage, beyond Coal Seam Passage.
Modelling by Mark, lighting by Tarquin and Mark
The canyon of Dryslade Passage, beyond Coal Seam Passage.
Modelling by Mark, lighting by Tarquin and Mark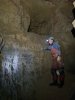 The next major side passage is Pirate Passage, one of the longest side passages in the cave, at about 1.5 km in length. It has no significant side passages of its own, but gains an inlet stream along its second half, and includes joys such as a duck. There is another side passage in a very similar position ahead, called Dry Dig Passage, but it ends almost immediately. At a dig, of course.
Modelling by Adam, lighting by Tarquin and Adam
The next major side passage is Pirate Passage, one of the longest side passages in the cave, at about 1.5 km in length. It has no significant side passages of its own, but gains an inlet stream along its second half, and includes joys such as a duck. There is another side passage in a very similar position ahead, called Dry Dig Passage, but it ends almost immediately. At a dig, of course.
Modelling by Adam, lighting by Tarquin and Adam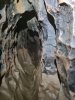 Kamasutra 1, another torturously tight side passage, which has been followed for 30 metres to a pitch into a static sump. And yes, the passages are named in the wrong order.
 To give a sense of scale to Kamasutra 1. It's almost a joke; hard to believe anyone has followed it, and surveyed it.
Modelling by Adam
To give a sense of scale to Kamasutra 1. It's almost a joke; hard to believe anyone has followed it, and surveyed it.
Modelling by Adam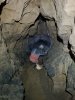 Former sump in Dryslade Passage.
Modelling by Adam, lighting by Tarquin and Adam
Former sump in Dryslade Passage.
Modelling by Adam, lighting by Tarquin and Adam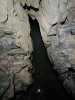 Dryslade Passage ends at a traverse over Sump 2. This is relatively short, regaining a lengthy dry passage, ending at Well Sump, where the water comes from Sump 1. The last section of dry passage is called Condom Passage, which is painfully appropriate, as one was high on the rock ledges here a couple of decades ago on my first visit to the cave.
Modelling by Tarquin's left toe
Dryslade Passage ends at a traverse over Sump 2. This is relatively short, regaining a lengthy dry passage, ending at Well Sump, where the water comes from Sump 1. The last section of dry passage is called Condom Passage, which is painfully appropriate, as one was high on the rock ledges here a couple of decades ago on my first visit to the cave.
Modelling by Tarquin's left toe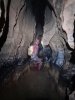 Main Stream 2 (yes, the word "Passage" is missing from the name this time) continues as a fine canyon. The black staining on the walls is much more evident now. Its origin is not fully known, but it appears to be manganese, perhaps precipitated onto the walls by bacterial colonies which create it from the minerals they find in the water.
Modelling by Mark, lighting by Tarquin and Mark
Main Stream 2 (yes, the word "Passage" is missing from the name this time) continues as a fine canyon. The black staining on the walls is much more evident now. Its origin is not fully known, but it appears to be manganese, perhaps precipitated onto the walls by bacterial colonies which create it from the minerals they find in the water.
Modelling by Mark, lighting by Tarquin and Mark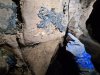 The black coating is over the fossil layer too.
Modelling by Mark, lighting by Tarquin and Mark
The black coating is over the fossil layer too.
Modelling by Mark, lighting by Tarquin and Mark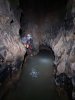 A cascade into a large pool, which is deep in places, but whose depth can be easily avoided using shallow ledges.
Modelling by Adam, lighting by Tarquin and Adam
A cascade into a large pool, which is deep in places, but whose depth can be easily avoided using shallow ledges.
Modelling by Adam, lighting by Tarquin and Adam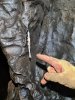 Another decoration.
Modelling by Adam
Another decoration.
Modelling by Adam The next side passage is Echo Passage, over 500 m long. It gains the stream from Pirate Passage. An oxbow at its start leads back to the last cascade.
 Downstream, the streamway develops into a tall canyon.
Modelling by Mark, lighting by Tarquin and Mark
Downstream, the streamway develops into a tall canyon.
Modelling by Mark, lighting by Tarquin and Mark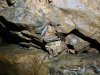 More remains of flooding. This appears to be a fragment of conservation tape, and some sanitary towel.
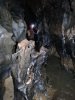 More pieces of conservation tape, wrapped around a rock. You quickly get a picture of how severe the flooding can be here.
Modelling by Mark, lighting by Tarquin and Mark
More pieces of conservation tape, wrapped around a rock. You quickly get a picture of how severe the flooding can be here.
Modelling by Mark, lighting by Tarquin and Mark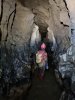 The ceiling becomes arched, and begins to drop. The manganese tide mark is particularly striking here.
Modelling by Mark, lighting by Tarquin and Mark
The ceiling becomes arched, and begins to drop. The manganese tide mark is particularly striking here.
Modelling by Mark, lighting by Tarquin and Mark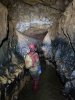 Manganese against a white calcite arch.
Modelling by Mark, lighting by Tarquin and Mark
Manganese against a white calcite arch.
Modelling by Mark, lighting by Tarquin and Mark More remains of the outflow. A pity.
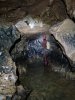 The ceiling lowers further, or to be more accurate, the ceiling has remained at the same gradient as before, but the trench has not cut down as deeply, as the passage is approaching the water table.
Modelling by Mark, lighting by Tarquin and Mark
The ceiling lowers further, or to be more accurate, the ceiling has remained at the same gradient as before, but the trench has not cut down as deeply, as the passage is approaching the water table.
Modelling by Mark, lighting by Tarquin and Mark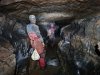 The final part of the streamway is a fine keyhole, easily my favourite piece of passage in the system.
Modelling by Mark and Adam, lighting by Tarquin, Mark and Adam
The final part of the streamway is a fine keyhole, easily my favourite piece of passage in the system.
Modelling by Mark and Adam, lighting by Tarquin, Mark and Adam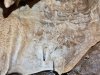 Helictites in the streamway.
 A deep pool beneath a disproportionately small cascade. This is avoided by crawling along the ledges.
Modelling by Adam, lighting by Tarquin and Adam
A deep pool beneath a disproportionately small cascade. This is avoided by crawling along the ledges.
Modelling by Adam, lighting by Tarquin and Adam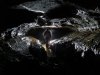 The streamway ends with this superb phreatic tube.
Modelling by Adam, lighting by Mark
The streamway ends with this superb phreatic tube.
Modelling by Adam, lighting by Mark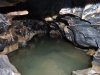 The keyhole's cleft then darts through the wall, and takes the river with it, into Sump 3. Beyond here are Sump 4 and Sump 5, followed by a too tight bedding. This is the last time the river is seen within the cave.
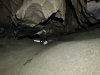 The way on is ahead, into the remains of the phreas, which begins as a crawl over flood sediment.
Modelling by Mark, lighting by Tarquin and Mark
The way on is ahead, into the remains of the phreas, which begins as a crawl over flood sediment.
Modelling by Mark, lighting by Tarquin and Mark The sediment soon disappears, and the majority of the cave is then a good size, with only occasional sand banks.
Modelling by Mark, lighting by Tarquin and Mark
The sediment soon disappears, and the majority of the cave is then a good size, with only occasional sand banks.
Modelling by Mark, lighting by Tarquin and Mark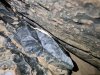 There are occasional remains showing extreme flooding. This is a piece of conservation tape, jammed into a gap in the rocks.
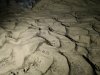 Ripples in the sand, looking like small sand dunes. These clearly show a flow to the right, futher into the passage. The entire route serves as a severe flood overflow, with very little dry passage when that happens.
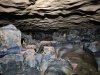 A bedding on the left is Yud Scraper ("head scraper", in local dialect), a tight bedding leading back to the start of Sump 3.
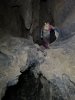 Natural rock bridge.
Modelling by Mark, lighting by Tarquin and Mark
Natural rock bridge.
Modelling by Mark, lighting by Tarquin and Mark Bottom Bend, a series of sand crawls where the passage turns a hard right, and picks up the direction that it follows almost until its end.
Modelling by Mark, lighting by Tarquin and Mark
Bottom Bend, a series of sand crawls where the passage turns a hard right, and picks up the direction that it follows almost until its end.
Modelling by Mark, lighting by Tarquin and Mark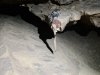 Another remains of outflow. Sanitary towel again, and a bit of conservation tape. The brown smudge is a leaf - the other brown smudges you might be concerned about are never seen, as they get broken down much more effectively.
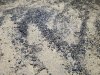 White particles of tissue in the sand.
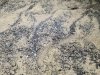 Sand shitites.
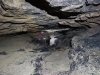 Approaching The Zider Press.
Modelling by Mark, lighting by Tarquin and Mark
Approaching The Zider Press.
Modelling by Mark, lighting by Tarquin and Mark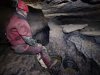 The Zider Press, an oxbowing phreas and deep rift. The rift is the way on, and is the point where the passage first gains the fault which it will follow for over 750 metres. The name is local dialect for "cider press". From here onwards, the passage is called Kuwait Passage, as the walls often look like they have been coated in oil.
Modelling by Mark, lighting by Tarquin and Mark
The Zider Press, an oxbowing phreas and deep rift. The rift is the way on, and is the point where the passage first gains the fault which it will follow for over 750 metres. The name is local dialect for "cider press". From here onwards, the passage is called Kuwait Passage, as the walls often look like they have been coated in oil.
Modelling by Mark, lighting by Tarquin and Mark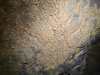 Flood scum on the ceiling. This place really floods when it floods.
 Large fossil favosites (that is the singular form) in the ceiling of the Zider Press, a densely communal coral, which looks like a honeycomb when seen in fossil form. It seems that there is great confusion about how to pronounce this name, with several conflicting demos online, and several dictionaries also giving randomly different pronunciations. The name is Latin, and should be pronounced "favoos eetess" in Latin - meaning "it is full of honeycomb". You may also hear it being pronounced "fav o site eez" (using a modern Greek ending which is common in geology), or mispronounced "fav oh site", "fave oh site" or "fav oh zets".
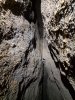 Shitites in the ceiling of the passage.
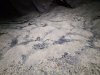 Plants trying to grow in the sand. This looks like a beansprout, as it has not been able to photosynthesise.
 Two more plants.
 The passage then splits into an upper phreas, and a deep slot in the floor. This is not a simple keyhole, as each continues quite independently, following the same line.
Modelling by Mark, lighting by Tarquin and Mark
The passage then splits into an upper phreas, and a deep slot in the floor. This is not a simple keyhole, as each continues quite independently, following the same line.
Modelling by Mark, lighting by Tarquin and Mark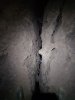 Initially, the lower route can be seen in the floor of the upper route, but the upper route soon climbs high enough for the two levels to separate.
Modelling by hints of Mark and Tarquin's welly
Initially, the lower route can be seen in the floor of the upper route, but the upper route soon climbs high enough for the two levels to separate.
Modelling by hints of Mark and Tarquin's welly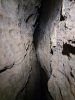 The upper route then becomes exceptionally tight and awkward, but remains uncomfortably navigable, for masochists.
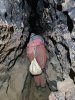 The lower route is stooping size, and is the way on, quickly gaining a solid ceiling.
Modelling by Adam
The lower route is stooping size, and is the way on, quickly gaining a solid ceiling.
Modelling by Adam The lower route soon returns to a good size, with a distinctive cross section, but the upper route does not appear to rejoin it.
Modelling by Mark, lighting by Tarquin, Adam and Mark
The lower route soon returns to a good size, with a distinctive cross section, but the upper route does not appear to rejoin it.
Modelling by Mark, lighting by Tarquin, Adam and Mark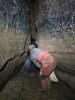 Multiple tide lines, showing how severe the ponding is after floods. Interestingly, the manganese is inverted here, being on top of the lighter colours. This is likely because the sediment has covered the manganese.
Modelling by Adam, lighting by Tarquin and Adam
Multiple tide lines, showing how severe the ponding is after floods. Interestingly, the manganese is inverted here, being on top of the lighter colours. This is likely because the sediment has covered the manganese.
Modelling by Adam, lighting by Tarquin and Adam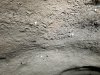 The tide line brings another set of shitites. It is probably best not to lick the rock here.
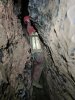 A squeeze, easily bypassed with a climb above into a stooping sized tube. We didn't notice the tube on the way in, and all enjoyed the squeeze, trying not to slip downwards into the tighter part of the rift.
Modelling by Mark, lighting by Tarquin and Mark
A squeeze, easily bypassed with a climb above into a stooping sized tube. We didn't notice the tube on the way in, and all enjoyed the squeeze, trying not to slip downwards into the tighter part of the rift.
Modelling by Mark, lighting by Tarquin and Mark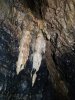 Flowstone on the walls of Kuwait Passage, strikingly bright against the manganese.
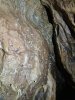 Helictites in Kuwait Passage.
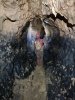 Temporarily becoming tubular.
Modelling by Mark, lighting by Tarquin and Mark
Temporarily becoming tubular.
Modelling by Mark, lighting by Tarquin and Mark A larger bunch of helictites. This is the first significant picture I had taken using the optical zoom feature of my new phone camera. Pretty good, only a little grainy, but much better than trying to crop a picture from the older camera.
 Black stained fault breccia.
Modelling by Mark, lighting by Tarquin and Mark
Black stained fault breccia.
Modelling by Mark, lighting by Tarquin and Mark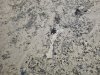 More remains in the sand. Sadly the last severe flooding here was also the last time the outflow was active, and there have not been any subsequent floods to wash the remains away.
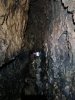 Just before a decorated section of passage.
Modelling by Mark, lighting by Tarquin and Mark
Just before a decorated section of passage.
Modelling by Mark, lighting by Tarquin and Mark Formations in the passage.
 More formations in the ceiling.
Modelling by Mark, lighting by Tarquin and Mark
More formations in the ceiling.
Modelling by Mark, lighting by Tarquin and Mark Formations on the wall.
 Immature helictites.
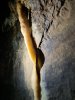 Translucent curtain.
 More fault breccia. Still following that line.
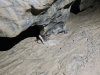 Snagged debris.
 Boxwork highlighted by manganese staining.
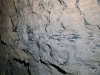 Shells with manganese staining.
 Contrast between the manganese staining and plain rock.
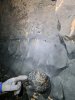 Manganese coated favosites. This one has been sliced through, and interestingly the corallite tubes are not visible in the cross section.
Modelling by Mark's left hand, lighting by Tarquin and Mark
Manganese coated favosites. This one has been sliced through, and interestingly the corallite tubes are not visible in the cross section.
Modelling by Mark's left hand, lighting by Tarquin and Mark Richly coated fault breccia and scallops.
Modelling by Mark's right hand, lighting by Tarquin and Mark
Richly coated fault breccia and scallops.
Modelling by Mark's right hand, lighting by Tarquin and Mark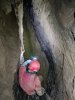 Deep pool at (I think) First Pot. This pool looks beautiful, but it is worth mentioning again that the last time this passage carried water, there was effluent outflow at Dry Sink. This water is contaminated.
Modelling by Mark, lighting by Tarquin and Mark
Deep pool at (I think) First Pot. This pool looks beautiful, but it is worth mentioning again that the last time this passage carried water, there was effluent outflow at Dry Sink. This water is contaminated.
Modelling by Mark, lighting by Tarquin and Mark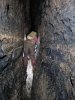 Traversing the canyon.
Modelling by Mark, lighting by Tarquin and Mark
Traversing the canyon.
Modelling by Mark, lighting by Tarquin and Mark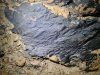 Rich black coating on the sand, some of the most impressive in the passage.
Lighting by Tarquin and Mark
Rich black coating on the sand, some of the most impressive in the passage.
Lighting by Tarquin and Mark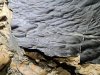 The coat even shimmers with an oil slick rainbow effect. The name Kuwait Passage is well deserved.
Lighting by Tarquin and Mark
The coat even shimmers with an oil slick rainbow effect. The name Kuwait Passage is well deserved.
Lighting by Tarquin and Mark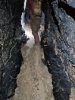 It really does look like a crude oil spill, but this is a natural effect.
Modelling by Mark, lighting by Tarquin and Mark
It really does look like a crude oil spill, but this is a natural effect.
Modelling by Mark, lighting by Tarquin and Mark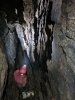 Razor Pot, with its very impressive rock flakes, where we started our survey with Mark in the captain's chair.
Modelling by Mark, lighting by Tarquin and Mark
Razor Pot, with its very impressive rock flakes, where we started our survey with Mark in the captain's chair.
Modelling by Mark, lighting by Tarquin and Mark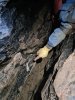 Debris at Razor Pot. This appears to a piece of cloth, or perhaps some conservation tape.
Modelling by Adam, lighting by Tarquin and Adam
Debris at Razor Pot. This appears to a piece of cloth, or perhaps some conservation tape.
Modelling by Adam, lighting by Tarquin and Adam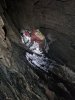 Base of Razor Pot. There is a way on at the bottom, but it is very tight. An alternative is to climb up above it, or traverse on the flakes, into a higher level traversing rift.
Modelling by Mark, lighting by Tarquin and Mark
Base of Razor Pot. There is a way on at the bottom, but it is very tight. An alternative is to climb up above it, or traverse on the flakes, into a higher level traversing rift.
Modelling by Mark, lighting by Tarquin and Mark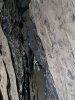 Conservation tape washed into the traverse rift at Lights Out Chamber.
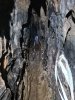 We surveyed into the lower rift from Lights Out Chamber, which had never been surveyed before. It started easily enough, adorned with conservation tape that had been washed in by severe floods.
Modelling by Adam, lighting by Tarquin and Adam
We surveyed into the lower rift from Lights Out Chamber, which had never been surveyed before. It started easily enough, adorned with conservation tape that had been washed in by severe floods.
Modelling by Adam, lighting by Tarquin and Adam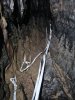 The amount of tape was almost ridiculous, like the river had chosen this spot to decorate.
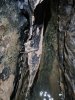 A deep pool in the rift, with more debris.
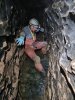 The pool is definitely deep enough to swallow wellies, so we traversed over it to avoid the stagnant water. Beyond here, however, the passage became so tight and awkward that surveying became extremely hard. After struggling for several survey legs, we left it with a single shot into the distance, hoping to at least be able to draw the passage for the survey, leaving it as "continues tight and awkward".
Modelling by Adam, lighting by Tarquin and Adam
The pool is definitely deep enough to swallow wellies, so we traversed over it to avoid the stagnant water. Beyond here, however, the passage became so tight and awkward that surveying became extremely hard. After struggling for several survey legs, we left it with a single shot into the distance, hoping to at least be able to draw the passage for the survey, leaving it as "continues tight and awkward".
Modelling by Adam, lighting by Tarquin and Adam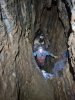 Returning to Lights Out Chamber, we climbed up into the way on, a higher level rift.
Modelling by Adam and Mark, lighting by Tarquin, Adam and Mark
Returning to Lights Out Chamber, we climbed up into the way on, a higher level rift.
Modelling by Adam and Mark, lighting by Tarquin, Adam and Mark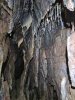 The passage contains a lovely little grotto, with a hole down into the lower rift. This is one of the few parts of the route that might keep a dry floor in severe floods.
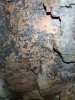 Manganese staining in the grotto.
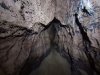 Manganese stained shells in the upper passage.
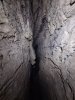 Manganese stained shells in the upper passage.
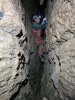 Surveying along a traverse. This was a DistoX survey using PocketTopo, with Adam on instruments, and me (mostly) on stations.
Modelling by Adam, lighting by Tarquin and Adam
Surveying along a traverse. This was a DistoX survey using PocketTopo, with Adam on instruments, and me (mostly) on stations.
Modelling by Adam, lighting by Tarquin and Adam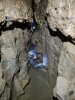 The passage is supposed to have a squeeze, but this is it, and we didn't have to squeeze.
Modelling by Adam and Mark, lighting by Tarquin, Adam and Mark
The passage is supposed to have a squeeze, but this is it, and we didn't have to squeeze.
Modelling by Adam and Mark, lighting by Tarquin, Adam and Mark The second grotto in the upper passage, much more substantial than the first, but with less pristine formations.
Lighting by Tarquin and Adam
The second grotto in the upper passage, much more substantial than the first, but with less pristine formations.
Lighting by Tarquin and Adam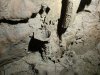 Exposed drip pocket.
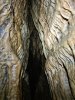 The second grotto.
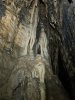 The second grotto.
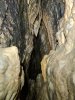 The second grotto.
 The upper passage ends immediately afterwards, at a climb back down, adorned with more flooded-in conservation tape.
Modelling by Adam and Mark, lighting by Tarquin, Adam and Mark
The upper passage ends immediately afterwards, at a climb back down, adorned with more flooded-in conservation tape.
Modelling by Adam and Mark, lighting by Tarquin, Adam and Mark The lower rift rejoins at the bottom of the climb, and fortunately for us, it ended just after where my last Disto shot had landed, and we were able to close the loop.
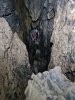 The passage regains its former size, much more impressive. With more conservation tape.
Modelling by Adam, lighting by Tarquin, Adam and Mark
The passage regains its former size, much more impressive. With more conservation tape.
Modelling by Adam, lighting by Tarquin, Adam and Mark The passage passes a boulder pile with a choice of over and under.
Modelling by Adam and Mark, lighting by Tarquin, Adam and Mark
The passage passes a boulder pile with a choice of over and under.
Modelling by Adam and Mark, lighting by Tarquin, Adam and Mark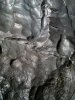 Beautifully glossy black walls.
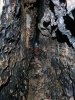 A tall rift passage.
Modelling by Adam, lighting by Tarquin and Adam
A tall rift passage.
Modelling by Adam, lighting by Tarquin and Adam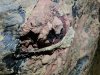 Manganese staining, haematite, and more debris.
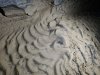 Another set of sand ripples, showing flow from right to left.
 A wide strip of fault breccia.
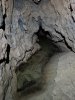 Another deep pool. This could be crossed with dry feet by taking a good line.
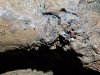 Shitites on the wall. This set had a large mould growth coming from it, and what looked like a deflated egg. Not sure I want to know what it is.
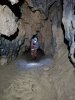 Stooping under an arch.
Modelling by Adam, lighting by Tarquin and Adam
Stooping under an arch.
Modelling by Adam, lighting by Tarquin and Adam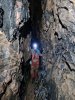 The passage returns to being a fault controlled rift.
Modelling by Adam, lighting by Tarquin and Adam
The passage returns to being a fault controlled rift.
Modelling by Adam, lighting by Tarquin and Adam Manganese stained fractures.
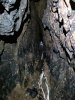 More tapes washed into the rift.
Modelling by Adam, lighting by Tarquin and Adam
More tapes washed into the rift.
Modelling by Adam, lighting by Tarquin and Adam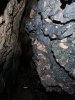 Stained fault breccia.
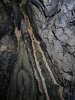 The passage then passes a short side passage ahead and gains a set of crystal pools. The pools are static at this point, but gain a flow later. We did not see exactly where the flowing water starts. This appears to be the point at which Remelt Series begins to track overhead, and a round trip might be established somewhere beyond here. The new survey should help to determine just how close the passages really are, and where a connection might be found.
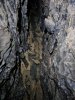 The pools are the way on, but can be partially bypassed with a traverse into an oxbow.
 The part avoided by the oxbow.
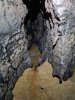 The flowstone floor then heads off into a narrow oxbow.
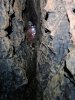 The route avoids the narrow oxbow via a traverse rift.
Modelling by Adam and Mark, lighting by Tarquin, Adam and Mark
The route avoids the narrow oxbow via a traverse rift.
Modelling by Adam and Mark, lighting by Tarquin, Adam and Mark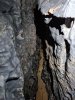 The narrow oxbow returns.
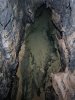 The water then forms a deeper pool, and this one cannot be avoided. Wet feet. Tainted water. However, there is a very minor flow at this point, so the water is fresher than before.
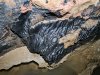 Deep black stains at the end of the pool. Another fake oil spill.
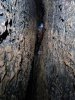 The tiny flow makes a lot of noise at this narrow cascade, and sounds a lot more impressive than it is.
Modelling by Adam, lighting by Tarquin and Adam
The tiny flow makes a lot of noise at this narrow cascade, and sounds a lot more impressive than it is.
Modelling by Adam, lighting by Tarquin and Adam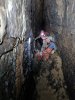 With time running out, we had to turn around at a tall section of rift. We had only made it half way to the end of the passage, but distances are deceptive here; the cave is impressively long, and the amount of survey data we had gathered was substantial. Over a quarter of it had never been surveyed before. The remaining passage finally ends at Static Sump 4 (not to be confused with Sump 4), which has not been passed and ends in silt fill. It should rejoin the main flow, and is the most promising way on.
Modelling by Adam and Mark, lighting by Tarquin, Adam and Mark
With time running out, we had to turn around at a tall section of rift. We had only made it half way to the end of the passage, but distances are deceptive here; the cave is impressively long, and the amount of survey data we had gathered was substantial. Over a quarter of it had never been surveyed before. The remaining passage finally ends at Static Sump 4 (not to be confused with Sump 4), which has not been passed and ends in silt fill. It should rejoin the main flow, and is the most promising way on.
Modelling by Adam and Mark, lighting by Tarquin, Adam and Mark
 The nearest cave entrance from the main Wet Sink Entrance is Dry Sink. This has a couple of openings, including this almost invisible dry slot.
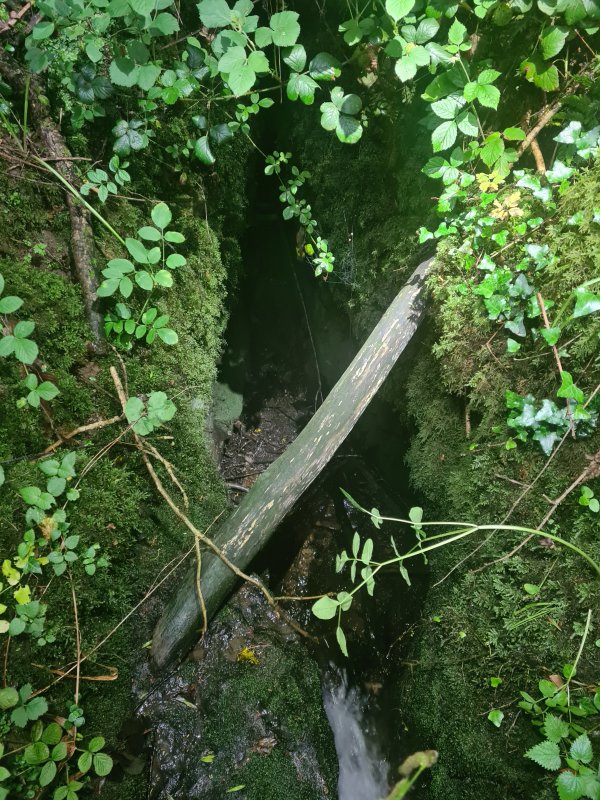 The main Dry Sink is full of debris, and has not been connected to the main cave. However, its water supplies several of the inlets in the cave, the first of which is just before the entrance series reaches the main streamway at Cross Stream Junction. Rather humorously, the Wet Sink entrance is dry except in extreme floods, while the Dry Sink entrance is always wet.
Lighting by Tarquin, Mark and Sol
The main Dry Sink is full of debris, and has not been connected to the main cave. However, its water supplies several of the inlets in the cave, the first of which is just before the entrance series reaches the main streamway at Cross Stream Junction. Rather humorously, the Wet Sink entrance is dry except in extreme floods, while the Dry Sink entrance is always wet.
Lighting by Tarquin, Mark and Sol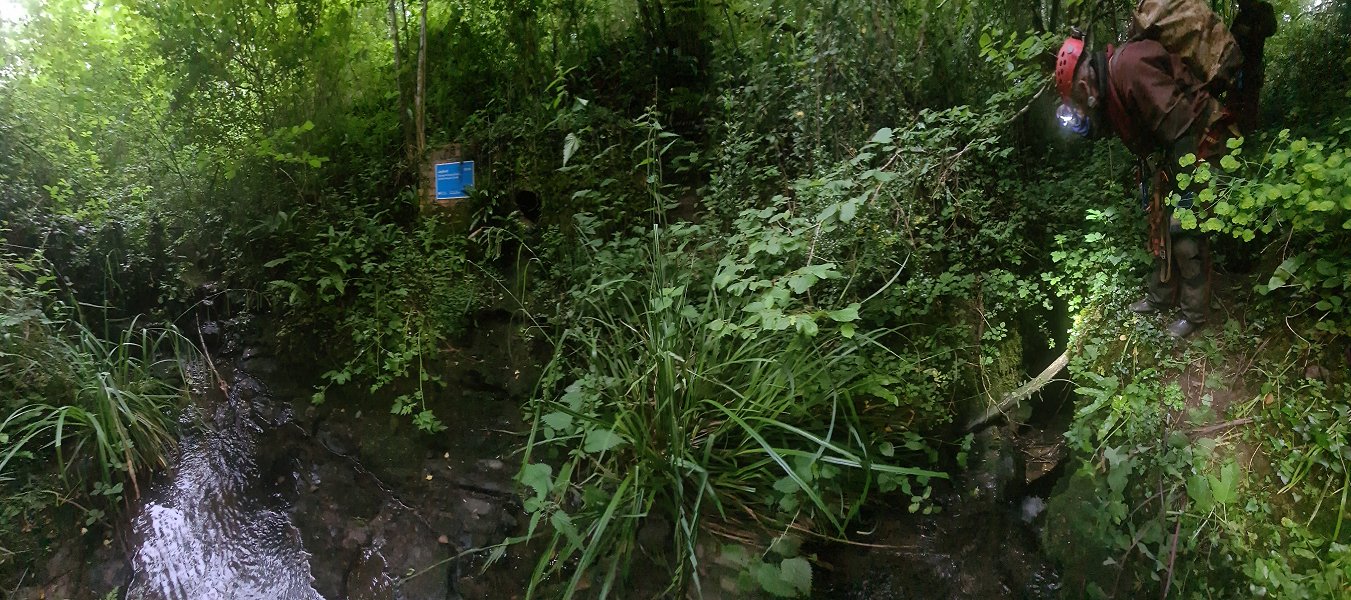 Immediately above the Dry Sink entrance is an outflow from the local sewage treatment works (to the right of the blue sign). In most conditions, this is completely dry. However, in severe floods every few years, this can outflow effluent (partially treated sewage) into the sink. This used to happen regularly, but for many years had remained dry. Early in 2021, it had outflowed. This intentional vadalism is done because in the past, it used to flow to the nearby streams, and had killed cattle who drank it. Apparently, dumping it into a cave takes it out of sight, and is therefore OK, even though karst aquifers provide no natural filtration, and the effluent then emerges unfiltered into the River Wye Area Of Outstanding Natural Beauty where it affects the fish and river tourism instead. There is no getting away from this fact in the cave, though the subsequent floods usually remove most of the obvious traces. The water in the cave must not be used for drinking, and any cuts must be cleaned. It is a real shame, because the cave is one of the finest river caves in the area, and does not deserve this abuse. The water treatment architects, and the planners who authorised this, should be ashamed of themselves.
Modelling by Mark and Adam, lighting by Tarquin, Sol and Mark
Immediately above the Dry Sink entrance is an outflow from the local sewage treatment works (to the right of the blue sign). In most conditions, this is completely dry. However, in severe floods every few years, this can outflow effluent (partially treated sewage) into the sink. This used to happen regularly, but for many years had remained dry. Early in 2021, it had outflowed. This intentional vadalism is done because in the past, it used to flow to the nearby streams, and had killed cattle who drank it. Apparently, dumping it into a cave takes it out of sight, and is therefore OK, even though karst aquifers provide no natural filtration, and the effluent then emerges unfiltered into the River Wye Area Of Outstanding Natural Beauty where it affects the fish and river tourism instead. There is no getting away from this fact in the cave, though the subsequent floods usually remove most of the obvious traces. The water in the cave must not be used for drinking, and any cuts must be cleaned. It is a real shame, because the cave is one of the finest river caves in the area, and does not deserve this abuse. The water treatment architects, and the planners who authorised this, should be ashamed of themselves.
Modelling by Mark and Adam, lighting by Tarquin, Sol and Mark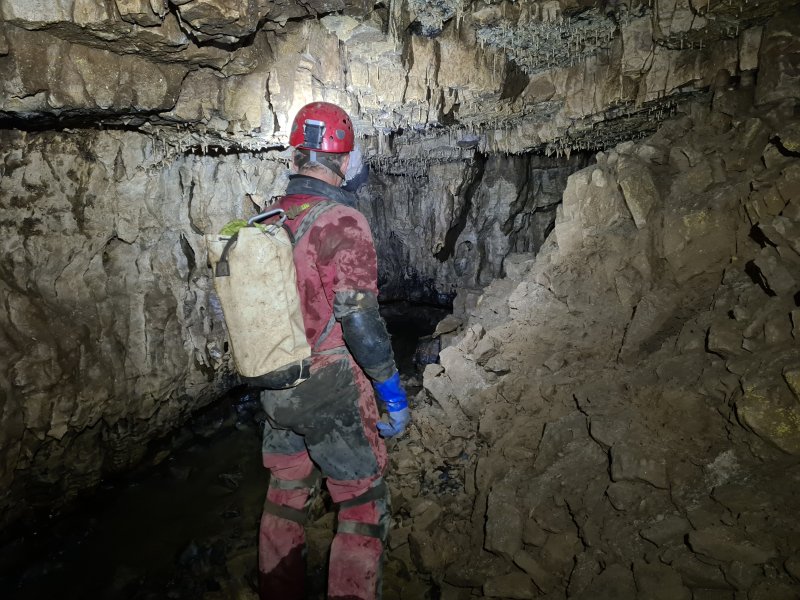 Looking downstream from Cross Stream Junction, the main river cave. This section is known as Main Stream Passage 1. The water is already tainted at this point, from the last inlet in the entrance series.
Modelling by Mark, lighting by Tarquin and Mark
Looking downstream from Cross Stream Junction, the main river cave. This section is known as Main Stream Passage 1. The water is already tainted at this point, from the last inlet in the entrance series.
Modelling by Mark, lighting by Tarquin and Mark Fossil brachyopod shells, which stick out of the wall visibly in a few distinct beds within the cave. Strangely, the fossils are quite soft, and may bend or snap off easily when touched. Brachopods (meaning "arm foot") are similar to bivalve molluscs like mussels, but somewhat flatter, and with a hinge at the end instead of the side of the shell.
 Bones on a mudbank. These are rather large, with the tooth on the left appearing to be from a horse or cow. An inlet on the right here also comes from Dry Sink.
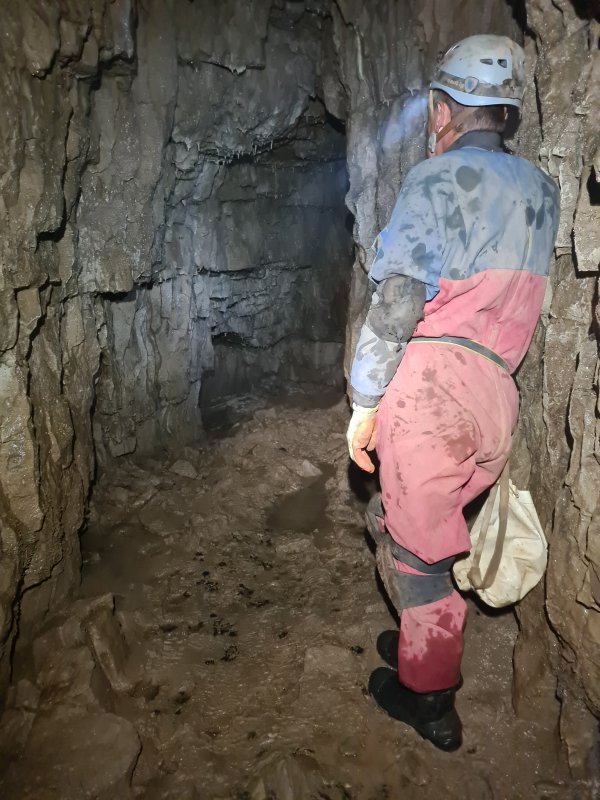 An early oxbow. This has an inlet, which appears to have a cleaner water source, though the actual source is not known.
Modelling by Adam, lighting by Tarquin and Adam
An early oxbow. This has an inlet, which appears to have a cleaner water source, though the actual source is not known.
Modelling by Adam, lighting by Tarquin and Adam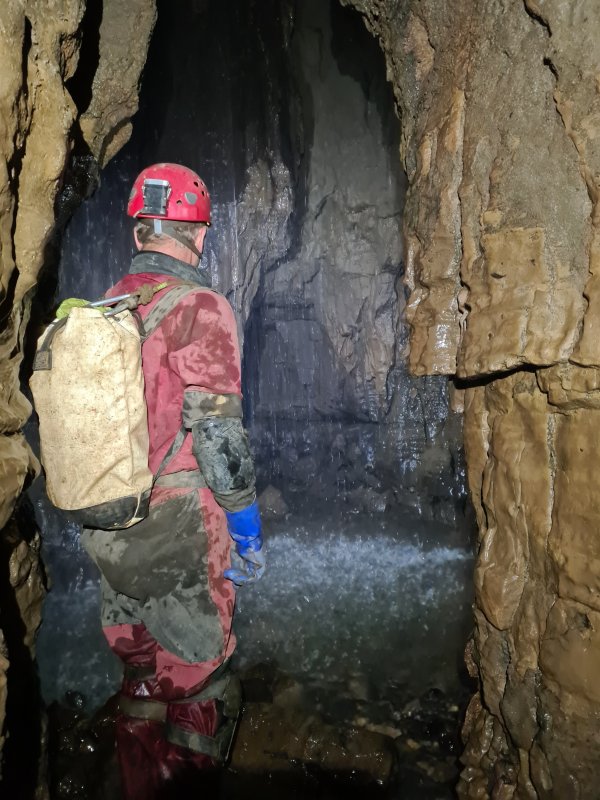 An inlet aven, where most of the Dry Sink water enters. On the way in we could not smell anything unusual here, but on the way out, we did notice there was a somewhat earthy smell, hardly surprising considering the sink is almost directly above, and the water has just come from the surface. There was no noticeable smell anywhere else in the cave.
Modelling by Mark, lighting by Tarquin and Mark
An inlet aven, where most of the Dry Sink water enters. On the way in we could not smell anything unusual here, but on the way out, we did notice there was a somewhat earthy smell, hardly surprising considering the sink is almost directly above, and the water has just come from the surface. There was no noticeable smell anywhere else in the cave.
Modelling by Mark, lighting by Tarquin and Mark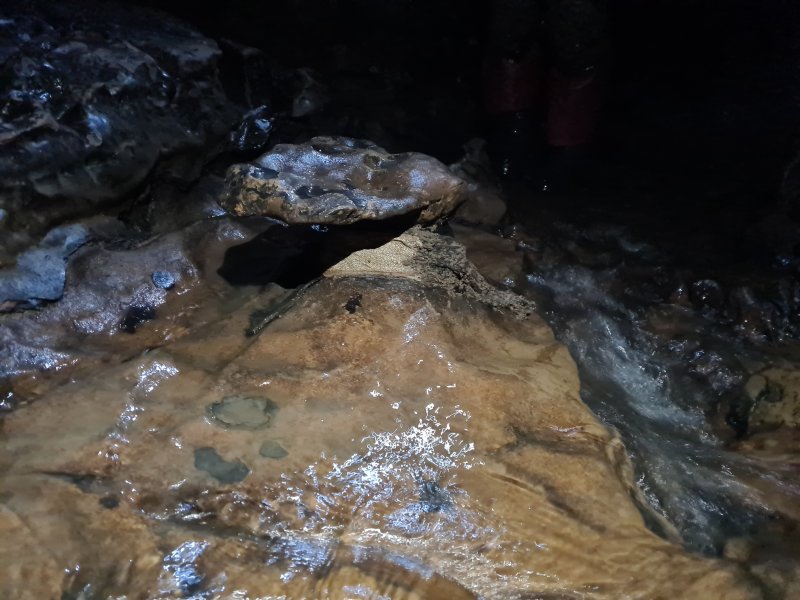 A mushroom-like rock formation in the stream. This is adorned with what appears to be the remains of a sanitary towel. These are the most commonly seen pollution (why are they being flushed anyway?...), as they do not decompose like other items. The cleaning crew of cavers will take care of these items on a subsequent trip - these pictures were taken to assist with the process.
 The first major inlet on the left is the lengthy East Stream Passage. This passes beyond the entrance series, and seems to have a different water source, but is not used for drinking, to be on the safe side.
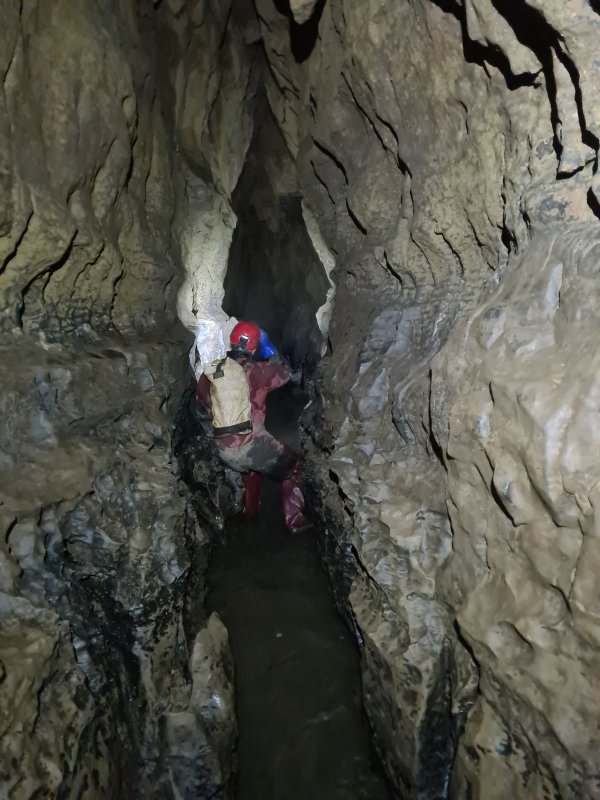 The stream gets a little deeper, thigh deep at one point, and it is impossible to keep your feet dry.
Modelling by Mark, lighting by Tarquin and Mark
The stream gets a little deeper, thigh deep at one point, and it is impossible to keep your feet dry.
Modelling by Mark, lighting by Tarquin and Mark The stream then charges off along a narrow rift into Sump 1.
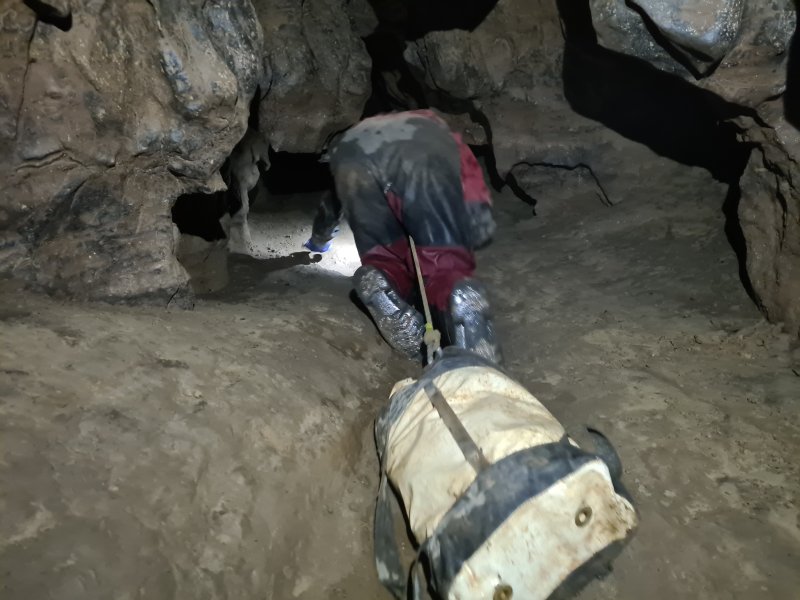 Instead, we take Dryslade Passage, a dry oxbow that bypasses the sump.
Modelling by Mark, lighting by Tarquin and Mark
Instead, we take Dryslade Passage, a dry oxbow that bypasses the sump.
Modelling by Mark, lighting by Tarquin and Mark Like a lot of the early cave, Dryslade Passage is adorned with rich yellow patches, which are also often seen in other caves. These look like lichens (which would require daylight) but they are actually bacterial mats. They are hydrophobic; meaning that they repel water, causing it to bead up on the surface and reflect light, so they appear to glisten. They feed on rotting vegitation in flood waters, and will be well fed in here.
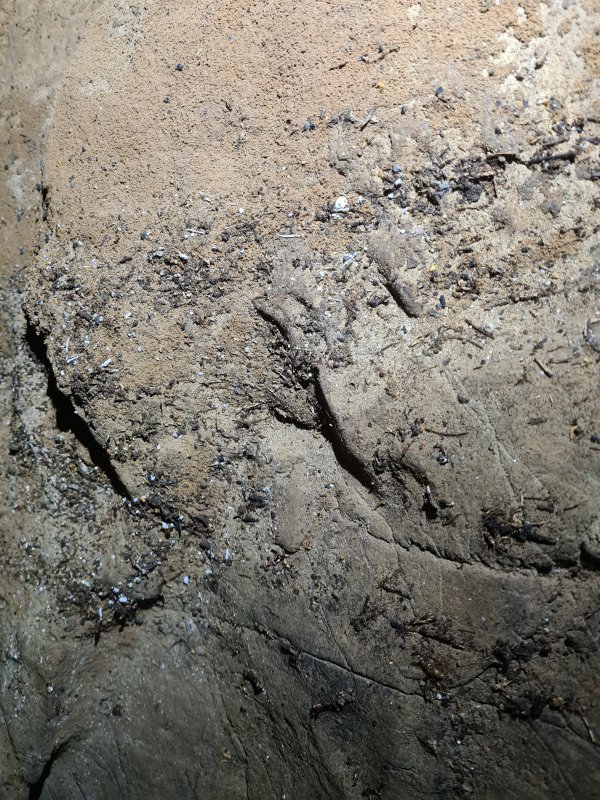 Up on the walls of Dryslade Passage is a very visible flood line, with bits of vegitation. The white fragments appear like immature helictites, and are insultingly known as Shitites. These are likely to be pieces of toilet tissue that have stuck to the walls during a previous outflow. Don't touch the formations.
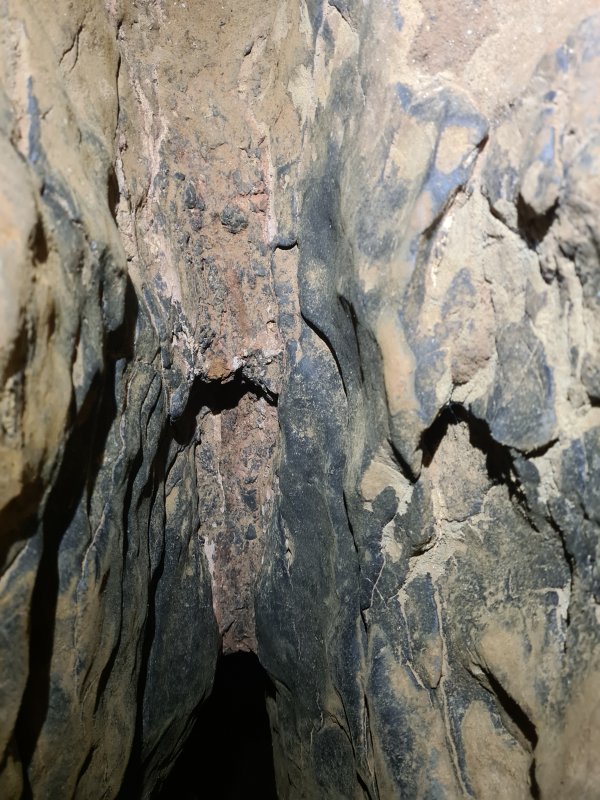 Fault breccia ("brechee-a") in Dryslade Passage. This is made from re-cemented fragments of rock that were originally shattered by movement of a fault. They are easily distinguished from a conglomerate by looking for the sharply angled pieces of stone, where a conglomerate would have rounded cobbles.
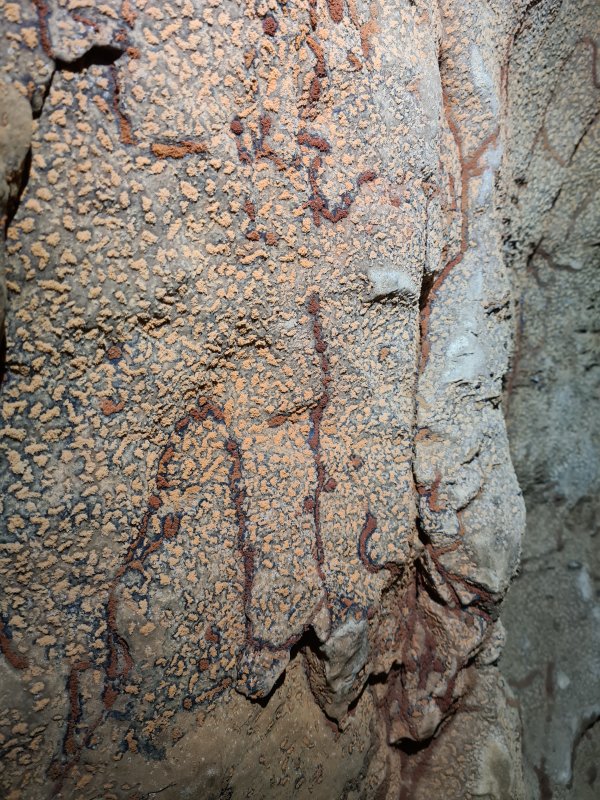 Vermiculation - little bunches of powdered clay. While these can form naturally (for example, where water dribbles over a surface), these are almost certainly bacterial in origin, with the bacteria slowly moving and clumping fragments of clay. In this case, the clay appears to be haematite, a red form of ochre.
 A torturously tight tube on one side is Kamasutra 2 (yes, that is how it is spelled on the survey, instead of "Karma Sutra 2"). This has been followed for about 100 m, nearly forming an oxbow.
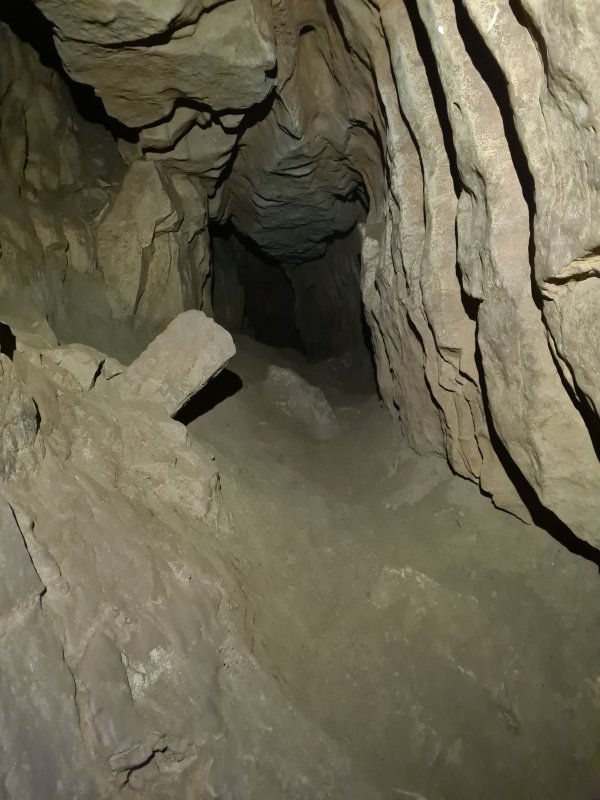 The end of Coal Seam Passage, which forms the round trip from The Chunnel. It does not appear to follow a coal seam.
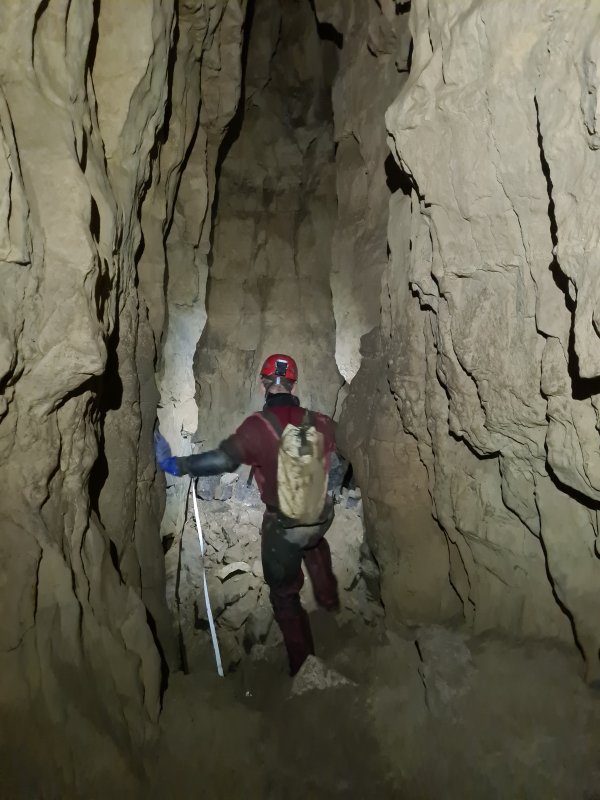 The canyon of Dryslade Passage, beyond Coal Seam Passage.
Modelling by Mark, lighting by Tarquin and Mark
The canyon of Dryslade Passage, beyond Coal Seam Passage.
Modelling by Mark, lighting by Tarquin and Mark The next major side passage is Pirate Passage, one of the longest side passages in the cave, at about 1.5 km in length. It has no significant side passages of its own, but gains an inlet stream along its second half, and includes joys such as a duck. There is another side passage in a very similar position ahead, called Dry Dig Passage, but it ends almost immediately. At a dig, of course.
Modelling by Adam, lighting by Tarquin and Adam
The next major side passage is Pirate Passage, one of the longest side passages in the cave, at about 1.5 km in length. It has no significant side passages of its own, but gains an inlet stream along its second half, and includes joys such as a duck. There is another side passage in a very similar position ahead, called Dry Dig Passage, but it ends almost immediately. At a dig, of course.
Modelling by Adam, lighting by Tarquin and Adam Kamasutra 1, another torturously tight side passage, which has been followed for 30 metres to a pitch into a static sump. And yes, the passages are named in the wrong order.
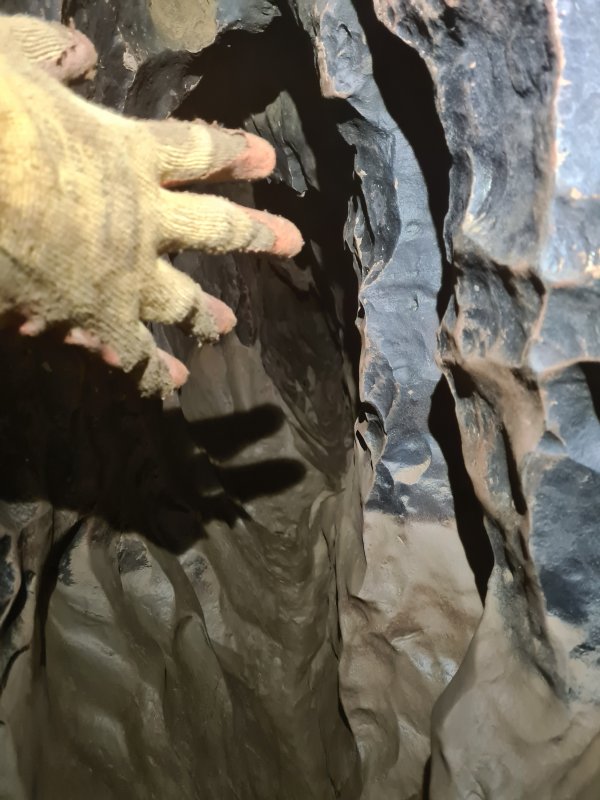 To give a sense of scale to Kamasutra 1. It's almost a joke; hard to believe anyone has followed it, and surveyed it.
Modelling by Adam
To give a sense of scale to Kamasutra 1. It's almost a joke; hard to believe anyone has followed it, and surveyed it.
Modelling by Adam Former sump in Dryslade Passage.
Modelling by Adam, lighting by Tarquin and Adam
Former sump in Dryslade Passage.
Modelling by Adam, lighting by Tarquin and Adam Dryslade Passage ends at a traverse over Sump 2. This is relatively short, regaining a lengthy dry passage, ending at Well Sump, where the water comes from Sump 1. The last section of dry passage is called Condom Passage, which is painfully appropriate, as one was high on the rock ledges here a couple of decades ago on my first visit to the cave.
Modelling by Tarquin's left toe
Dryslade Passage ends at a traverse over Sump 2. This is relatively short, regaining a lengthy dry passage, ending at Well Sump, where the water comes from Sump 1. The last section of dry passage is called Condom Passage, which is painfully appropriate, as one was high on the rock ledges here a couple of decades ago on my first visit to the cave.
Modelling by Tarquin's left toe Main Stream 2 (yes, the word "Passage" is missing from the name this time) continues as a fine canyon. The black staining on the walls is much more evident now. Its origin is not fully known, but it appears to be manganese, perhaps precipitated onto the walls by bacterial colonies which create it from the minerals they find in the water.
Modelling by Mark, lighting by Tarquin and Mark
Main Stream 2 (yes, the word "Passage" is missing from the name this time) continues as a fine canyon. The black staining on the walls is much more evident now. Its origin is not fully known, but it appears to be manganese, perhaps precipitated onto the walls by bacterial colonies which create it from the minerals they find in the water.
Modelling by Mark, lighting by Tarquin and Mark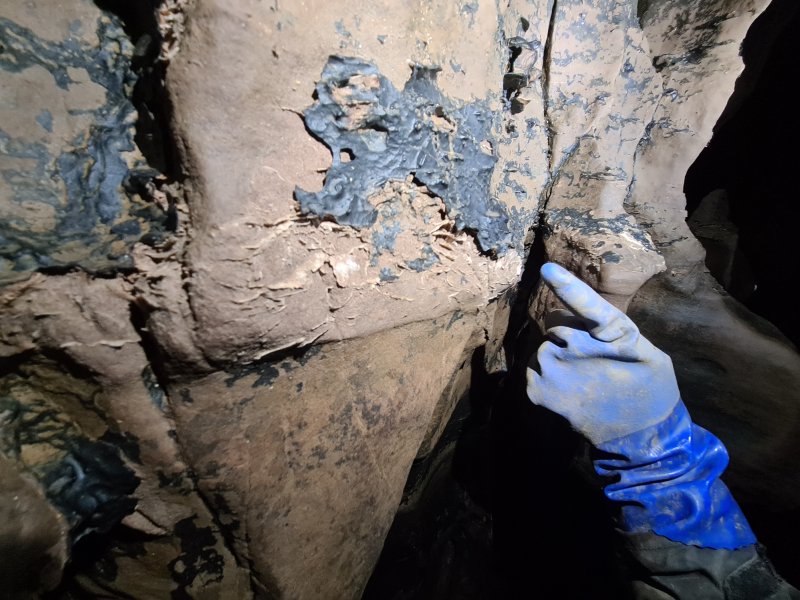 The black coating is over the fossil layer too.
Modelling by Mark, lighting by Tarquin and Mark
The black coating is over the fossil layer too.
Modelling by Mark, lighting by Tarquin and Mark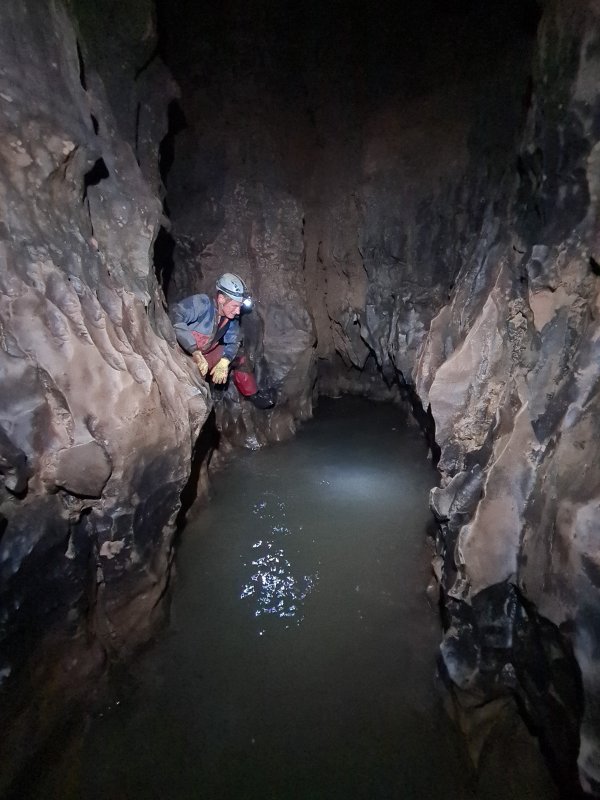 A cascade into a large pool, which is deep in places, but whose depth can be easily avoided using shallow ledges.
Modelling by Adam, lighting by Tarquin and Adam
A cascade into a large pool, which is deep in places, but whose depth can be easily avoided using shallow ledges.
Modelling by Adam, lighting by Tarquin and Adam Another decoration.
Modelling by Adam
Another decoration.
Modelling by Adam The next side passage is Echo Passage, over 500 m long. It gains the stream from Pirate Passage. An oxbow at its start leads back to the last cascade.
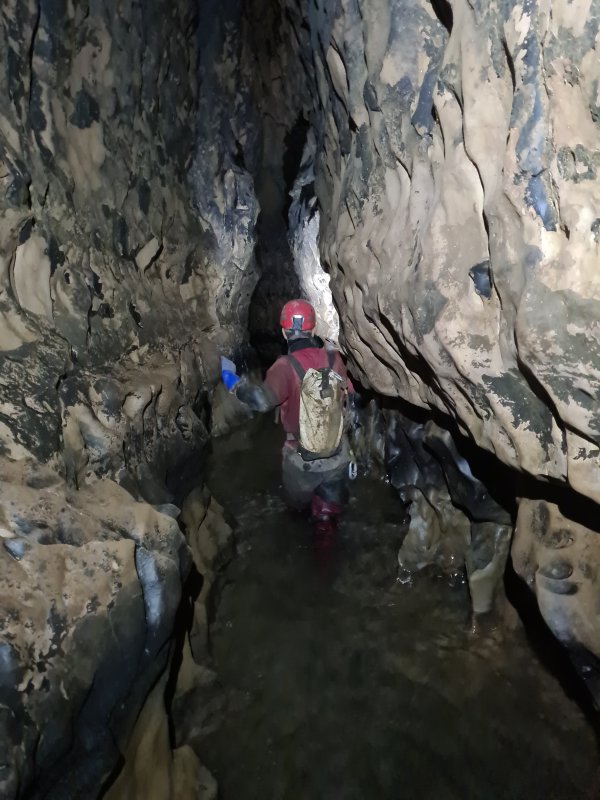 Downstream, the streamway develops into a tall canyon.
Modelling by Mark, lighting by Tarquin and Mark
Downstream, the streamway develops into a tall canyon.
Modelling by Mark, lighting by Tarquin and Mark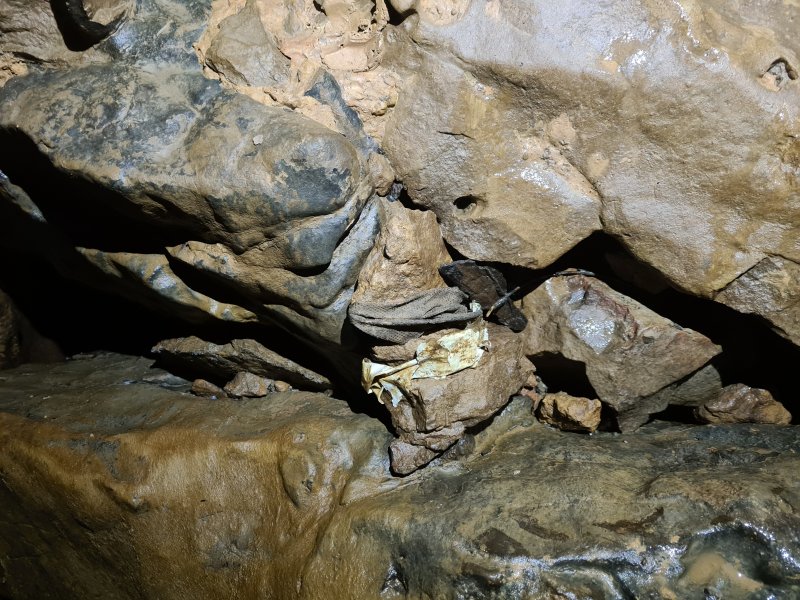 More remains of flooding. This appears to be a fragment of conservation tape, and some sanitary towel.
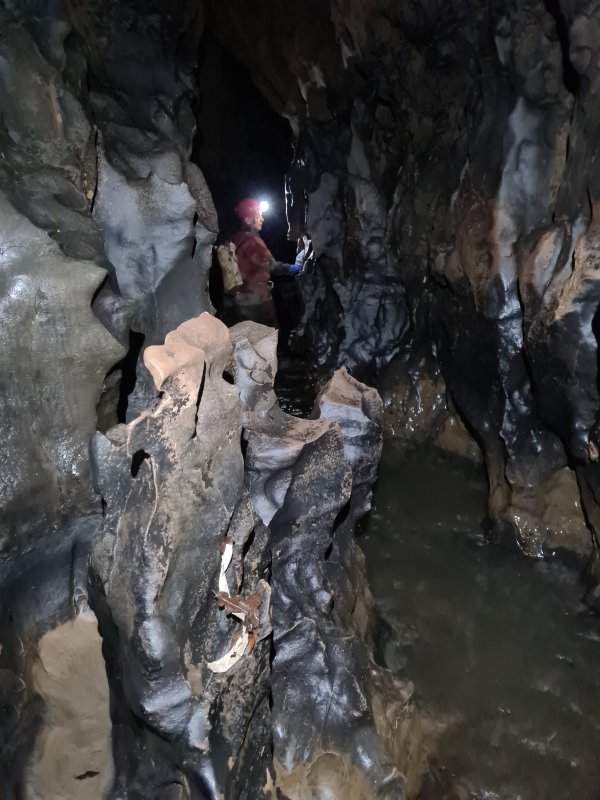 More pieces of conservation tape, wrapped around a rock. You quickly get a picture of how severe the flooding can be here.
Modelling by Mark, lighting by Tarquin and Mark
More pieces of conservation tape, wrapped around a rock. You quickly get a picture of how severe the flooding can be here.
Modelling by Mark, lighting by Tarquin and Mark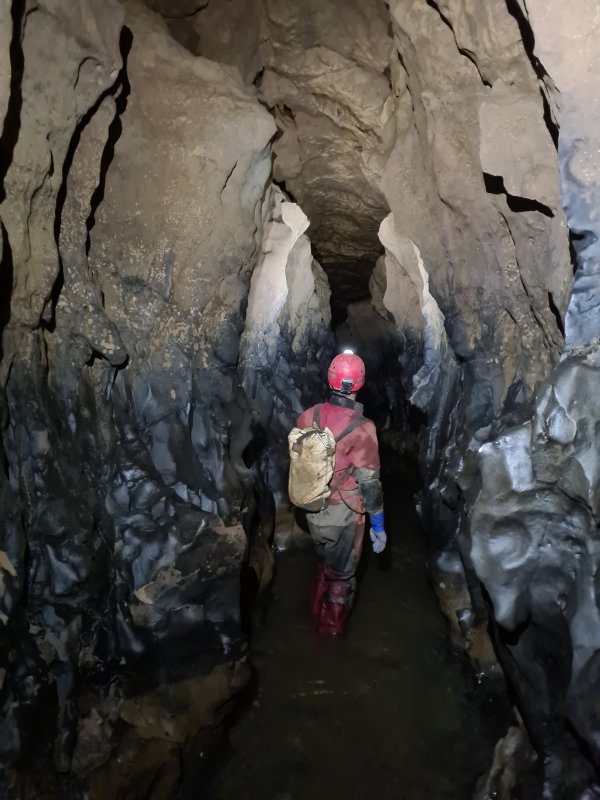 The ceiling becomes arched, and begins to drop. The manganese tide mark is particularly striking here.
Modelling by Mark, lighting by Tarquin and Mark
The ceiling becomes arched, and begins to drop. The manganese tide mark is particularly striking here.
Modelling by Mark, lighting by Tarquin and Mark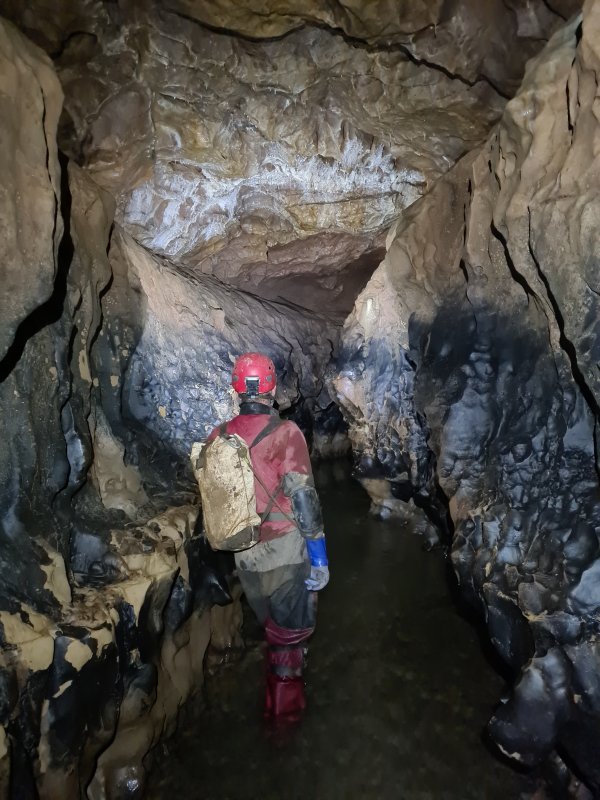 Manganese against a white calcite arch.
Modelling by Mark, lighting by Tarquin and Mark
Manganese against a white calcite arch.
Modelling by Mark, lighting by Tarquin and Mark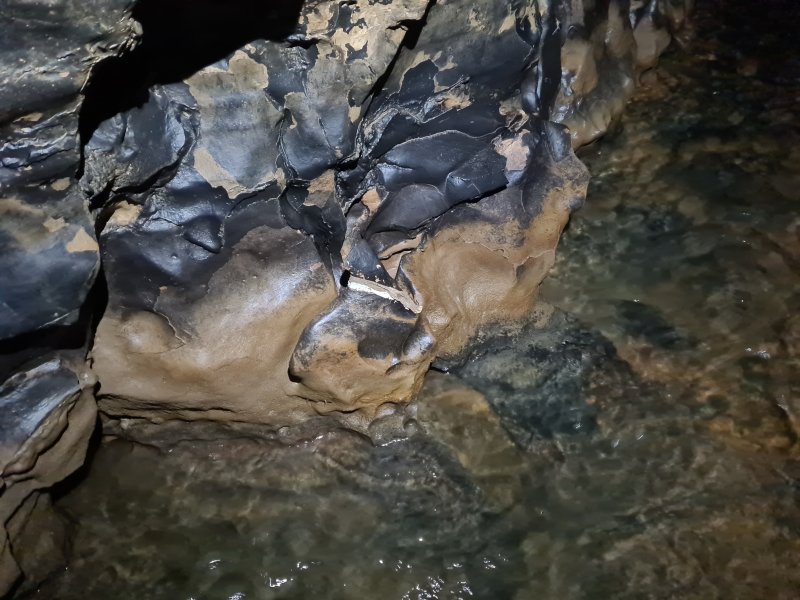 More remains of the outflow. A pity.
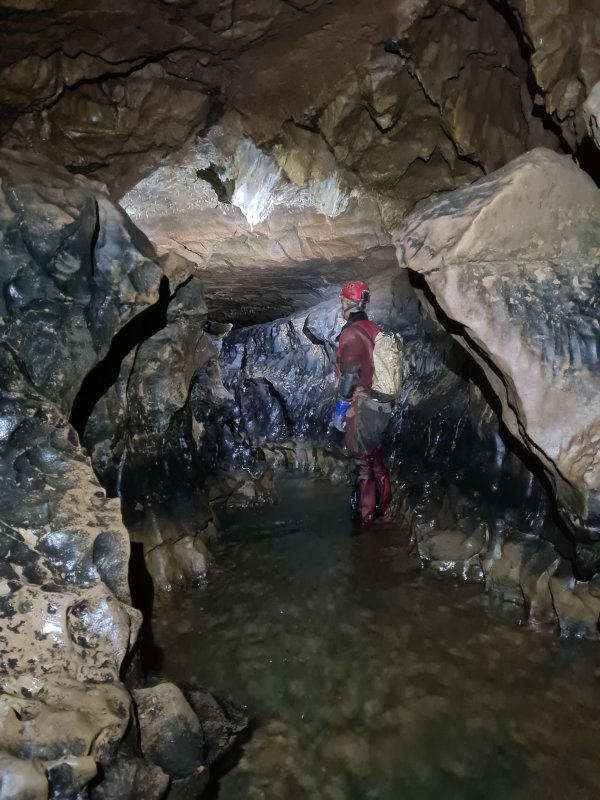 The ceiling lowers further, or to be more accurate, the ceiling has remained at the same gradient as before, but the trench has not cut down as deeply, as the passage is approaching the water table.
Modelling by Mark, lighting by Tarquin and Mark
The ceiling lowers further, or to be more accurate, the ceiling has remained at the same gradient as before, but the trench has not cut down as deeply, as the passage is approaching the water table.
Modelling by Mark, lighting by Tarquin and Mark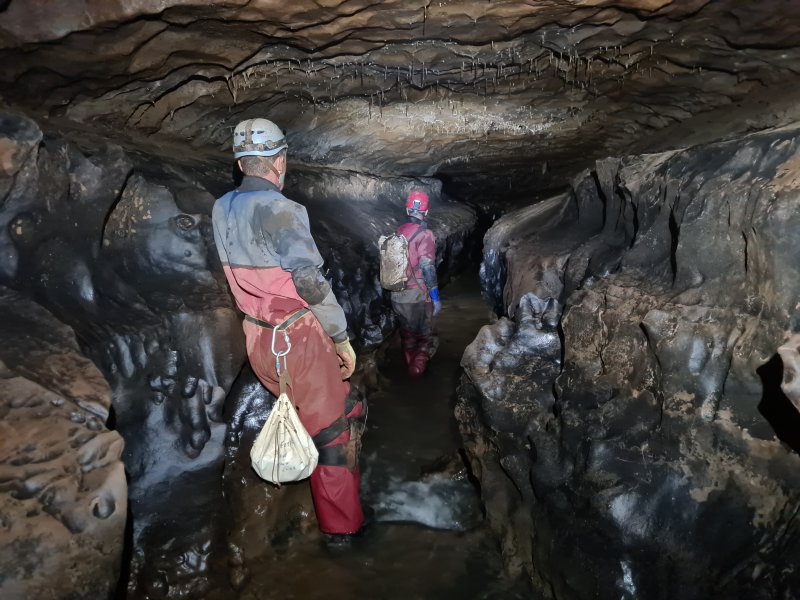 The final part of the streamway is a fine keyhole, easily my favourite piece of passage in the system.
Modelling by Mark and Adam, lighting by Tarquin, Mark and Adam
The final part of the streamway is a fine keyhole, easily my favourite piece of passage in the system.
Modelling by Mark and Adam, lighting by Tarquin, Mark and Adam Helictites in the streamway.
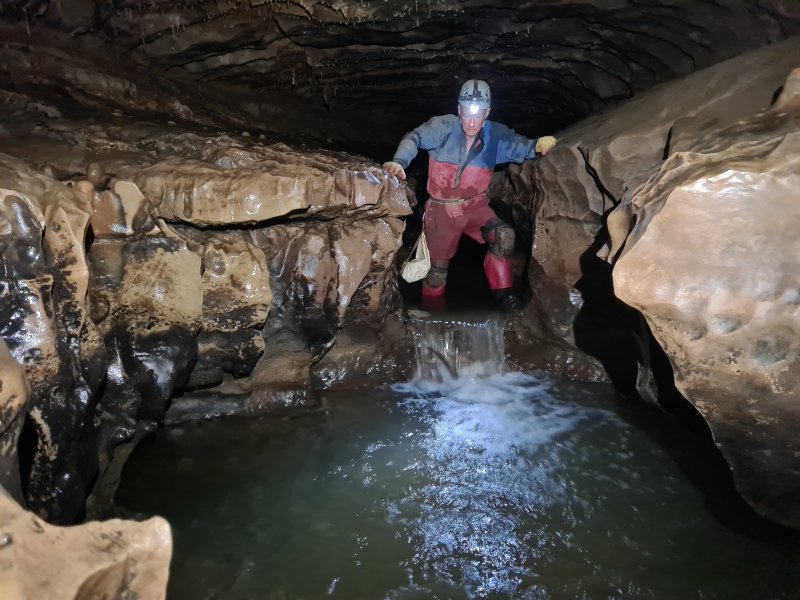 A deep pool beneath a disproportionately small cascade. This is avoided by crawling along the ledges.
Modelling by Adam, lighting by Tarquin and Adam
A deep pool beneath a disproportionately small cascade. This is avoided by crawling along the ledges.
Modelling by Adam, lighting by Tarquin and Adam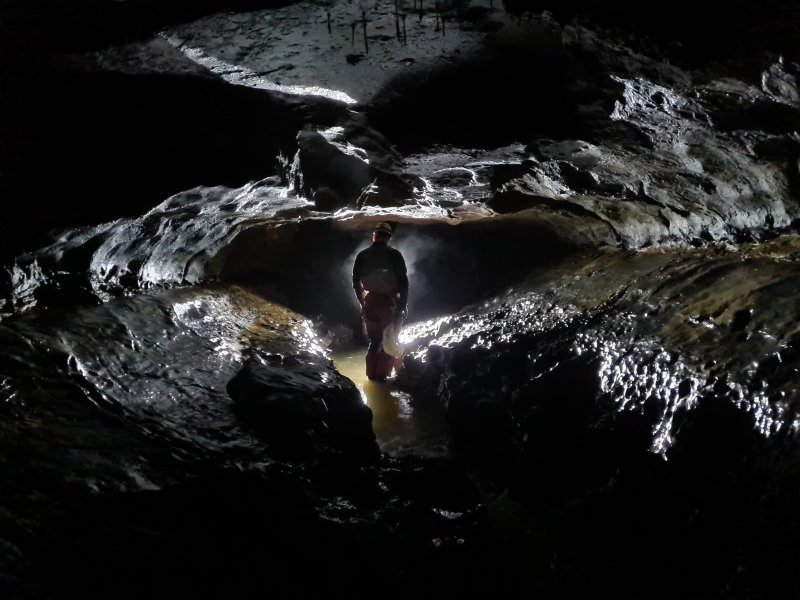 The streamway ends with this superb phreatic tube.
Modelling by Adam, lighting by Mark
The streamway ends with this superb phreatic tube.
Modelling by Adam, lighting by Mark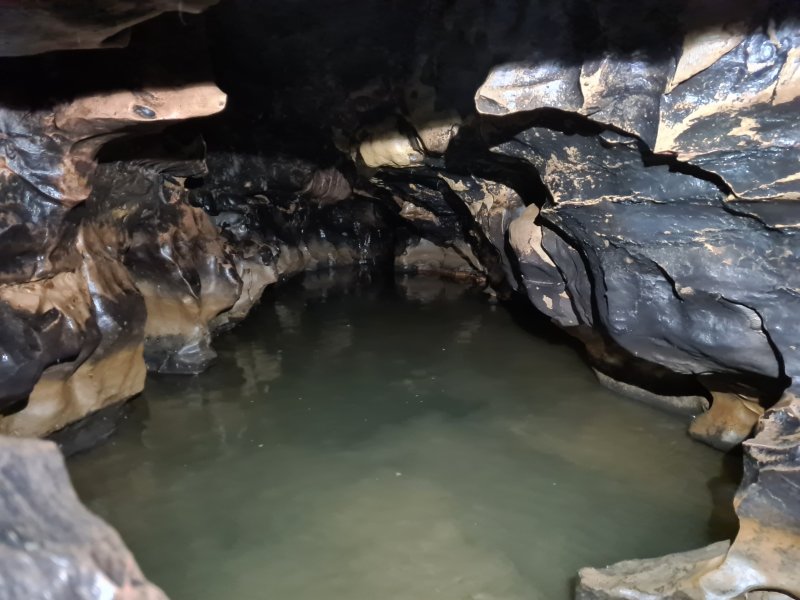 The keyhole's cleft then darts through the wall, and takes the river with it, into Sump 3. Beyond here are Sump 4 and Sump 5, followed by a too tight bedding. This is the last time the river is seen within the cave.
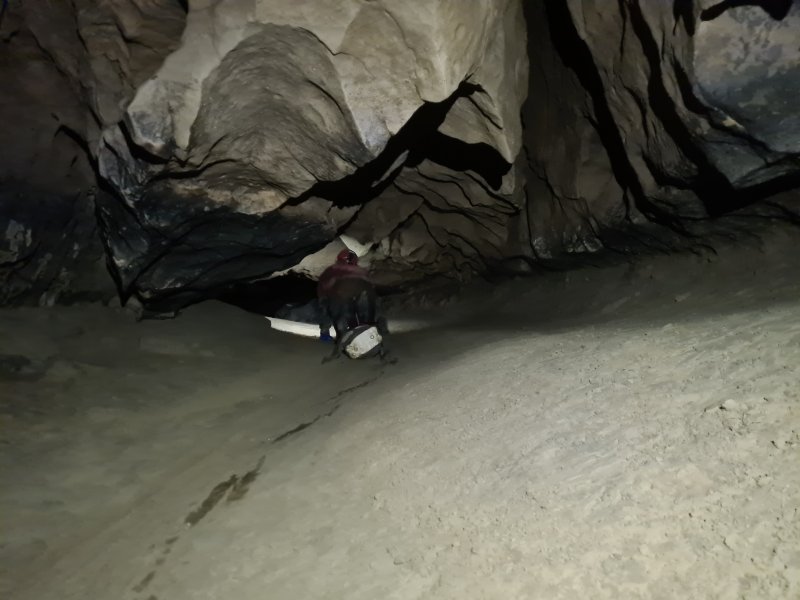 The way on is ahead, into the remains of the phreas, which begins as a crawl over flood sediment.
Modelling by Mark, lighting by Tarquin and Mark
The way on is ahead, into the remains of the phreas, which begins as a crawl over flood sediment.
Modelling by Mark, lighting by Tarquin and Mark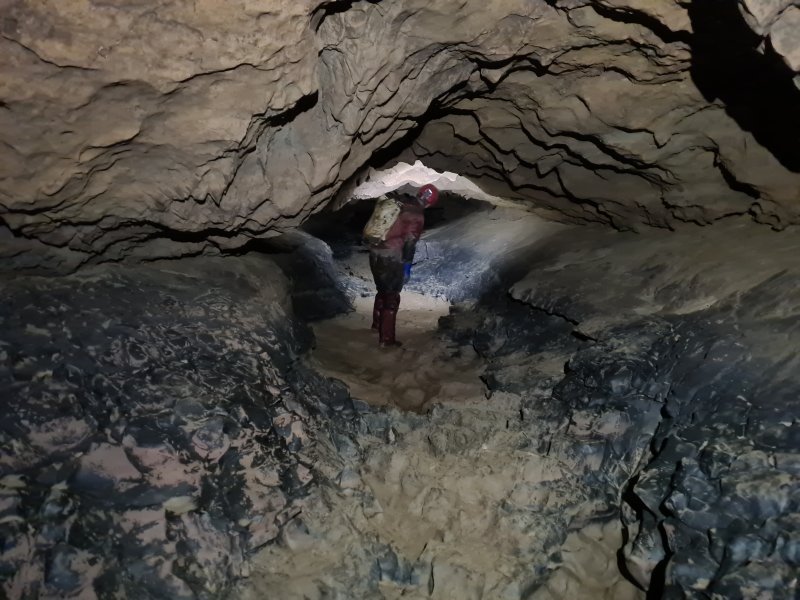 The sediment soon disappears, and the majority of the cave is then a good size, with only occasional sand banks.
Modelling by Mark, lighting by Tarquin and Mark
The sediment soon disappears, and the majority of the cave is then a good size, with only occasional sand banks.
Modelling by Mark, lighting by Tarquin and Mark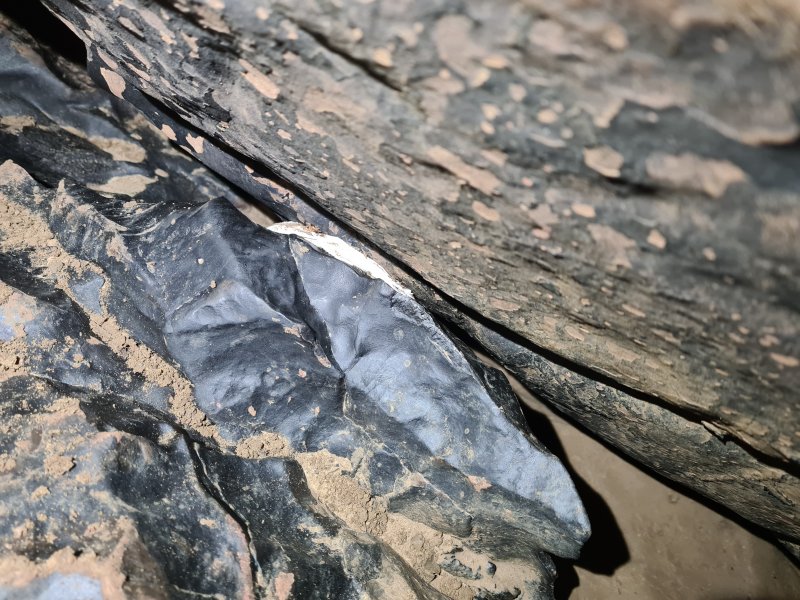 There are occasional remains showing extreme flooding. This is a piece of conservation tape, jammed into a gap in the rocks.
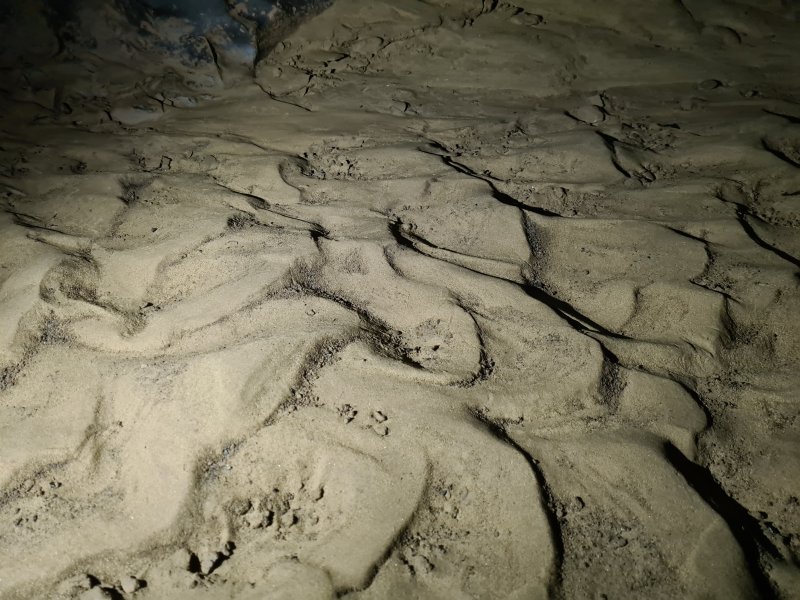 Ripples in the sand, looking like small sand dunes. These clearly show a flow to the right, futher into the passage. The entire route serves as a severe flood overflow, with very little dry passage when that happens.
 A bedding on the left is Yud Scraper ("head scraper", in local dialect), a tight bedding leading back to the start of Sump 3.
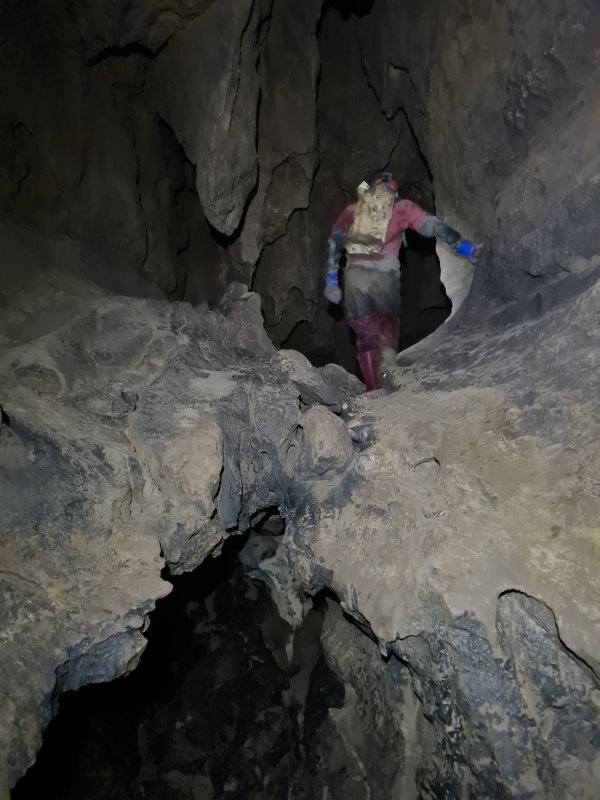 Natural rock bridge.
Modelling by Mark, lighting by Tarquin and Mark
Natural rock bridge.
Modelling by Mark, lighting by Tarquin and Mark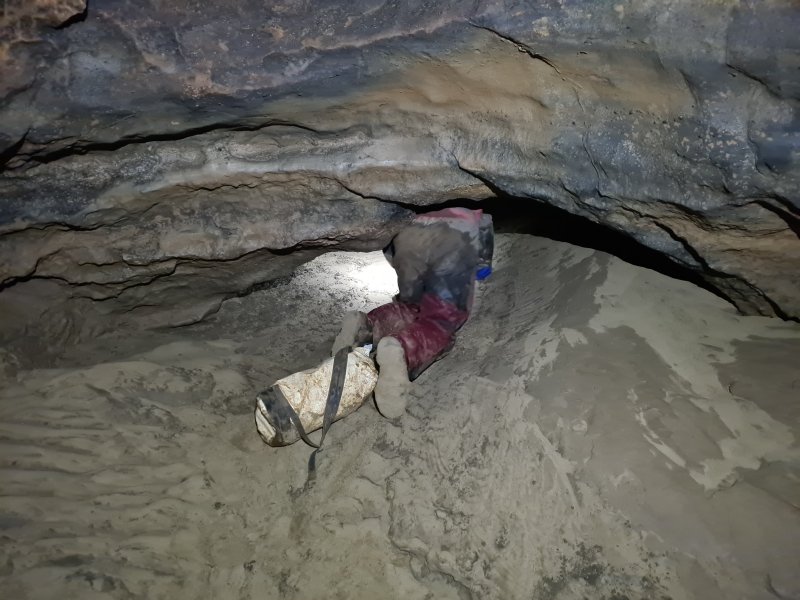 Bottom Bend, a series of sand crawls where the passage turns a hard right, and picks up the direction that it follows almost until its end.
Modelling by Mark, lighting by Tarquin and Mark
Bottom Bend, a series of sand crawls where the passage turns a hard right, and picks up the direction that it follows almost until its end.
Modelling by Mark, lighting by Tarquin and Mark Another remains of outflow. Sanitary towel again, and a bit of conservation tape. The brown smudge is a leaf - the other brown smudges you might be concerned about are never seen, as they get broken down much more effectively.
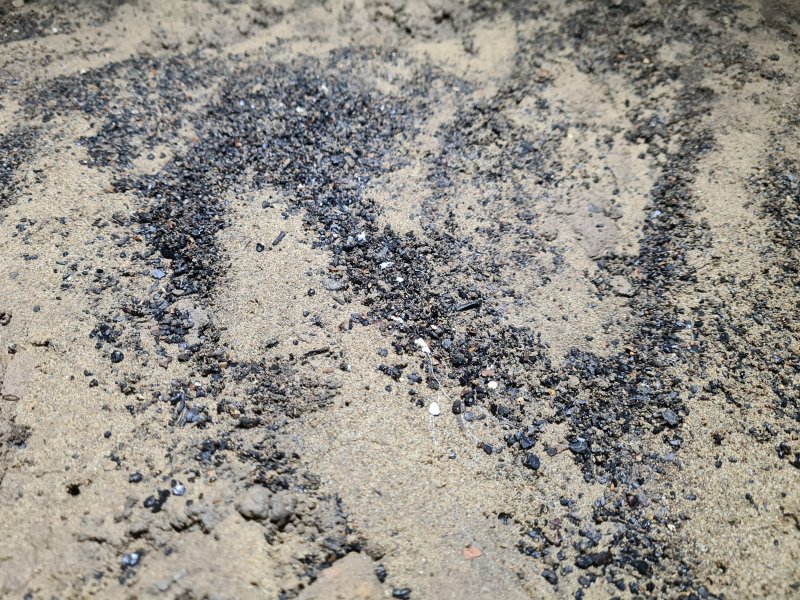 White particles of tissue in the sand.
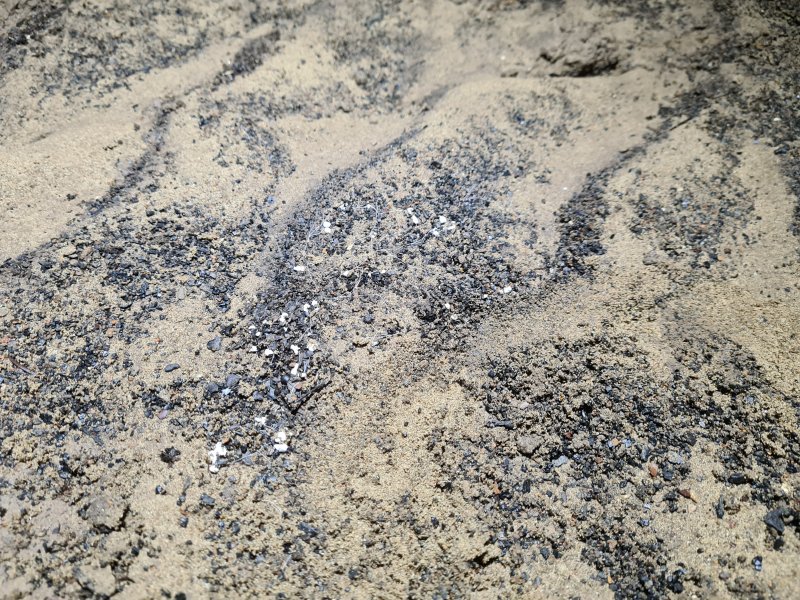 Sand shitites.
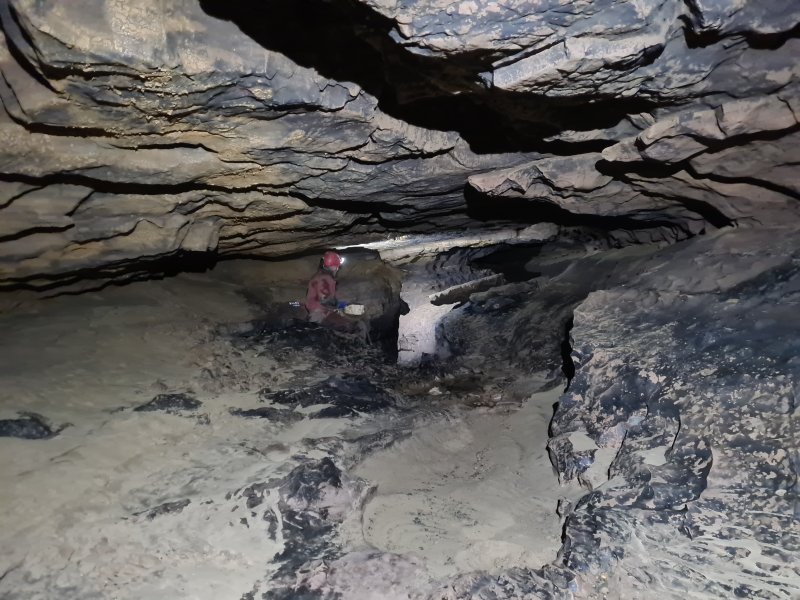 Approaching The Zider Press.
Modelling by Mark, lighting by Tarquin and Mark
Approaching The Zider Press.
Modelling by Mark, lighting by Tarquin and Mark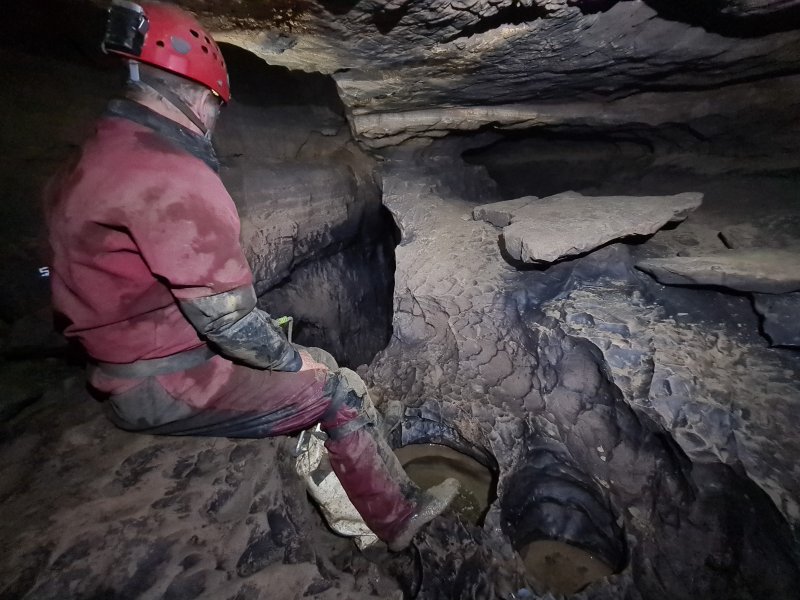 The Zider Press, an oxbowing phreas and deep rift. The rift is the way on, and is the point where the passage first gains the fault which it will follow for over 750 metres. The name is local dialect for "cider press". From here onwards, the passage is called Kuwait Passage, as the walls often look like they have been coated in oil.
Modelling by Mark, lighting by Tarquin and Mark
The Zider Press, an oxbowing phreas and deep rift. The rift is the way on, and is the point where the passage first gains the fault which it will follow for over 750 metres. The name is local dialect for "cider press". From here onwards, the passage is called Kuwait Passage, as the walls often look like they have been coated in oil.
Modelling by Mark, lighting by Tarquin and Mark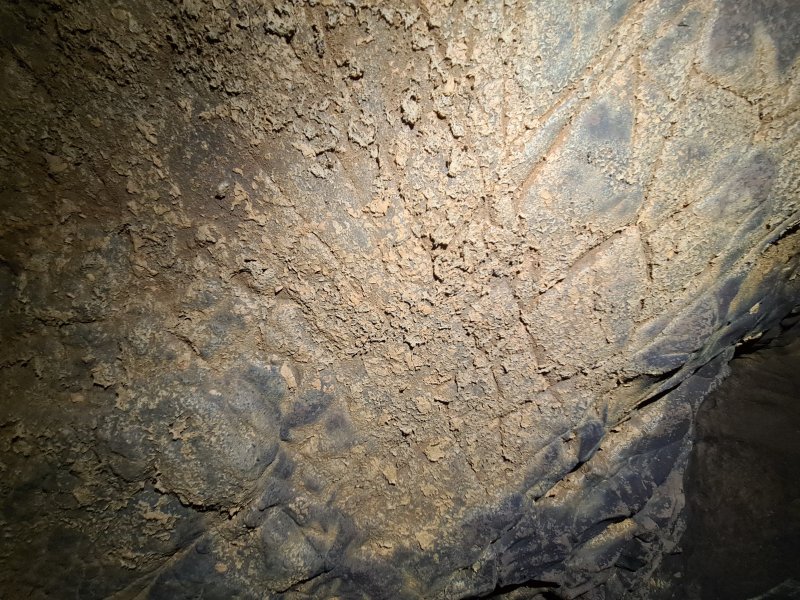 Flood scum on the ceiling. This place really floods when it floods.
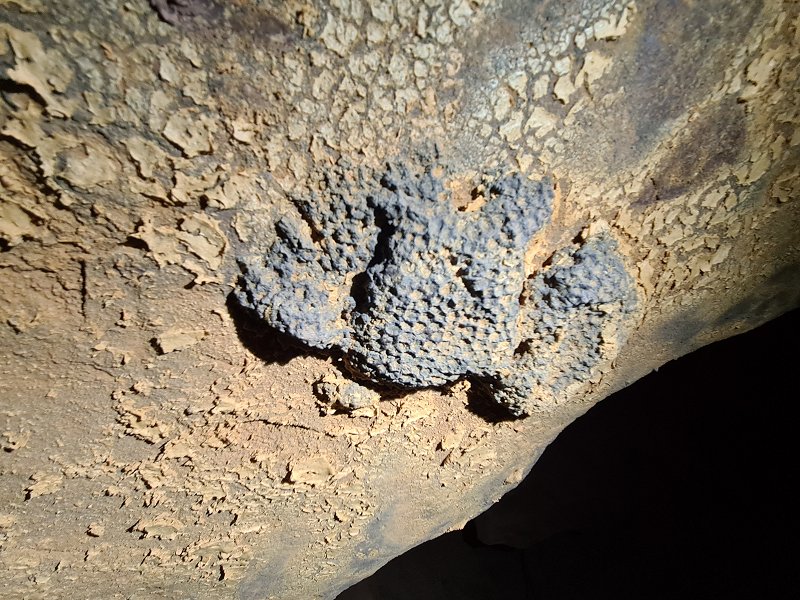 Large fossil favosites (that is the singular form) in the ceiling of the Zider Press, a densely communal coral, which looks like a honeycomb when seen in fossil form. It seems that there is great confusion about how to pronounce this name, with several conflicting demos online, and several dictionaries also giving randomly different pronunciations. The name is Latin, and should be pronounced "favoos eetess" in Latin - meaning "it is full of honeycomb". You may also hear it being pronounced "fav o site eez" (using a modern Greek ending which is common in geology), or mispronounced "fav oh site", "fave oh site" or "fav oh zets".
 Shitites in the ceiling of the passage.
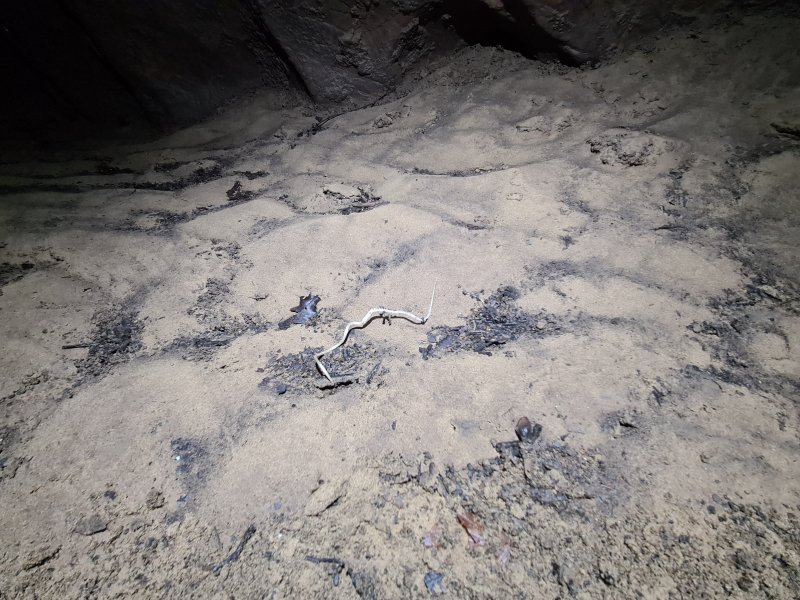 Plants trying to grow in the sand. This looks like a beansprout, as it has not been able to photosynthesise.
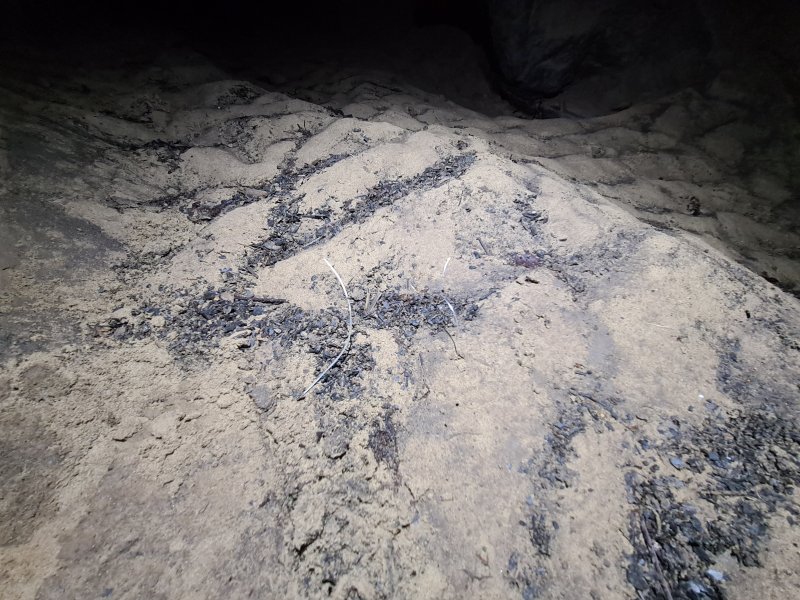 Two more plants.
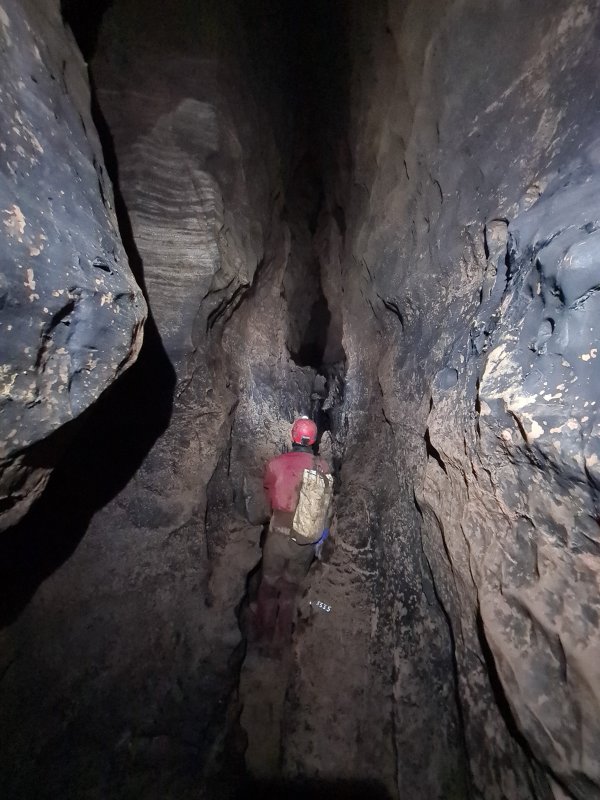 The passage then splits into an upper phreas, and a deep slot in the floor. This is not a simple keyhole, as each continues quite independently, following the same line.
Modelling by Mark, lighting by Tarquin and Mark
The passage then splits into an upper phreas, and a deep slot in the floor. This is not a simple keyhole, as each continues quite independently, following the same line.
Modelling by Mark, lighting by Tarquin and Mark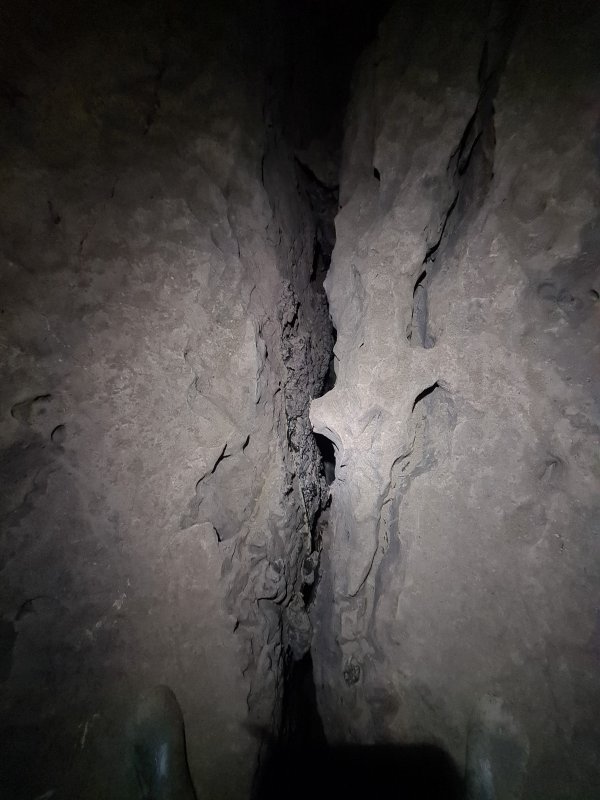 Initially, the lower route can be seen in the floor of the upper route, but the upper route soon climbs high enough for the two levels to separate.
Modelling by hints of Mark and Tarquin's welly
Initially, the lower route can be seen in the floor of the upper route, but the upper route soon climbs high enough for the two levels to separate.
Modelling by hints of Mark and Tarquin's welly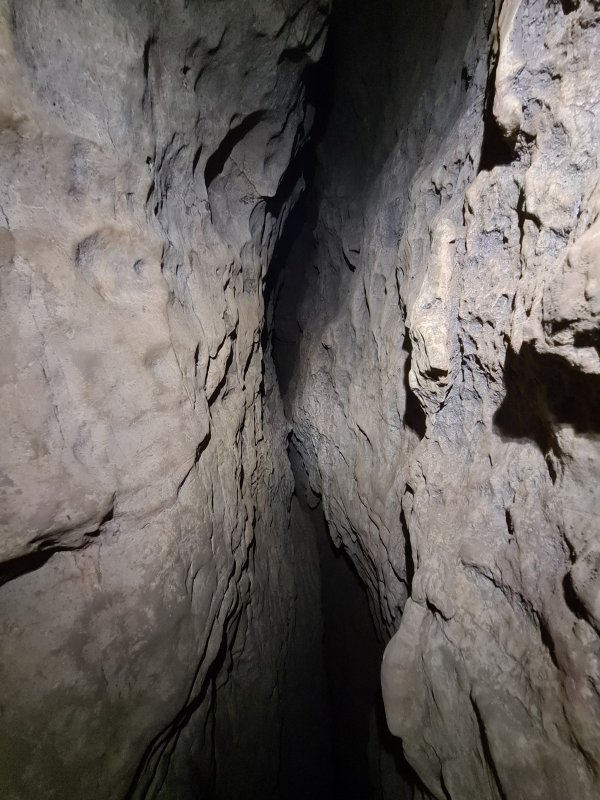 The upper route then becomes exceptionally tight and awkward, but remains uncomfortably navigable, for masochists.
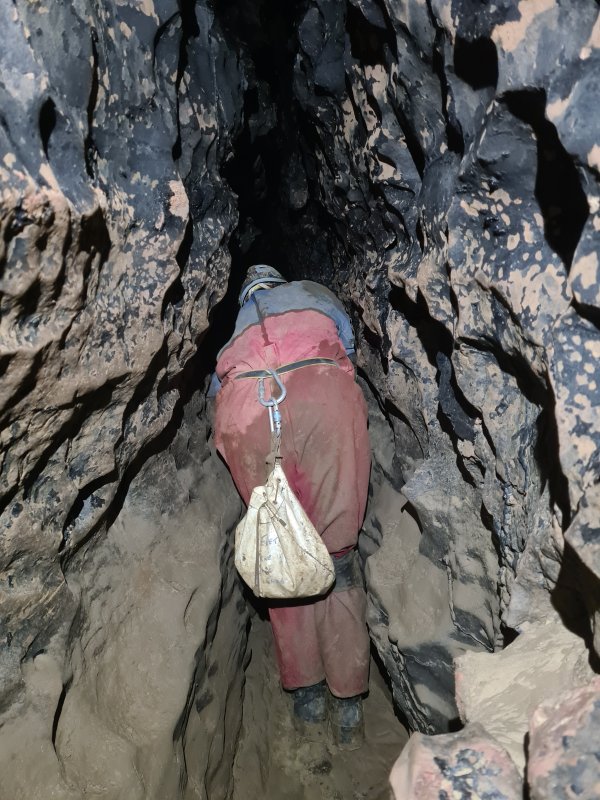 The lower route is stooping size, and is the way on, quickly gaining a solid ceiling.
Modelling by Adam
The lower route is stooping size, and is the way on, quickly gaining a solid ceiling.
Modelling by Adam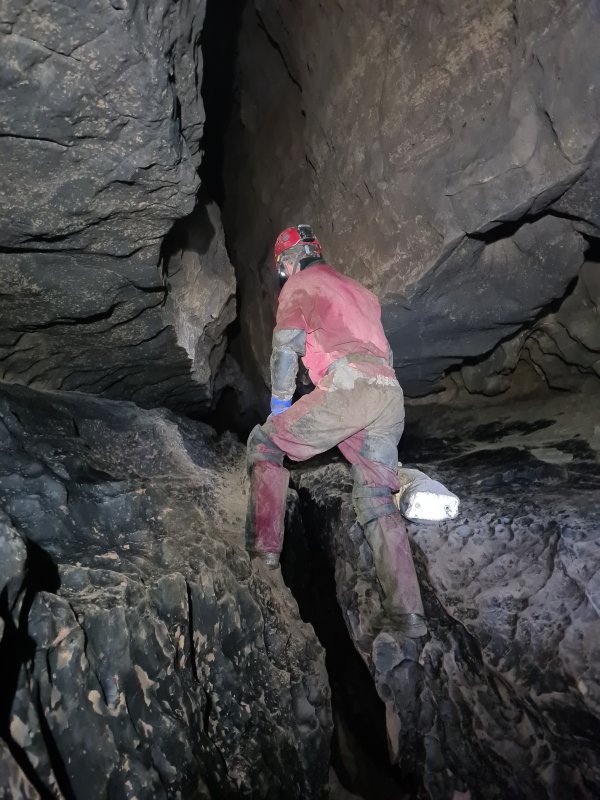 The lower route soon returns to a good size, with a distinctive cross section, but the upper route does not appear to rejoin it.
Modelling by Mark, lighting by Tarquin, Adam and Mark
The lower route soon returns to a good size, with a distinctive cross section, but the upper route does not appear to rejoin it.
Modelling by Mark, lighting by Tarquin, Adam and Mark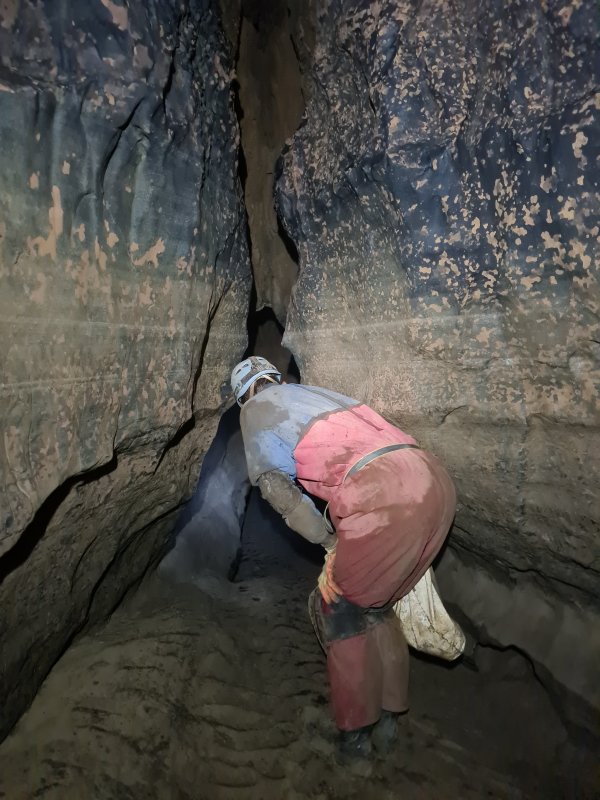 Multiple tide lines, showing how severe the ponding is after floods. Interestingly, the manganese is inverted here, being on top of the lighter colours. This is likely because the sediment has covered the manganese.
Modelling by Adam, lighting by Tarquin and Adam
Multiple tide lines, showing how severe the ponding is after floods. Interestingly, the manganese is inverted here, being on top of the lighter colours. This is likely because the sediment has covered the manganese.
Modelling by Adam, lighting by Tarquin and Adam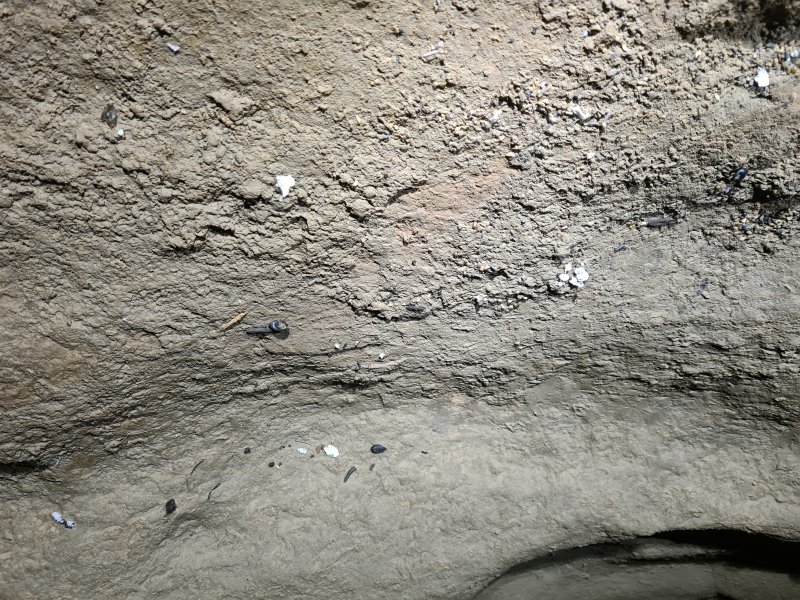 The tide line brings another set of shitites. It is probably best not to lick the rock here.
 A squeeze, easily bypassed with a climb above into a stooping sized tube. We didn't notice the tube on the way in, and all enjoyed the squeeze, trying not to slip downwards into the tighter part of the rift.
Modelling by Mark, lighting by Tarquin and Mark
A squeeze, easily bypassed with a climb above into a stooping sized tube. We didn't notice the tube on the way in, and all enjoyed the squeeze, trying not to slip downwards into the tighter part of the rift.
Modelling by Mark, lighting by Tarquin and Mark Flowstone on the walls of Kuwait Passage, strikingly bright against the manganese.
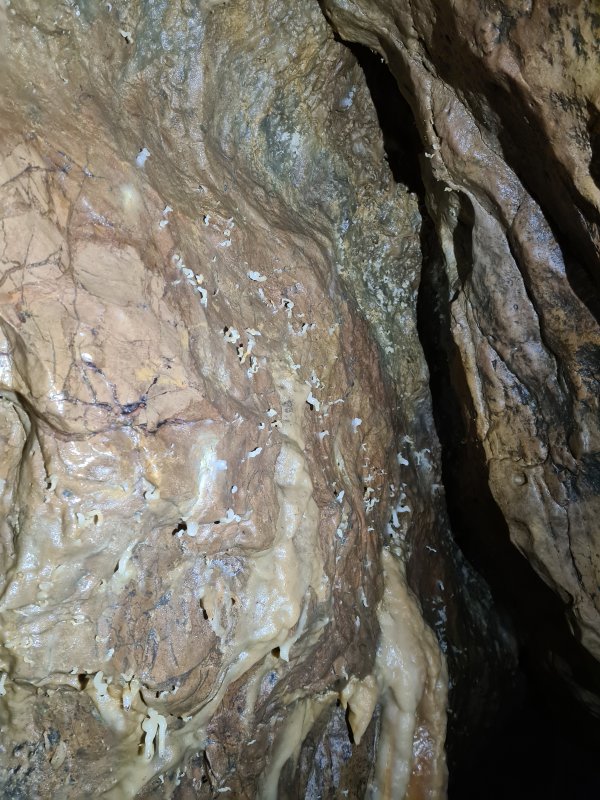 Helictites in Kuwait Passage.
 Temporarily becoming tubular.
Modelling by Mark, lighting by Tarquin and Mark
Temporarily becoming tubular.
Modelling by Mark, lighting by Tarquin and Mark A larger bunch of helictites. This is the first significant picture I had taken using the optical zoom feature of my new phone camera. Pretty good, only a little grainy, but much better than trying to crop a picture from the older camera.
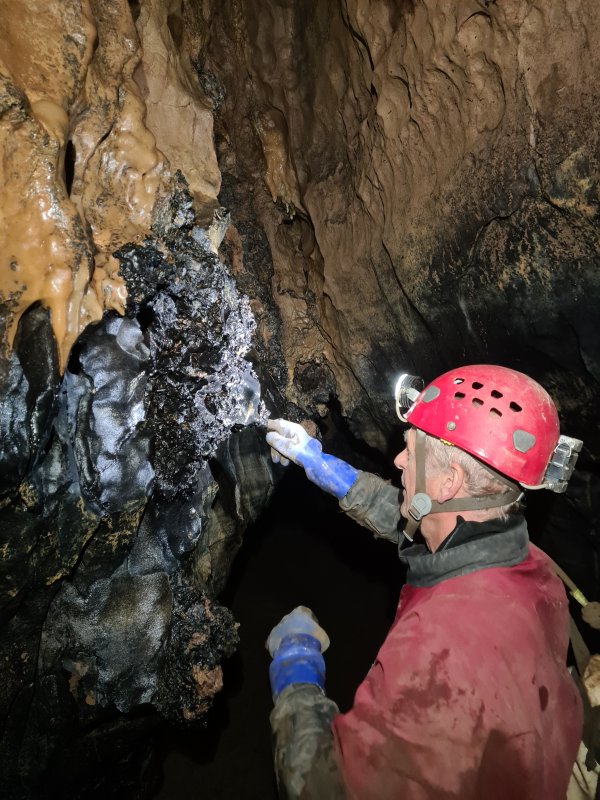 Black stained fault breccia.
Modelling by Mark, lighting by Tarquin and Mark
Black stained fault breccia.
Modelling by Mark, lighting by Tarquin and Mark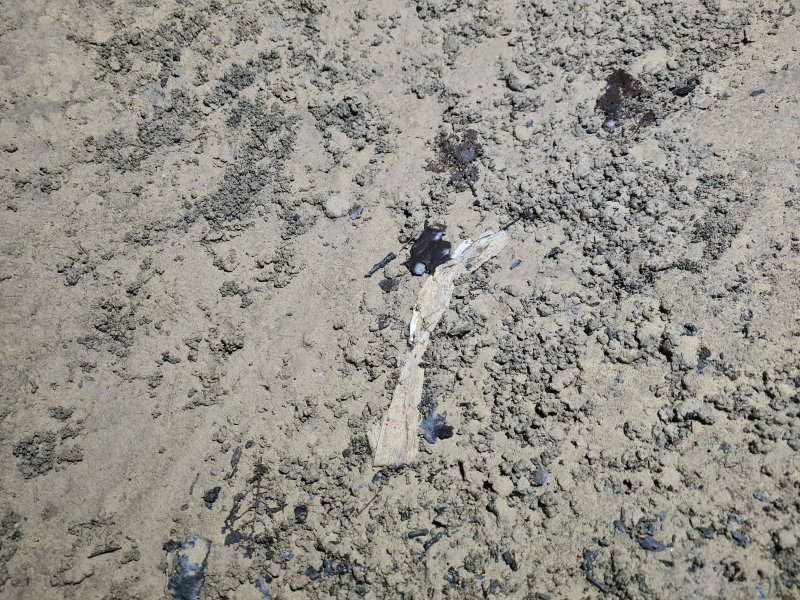 More remains in the sand. Sadly the last severe flooding here was also the last time the outflow was active, and there have not been any subsequent floods to wash the remains away.
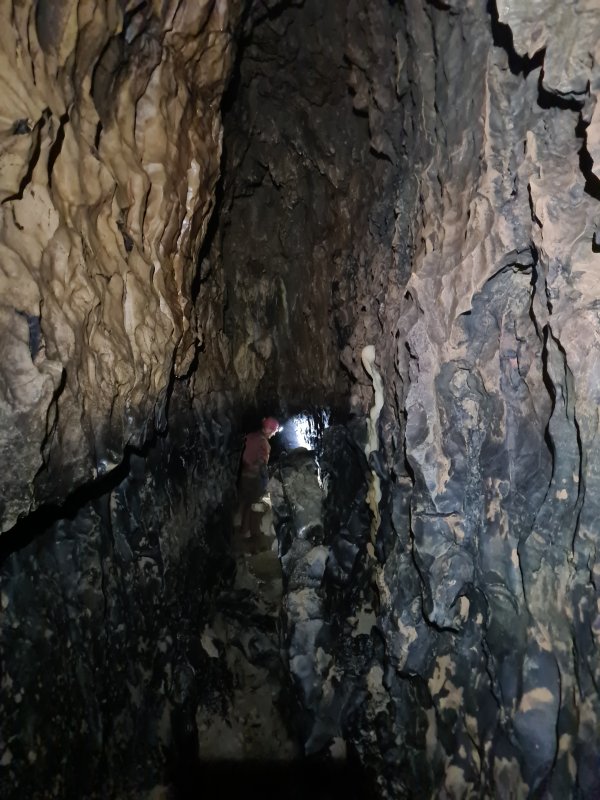 Just before a decorated section of passage.
Modelling by Mark, lighting by Tarquin and Mark
Just before a decorated section of passage.
Modelling by Mark, lighting by Tarquin and Mark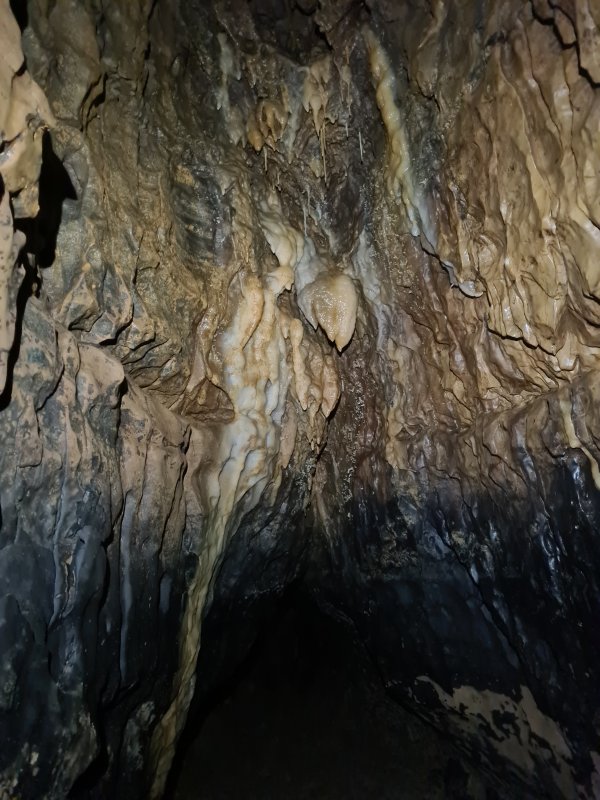 Formations in the passage.
 More formations in the ceiling.
Modelling by Mark, lighting by Tarquin and Mark
More formations in the ceiling.
Modelling by Mark, lighting by Tarquin and Mark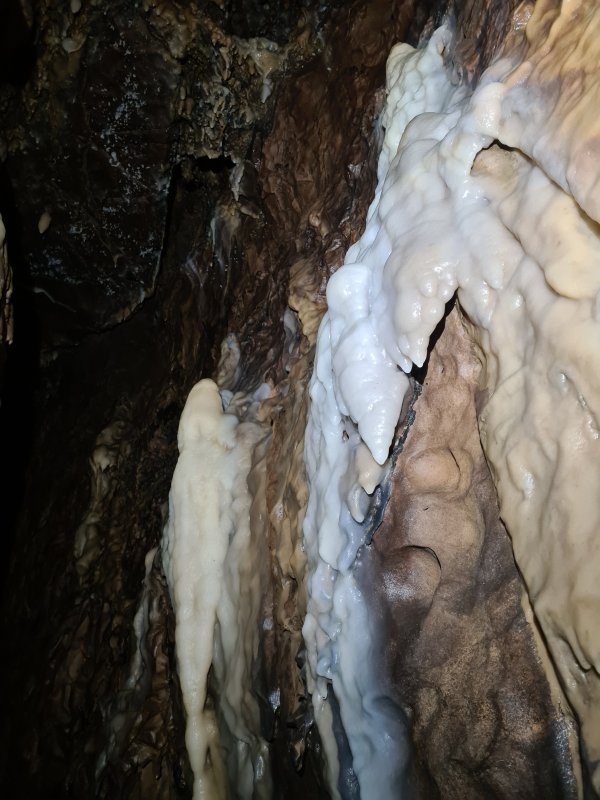 Formations on the wall.
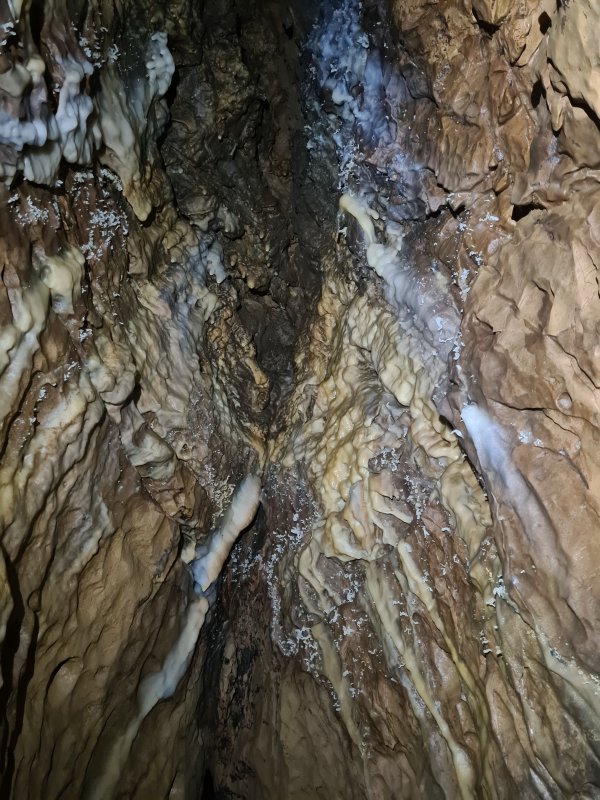 Immature helictites.
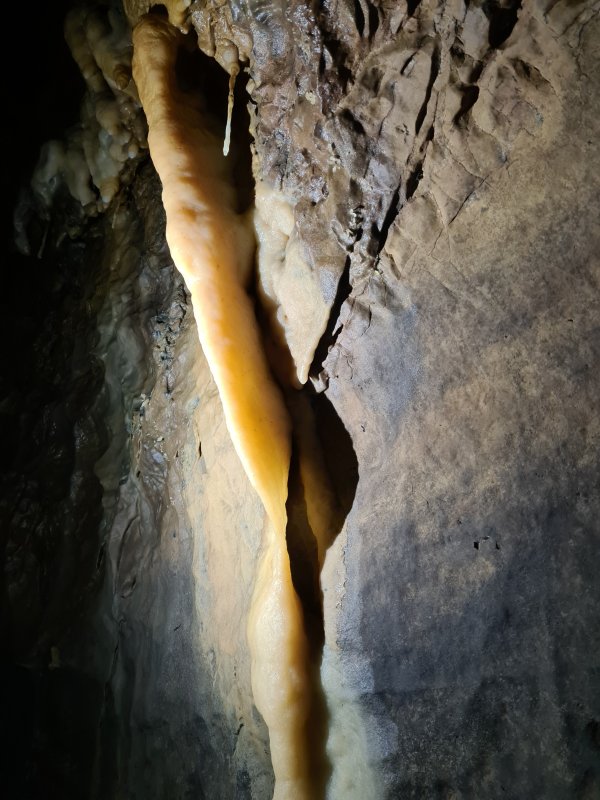 Translucent curtain.
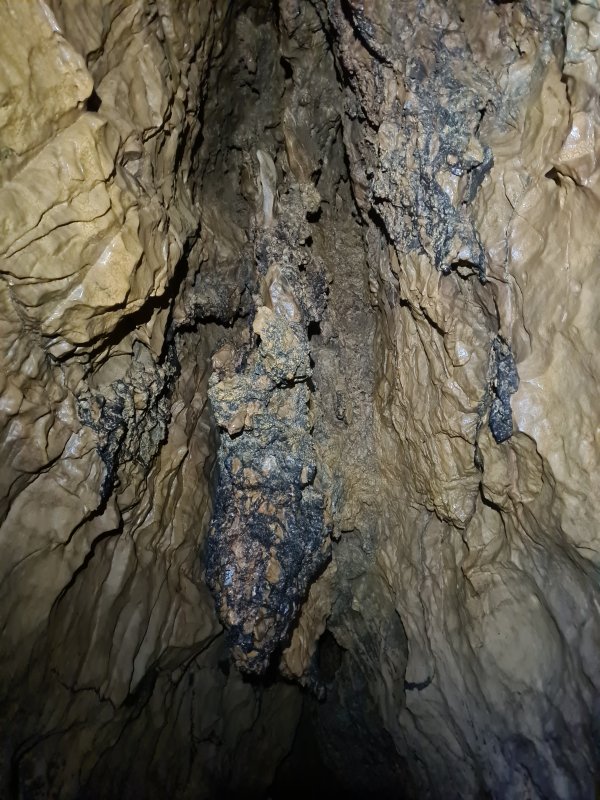 More fault breccia. Still following that line.
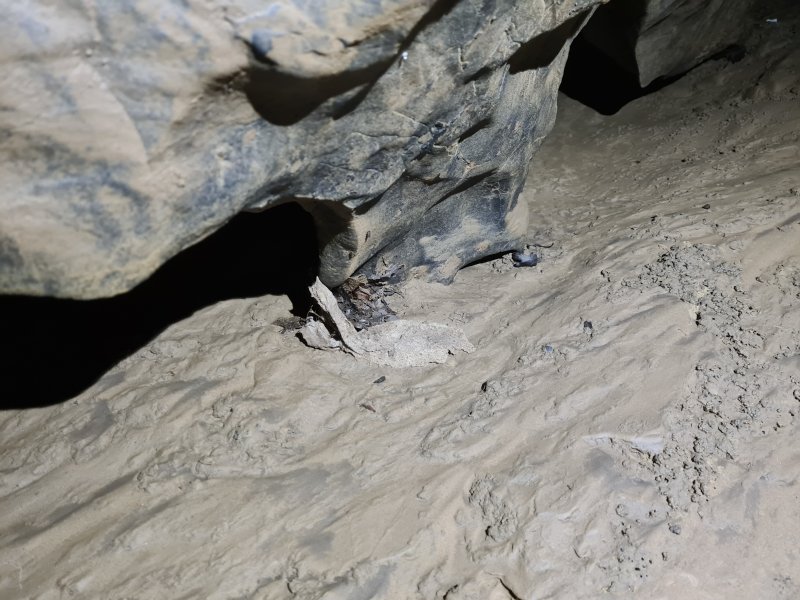 Snagged debris.
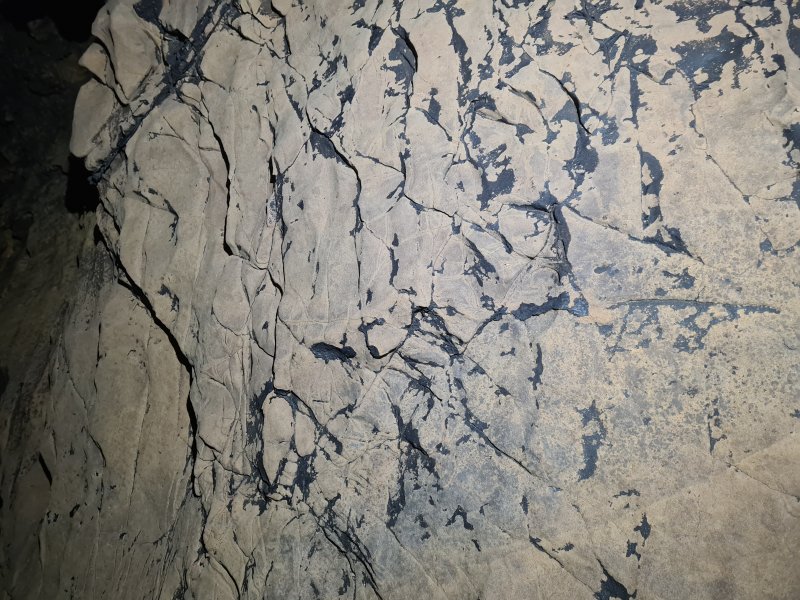 Boxwork highlighted by manganese staining.
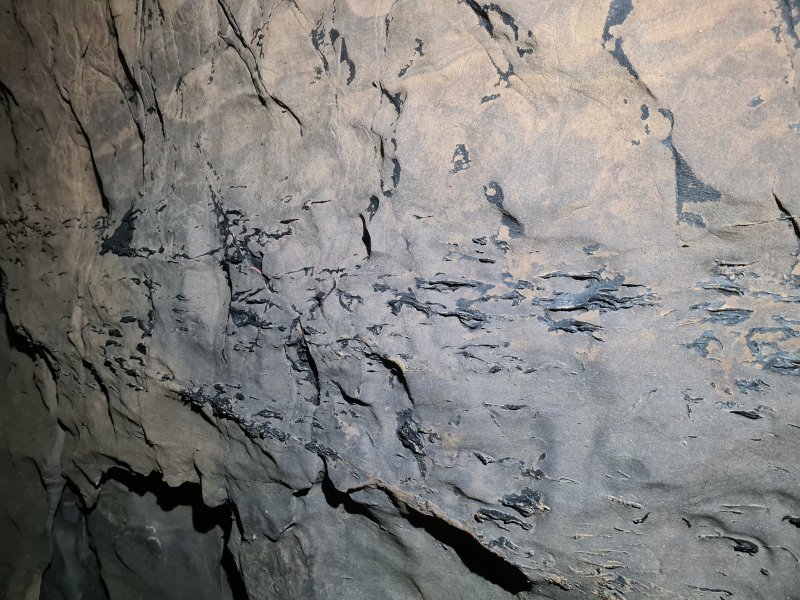 Shells with manganese staining.
 Contrast between the manganese staining and plain rock.
 Manganese coated favosites. This one has been sliced through, and interestingly the corallite tubes are not visible in the cross section.
Modelling by Mark's left hand, lighting by Tarquin and Mark
Manganese coated favosites. This one has been sliced through, and interestingly the corallite tubes are not visible in the cross section.
Modelling by Mark's left hand, lighting by Tarquin and Mark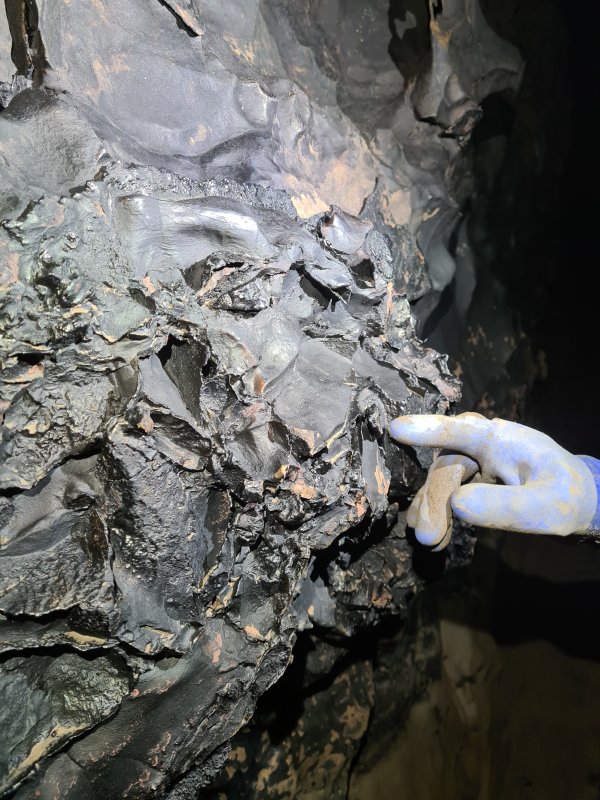 Richly coated fault breccia and scallops.
Modelling by Mark's right hand, lighting by Tarquin and Mark
Richly coated fault breccia and scallops.
Modelling by Mark's right hand, lighting by Tarquin and Mark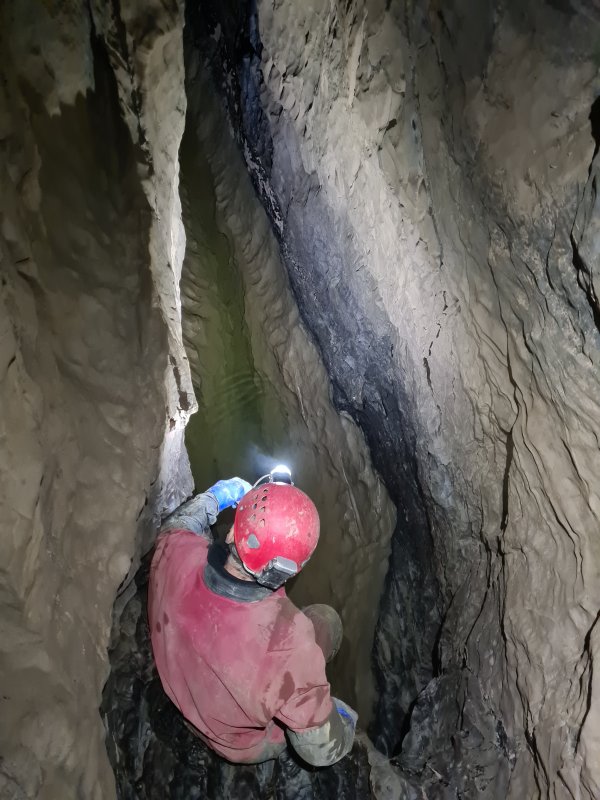 Deep pool at (I think) First Pot. This pool looks beautiful, but it is worth mentioning again that the last time this passage carried water, there was effluent outflow at Dry Sink. This water is contaminated.
Modelling by Mark, lighting by Tarquin and Mark
Deep pool at (I think) First Pot. This pool looks beautiful, but it is worth mentioning again that the last time this passage carried water, there was effluent outflow at Dry Sink. This water is contaminated.
Modelling by Mark, lighting by Tarquin and Mark Traversing the canyon.
Modelling by Mark, lighting by Tarquin and Mark
Traversing the canyon.
Modelling by Mark, lighting by Tarquin and Mark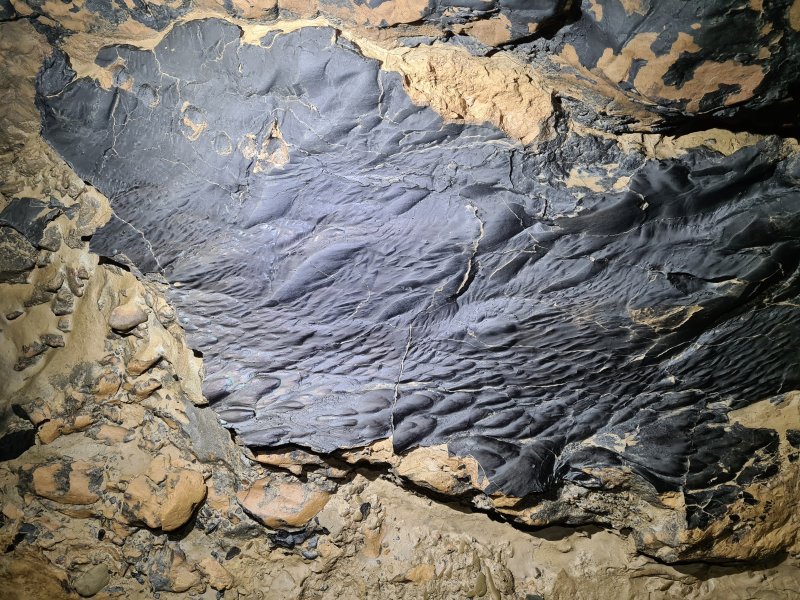 Rich black coating on the sand, some of the most impressive in the passage.
Lighting by Tarquin and Mark
Rich black coating on the sand, some of the most impressive in the passage.
Lighting by Tarquin and Mark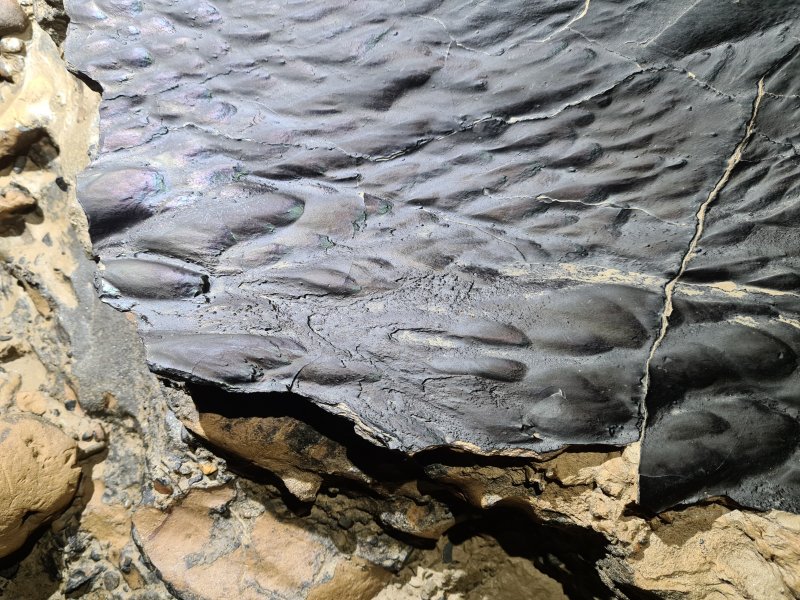 The coat even shimmers with an oil slick rainbow effect. The name Kuwait Passage is well deserved.
Lighting by Tarquin and Mark
The coat even shimmers with an oil slick rainbow effect. The name Kuwait Passage is well deserved.
Lighting by Tarquin and Mark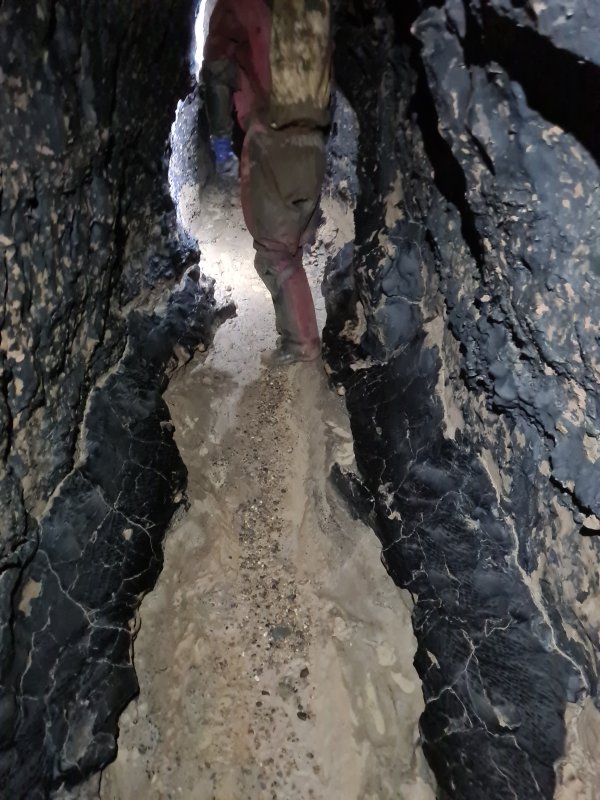 It really does look like a crude oil spill, but this is a natural effect.
Modelling by Mark, lighting by Tarquin and Mark
It really does look like a crude oil spill, but this is a natural effect.
Modelling by Mark, lighting by Tarquin and Mark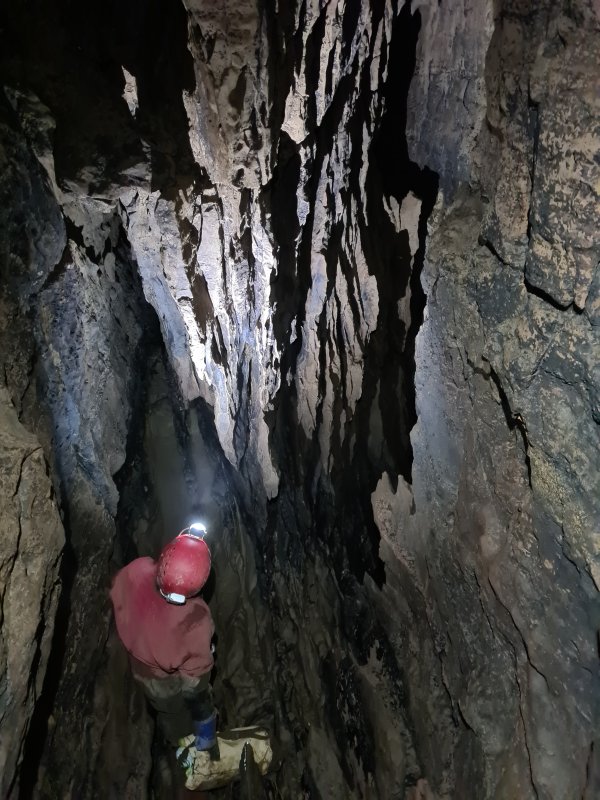 Razor Pot, with its very impressive rock flakes, where we started our survey with Mark in the captain's chair.
Modelling by Mark, lighting by Tarquin and Mark
Razor Pot, with its very impressive rock flakes, where we started our survey with Mark in the captain's chair.
Modelling by Mark, lighting by Tarquin and Mark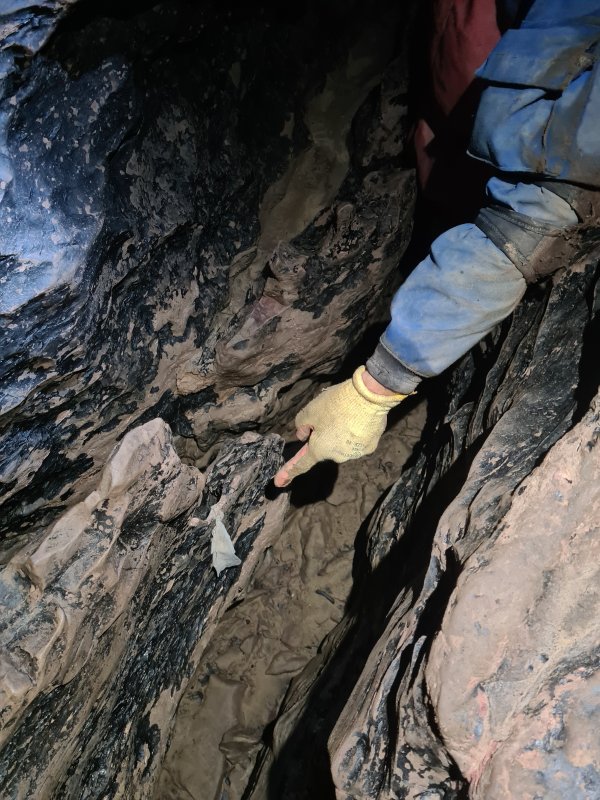 Debris at Razor Pot. This appears to a piece of cloth, or perhaps some conservation tape.
Modelling by Adam, lighting by Tarquin and Adam
Debris at Razor Pot. This appears to a piece of cloth, or perhaps some conservation tape.
Modelling by Adam, lighting by Tarquin and Adam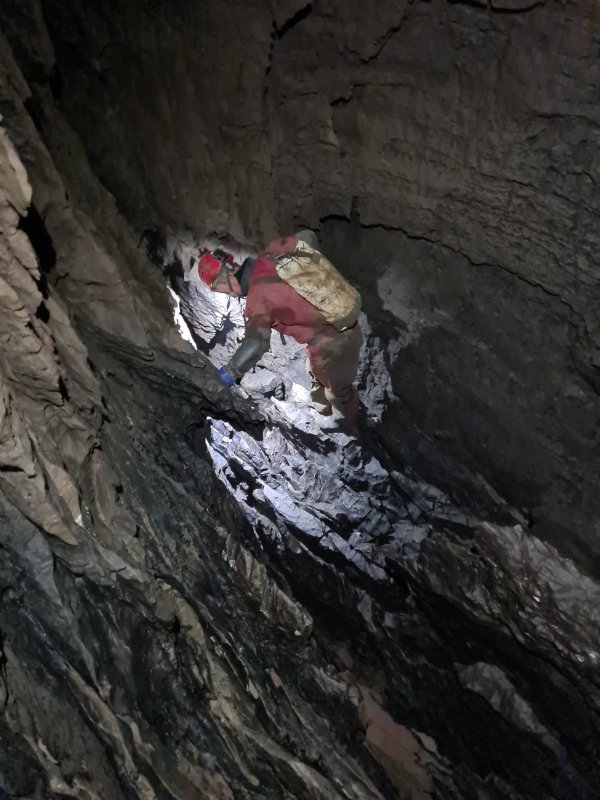 Base of Razor Pot. There is a way on at the bottom, but it is very tight. An alternative is to climb up above it, or traverse on the flakes, into a higher level traversing rift.
Modelling by Mark, lighting by Tarquin and Mark
Base of Razor Pot. There is a way on at the bottom, but it is very tight. An alternative is to climb up above it, or traverse on the flakes, into a higher level traversing rift.
Modelling by Mark, lighting by Tarquin and Mark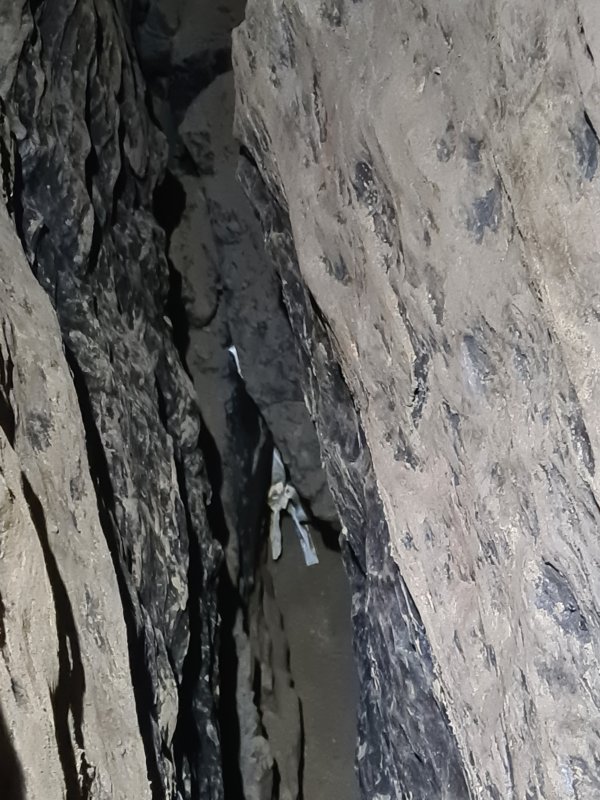 Conservation tape washed into the traverse rift at Lights Out Chamber.
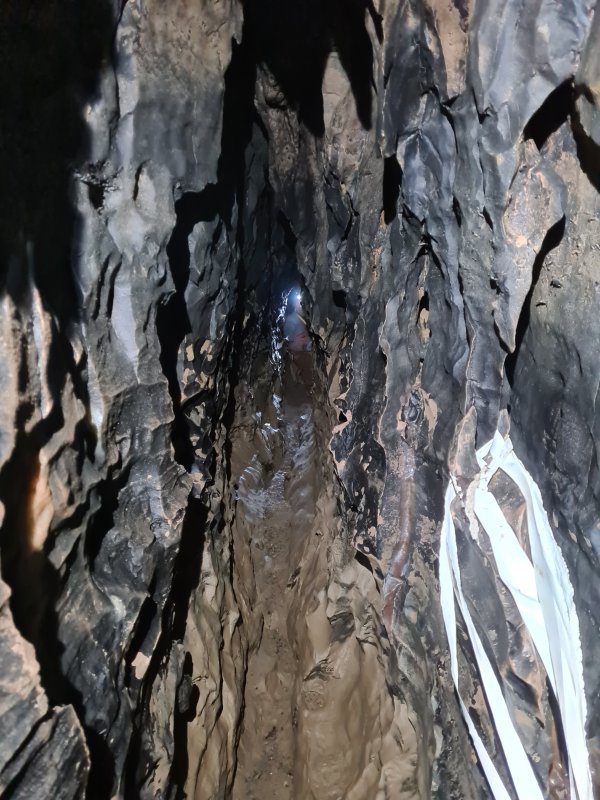 We surveyed into the lower rift from Lights Out Chamber, which had never been surveyed before. It started easily enough, adorned with conservation tape that had been washed in by severe floods.
Modelling by Adam, lighting by Tarquin and Adam
We surveyed into the lower rift from Lights Out Chamber, which had never been surveyed before. It started easily enough, adorned with conservation tape that had been washed in by severe floods.
Modelling by Adam, lighting by Tarquin and Adam The amount of tape was almost ridiculous, like the river had chosen this spot to decorate.
 A deep pool in the rift, with more debris.
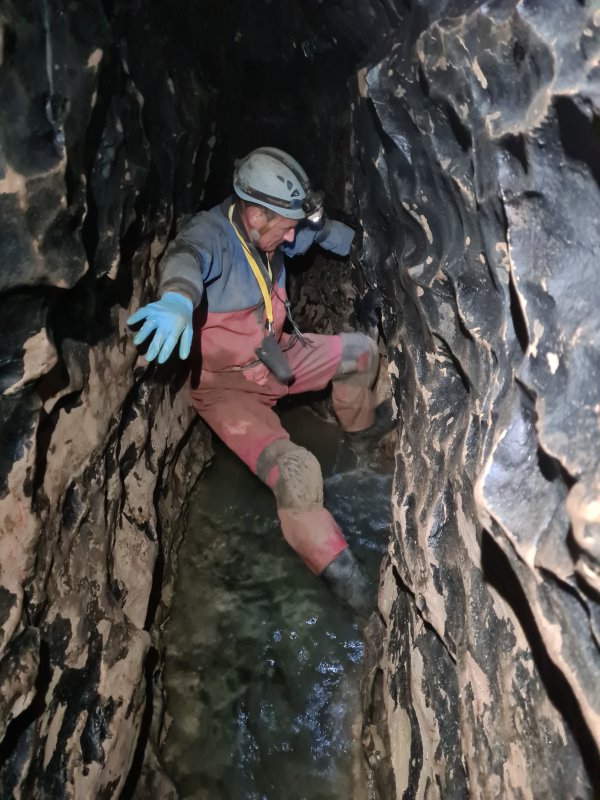 The pool is definitely deep enough to swallow wellies, so we traversed over it to avoid the stagnant water. Beyond here, however, the passage became so tight and awkward that surveying became extremely hard. After struggling for several survey legs, we left it with a single shot into the distance, hoping to at least be able to draw the passage for the survey, leaving it as "continues tight and awkward".
Modelling by Adam, lighting by Tarquin and Adam
The pool is definitely deep enough to swallow wellies, so we traversed over it to avoid the stagnant water. Beyond here, however, the passage became so tight and awkward that surveying became extremely hard. After struggling for several survey legs, we left it with a single shot into the distance, hoping to at least be able to draw the passage for the survey, leaving it as "continues tight and awkward".
Modelling by Adam, lighting by Tarquin and Adam Returning to Lights Out Chamber, we climbed up into the way on, a higher level rift.
Modelling by Adam and Mark, lighting by Tarquin, Adam and Mark
Returning to Lights Out Chamber, we climbed up into the way on, a higher level rift.
Modelling by Adam and Mark, lighting by Tarquin, Adam and Mark The passage contains a lovely little grotto, with a hole down into the lower rift. This is one of the few parts of the route that might keep a dry floor in severe floods.
 Manganese staining in the grotto.
 Manganese stained shells in the upper passage.
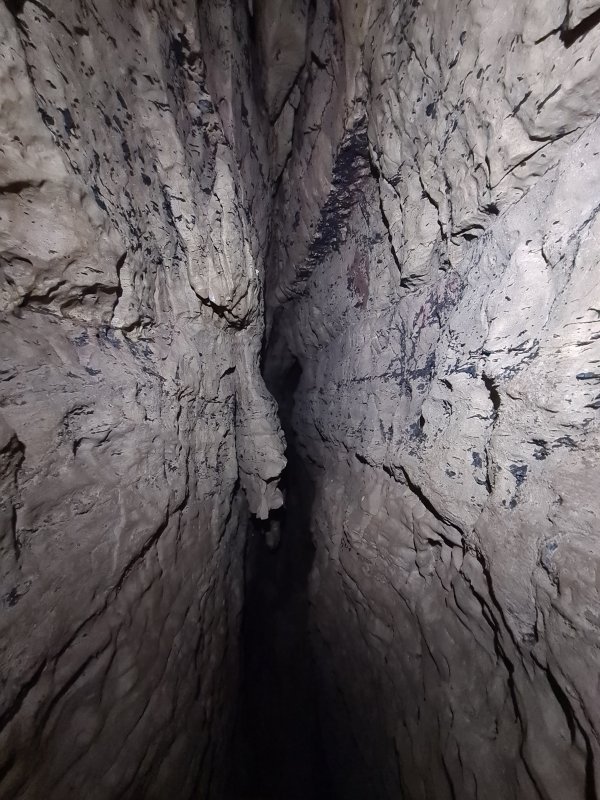 Manganese stained shells in the upper passage.
 Surveying along a traverse. This was a DistoX survey using PocketTopo, with Adam on instruments, and me (mostly) on stations.
Modelling by Adam, lighting by Tarquin and Adam
Surveying along a traverse. This was a DistoX survey using PocketTopo, with Adam on instruments, and me (mostly) on stations.
Modelling by Adam, lighting by Tarquin and Adam The passage is supposed to have a squeeze, but this is it, and we didn't have to squeeze.
Modelling by Adam and Mark, lighting by Tarquin, Adam and Mark
The passage is supposed to have a squeeze, but this is it, and we didn't have to squeeze.
Modelling by Adam and Mark, lighting by Tarquin, Adam and Mark The second grotto in the upper passage, much more substantial than the first, but with less pristine formations.
Lighting by Tarquin and Adam
The second grotto in the upper passage, much more substantial than the first, but with less pristine formations.
Lighting by Tarquin and Adam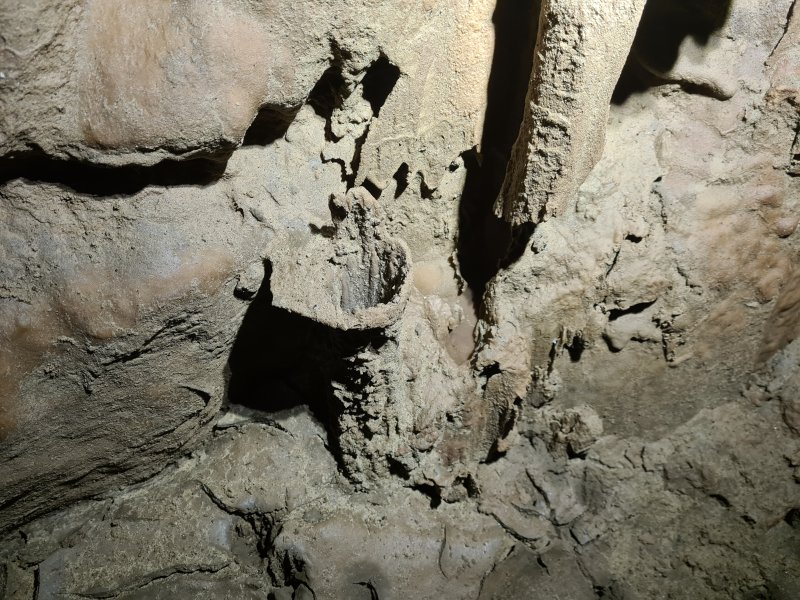 Exposed drip pocket.
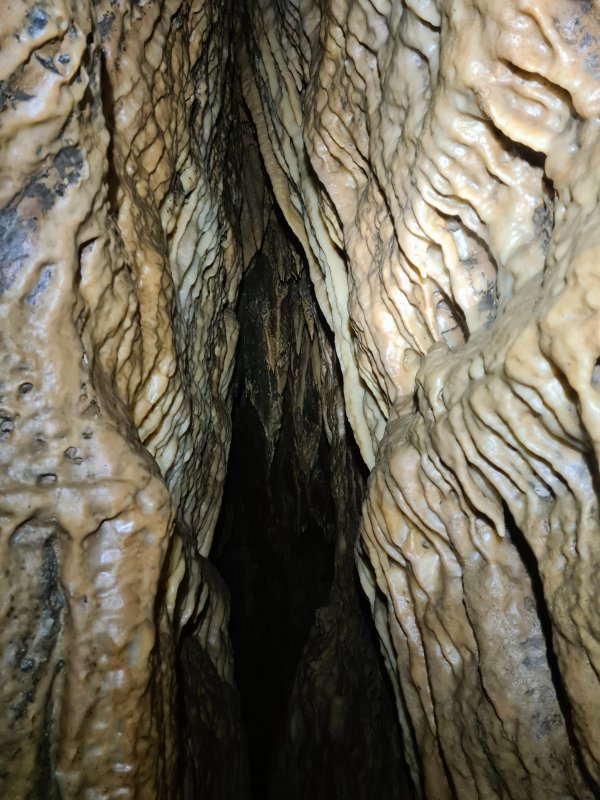 The second grotto.
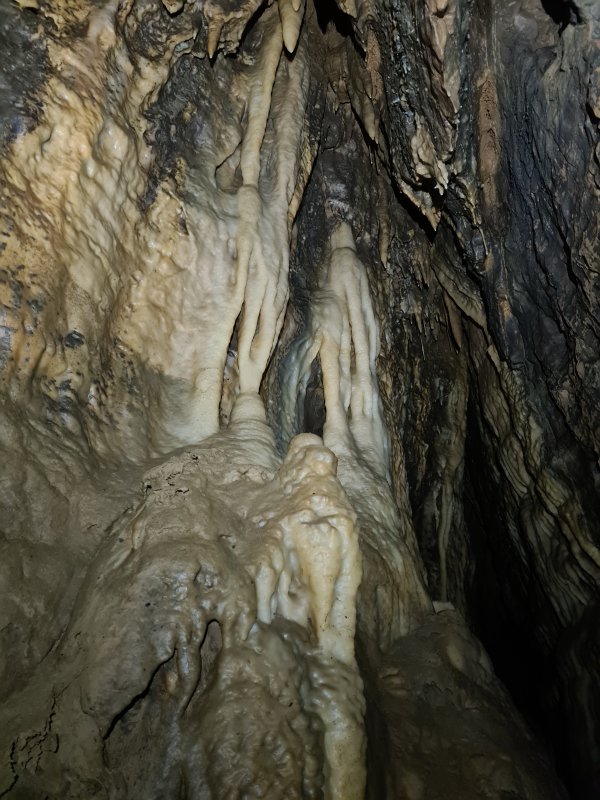 The second grotto.
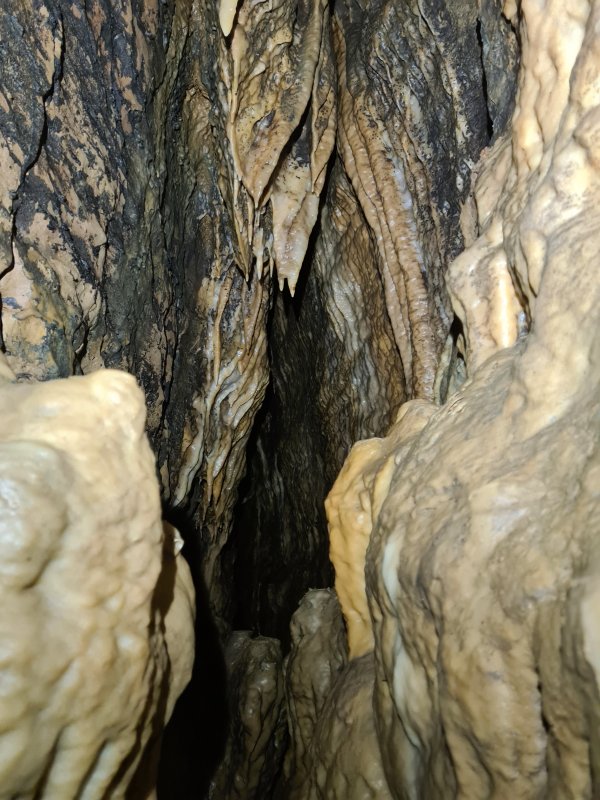 The second grotto.
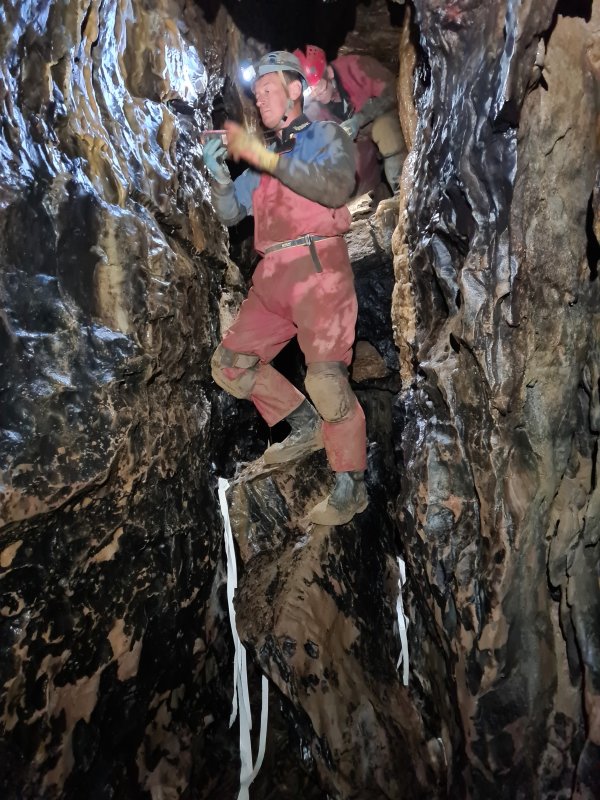 The upper passage ends immediately afterwards, at a climb back down, adorned with more flooded-in conservation tape.
Modelling by Adam and Mark, lighting by Tarquin, Adam and Mark
The upper passage ends immediately afterwards, at a climb back down, adorned with more flooded-in conservation tape.
Modelling by Adam and Mark, lighting by Tarquin, Adam and Mark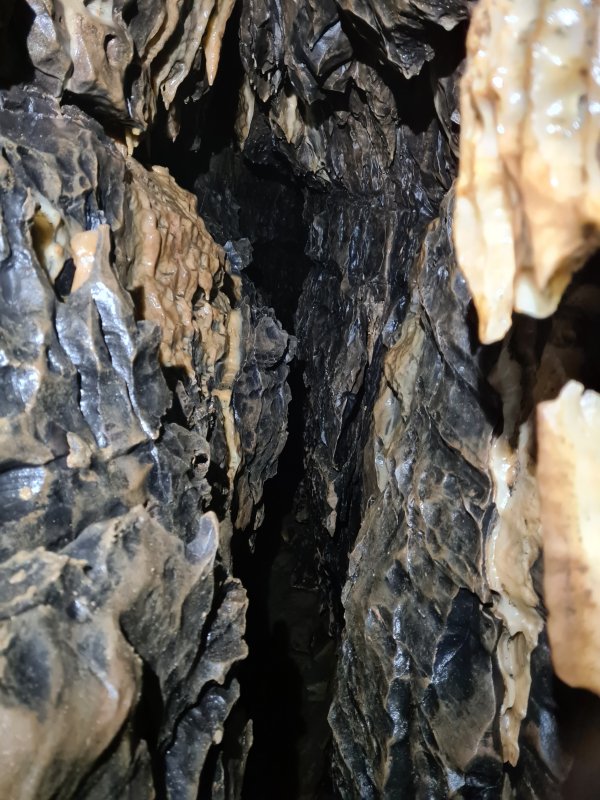 The lower rift rejoins at the bottom of the climb, and fortunately for us, it ended just after where my last Disto shot had landed, and we were able to close the loop.
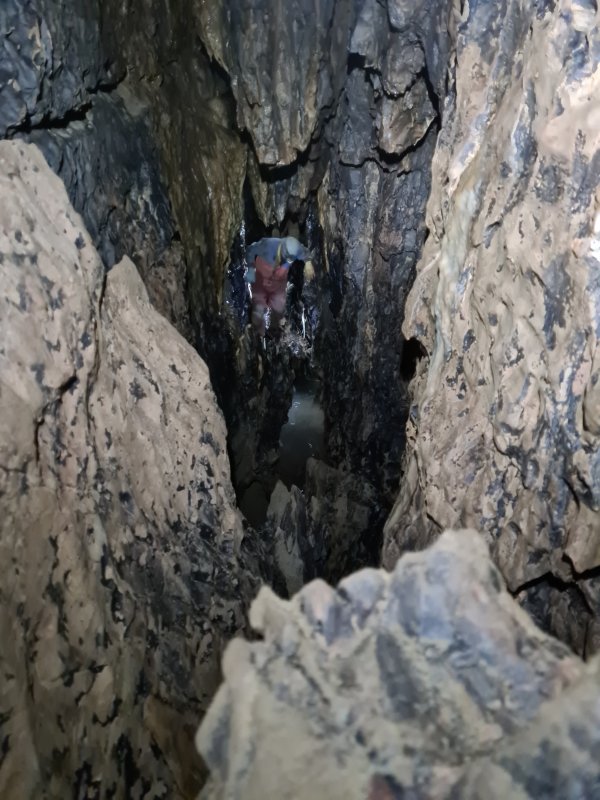 The passage regains its former size, much more impressive. With more conservation tape.
Modelling by Adam, lighting by Tarquin, Adam and Mark
The passage regains its former size, much more impressive. With more conservation tape.
Modelling by Adam, lighting by Tarquin, Adam and Mark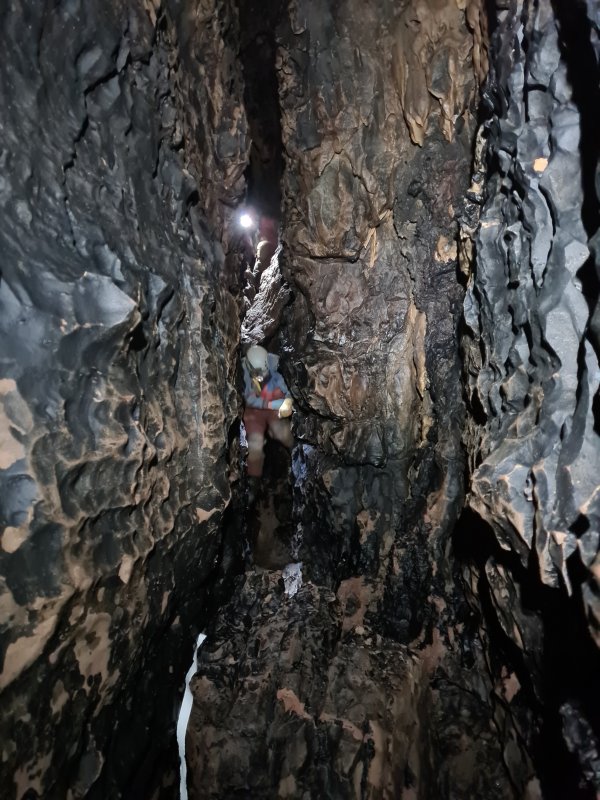 The passage passes a boulder pile with a choice of over and under.
Modelling by Adam and Mark, lighting by Tarquin, Adam and Mark
The passage passes a boulder pile with a choice of over and under.
Modelling by Adam and Mark, lighting by Tarquin, Adam and Mark Beautifully glossy black walls.
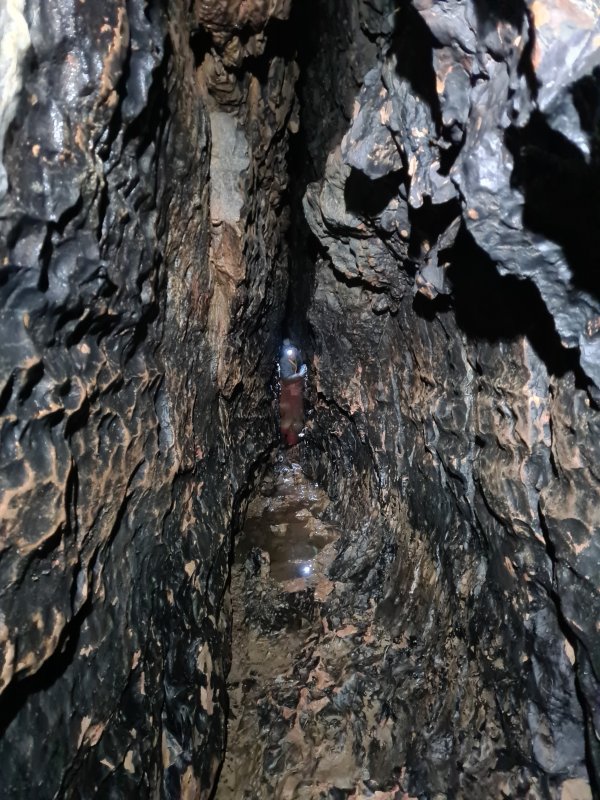 A tall rift passage.
Modelling by Adam, lighting by Tarquin and Adam
A tall rift passage.
Modelling by Adam, lighting by Tarquin and Adam Manganese staining, haematite, and more debris.
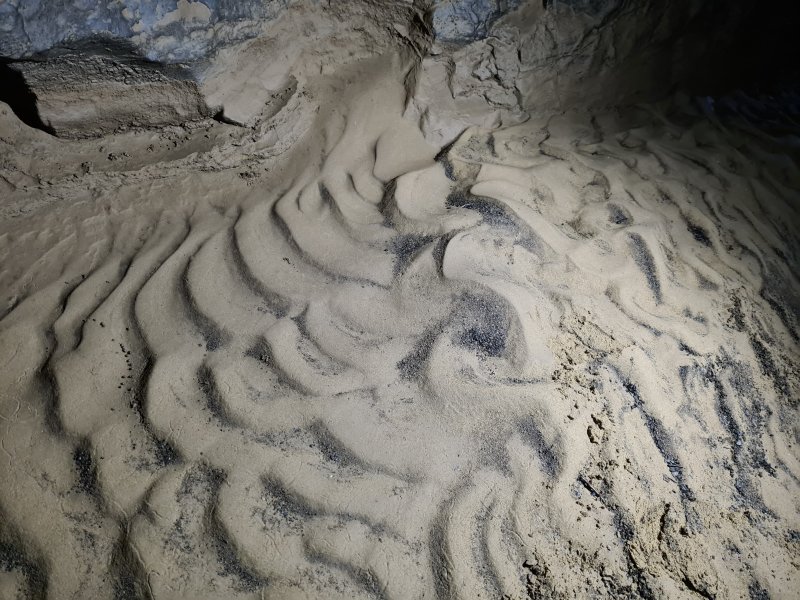 Another set of sand ripples, showing flow from right to left.
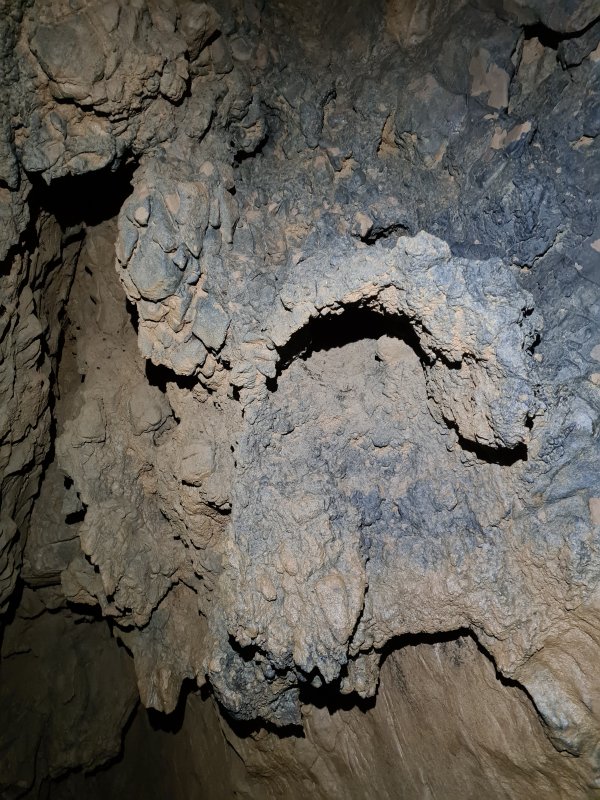 A wide strip of fault breccia.
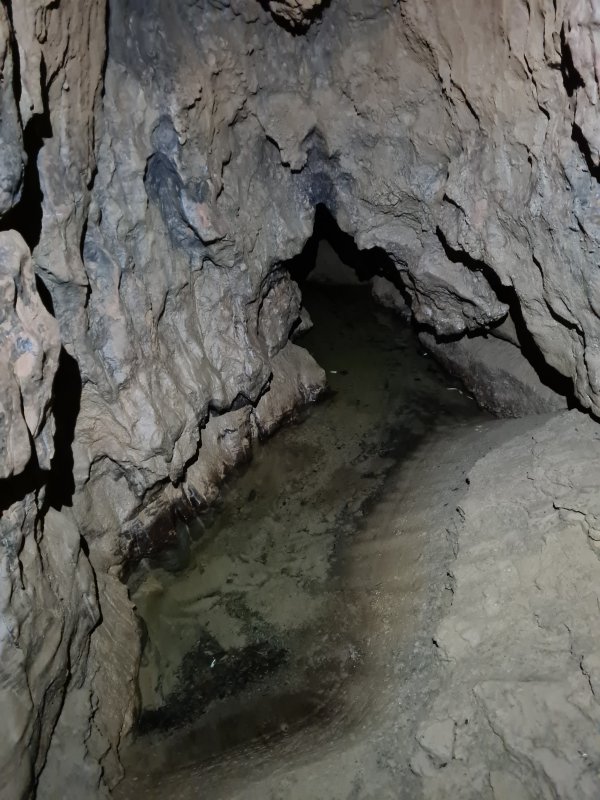 Another deep pool. This could be crossed with dry feet by taking a good line.
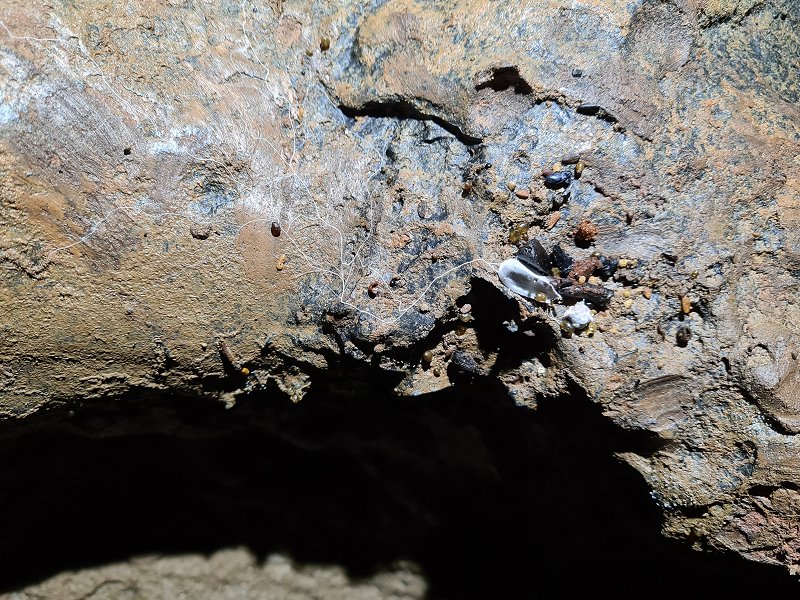 Shitites on the wall. This set had a large mould growth coming from it, and what looked like a deflated egg. Not sure I want to know what it is.
 Stooping under an arch.
Modelling by Adam, lighting by Tarquin and Adam
Stooping under an arch.
Modelling by Adam, lighting by Tarquin and Adam The passage returns to being a fault controlled rift.
Modelling by Adam, lighting by Tarquin and Adam
The passage returns to being a fault controlled rift.
Modelling by Adam, lighting by Tarquin and Adam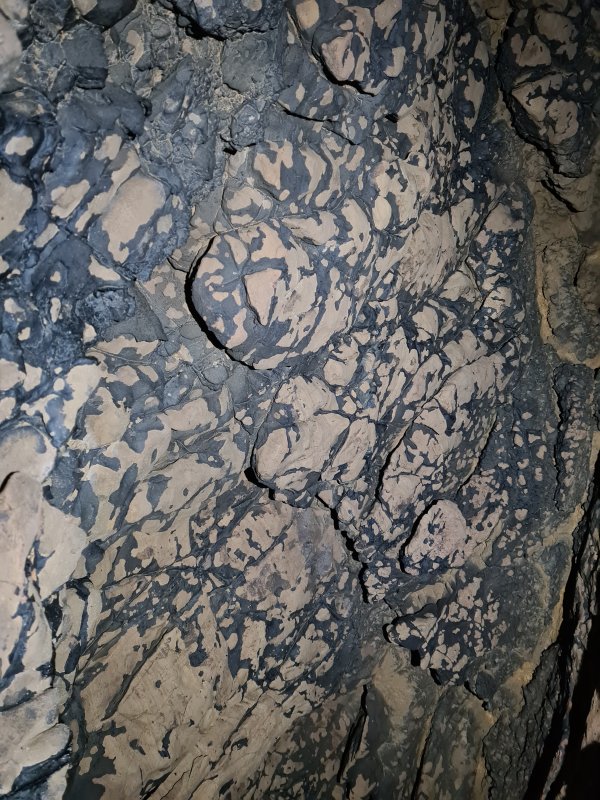 Manganese stained fractures.
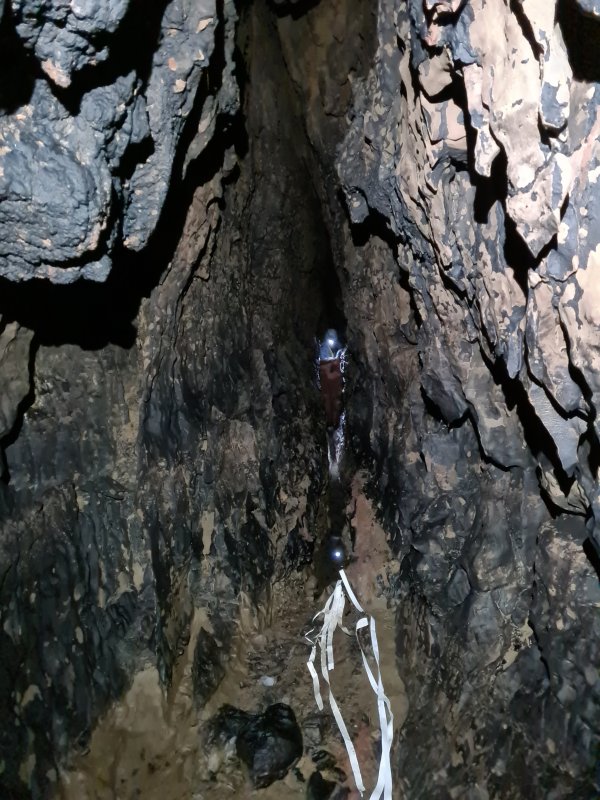 More tapes washed into the rift.
Modelling by Adam, lighting by Tarquin and Adam
More tapes washed into the rift.
Modelling by Adam, lighting by Tarquin and Adam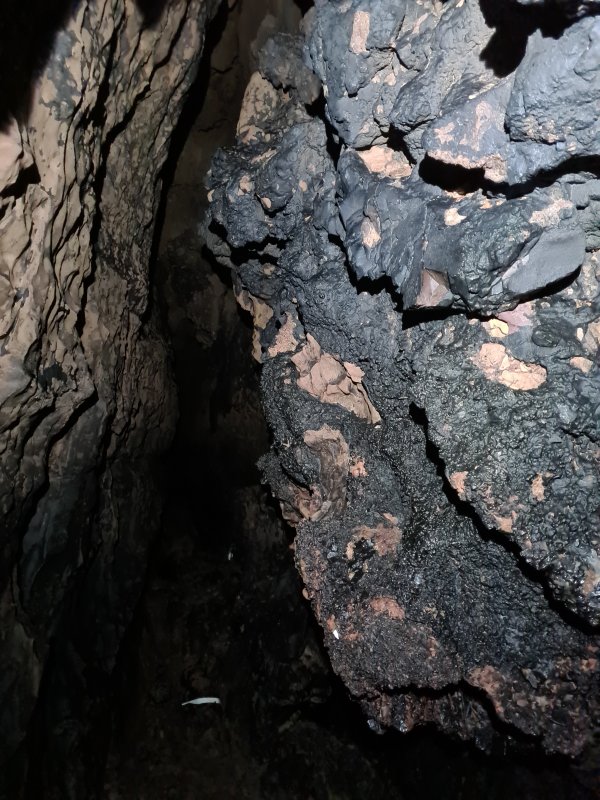 Stained fault breccia.
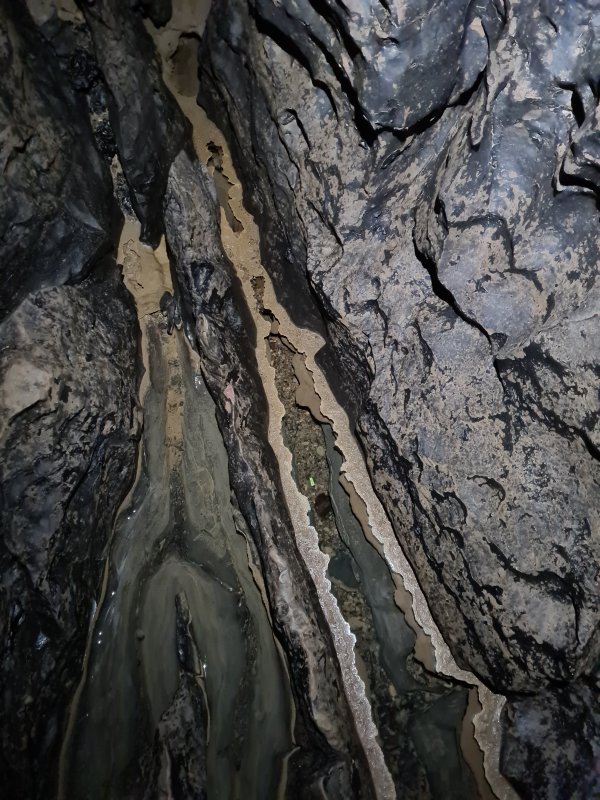 The passage then passes a short side passage ahead and gains a set of crystal pools. The pools are static at this point, but gain a flow later. We did not see exactly where the flowing water starts. This appears to be the point at which Remelt Series begins to track overhead, and a round trip might be established somewhere beyond here. The new survey should help to determine just how close the passages really are, and where a connection might be found.
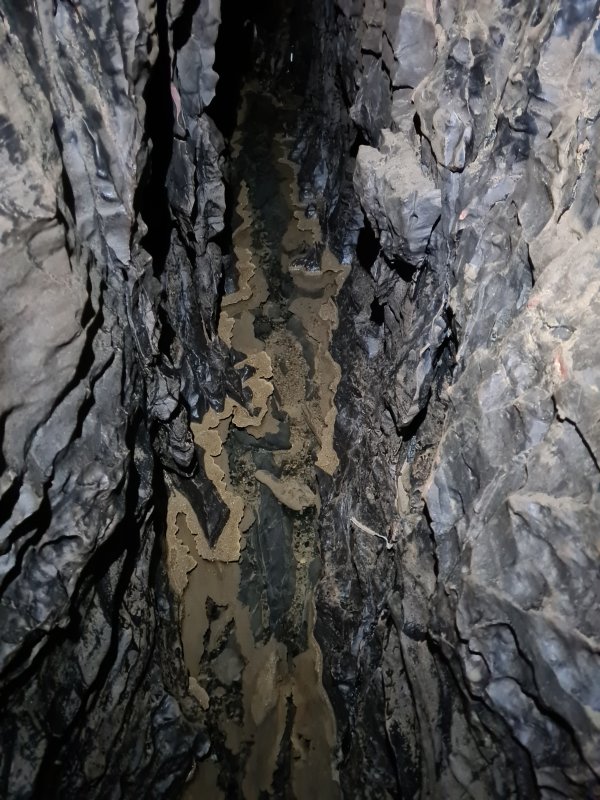 The pools are the way on, but can be partially bypassed with a traverse into an oxbow.
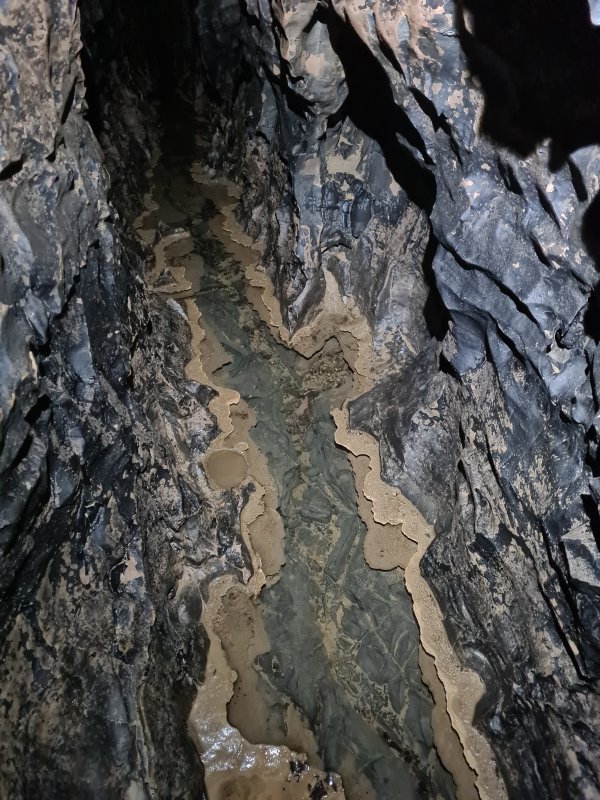 The part avoided by the oxbow.
 The flowstone floor then heads off into a narrow oxbow.
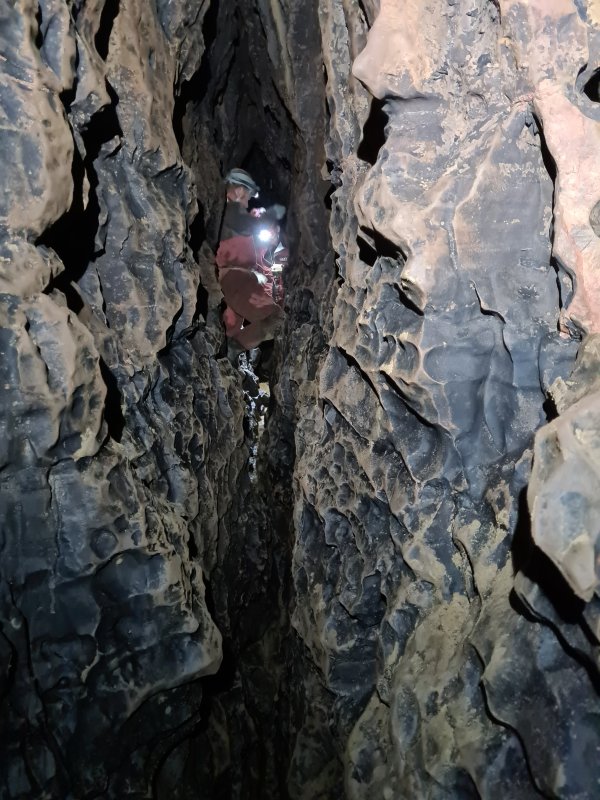 The route avoids the narrow oxbow via a traverse rift.
Modelling by Adam and Mark, lighting by Tarquin, Adam and Mark
The route avoids the narrow oxbow via a traverse rift.
Modelling by Adam and Mark, lighting by Tarquin, Adam and Mark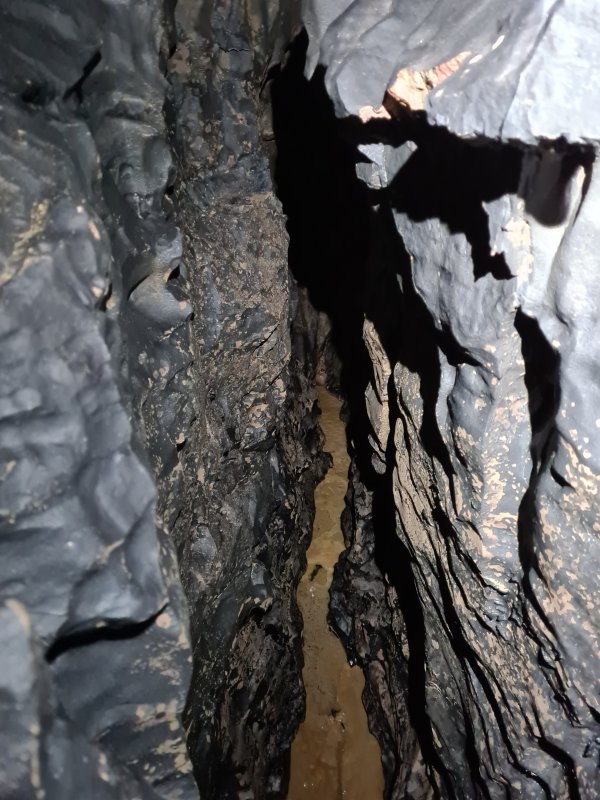 The narrow oxbow returns.
 The water then forms a deeper pool, and this one cannot be avoided. Wet feet. Tainted water. However, there is a very minor flow at this point, so the water is fresher than before.
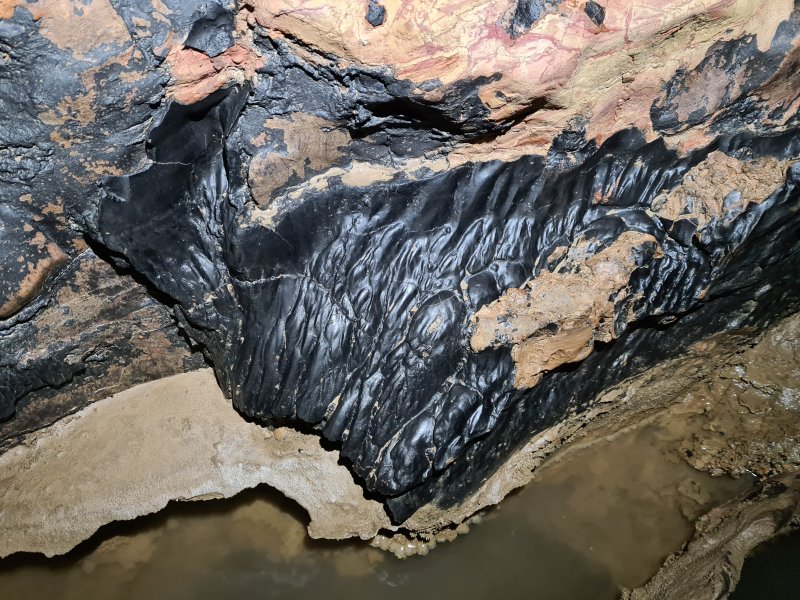 Deep black stains at the end of the pool. Another fake oil spill.
 The tiny flow makes a lot of noise at this narrow cascade, and sounds a lot more impressive than it is.
Modelling by Adam, lighting by Tarquin and Adam
The tiny flow makes a lot of noise at this narrow cascade, and sounds a lot more impressive than it is.
Modelling by Adam, lighting by Tarquin and Adam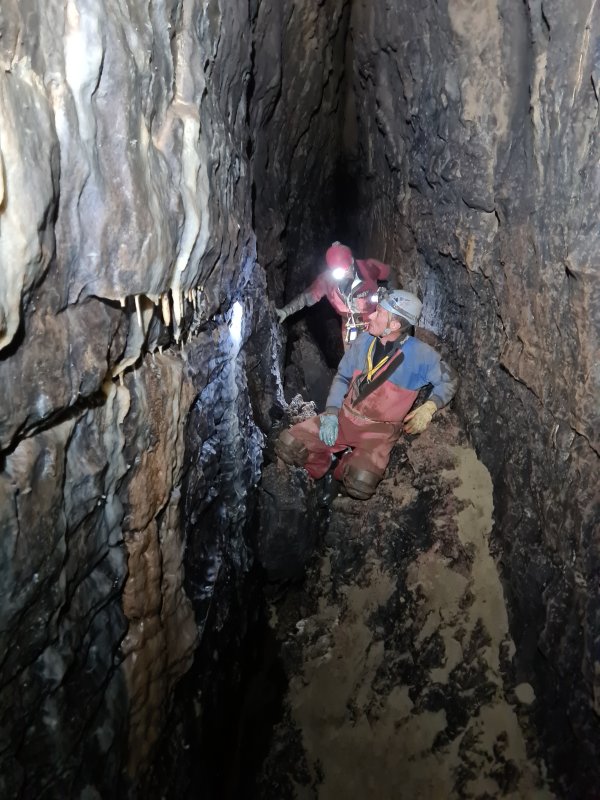 With time running out, we had to turn around at a tall section of rift. We had only made it half way to the end of the passage, but distances are deceptive here; the cave is impressively long, and the amount of survey data we had gathered was substantial. Over a quarter of it had never been surveyed before. The remaining passage finally ends at Static Sump 4 (not to be confused with Sump 4), which has not been passed and ends in silt fill. It should rejoin the main flow, and is the most promising way on.
Modelling by Adam and Mark, lighting by Tarquin, Adam and Mark
With time running out, we had to turn around at a tall section of rift. We had only made it half way to the end of the passage, but distances are deceptive here; the cave is impressively long, and the amount of survey data we had gathered was substantial. Over a quarter of it had never been surveyed before. The remaining passage finally ends at Static Sump 4 (not to be confused with Sump 4), which has not been passed and ends in silt fill. It should rejoin the main flow, and is the most promising way on.
Modelling by Adam and Mark, lighting by Tarquin, Adam and Mark