
This article was written to accompany the BCRA Cave Surveying Group paperless surveying courses that are based on the use of SexyTopo and Therion. SexyTopo also has its own user guide built into the app. For general information on how caves are surveyed, see the cave surveying and B.C.R.A. survey grades article.

For Android, there are two popular applications for surveying caves. The first and most complete is TopoDroid, and the second is SexyTopo. Both have their strengths, and either is a great tool for cave surveying. The assumption here is that the desired output will be a set of files that can be used to produce a survey using Therion. However, both apps can produce a variety of output formats that can be used with other applications too.
The UI of TopoDroid is quite challenging to understand, as it tries to do everything at once. When sketching, the correct types of lines must be drawn while in the cave (a wall for a wall, a ceiling step for a ceiling step). This may be able to cut out some of the time taken to draw up in Therion later, as the correct types of line have already been selected, and will exist as a line. However, it takes a great deal more time in the cave instead. Time in the cave is precious, and should not be wasted. In general, the lines created in the cave will be very rapidly drawn and messy, and might not actually be touching all of the splays they were supposed to, since they are done very roughly with a small screen and stylus. They will almost never be the final lines used in Therion. Therion has features to help smooth out lines and reduce the number of data points while retaining their curved shapes, but even so, most lines will end up being redrawn completely in their correct locations, and most scraps will need to be reworked to hold the correct parts of the cave. Therefore the perceived benefits of TopoDroid get wasted.
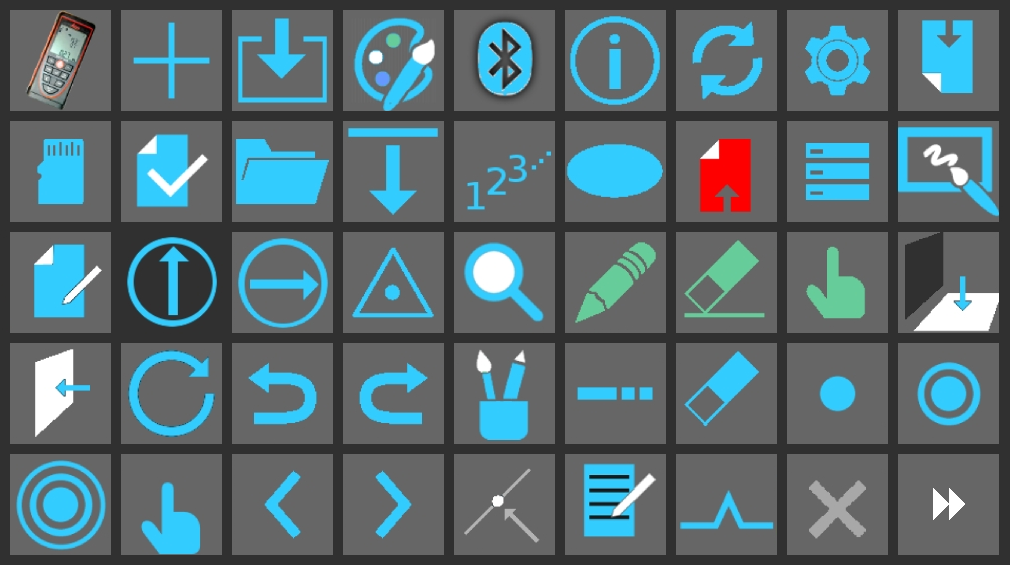
The entire UI of TopoDroid is based on the user learning and recognising a large number of button icons that bear very little resemblance to their purpose, without visible text to explain what they mean, so more time is taken reading through the help files. For example, the button to switch in and out of calibration mode inexplicably looks like a standard reload button, the calibration history and compute calibration both look like a settings button, and the editing mode and selection tool both look like a finger but they do very different things. It does have very good help files, which is lucky, because it really needs them. Everything you do in the app seems to open yet another view with yet another dizzying selection of buttons that need to be learned. TopoDroid has a lot more features, such as being able to edit lines and see a 3D cave view, and tries to produce a lot more outputs natively, such as DXF. If you are able to learn how to navigate through the app, how to activate the right mode to do what you wanted to do, what all 45 buttons mean (or perhaps there are more, that is just what I found with a quick scan through the different screens I could find), and what all 33 survey symbols (as of 2021) mean so that you do not have to search through the list every time, it opens up a world of possibilities.
SexyTopo is a much more easy app to use, and the time taken in the cave is greatly reduced. It was written specifically to be an Android replacement for the popular PocketTopo app for Windows Mobile/Pocket PC, to reduce the learning time for people who are new to surveying, or who would like to switch from PocketTopo. It is based on the idea of sketching drawings by hand, using basic coloured drawings (though in future, it might become possible to also select specific line and symbol types too). The interface feels a lot like a basic sketching application, like Microsoft Paint. Instead of drawing specific line types, the surveyor must hand draw symbols like pitch edges and ceiling steps in a way that can be understood when sitting in front of Therion on a computer later. A surveyor can use different colours for this, or may choose to draw a symbol that looks like the standard symbol for a pitch. In Therion, the lines will appear as a background image that must be traced over with newly created lines. SexyTopo is definitely not as complete (it has not been around for as long) but the UI is very intuitive, and takes very little time to learn. It is not intended to do everything that Therion can do, since its purpose is for gathering the data so that it can be used in more complete apps like Therion. For most surveyors, this is what they need, since the underground part of the survey is just the rapid data gathering which is done with the handheld device, and the more complex drawing up and exporting will be done with Therion.
TopoDroid is primarily made by Marco Corvi from Recco, Italy. SexyTopo is primarily made by Rich Smith based in Cardiff, Wales. The development pace of SexyTopo has been fairly rapid, and bug fixes seem to happen very quickly. Useful feature requests also get implemented. The first paperless surveying course coordinated by the BCRA Cave Surveying Group and based on SexyTopo was held at SWCC starting on the 13th of November, delivered by the author of this website. Previous courses coordinated by the same group were based on PocketTopo.
SexyTopo is an open source project hosted on GitHub, and contributions to the project are welcome!


Since the introduction of the DistoX in 2008, the most common surveying devices were Pocket PC PDAs, but these have now reached beyond the end of their production lifetime. They are available only as second hand devices, and batteries are no longer made, so only refurbished items can be bought, or an external battery pack must be carried. Android devices are still actively manufactured, and are significantly more capable. In spite of that, Android devices are surprisingly slow compared with a Pocket PC, because they try so hard to be clever, and have such fancy graphics, which really is not important for cave surveying. Pocket PC devices are able to hold vast amounts of survey data, but they do so by using incredibly low resolution graphics. Neither approach is better, but Android seems to be taking over as the platform of choice for cave surveying.
Pocket PC PDAs typically are not waterproof or shock proof, and need a hard case to cover them. They use resistive screens, which can work with any hard pointing device as a stylus, including a fingernail. Dedicated cases usually have a soft screen to cover the touchscreen, to allow the use of a stylus. Higher quality Android devices are normally waterproof and dust proof, but they usually have capacitance touchscreens, which do not function when wet. A stylus is almost essential, since a finger obscurs the view of the splays. Some devices may come with a dedicated sensor-based stylus, which can work with a wet screen, but the styluses themselves often suffer from being used in the wet for too long, and replacements are usually needed over time, which will typically work only with a specific make and model (especially those for Samsung Galaxy Note devices). Simple capacitance styluses, usually looking like a pen, can be purchased for capacitance touchscreens, and work with almost all Android devices, as long as the screen is dry enough; most come with spare tips which can be replaced when the old one wears out. Android devices normally have far more fragile screens, and a rugged case with screen protector is essential. Some rugged cases are waterproof, which prevents water seeping between the case's screen protector and real screen, allowing water to be dried off the outside, without needing to remove the case. Basic phone cases do not provide sufficient protection within a cave; use a rugged case!
Android devices often have exceptionally good cameras, which can be used to record photographs or videos during surveying, which can really help when drawing up a survey later.
In general, Android devices have more than enough capabilities for cave surveying, but some of their limitations can cause issues if you choose a poor device or case.

When you start the SexyTopo app, it shows the connection screen. Ignore this for now. At the top is the toolbar with four buttons and the menu. The buttons are as follows:
 "Save"
 "Table"
 "Plan"
 "Elevation"
 "Menu"
There, that was pretty simple.

Before you connect to a DistoX2 or other surveying tool (SexyTopo also supports the DistoX, Shetland Attack Pony 5 and Bric4), create a survey for the data to go into. If you don't do this first, then when you connect, any pending survey data in the DistoX2 will be downloaded immediately, and will get put into whatever cave survey you last had open, and that may not be the place you wanted to put it. If there are no surveys, SexyTopo will have created a placeholder survey, whose name is probably not what you would want to use in your final project.
You should create a new survey for every surveying trip. The reason for this is that SexyTopo can only keep records of the date and team members for a survey (Therion can do it per centreline). The date is used by Therion for automatic magnetic declination of the compass readings, and the team members are used for credits on the survey (for copyright reasons).
You should create a new survey for every cave that you survey, even if they are surveyed on the same day by the same team. The reason for this is that Therion can only split data up in to "caves" (for generating separate length statistics) if they are in separate surveys. You can choose to use a different survey for surface surveying, if it helps you to manage your data better. In general, a short bit of survey data to get from a nearby station into the entrance of a cave can be in the same survey as the cave, but it is best to keep lengthy surface surveys in their own survey (this also allows the surface survey to be easily rendered underneath the cave in Therion). SexyTopo does not know the difference between surface and undeground legs or splays. Those need to be manually configured in Therion or Survex.
Don't worry, SexyTopo can link surveys together so that you can see them all at once if you would like.

To create a new survey, use kebab menu - File - New Survey. Give it a good name, such as the name of the passage you are starting your survey in, or the area you are hoping to survey (but bear in mind that you might not actually complete the area you were hoping). This name will be used in the file names when exporting the data, and will be used as the Therion survey name too. The recommendation is to use lowercase names without any spaces, and without special characters. This makes it easiest to use on computer systems that are case sensitive (such as Linux) as well as on computer systems that are case insensitive (such as Windows) without errors.
All of your SexyTopo surveys are saved into the same folder, so it is not possible to group them by cave or project. As a result, it is not possible to have a survey named "mainpassage" in two separate caves. If you think you might need this, then you will need to include the cave or project name in the name of the survey, such as "swildonswetway".
If you have chosen a bad name, and need to rename it later, you can use kebab menu - File - Save As.
If you want to reopen an old survey, you can use kebab menu - File - Open Survey.
You can also delete the survey using kebab menu - File - Delete Current Survey, then confirm deletion. But do not ever delete surveys. It is better to keep obsolete survey data than to accidentally delete one that you needed, and old data might sometimes be useful for historical analysis.
When learning how to use SexyTopo, it can be nice to have some sample data to work with. SexyTopo can be told to generate some fake cave data for this purpose, using kebab menu - Tools - Generate Test Survey. Always do this with a new, blank survey, as it will overwrite any existing data. The generated data uses the LRUD concept rather than proper splays, so it is not really realistic, but it can be useful just for practicing. A DistoX2 is not needed when testing SexyTopo in this way, so several of the following sections can be skipped.

If you have not previously paired the DistoX2 with the Android device, you will need to do that first. If the DistoX2 is already in use by another device, either disconnect it from that device, or unpair it from that device, or disable Bluetooth on that device. This will put the DistoX2 back into pairing mode, ready to connect to your device.
Use Android settings - Connections - Bluetooth. With Bluetooth enabled, switch on the Disto (which must not be paired to another device at that moment). When it appears in the list of available devices, tap on the DistoX2 (which will appear as something like DistoX-1234), and agree to pair it if the Android system asks. If it asks for a passcode, use 0000.
If any other apps (such as TopoDroid) are using the DistoX2, close those apps, or tell them to disconnect from the DistoX2.


In SexyTopo, use kebab menu - Instrument - Connect. This shows the connection screen that SexyTopo will also show when it is first started.
On the connection screen, you can enable and disable Bluetooth on the device. This is the same as enabling and disabling Bluetooth in the Android settings, and can be disabled when not in use, to save battery.
The connection screen has a "PAIR" button that allows you to pair with a DistoX2 or other devices, but this does not work on some versions of Android. The "UNPAIR" button allows you to unpair from a DistoX2, so that it can be used by another Android device without having to switch Bluetooth off on the current one. SexyTopo can only use one DistoX2 (or equivalent) device at a time, and you will need to unpair from any previous DistoX2 device before you can pair with a new one.
Once a DistoX2 has been paired, use the "Connect" switch to connect to the DistoX2. It will connect, showing a lot of debugging data below. If it worked, the debugging output should end with "Ready to receive data". If not, double check that the steps above have worked correctly.
When it connects, any pending survey data in the DistoX2 will be downloaded immediately (which will also be shown in the debugging output), and will get put into the current survey.
If the DistoX2 becomes disconnected, by being taken out of range or switched off, SexyTopo will retry the connection for a while, but will eventually give up. Once it gives up, you will need to return to the connection screen and tell it to connect again, once the DistoX2 is within range.

There is the common suggestion that a DistoX2 should be re-calibrated if it has not been used for a couple of months, or if it has moved locations significantly since it was calibrated (such as from one country to another). In practice, however, it generally does not need to be re-calibrated unless the calibration is faulty. This can happen if the device sustains an impact, or if ice crystals are allowed to form inside it. With the older DistoX devices, a recalibration is needed whenever the battery is changed. Always test the device's calibration before deciding whether to recalibrate it.
Before calibration, ensure that you have no metalwork or electrics on you that might affect the readings: belts, carabiners, lamp, keys, wallet, wedding ring. Place a light nearby so that you can see what you are doing, but keep it a couple of metres away from the DistoX2. Keep the Android device a couple of metres away from the DistoX2. Avoid calibrating in caves that have strong magnetic influences. Avoid overhead power lines. Avoid fences. Do not calibrate in buildings with electricity, nails or iron reinforced walls. For best results, calibrate in a cave or forest.
In SexyTopo, select kebab menu - Instrument - Calibration (the DistoX2 must be paired already, and must be connected in order to start calibration). This shows the calibration screen. Use the DISTO CAL MODE ON button to switch the DistoX2 into calibration mode.

Start taking the calibration readings. There are videos online showing the general procedure. The basic idea is to imagine that you are standing in the middle of a cube. Ideally, the cube should have one face facing North, one facing South, one facing East, and one facing West, so that the DistoX2 experiences the maximum difference in the Earth's magnetic field from North-South to East-West, but if there is nowhere suitable with that orientation, then just use what you have. From the middle of the cube, imagine that you want to take a set of readings towards the middle of each 6 faces of the cube (North, South, East, West, Up, Down). For each direction, take 4 readings, one with the DistoX2 face up, one facing to the right, one facing down, and one facing to the left. So the DistoX2 rotates clockwise along its length by 90° between readings. When pointing up or down, rotate it the same way between readings. It usually helps to be consistent, always rotating clockwise, perhaps even saying the directions out loud to yourself, to avoid forgetting to take one of them.
You do not have to actually hold it on an imaginary point in the middle of the passage in order to do this. You just have to imagine which direction it needs to point, and find two points (such as from one wall of the passage to the other, or one boulder to another) that point in that same direction. To get the best results when aiming, each reading should be about 3 metres in length, though the exact length is not relevant, as the length measurement is not used during calibration. There will be limitations imposed by the available space in the cave, and the places where the device can be held. Each set of 4 readings should be as accurate as possible, pointing from one point to another, using the same two points as you rotate the device. The opposing directions (eg. North and South) do not have to be perfectly opposite, but should be roughly opposite. They also do not have to be perfectly level, but should be roughly level. A few degrees off is fine. The perpendicular directions (eg. East and West) do not have to be perfectly perpendicular to first direction, but should be roughly perpendicular. For up and down, an overhanging wall ledge is usually best; drop a pebble from there to see which point on the floor to point at.
Now that you have done those most important calibration readings, you need to do the corners of the cube. Again, imagine that you are in the middle of the cube. Point the DistoX2 roughly towards each corner of the cube (4 diagonally upwards, 4 diagonally downwards). For each corner, take another set of 4 readings, again rolling the DistoX2 90° clockwise between readings (facing up, facing right, facing down, facing left). These are used for checking the calibration, and it is not so important to get them perfect, but it is still a good idea to do each set of 4 accurately anyway. Again, pick an appropriate location to work from, such as a point on the wall, and aim diagonally from there towards appropriate points on the ceiling and floor. It is often possible to do 4 diagonal directions from just one point on the wall.
It does not actually matter which order you do the faces or corners of the cube, as long as you do all of them, and as long as you take 4 readings in each direction, rotating the DistoX2 in between. SexyTopo will be able to group them into sets of 4, and work out the calibration. If it helps, you can use SexyTopo's "Next (suggested)" guide as to which direction you need to point, starting from a direction that you can choose to call "ahead".
The DistoX2 will send its results to SexyTopo immediately, and you should see the data coming in as it is recorded. SexyTopo will give a count of the total number of readings. Every time you complete a set of 4 readings, check that the Reading number shown in SexyTopo is divisible by 4. If at any point you mess up a reading, such as aiming at the wrong place, you can tap the DELETE READING button in SexyTopo to delete the last reading (the DistoX2 will not realise it has been deleted, so the number on the DistoX2 screen will no longer be divisible by 4). In total, you should end up with 56 readings.
Once you have taken all 56 readings, SexyTopo will show the Calibration Assessment. This must be below 0.5 for the calibration to be acceptable, and anything below 0.3 is considered excellent. Getting below 0.2 is almost impossible, but earns the DistoX2 user an extra pint! If the Calibration Assessment is 0.5 or above, you will have to tap CLEAR, and start taking a new set of readings. This is where TopoDroid is a lot better, as it can show which readings were the worst, so that you can delete just those readings, and try taking just those readings again. Oh well. Unlike with TopoDroid and PocketTopo, you do not need to switch SexyTopo into non-linear mode for older Disto devices, because it will automatically use that mode anyway, since it gives the best results. It does not matter which device or app is used to calibrate the DixtoX2; once it is calibrated, it can be used with any device or app.
If the calibration worked, save it first before going any further, which will allow you to reuse the calibration data, or analyse it if something went wrong (surveys done with a poor calibration can in theory be corrected later by re-analysing the calibration data, though this is not commonly done). Tap the SAVE button, and give it a name that will help you remember it, such as the date and location. After saving, tap UPLOAD CALIBRATION to send the calibration to the DistoX2, and wait a few seconds for it to complete. If it fails to upload, it is possible that the DistoX2 dislikes something in the calibration data, which can cause both the DistoX2 and SexyTopo to lock up. If it locks up, press and hold Angle and Clear simultaneously on the DistoX2 to exit calibration mode. Restart SexyTopo if needed, and try calibrating again.
Once the upload is successfully completed, tap on DISTO CAL MODE OFF to return the DistoX2 to its normal mode.
If you ever need to re-send the same calibration data to the device, such as if the device loses its calibration data (this can happen when swapping batteries on older devices, or due to faults on newer devices), this is also possible. On the calibration screen in SexyTopo, tap LOAD, and select the saved calibration data. Tap DISTO CAL MODE ON to switch the DistoX2 into calibration mode. Tap UPLOAD CALIBRATION to send the calibration to the DistoX2. Tap DISTO CAL MODE OFF to return the DistoX2 to its normal mode.
It is always best to test the device's calibration after uploading a calibration.

To test whether the DistoX2's calibration is faulty, create a new survey for holding the test data (give it a good name if you plan on keeping it, as proof that the calibration was good). From a selected station, take three readings towards another station, to create a leg. For the first reading, keep the DistoX2 screen facing up. For the second reading, rotate the DistoX2 so the screen faces to one side. For the third reading, it does not matter, use whatever orientation you want. If it did not create a leg, then the calibration is faulty (or there is a magnetism issue near the station). If it created a leg, move to the new station. Take a single splay pointing back to the first station. If it does not line up with the station, then the calibration is faulty (or there is a magnetism issue near one of the stations). This simple test can be performed every few legs while surveying too, to catch calibration issues before they affect too much data.
Now perform the same test to a new station at a right angle to the first leg. If that works, then great, the calibration is good, and you are ready to go!

As stated above, it is important to record the team members during a survey, since they are the ones who will hold copyright for the data, and they are the ones who should be credited for the surveying (which Therion will do automatically if you record it correctly).
Open the survey you plan to use. Use kebab menu - Current Trip. Tap ADD to add a team member. Supply their full name as they want it to appear on the survey. Tick the roles that they will perform during the survey (you can change it later if needed), and tap ADD. In general, Book (drawing) will be the person using the Android device, Instruments will be the person using the DistoX2, and Dog (assistant) will be the person marking out stations for the DistoX2 user to see them, and rushing around looking for additional passages to survey. Exploration team will be used if the surveyors are also discovering the passage as they survey, or if the project requires the explorers to be recorded. Therion supports several other roles (such as a specific one for station marking), which can be changed in the Therion files later. If no roles are selected, SexyTopo will tick the Exploration team role.
Team members can be edited by tapping on their name, or deleted by ticking the box next to their name and selecting DELETE. All trip data can be deleted at the same time using the CLEAR button.
Other comments can be added by typing below. For example, it is a good idea to record exactly which DistoX2 is used for the survey, so that this can be used to detect faulty surveys if a device is later found to be faulty. Comments will be added as a Therion comment when exporting in Therion format, and can be manually changed to a Therion instruments command later if needed.
The date cannot be changed, and is manually taken from the date that the team members or comments are added to the trip. So ensure that you fill this all in on the day that the survey is being done. (It can be manually edited in Therion later if needed.)
Warning: make sure you tap SAVE TRIP before leaving the current trip screen, as it will not save if you tap the normal Save button, and the data will be lost if you switch to a different screen.

With a calibrated Disto, and the trip information set up, it is time to start surveying. The person who uses the DistoX2 puts it against the first station, and starts taking readings. Single readings in any direction are a splay. If three readings in sequence are taken towards a station, then SexyTopo will recognise that they are all pointing to the same place, and will create a leg (also known as a shot in some other countries) and station instead, using the average of those three readings. By default, it will also vibrate to say that it has created a station. The three readings must be taken in sequence. Taking two readings towards a station, then one pointing elsewhere, then a final one towards the station, will not cause a station to be recognised. However, if the single station pointing elsewhere were to be deleted before taking the final reading towards the station, the leg and station will be created, since the last three readings that SexyTopo now knows about, all pointed to the same place.
If the three readings were not close enough to each other, then it will fail to create a station, which usually suggests that the DistoX2 user has not been accurate enough, or that the DistoX2 needs to be recalibrated. Requiring three readings helps avoid faulty readings, such as ones that miss their target by hitting clothing or obstructions, or by overshooting the target due to shaking. It also can be used to help detect magnetic problems. This forces legs to be made from 3 good readings, since they are the ones that are important for the overall survey accuracy. Faulty readings are relatively harmless for splays.
SexyTopo does not let you see the three readings that created the station, though it does remember them, and will export them as a comment in the Survex or Therion outputs. This is different from PocketTopo.
In the SexyTopo settings, it is possible to adjust the accuracy required for recognising three splays as a station.
SexyTopo also allows the DistoX2 to be remotely controlled. This can be used to take very long measurements without shaking; a perpetual problem with handheld readings. With remote control, the DistoX2 could be used on a (non-ferrous) tripod, and then remotely triggered. Kebab menu - Instrument allows the laser to be switched on or off, a reading to be taken with the "Take shot" option, and the DistoX2 to be switched off.
With very short survey legs, tiny misplacements can cause a big difference between readings. With very long survey legs, it gets harder to hit the target, and small amounts of shaking translate to a very big error. As a result, it is normally considered best to keep the survey legs between 5 and 10 metres, where possible. However, there will be times when the nature of the cave forces the survey legs to be shorter or longer, particularly in small passages, or near foggy waterfalls.

There are several different ways that a reading can be taken between stations. The normal approach is to go forward between stations. Station 1 to 2, 2 to 3, 3 to 4, and so on. However, legs can be done backwards, such as 2 to 1, 3 to 2, 4 to 3. This might be done when the passage dimensions force the person with the DistoX2 to remain ahead of the person who is marking the stations, or just to avoid having to lie in a duck or squeeze while taking readings. This might also be done when trying to avoid putting the Disto against a station that has a strong magnetic influence. Legs can also be leap-frogged, alternating forwards then backwards such as 1 to 2, 3 to 2, 3 to 4, 5 to 4 (used to cancel out inclinometer bias). Before taking a reading, SexyTop can be told to expect the readings to be done either forwards or backwards using kebab menu - Input Mode - Forward, or kebab menu - Input Mode - Backsights. It is important to remember to switch back when needed, so for leapfrogging, it is perhaps better and less work to reverse each leg as needed, using the context menu of the stations in plan view (described later).
SexyTopo can also be told to create survey legs from a splay taken forwards between the stations, then the same splay taken in reverse between the same stations. Therefore the station gets created from 2 readings instead of 3, with the first being forwards and the second being backwards. This is used for some surveys, particularly in America. This mode can be activated using kebab menu - Input Mode - Fore-/Backsights. In this mode, it will still recognise three forward readings as a forward leg, just like in Forward mode.
SexyTopo can also be told not to create stations, even if there are three matching splay readings, using kebab menu - Input Mode - Splays Only.
Lastly, SexyTopo used to have a separate setting for Fore-/Backsights, in kebab menu - Settings - Automatic backsight promotion. This setting still exists in SexyTopo 1.6.1 but it does not actually do anything.

Start off with the table view. There are 5 columns: "From", "To", "Dist", "Azm", "Incl".
| From | To | Dist | Azm | Incl |
|---|---|---|---|---|
| 1 | - | 12.124 | 23.44 | 6.32 |
| 1 | 2 | 7.532 | 117.35 | -7.42 |
| 2 | 3 | 4.565 | 176.34 | 34.42 |
| 3 | - | 5.356 | 9.45 | 23.95 |
There is no proper option for specifying proper Left, Right, Up or Down (LRUD) measurements. SexyTopo expects you to use splays. You can of course use splays to merely measure Left, Right, Up and Down if that is your choice.
Legs are shown in bold, and can be seen as the lines that have a "To" station. Splays can be seen as the lines with "-" as a "To" station. The currently active station is shown highlighted in yellow. The currently active station is the one that will receive all new splays and legs, and will be used when linking existing surveys (covered later). Whenever a new leg is created, the new station will be automatically set as the active station.

New legs can be manually added using the  button on the toolbar, and specifying the measurements from the active station. If kebab menu - Settings - LRUD entries is enabled, then the LRUD data can also be supplied when manually adding legs; they will be the measurements taken at the active station, and will be converted into splays with Up and Down pointing directly up and down, and Left and Right pointing out to the sides, with their compass bearing half way between the previous leg and the current leg. New splays can be manually added using the
  button (looks like sun rays) on the same toolbar. The last reading (splay or leg) can be deleted either using the
  button on the same toolbar, or using kebab menu - Tools - Undo last reading. Be careful with this one, because it does not ask for confirmation first, and cannot be undone.
There are two separate context menus that can be opened in the table view. Tap and hold (long press) on a station to see the context menu for a station. Tap and hold on a Dist, Azm or Incl column to see the context menu for the data. The station context menu has the following options:

The data context menu has two versions. The first is shown for a survey leg, and the second is shown for a splay. Most of the items are the same, with one extra option for splays. There are the following options:

In cases where you delete the parent of the active station, SexyTopo normally chooses one of the remaining stations to become active. Sometimes, however, it will not know where to add any new data that you collect. Secretly, it will continue to add it to the now-deleted active station, and will even vibrate to tell you when it creates a station. The data, however, is going nowhere (and in previous releases used to cause an unrecoverable crash, with the total loss of all data - thankfully that bug has been fixed after I lost an entire day of survey data). Therefore it is very important indeed to ensure that you select a new active station after deleting the active station.
SexyTopo does not provide any way to batch operations such as deleting and moving data. Each operation is performed one reading at a time. This is different from PocketTopo.
All sorts of statistics about the current survey, and the entire linked set of surveys, can be seen using kebab menu - Tools - Stats. This also allows you to see the length and depth of an overall project. However, it does not know the difference between surface, underground and duplicate legs, so the statistics are for the survey data itself, not the cave.
This is the most important view, where the surveyor spends most of their time. SexyTopo is designed to provide almost all editing functionality from this view, with only a few little exceptions. There are also a great many settings that control the way that this view looks; these will be covered later.
The main area of the view is where the sketches will be drawn; the sketching area. By default, this shows as a grid, with a single station shown in the middle. When survey data is recorded, the survey leg and splay lines will start appearing in this view, so that the features of the cave can be drawn around them. The most recently measured reading is highlighted in pink, while all other legs and splays are shown in red. Legs are shown slightly thicker than splays.
The scale, survey name, surveyed length and vertical range are shown in tiny writing in the bottom-left corner.
There is a main editing toolbar either below or to one side. The toolbar has several choices of colours on one row. On the second row are the Draw button, the Move button, the Erase button, the Text button, the Select button, the Settings button (not to be confused with the Settings menu), the Undo button and the Redo button. At the end of the two toolbar rows/columns are the Zoom in and Zoom out buttons.
 Colours
 Draw
Draw Move
Move Erase
Erase Text
Text Select
 Settings
 Undo
Undo Redo
Redo Zoom in and
  Zoom out
Typically, a surveyor will decide their own colour scheme. For example, I like to use green for surface features (slopes) or ceiling features within the cave, black for cave walls, brown for cave floor features such as boulders or pitch lips, blue for water flows, and orange or purple for passage walls in passages stacked above or below the first passage. Typically a surveyor will also decide on how to draw their own symbols, but to aid understanding, it is usually best to try to make them look like the symbol that will be desired on the final survey, such as ceiling step symbol for a ceiling step, a pitch symbol for a pitch lip, small circles for cobblestone floors, etc.. Drawing up your own survey data in Therion and seeing the final output will usually teach you to create better drawings underground.
Sketch the walls and passage features, using splays from the Disto as a guide as to where to draw them. Since this is done using splays, there is very little point in just using basic Left, Right, Up and Down measurements (LRUD) at each station. Instead, splays can be aimed towards the walls showing every single point where the wall outline bulges significantly out or in, between this station and the next or previous stations. The walls can then normally be drawn just by joining the ends of the splays, except in places where the DistoX2 could not aim around a curve to see the wall. Most curves and wiggles can be accurately placed. Blind alcoves can be properly measured. Important features such as pitch edges, avens and prominent formations, can all be located correctly using splays to show their positions, rather than being approximated like they need to be with basic LRUD measurements. Splays allow a much more accurate rendering of the passage. You have the device, make use of it. It is important to have a lot of communication between team members, so that the person sketching, and the person taking readings, both know what the other one is pointing at or sketching. Time needs to be allowed for the person sketching to see each splay appear, so that they know where to draw which things. It is also important to remember that this is not a LIDAR scan; having a million splays is not useful, since it makes the lines very hard to see in Therion, and it is impossible to know which splays to aim for when tracing over lines. It can help to use Survex Aven to view a 3D rendering of the splays to work out which one points up or down, but it is better not to confuse matters in the first place. Try to find the right balance.
Occasionally, a splay might be needed towards a part of a wall or feature that cannot be seen from the station. Perhaps there is a boulder or other obstruction in the way. One option is to leave it, and aim for it from another station, but it might not be visible from the next station either. If it is something that needs to be measured and drawn accurately (such as a sump pool), then another leg can be taken to a more convenient location where it can be seen, so that more splays can be taken from there. The leg can be marked as a duplicate in Therion so that its length is not counted. It is common, however, to cheat a little. The DistoX2 can be lifted slightly above or below the station to allow a splay to be taken over the obstruction, without altering its horizontal length. This will cause the Therion 3D .lox output to be very slightly distorted (because the inclination of the splay will be wrong, and the obstruction will also be cut through), but as long as the cheating is only minimal, it is normally considered acceptable, since it allows the walls to be drawn in the correct locations. The centreline is used in all of the passage length and loop closure calculations, not the splays. The only people who will know or care, are the ones on the surveying team. Everyone else will just see a beautiful survey. Either way, this is a vast improvement over LRUD surveys, where the entire passage drawing is approximated from basic width measurements.
Creating text can optionally be done using the Text button to create a label point. When it is created, it appears visible on the screen in SexyTopo, scaled according to the zoom level when it was created. When exported to Therion, this becomes an almost invisible label point instead, so the text is not visible. The point is very easy to overlook there, and needs to be put into a scrap to allow Therion to compile the survey. This can be very confusing. As a result, it is common to just scribble handwritten text notes on the sketch instead, since these are then clearly visible in Therion, but do not affect the resulting PDF survey. Note, however, that sketched lines use up processing power, so the more text you scribble, the slower SexyTopo will eventualy become.

In any mode, tapping and holding (long press) on a survey station will show the station's context menu. To avoid accidental drawing or erasing, it is best to only do this in Move mode. The station's context menu offers a few of the same items as the context menu in the data view, as well as several extra options.
1 2 12.345 123.45 12.34 #flake on the right wallbut this does:
1 2 12.345 123.45 12.34 #station 2 is a flake on the right wall


The Settings button (cogwheel) has a lot of quick settings that you might want to change while editing. Some of them exist to hide clutter, some of them exist to show more information, and some of them help you make sense of the view.

SexyTopo refers to this only as Elevation view, but it is actually an extended elevation. All twists and turns are unfolded, and all legs are shown pointing in the same direction. All side passages and oxbows are also shown in that direction, starting at whichever station they were surveyed from. By default, the cave is shown with each leg heading from left to right (known as "extend right" in Therion). The ceiling and floor should be sketched in place accordingly. Most other features are not normally sketched in extended elevation view, though some might be, such as the positions of hangers for drawing a rigging topo. Important rock spikes or ledges might sometimes be drawn.


In extended elevation view, a station's context menu has the same items as in plan view, but now gains an extra option called TOGGLE LEFT/RIGHT. This turns the leg that created this station, and all subsequent legs, to the left. If the leg already points to the left, then it will switch it to the right instead. It is very important to note that switching this direction will affect all subsequent legs that extend beyond that station, which might have already been set to their own directions. The subsequent direction changes will be lost, and will need to be recreated if they were needed. When changing the direction of a station, any sketches that had already been drawn around it, will not move. Therefore direction changes should be done before drawing sketches. Direction changes cannot be undone, and need to be recreated manually if it was done by mistake. Note that SexyTopo does not show linked surveys in the correct place when the station they are linked to gets its direction changed. This is a harmless bug.
Direction changes like this might be used to keep passages out of the way of each other, or might intentionally be used to replicate the feeling of a hard corner within the cave, or might be used to try to make passages line up nicely with each other when one side of a loop is longer than another. In general, SexyTopo has very limited controls, while Therion has vastly better controls. The final rendered survey might also use a projected elevation instead of an extended elevation. As a result, it is uncommon, except in very simple caves, to actually use an extended elevation the way the data was originally recorded, and the entire set of drawings will probably need to be recreated manually after manipulating the extended elevation configuration in Therion. As a result, elevation drawings made within a cave should be considered only a guide, as they are likely to be manually recreated later. They should be recorded mainly as a reminder of the shape of the ceiling and floor. The direction controls are therefore not really of much use in most caves, apart from when avoiding clutter.
Again, splays can be aimed towards the ceiling and floor along the passage showing every point where the outline bulges significantly out or in, between this station and the next or previous stations. The floor and ceiling can then normally be drawn just by joining the ends of the splays. It is very common for the high and low points not to be perfectly visible from a station, and in such case it is normal to move the DistoX2 a short distance away from the station (keeping it at the same height as the station) in order to be able to aim into ceiling or floor clefts. While this is not perfect, and it does cause the Therion 3D .lox view to be slightly wrong (if that matters to you), it is generally considered to be acceptable, as it allows the extended elevation to be drawn correctly. Splays also get extended, and SexyTopo tries to extend them in the most appropriate direction when surveying around sharp corners. However, it is inevitable that some will point in the wrong direction sometimes, so an aven's splay can appear to be before a station rather than after it. Take care which splays you trust.
When exporting surveys to Therion, the extended elevation direction changes will be exported too, after the survey data. This can be used within Therion to begin configuring the desired extended elevation.

Cross sections may be sketched as frequently or infrequently as desired. Some surveyors like to take cross sections at every station, even though it is very unlikely that cross sections will be used in that density on the final survey. Some like to take them every 2 or 3 stations, just in case one of those is wanted. And others only take them every time the passage has changed shape signifcantly. For scientific research, one cross section every 5 stations is usually enough to study the speleogenesis (cave formation).
At the station where you want to draw a cross section, take splays roughly perpendicular to the passage, towards the walls, ceiling and floor, as if you were cutting through the passage. Do not worry about whether the last leg was heading perfectly along the passage, as it actually makes very little difference unless the leg was aiming at a very sharp angle. Splays can be taken towards all the important corners and bulges of the passage, making sure to hit the highest, lowest and widest parts of the passage. It is very common for the station to be in an awkward position which is not able to see all of the passage shapes (particularly for stations in the bottom of a keyhole trench). The shape can either be drawn as an approximation, or the DistoX2 can be moved a little distance away from the station to be able to see an important point in the passage. This will end up with the laser lines appearing to cut through the walls of the passage, so take care when drawing the cross section and plan if this approach has been used.
Cross sections can be drawn in either the plan or elevation views; SexyTopo doesn't care which, and neither does Therion. Zoom out enough so that you can see where you want to sketch the cross-section. Be warned that on some devices, placing cross sections can cause a crash if you are zoomed out a long way, so make sure you save first! Tap and hold (long press) on the station to open the station's context menu - this can be done on any station, even if it is not active. Select NEW CROSS-SECTION. The next time you tap on the sketching area, it will put the cross section in the place that you tapped (and may then scroll it out of sight, due to a bug). Cross sections cannot be moved later, so make it a good place where you think it will not overlap with the cave (if it does overlap, it will not break anything, it will just start to look cluttered). It can be placed as far away from the cave as you would like. If you accidentally placed a cross section, tap the Undo button to remove it again. Cross sections can be deleted later using the Erase tool, and that erasing can be undone with the Undo button. The cross section can be placed before taking the splays if needed.
When SexyTopo is asked to create a cross section, it will take all of the splays attached to the selected station, and draw them as they would appear when seen horizontally, in the direction of travel. Note that perfectly vertical splays will be dashed, and can be harder to see. A cross section line will appear on the station, with an arrow at one end showing the direction that the cross section is facing. The station and its cross section will be joined by a dotted line, so that you can remember which station it belongs to (it is also marked with the station number). Sketch around the splays on the cross section in the same way as any other piece of cave survey. If you take any further splay readings from that station, they will appear on the cross section, so ensure that you are finished drawing the cross section before taking any other splay readings that might confuse your cross section.
If this is the very first station, it will have no direction of travel, so it will assume you want the cross section to face northwards. Once the first station has a leg going away from it, that direction will be used instead. If a station has one leg coming into it and another leg going away from it, then SexyTopo will try to use the direction half way between those two legs for the cross section. This sounds good, but it gets the direction wrong when the difference between the compass bearings is over 180°, since it will use the numeric direction half way beween them (this is a bug). If a station has one leg coming into it, and two or more legs going away from it, then SexyTopo will use the direction of the leg coming into it only, just like it would have done if there were no legs going away from it. Once a cross section has a direction, it will remain in that direction even if more legs are added afterwards. For all these reasons, cross sections should be created as the first step, before creating additional legs (except when you need a cross section at the very first station).
A station can have multiple cross sections, and they can face in different directions. This means that if you create a cross section, then add a leg going away from the station, then add a second cross section from the same station, the first cross section will use only the incoming leg for its direction, and the second cross section will use both the incoming and outgoing legs for its direction. SexyTopo will only draw one direction arrow, however, which will be the direction for the first cross section that was created.
At the time of writing, SexyTopo does not export cross sections to Therion properly (the station and splays are missing, and they may appear out of the grid area of the XVI file). This is a bug that is being worked on.
Vertical cross-sections (such as the cross section of a shaft) are a concept that is not understood by SexyTopo. Fortunately, these are incredibly easy to replicate. In the plan view, simply take the relevant splays while in the shaft, and draw the cross section on the plan itself. This can be used in Therion to create a cross section scrap.
The following sequence is not a hard rule. Each team can decide on the process that works best for them, but this sequence generally helps avoid having too much clutter at the time when each part is being sketched. This sequence is based on the idea of using splays to achieve accurate passage drawings, rather than LRUD and approximate sketches.


SexyTopo automatically saves all DistoX2 data as it comes in. However, sketches are not saved until you tap the Save icon or use kebab menu - File - Save.
When switching apps, Android may randomly decide to close background apps, including SexyTopo, so make sure you save before switching apps (you can tell Android not to close SexyTopo in the Android app settings). If not, you might find that when you switch back to SexyTopo, it has your data, but not your sketches. Er ... thanks Android.
SexyTopo is software. It can have bugs. It may crash. If it does, you will lose all your unsaved sketches.
I cannot stress this enough; save regularly!
If SexyTopo crashes or gets forceably closed by Android, there is a chance that its regular autosaving feature might have saved your sketches, which it does in a separate file to avoid overwriting your survey. After retstarting it, use kebab menu - File - Restore Autosave.
When you are done surveying, use kebab menu - File - Exit SexyTopo. Not only will this ensure that it is not wasting your battery with Bluetooth, but it will also perform a final check to ensure you have actually saved first, and it will warn you if not. Say thank you to SexyTopo. Then remove SexyTopo from your application switcher, so it doesn't get accidentally opened. This will also make it less likely that you accidentally scribble something on your survey while the device is in storage.
If you are paranoid, you may also choose to export it in Therion format, so that even if you somehow manage to corrupt the SexyTopo data, at least you still have it in a useful format.
Surveys should be split up into at least separate-surveys-per-cave and one-survey-per-trip at least, as mentioned earlier. However, there are other considerations too. Perhaps a survey has progressed into passages stacked underneath each other, making it awkward to see which splays belong to which stations. The Fade Non-Active setting can of course help. However, in some caves, it can become a nightmare of passages stacked above each other, with splays everywhere. It is important to remember that Therion does not have any equivalent to Fade Non-Active, so in Therion, the splays can still be indistinguishable. Before the clutter gets too much, end the current survey, and start a new linked survey from the current station. These can be joined up in Therion later, but while editing, you can hide linked surveys, and sketch in a clutter-free environment.
Before version 1.6, SexyTopo had a serious limitation regarding how much data it could render at once. After about 200 metres, it was a good idea to start a new survey, to prevent it from slowing down and getting choked up on the amount of data. If this ever happens, it starts to take longer and longer to receive data from the DistoX2, and SexyTopo hangs up while that data is downloading, either becoming non-responsive or showing a blank screen for several minutes at a time. This issue was caused by the amount of sketches, not the underlying data, so the more you drew, the sooner the issue would appear (and scribbled text or scribbled shading of areas like sumps or canals means there is a lot more to render). This was largely fixed in SexyTopo 1.6, and it now copes with several km of cave being rendered at once.
However, this issue still appears quickly on older devices, such as those running Android 4. It is best to use a modern device, and it is also best to limit your sketching to the important details with simple symbols, and not a beautifully shaded artwork festooned in decorations. Breaking up your survey into several surveys can alleviate this issue if it becomes a problem for you, since you can just work on the active survey, and hide the previous ones.

If you have created a new survey related to an older survey, and you forgot to use START NEW SURVEY HERE, you can still link the surveys. In one of the surveys, set the active station to be the one where the surveys should be linked. Select kebab menu - Tools - Link to an Existing Survey. Select the survey that you want to link to, and then select the station in that survey that should be linked to the currently active station.
SexyTopo works with simplistic vector drawings, and cannot manipulate the vectors or sketches to distribute the errors in a loop, so it would not know how to cope with the two versions of a station not lining up. As a result, it is not possible to create a loop in SexyTopo. Stations cannot be renamed to create loops (this is different from PocketTopo, which can accept loops in the data, but also does not know how to distribute the errors in the sketches). Surveys cannot be linked in a way that would create a loop.
Surveys can only be linked via one path. That means that survey1 and survey2 cannot be linked in two separate places, but they can be linked in one place. Also, while survey1 can be linked to survey2, and survey2 can be linked to survey3, it is now not possible to link survey3 to survey1, as that would also create a loop.
If there is an actual loop, then the two versions of a station can be equated in Survex or Therion using the equate command.
When exporting surveys to Therion or Survex (or anything else) SexyTopo only exports one survey at a time. It does not have any way to export a parent survey that equates the stations in the surveys below it to link the data. This needs to be created manually, and the links need to be manually created as equates.

Exporting is extremely simple in SexyTopo. Save the survey. Use kebab menu - File - Export. Select the format that is required, such as Therion. That's it. Done.
(For PocketTopo users, this cuts out the step where TopParser was needed in order to generate Therion files from PocketTopo files. However, unlike TopParser, SexyTopo does not currently create any placeholder scraps in the .th2 files, so these need to be created in XTherion instead.)
SexyTopo will have created the files in Internal Storage/Documents/SexyTopo/Exported/Therion/[surveyname] (or the folder name matching whichever format name you selected). The folder will contain all the files that are needed, which can be transferred via USB or online file sharing (the files can also be compressed first using the Android file manager, so that they can be transferred as a single file).
You can also back up the SexyTopo data (backups are always a good idea), by copying the data folder for the survey, which can be found in Internal Storage/Documents/SexyTopo/Surveys/[surveyname]. Note, however, that Android 11 does not allow SexyTopo to load data files that were created by SexyTopo on another device, or which were copied into that location by another app. This is a (stupid) Android restriction relating to file access permissions. It is not possible for SexyTopo to ask for access to them, because that privilege is only given to apps that have special authorisation from Google, and that is only given for file management apps. As a result, although you can (and should) back up your data directory, it is not currently possible to restore the files from backup. This is a limitation that the author of SexyTopo is currently investigating workarounds for. Yay, Android.
Importing of survey data also works to do the reverse of exporting. SexyTopo can import data in Therion format, Survex format, or PocketTopo .txt format. It is limited to basic Therion and Survex data formats, and cannot cope with the fancier data formats (such as diving data). It cannot cope with equates in the import data. Basically, the data must be in the same basic format that SexyTopo itself would export. This should be enough to allow SexyTopo to load data gathered by PocketTopo.
To import files, put them in an appropriately named folder in Internal Storage/Documents/SexyTopo/To Import. So for example, to import survey data in Therion format from a file called gbmainchamber.th, create a folder on the device called Internal Storage/Documents/SexyTopo/To Import/gbmainchamber/ and put that file in it. Then in SexyTopo use kebab menu - File - Import - gbmainchamber. If it worked, it will immediately open that survey to show you the survey it imported. If there is already a survey with that name, it will check first that you want to overwrite it with the new data.
If import fails, there are several possible reasons. If it shows a message like "Error: Syntax error in regexp pattern near index 8 \{(.*?)}", this is because you have .xvi images in the folder, and it cannot import those in the version of SexyTopo that you are using. If it shows a message like "Error: Cannot import a file of that type", you probably tried to put the .th file directly in the To Import folder, instead of a folder with the same name inside it. Alternatively, you might be using a version of Android (such as Android 11) which does not allow SexyTopo to access the files - this is the same problem that prevents it from restoring from backups.


There are several display options in kebab menu - Settings, mostly affecting the Plan and extended elevation views.
Kebab menu - Help - Guide may be used for further information on how to use the app. It includes a section on troubleshooting DistoX2 communication failures.

If SexyTopo crashes, Android may ask to upload crash logs to Google, which can then be shared with the developer. The prompt allows you to supply additional comments and an error report with more system data. The crash log is uploaded next time the device is connected to WiFi.
When something has gone badly wrong, report bugs to the SexyTopo project on GitHub. The author of the app may ask for debugging data. This can be viewed using kebab menu - Tools - System Log.
The author of the app may ask for developer mode to be enabled. Once enabled, kebab menu - Dev - Debug mode may be used for further debugging, and other options within that menu may deliberately cause the application to malfunction and crash.
A quick note on Android permissions, and what they are used for. When you first start the SexyTopo app (or when you install it, depending on what version of Android you are using), it will ask for the Android Files and Media permission, and the Location permission. The Files and Media permission is used to allow SexyTopo to store the survey files and exported survey files in a place where they can be backed up and copied. If you deny this permission, SexyTopo will be unable to save or open any surveys, and it will always start with a blank survey, so it is an essential permission.
The Location permission is needed to enable Bluetooth pairing, which is required if you want SexyTopo to be able to manage pairing with a DistoX2 or other device. Bluetooth pairing and Location are treated as one permission by Android, because Bluetooth pairing allows an app to see Bluetooth hardware identifiers, which can establish your location using Bluetooth location beacons, which are installed in some buildings. This is not what SexyTopo uses Bluetooth for; it uses it to pair with a DistoX2.