Ogof Craig a Ffynnon Promised Land trip 13/09/2020
Unless otherwise stated, camera, setups, lighting, edits and gallery effects by Tarquin. Modelling and lighting at various points will be Pete Bolt.
Most trips to The Promised Land simply end at The Pagoda. However the rest of the passage is still rather lovely, despite being more challenging. I had only visited the end once before, at a time when photography meant lugging film SLR cameras, tripods and flashguns. This trip was intended as a photography trip, to complete the set, so that the entire cave now has photographs of the good (and most of the bad) bits. Previous galleries cover the entrance passage and North West Inlet, Gasoline Alley to Hall of the Mountain King and Severn Tunnel Junction to Fifth Choke, Travertine Passage side passages and Hurricane Highway, Blaen Elin and the Lower Series and Severn Tunnel, Fourth Choke, Helictite Passage and The Pagoda.
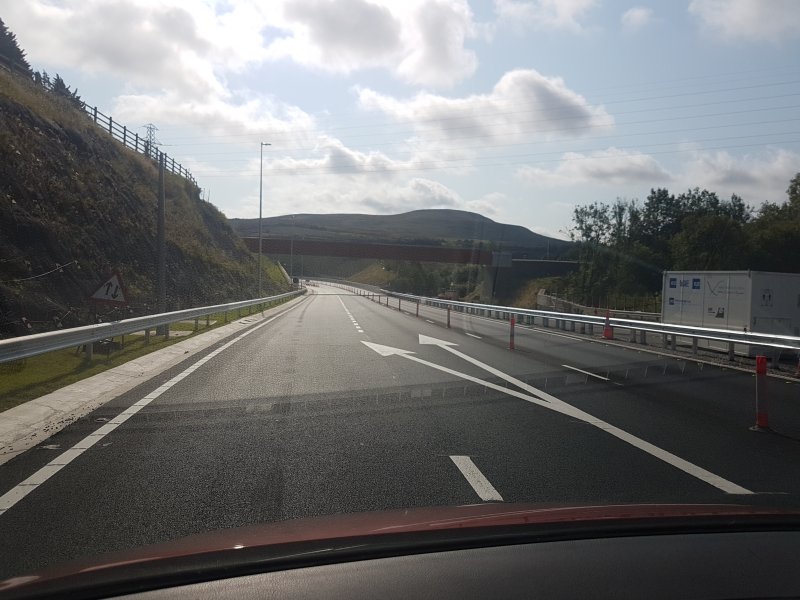
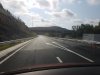 The A465 dualling is still ongoing, but the new lanes are being used at Brynmawr. Admittedly only two lanes are open below there, but ... progress ... right?
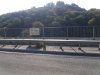 Someone is trying to prevent a repeat of our last trip here.
 From Severn Tunnel Junction, there is a series of side passages with no names. The passage on the left is a climb up to a balcony overlooking Severn Tunnel Junction. To the right here is Severn Tunnel. Ahead is the way to the big stuff and the rest of the cave, with Blaen Elin running underneath it towards the camera.
Modelling by Pete, lighting by Tarquin and Pete
From Severn Tunnel Junction, there is a series of side passages with no names. The passage on the left is a climb up to a balcony overlooking Severn Tunnel Junction. To the right here is Severn Tunnel. Ahead is the way to the big stuff and the rest of the cave, with Blaen Elin running underneath it towards the camera.
Modelling by Pete, lighting by Tarquin and Pete Heading away from the balcony is an eyehole over a rock bridge, but the safe way on is below it.
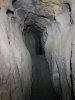 The passage beyond the bridge.
 At the end are some formations before it ends at a balcony overlooking the next passage.
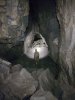 The passage ahead is the largest, heading north to reach a second junction. This is the main passage to the left. At its start is a very tall aven, which appears to have been climbed, but nothing is shown on the survey. Part way down on the left, the balcony passage rejoins up on the left wall.
Modelling by Pete, lighting by Tarquin and Pete
The passage ahead is the largest, heading north to reach a second junction. This is the main passage to the left. At its start is a very tall aven, which appears to have been climbed, but nothing is shown on the survey. Part way down on the left, the balcony passage rejoins up on the left wall.
Modelling by Pete, lighting by Tarquin and Pete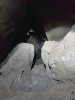 Down between boulders at its start is a very deep hole.
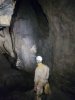 On the side of the passage is a nearly impossible climb up into a short oxbow. It is most easily reached using some scaffolding bars that are stashed in the passage nearby.
Modelling by Pete, lighting by Tarquin and Pete
On the side of the passage is a nearly impossible climb up into a short oxbow. It is most easily reached using some scaffolding bars that are stashed in the passage nearby.
Modelling by Pete, lighting by Tarquin and Pete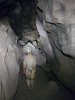 The passage slams into a choke, which is on a parallel to the Third Choke - the same fault that controls Promised Land, and the edge of the Lower Series. This could so easily be a major trunk passage heading over to the nearby Daren Cilau fossil passages like Half Mile Passage, Eastern Flyover and Aggy Passage.
Modelling by Pete, lighting by Tarquin and Pete
The passage slams into a choke, which is on a parallel to the Third Choke - the same fault that controls Promised Land, and the edge of the Lower Series. This could so easily be a major trunk passage heading over to the nearby Daren Cilau fossil passages like Half Mile Passage, Eastern Flyover and Aggy Passage.
Modelling by Pete, lighting by Tarquin and Pete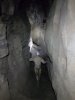 The passage ahead at the junction is a narrow canyon.
Modelling by Pete, lighting by Tarquin and Pete
The passage ahead at the junction is a narrow canyon.
Modelling by Pete, lighting by Tarquin and Pete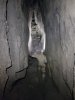 The passage also ends in a choke, which is less promising due to its direction. It heads towards the Lower Series, and very nearly connects with a smaller passage leading from there.
Modelling by Pete, lighting by Tarquin and Pete
The passage also ends in a choke, which is less promising due to its direction. It heads towards the Lower Series, and very nearly connects with a smaller passage leading from there.
Modelling by Pete, lighting by Tarquin and Pete Under the right wall half way down the passage is a climb down in an undercut.
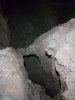 It drops to an extremely muddy pitch head, with nowhere good to rig from.
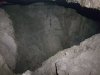 The pitch lands in a funnel of mud with a short fragment of streamway running parallel to, but not connected to, the nearby Blaen Elin streamway. It does not go far at all in either direction, but a hole up in the ceiling is the hole between boulders seen at the earlier junction. I recall one of us climbing up that route in the past, which looks like sheer insanity now.
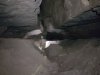 The superb and distinctive start of Promised Land, where the mud banks mirror the notched shape of the ceiling.
Modelling by Pete, lighting by Tarquin and Pete
The superb and distinctive start of Promised Land, where the mud banks mirror the notched shape of the ceiling.
Modelling by Pete, lighting by Tarquin and Pete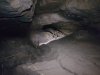 The shape then becomes a more normal oval.
Modelling by Pete, lighting by Tarquin and Pete
The shape then becomes a more normal oval.
Modelling by Pete, lighting by Tarquin and Pete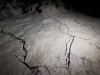 Cracked mud with very clear rivulet impressions, where the water last ran over it as it was draining.
Lighting by Pete
Cracked mud with very clear rivulet impressions, where the water last ran over it as it was draining.
Lighting by Pete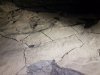 Beautifully preserved detail, presumably several thousand years old.
Lighting by Tarquin and Pete
Beautifully preserved detail, presumably several thousand years old.
Lighting by Tarquin and Pete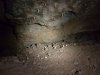 Miniature stal dwarfed by the passage.
 Immense fallen block that seems to have invented itself from nowhere. The sound when it fell from the ceiling must have been colossal. (And yes it made a sound, but it did not make a noise, since no one was there to hear it.)
Modelling by Pete, lighting by Tarquin and Pete
Immense fallen block that seems to have invented itself from nowhere. The sound when it fell from the ceiling must have been colossal. (And yes it made a sound, but it did not make a noise, since no one was there to hear it.)
Modelling by Pete, lighting by Tarquin and Pete Miniature hoodoos.
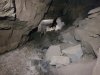 Reduced to its more normal size.
Modelling by Pete, lighting by Tarquin and Pete
Reduced to its more normal size.
Modelling by Pete, lighting by Tarquin and Pete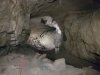 Nearly at the major obstruction.
Modelling by Pete, lighting by Tarquin and Pete
Nearly at the major obstruction.
Modelling by Pete, lighting by Tarquin and Pete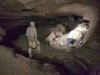 The stream route then fills with mud and gravel, and instead, we take an oxbow beside the stal flow. On quick tourist visits, this is a convenient place to stop, before the awkward oxbow.
Modelling by Pete, lighting by Tarquin and Pete
The stream route then fills with mud and gravel, and instead, we take an oxbow beside the stal flow. On quick tourist visits, this is a convenient place to stop, before the awkward oxbow.
Modelling by Pete, lighting by Tarquin and Pete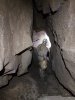 Start of the oxbow, with the first boulder obstacle.
Modelling by Pete, lighting by Tarquin and Pete
Start of the oxbow, with the first boulder obstacle.
Modelling by Pete, lighting by Tarquin and Pete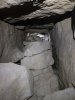 Another boulder obstacle that also seems to have come from nowhere.
Modelling by Pete, lighting by Tarquin and Pete
Another boulder obstacle that also seems to have come from nowhere.
Modelling by Pete, lighting by Tarquin and Pete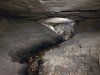 The oxbow regains the stream, with mud banks in the downstream direction.
Modelling by Pete, lighting by Tarquin and Pete
The oxbow regains the stream, with mud banks in the downstream direction.
Modelling by Pete, lighting by Tarquin and Pete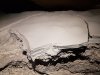 Layers of the mud banks.
Lighting by Pete
Layers of the mud banks.
Lighting by Pete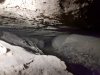 Downstream ends as a wallow in the stream, which becomes too tight before it connects with the earlier passage.
 The upstream direction, adorned with mud formations.
Modelling by Pete, lighting by Tarquin and Pete
The upstream direction, adorned with mud formations.
Modelling by Pete, lighting by Tarquin and Pete Mud formations.
 Mud formations.
 Mud formations.
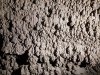 Mud formations.
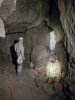 A beautiful flowstone formation, one of the best in the passage.
Modelling by Pete, lighting by Tarquin and Pete
A beautiful flowstone formation, one of the best in the passage.
Modelling by Pete, lighting by Tarquin and Pete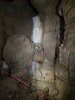 Almost pure white, with a tint on one side.
Lighting by Tarquin and Pete
Almost pure white, with a tint on one side.
Lighting by Tarquin and Pete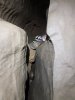 Temporarily narrow.
Modelling by Pete, lighting by Tarquin and Pete
Temporarily narrow.
Modelling by Pete, lighting by Tarquin and Pete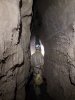 With mud and gypsum formations.
Modelling by Pete, lighting by Tarquin and Pete
With mud and gypsum formations.
Modelling by Pete, lighting by Tarquin and Pete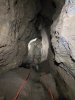 The stream has been regained.
Modelling by Pete, lighting by Tarquin and Pete
The stream has been regained.
Modelling by Pete, lighting by Tarquin and Pete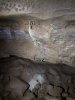 Minimalistic formations.
Modelling by Pete, lighting by Tarquin and Pete
Minimalistic formations.
Modelling by Pete, lighting by Tarquin and Pete Growing back to its normal size again.
Modelling by Pete, lighting by Tarquin and Pete
Growing back to its normal size again.
Modelling by Pete, lighting by Tarquin and Pete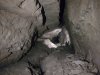 Always dominated by that fault line in the ceiling.
Modelling by Pete, lighting by Tarquin and Pete
Always dominated by that fault line in the ceiling.
Modelling by Pete, lighting by Tarquin and Pete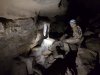 Another beautiful formation. You may notice that there is no flagging tape; so few people make it this far that there is no taping for the rest of the journey.
Modelling by Pete, lighting by Tarquin and Pete
Another beautiful formation. You may notice that there is no flagging tape; so few people make it this far that there is no taping for the rest of the journey.
Modelling by Pete, lighting by Tarquin and Pete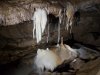 The formations.
Lighting by Tarquin and Pete
The formations.
Lighting by Tarquin and Pete A cairn marks the location of the only significant side passage. Here the main passage jumps sideways away from the fault, and this passage continues along the fault.
Modelling by Pete, lighting by Tarquin and Pete
A cairn marks the location of the only significant side passage. Here the main passage jumps sideways away from the fault, and this passage continues along the fault.
Modelling by Pete, lighting by Tarquin and Pete The cairn is a ladder used to reach the passage.
Modelling by Pete, lighting by Tarquin and Pete
The cairn is a ladder used to reach the passage.
Modelling by Pete, lighting by Tarquin and Pete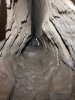 The side passage is a crawl for most of its length.
Modelling by Pete, lighting by Tarquin and Pete
The side passage is a crawl for most of its length.
Modelling by Pete, lighting by Tarquin and Pete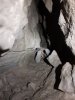 It ends at a dig that has seen some effort. This is the most promising passage for a connection with Daren Cilau, as it points towards the flowstone choked corner of Antler Passage, and has a draught. The original explorers, however, never wanted to make a connection (since through trips would put all the formations at risk of rushed tourist trips), and threatened to collapse any connections if one was made.
Modelling by Pete
It ends at a dig that has seen some effort. This is the most promising passage for a connection with Daren Cilau, as it points towards the flowstone choked corner of Antler Passage, and has a draught. The original explorers, however, never wanted to make a connection (since through trips would put all the formations at risk of rushed tourist trips), and threatened to collapse any connections if one was made.
Modelling by Pete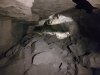 The main passage, freed from the fault, now enlarges dramatically.
Modelling by Pete, lighting by Tarquin and Pete
The main passage, freed from the fault, now enlarges dramatically.
Modelling by Pete, lighting by Tarquin and Pete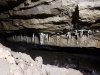 Stal in the undercut.
 Mud formations. Without any tape, there is nothing to help avoid them, and these are exactly where you would want to stand to take photographs.
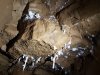 The only set of helictites in this part of Promised Land, positioned rather awkwardly out of range.
 The best of the helictites and anthodites.
 Immaculate mud bank with drip pockets.
 Roof tube with ropes. It looks promising, but chokes immediately. This is close to the end of the earlier side passage.
Lighting by Tarquin and Pete
Roof tube with ropes. It looks promising, but chokes immediately. This is close to the end of the earlier side passage.
Lighting by Tarquin and Pete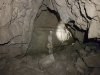 Finally, a really significant event; a corner. THE corner. The only one. The passage finally breaks completely free from the fault, and turns away from Daren Cilau. Some pitiful roof rifts try to mark the occasion but all seem to fizzle out or act as oxbows.
Modelling by Pete, lighting by Tarquin and Pete
Finally, a really significant event; a corner. THE corner. The only one. The passage finally breaks completely free from the fault, and turns away from Daren Cilau. Some pitiful roof rifts try to mark the occasion but all seem to fizzle out or act as oxbows.
Modelling by Pete, lighting by Tarquin and Pete Formations tucked into the ceiling.
Lighting by Tarquin and Pete
Formations tucked into the ceiling.
Lighting by Tarquin and Pete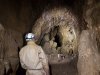 Passing through a grotto.
Modelling by Pete, lighting by Tarquin and Pete
Passing through a grotto.
Modelling by Pete, lighting by Tarquin and Pete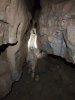 Beyond the grotto.
Modelling by Pete, lighting by Tarquin and Pete
Beyond the grotto.
Modelling by Pete, lighting by Tarquin and Pete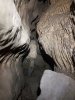 A hole with old stal. The passage is definitely not as grand as it used to be.
Modelling by Pete, lighting by Tarquin and Pete
A hole with old stal. The passage is definitely not as grand as it used to be.
Modelling by Pete, lighting by Tarquin and Pete An unexpectedly large collapse chamber. This is the largest piece of cave beyond the corner.
Modelling by Pete, lighting by Tarquin and Pete
An unexpectedly large collapse chamber. This is the largest piece of cave beyond the corner.
Modelling by Pete, lighting by Tarquin and Pete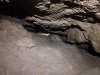 The way on becomes a low crawl, and the stream is seen again.
Modelling by Pete, lighting by Tarquin and Pete
The way on becomes a low crawl, and the stream is seen again.
Modelling by Pete, lighting by Tarquin and Pete Mud formations on the ceiling of the crawl.
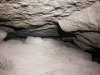 The way ahead then becomes too low, so a side crawl is used to regain the way on.
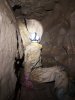 The side crawl pops up into a rift.
Modelling by Pete, lighting by Tarquin and Pete
The side crawl pops up into a rift.
Modelling by Pete, lighting by Tarquin and Pete This then passes through a squeeze. This looks absolutely impossible on the way in, and requires a shimmy up to ceiling level, using the little stones on tip toe to get enough height to reach the wide section. On the way out (seen here), you simply fall through it, and wonder what all the fuss was about.
Modelling by Pete, lighting by Tarquin and Pete
This then passes through a squeeze. This looks absolutely impossible on the way in, and requires a shimmy up to ceiling level, using the little stones on tip toe to get enough height to reach the wide section. On the way out (seen here), you simply fall through it, and wonder what all the fuss was about.
Modelling by Pete, lighting by Tarquin and Pete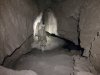 Beyond the squeeze.
Modelling by Pete, lighting by Tarquin and Pete
Beyond the squeeze.
Modelling by Pete, lighting by Tarquin and Pete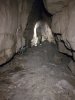 Passing over a very old flowstone floor.
Modelling by Pete, lighting by Tarquin and Pete
Passing over a very old flowstone floor.
Modelling by Pete, lighting by Tarquin and Pete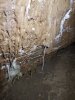 Minor stal formations.
 The route passes beneath this beautiful flow, which is easily missed on the way in. And yes, someone has been up it.
Lighting by Tarquin and Pete
The route passes beneath this beautiful flow, which is easily missed on the way in. And yes, someone has been up it.
Lighting by Tarquin and Pete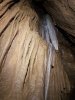 More stal in the ceiling.
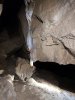 At floor level, it all looks a lot less impressive.
Lighting by Tarquin and Pete
At floor level, it all looks a lot less impressive.
Lighting by Tarquin and Pete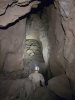 The passage reaches a bouldery chamber, which really looks like the end of the cave, but there are actually two ways on.
Modelling by Pete, lighting by Tarquin and Pete
The passage reaches a bouldery chamber, which really looks like the end of the cave, but there are actually two ways on.
Modelling by Pete, lighting by Tarquin and Pete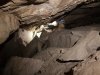 Two routes through the boulders on the left reunite in a large undercut. This is the only piece of passage pointing towards Busman's Holiday in Daren Cilau, but it does not have anywhere obvious to dig. It appears to just be a meander.
Modelling by Pete, lighting by Tarquin and Pete
Two routes through the boulders on the left reunite in a large undercut. This is the only piece of passage pointing towards Busman's Holiday in Daren Cilau, but it does not have anywhere obvious to dig. It appears to just be a meander.
Modelling by Pete, lighting by Tarquin and Pete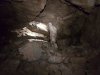 At the top of the boulder chamber is a bedding.
Modelling by Pete, lighting by Tarquin and Pete
At the top of the boulder chamber is a bedding.
Modelling by Pete, lighting by Tarquin and Pete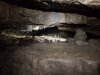 Stal in the bedding. The bedding appears very promising over to the left, but the only way on is to the right, regaining the direction of the passage.
Modelling by Pete, lighting by Tarquin and Pete
Stal in the bedding. The bedding appears very promising over to the left, but the only way on is to the right, regaining the direction of the passage.
Modelling by Pete, lighting by Tarquin and Pete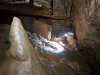 At the back of the bedding is a squeeze down between rocks.
Modelling by Pete, lighting by Tarquin and Pete
At the back of the bedding is a squeeze down between rocks.
Modelling by Pete, lighting by Tarquin and Pete Holes dropping further down uner your feet.
Lighting by Tarquin and Pete
Holes dropping further down uner your feet.
Lighting by Tarquin and Pete The squeeze lands in a tall aven, which is the source of the stream.
 Continuing a little further reaches the base of a second aven.
Modelling by Pete, lighting by Tarquin and Pete
Continuing a little further reaches the base of a second aven.
Modelling by Pete, lighting by Tarquin and Pete Climbing that aven reveals an eyehole at the top linking back to the first aven. There is no other way on at the top of either aven. This is the rather miserable end to a very fine passage, and it is time to turn around.
 On our way back, at Hall Of The Mountain King, we decided to complete the set by photographing The Small Side Passage Near The Entrance. The name is a play on the name of the famous chamber in Ogof Ffynnon Ddu (Big Chamber Near The Entrance) and the similarly named chamber in Daren Cilau (Big Chamber Nowhere Near The Entrance). Despite its name, this passage is neither small, nor near the entrance. It is formed on the same fault as Third Choke, perpendicular to the main faults that control the rest of the cave.
Modelling by Pete, lighting by Tarquin and Pete
On our way back, at Hall Of The Mountain King, we decided to complete the set by photographing The Small Side Passage Near The Entrance. The name is a play on the name of the famous chamber in Ogof Ffynnon Ddu (Big Chamber Near The Entrance) and the similarly named chamber in Daren Cilau (Big Chamber Nowhere Near The Entrance). Despite its name, this passage is neither small, nor near the entrance. It is formed on the same fault as Third Choke, perpendicular to the main faults that control the rest of the cave.
Modelling by Pete, lighting by Tarquin and Pete The side passage starts with a partially dry crystal pool formed in the mud, with the crystal growth showing the old water line. They are formed in the same way as Draenen's strawberries, and are much larger.
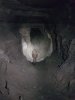 "Small" passage.
Modelling by Pete, lighting by Tarquin and Pete
"Small" passage.
Modelling by Pete, lighting by Tarquin and Pete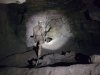 The passage shrinks dramatically at a junction. The dry stone wall in the floor seems to serve no purpose except maybe shelter.
Modelling by Pete, lighting by Tarquin and Pete
The passage shrinks dramatically at a junction. The dry stone wall in the floor seems to serve no purpose except maybe shelter.
Modelling by Pete, lighting by Tarquin and Pete Under the wall to the right is the only substantial side passage, which has gypsum formations protected by a stone ring.
Modelling by Pete, lighting by Tarquin and Pete
Under the wall to the right is the only substantial side passage, which has gypsum formations protected by a stone ring.
Modelling by Pete, lighting by Tarquin and Pete Gypsum formations.
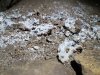 Gypsum formations.
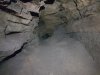 The side passage to the Small Side Passage reduces in size and pinches out. It points towards North West Inlet's choke, and is probably formed by the same fractures. Maybe that is why the Small Side Passage suddenly shrinks in size, because its size is lost into the streamway that lies hidden somewhere below.
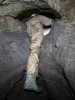 Continuing along The Small Side Passage Near The Entrance, the smaller passage enters a complex area with several awkward parts.
Modelling by Pete, lighting by Tarquin and Pete
Continuing along The Small Side Passage Near The Entrance, the smaller passage enters a complex area with several awkward parts.
Modelling by Pete, lighting by Tarquin and Pete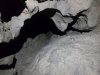 A probable oxbow on the side.
 A narrowing, awkward rift, ending with an awkward step up.
Modelling by Pete, lighting by Tarquin and Pete
A narrowing, awkward rift, ending with an awkward step up.
Modelling by Pete, lighting by Tarquin and Pete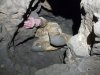 A crawl around an awkward corner.
Modelling by Pete, lighting by Tarquin and Pete
A crawl around an awkward corner.
Modelling by Pete, lighting by Tarquin and Pete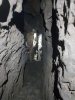 The final rift.
Modelling by Pete, lighting by Tarquin and Pete
The final rift.
Modelling by Pete, lighting by Tarquin and Pete This then drops into a narrow slot that immediately becomes too narrow. Another miserable end to a fine passage.
Modelling by Pete, lighting by Tarquin and Pete
This then drops into a narrow slot that immediately becomes too narrow. Another miserable end to a fine passage.
Modelling by Pete, lighting by Tarquin and Pete
 The A465 dualling is still ongoing, but the new lanes are being used at Brynmawr. Admittedly only two lanes are open below there, but ... progress ... right?
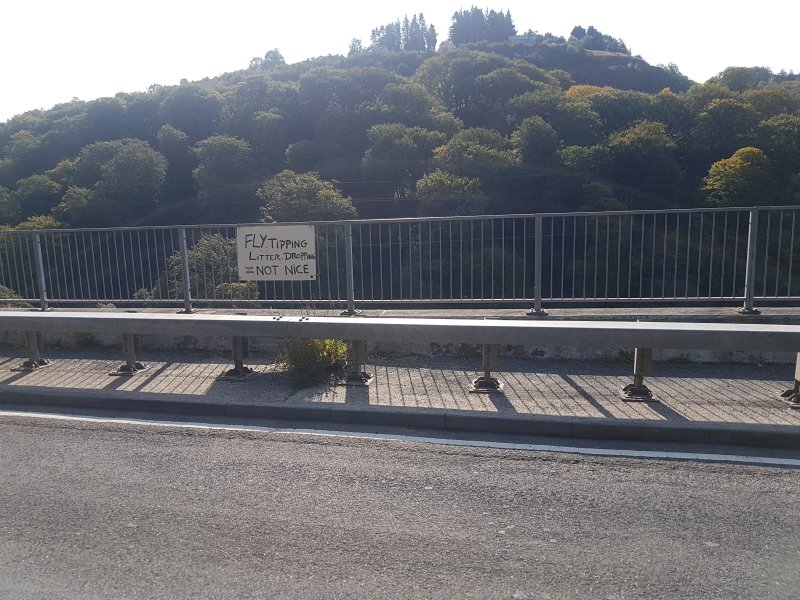 Someone is trying to prevent a repeat of our last trip here.
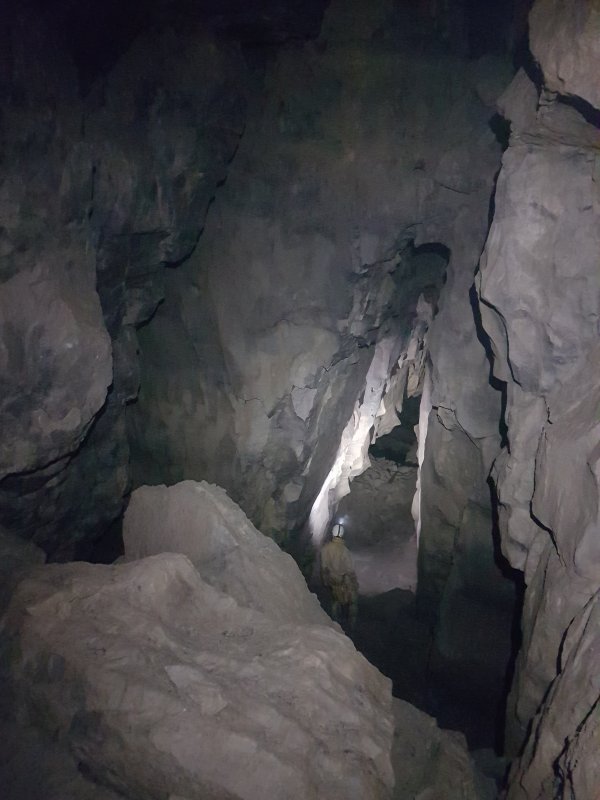 From Severn Tunnel Junction, there is a series of side passages with no names. The passage on the left is a climb up to a balcony overlooking Severn Tunnel Junction. To the right here is Severn Tunnel. Ahead is the way to the big stuff and the rest of the cave, with Blaen Elin running underneath it towards the camera.
Modelling by Pete, lighting by Tarquin and Pete
From Severn Tunnel Junction, there is a series of side passages with no names. The passage on the left is a climb up to a balcony overlooking Severn Tunnel Junction. To the right here is Severn Tunnel. Ahead is the way to the big stuff and the rest of the cave, with Blaen Elin running underneath it towards the camera.
Modelling by Pete, lighting by Tarquin and Pete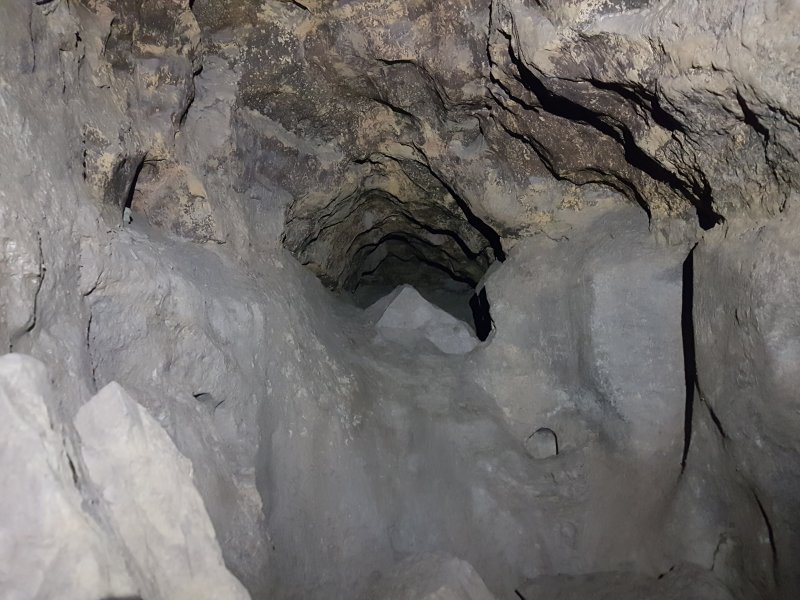 Heading away from the balcony is an eyehole over a rock bridge, but the safe way on is below it.
 The passage beyond the bridge.
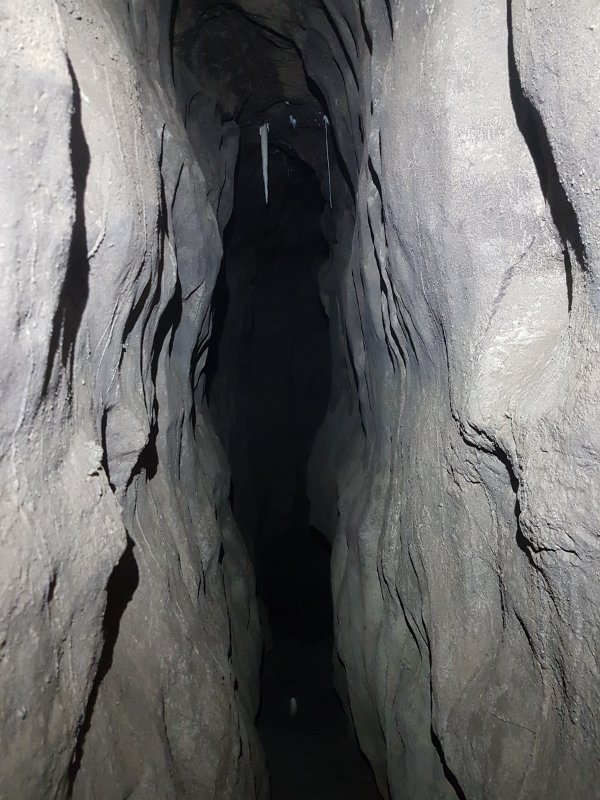 At the end are some formations before it ends at a balcony overlooking the next passage.
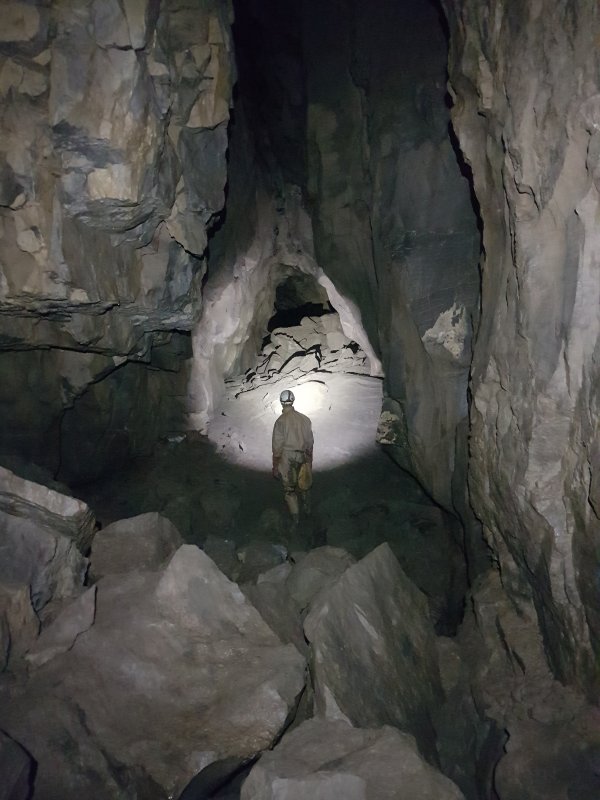 The passage ahead is the largest, heading north to reach a second junction. This is the main passage to the left. At its start is a very tall aven, which appears to have been climbed, but nothing is shown on the survey. Part way down on the left, the balcony passage rejoins up on the left wall.
Modelling by Pete, lighting by Tarquin and Pete
The passage ahead is the largest, heading north to reach a second junction. This is the main passage to the left. At its start is a very tall aven, which appears to have been climbed, but nothing is shown on the survey. Part way down on the left, the balcony passage rejoins up on the left wall.
Modelling by Pete, lighting by Tarquin and Pete Down between boulders at its start is a very deep hole.
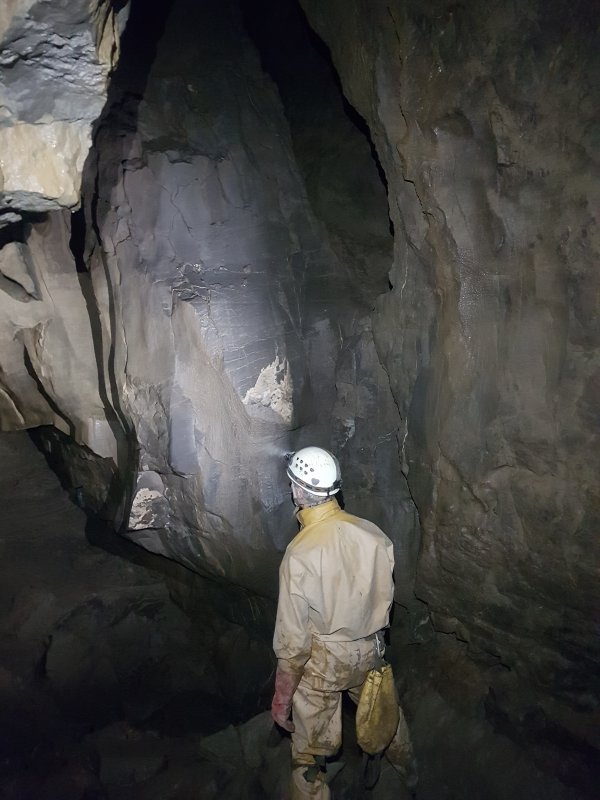 On the side of the passage is a nearly impossible climb up into a short oxbow. It is most easily reached using some scaffolding bars that are stashed in the passage nearby.
Modelling by Pete, lighting by Tarquin and Pete
On the side of the passage is a nearly impossible climb up into a short oxbow. It is most easily reached using some scaffolding bars that are stashed in the passage nearby.
Modelling by Pete, lighting by Tarquin and Pete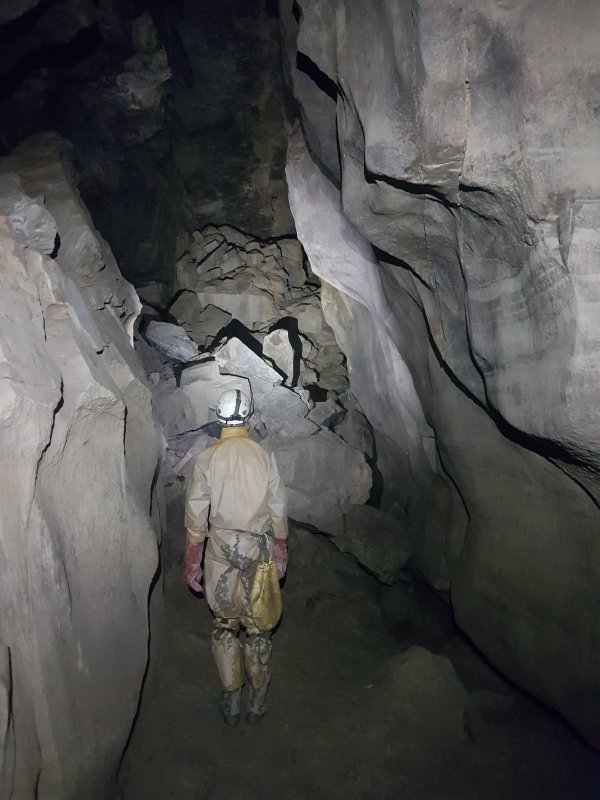 The passage slams into a choke, which is on a parallel to the Third Choke - the same fault that controls Promised Land, and the edge of the Lower Series. This could so easily be a major trunk passage heading over to the nearby Daren Cilau fossil passages like Half Mile Passage, Eastern Flyover and Aggy Passage.
Modelling by Pete, lighting by Tarquin and Pete
The passage slams into a choke, which is on a parallel to the Third Choke - the same fault that controls Promised Land, and the edge of the Lower Series. This could so easily be a major trunk passage heading over to the nearby Daren Cilau fossil passages like Half Mile Passage, Eastern Flyover and Aggy Passage.
Modelling by Pete, lighting by Tarquin and Pete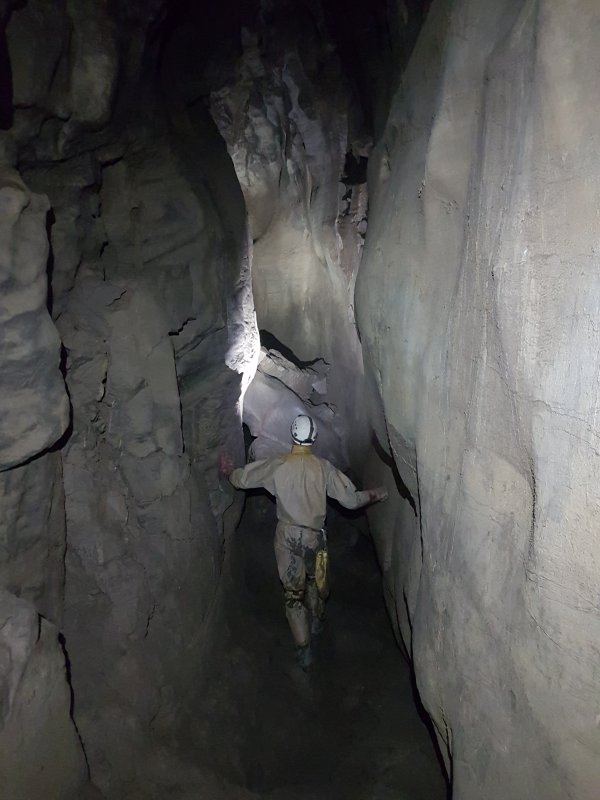 The passage ahead at the junction is a narrow canyon.
Modelling by Pete, lighting by Tarquin and Pete
The passage ahead at the junction is a narrow canyon.
Modelling by Pete, lighting by Tarquin and Pete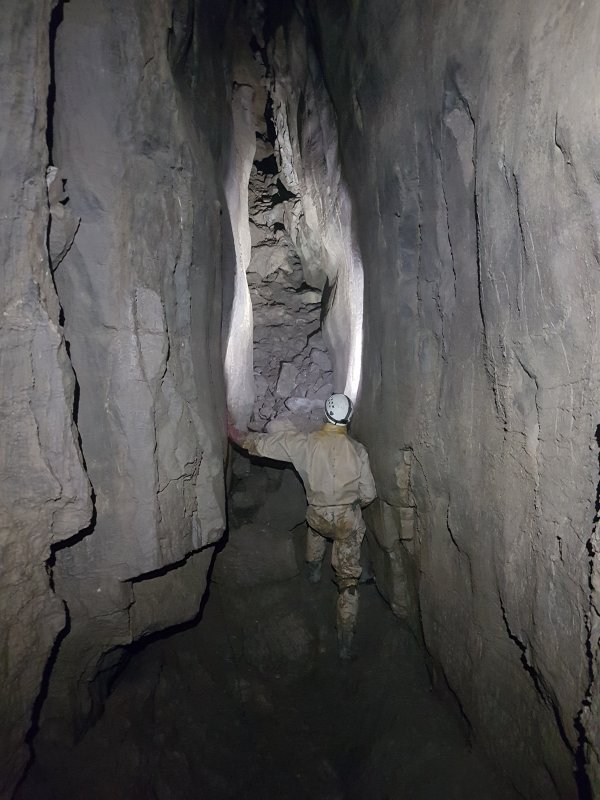 The passage also ends in a choke, which is less promising due to its direction. It heads towards the Lower Series, and very nearly connects with a smaller passage leading from there.
Modelling by Pete, lighting by Tarquin and Pete
The passage also ends in a choke, which is less promising due to its direction. It heads towards the Lower Series, and very nearly connects with a smaller passage leading from there.
Modelling by Pete, lighting by Tarquin and Pete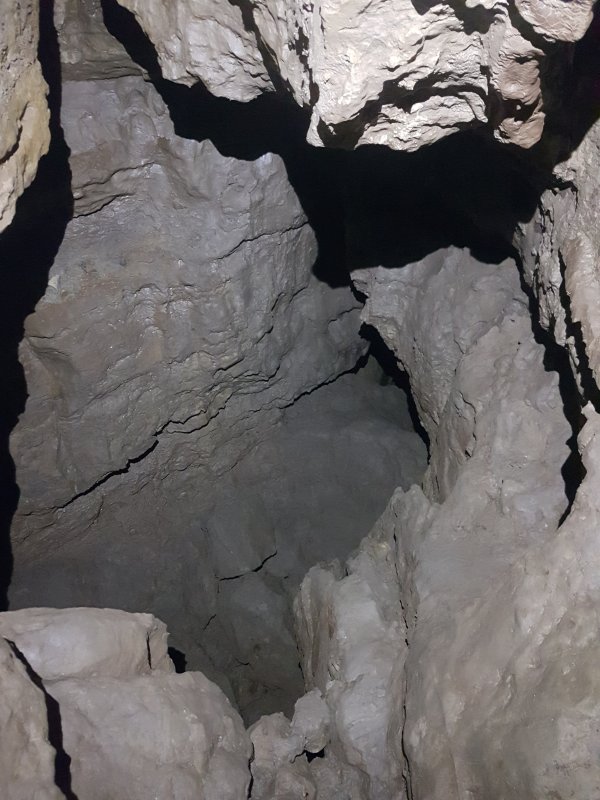 Under the right wall half way down the passage is a climb down in an undercut.
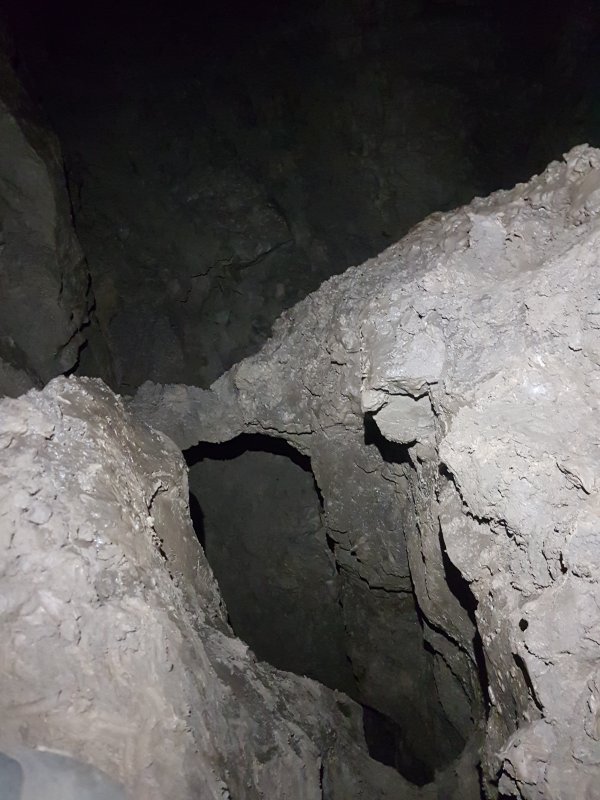 It drops to an extremely muddy pitch head, with nowhere good to rig from.
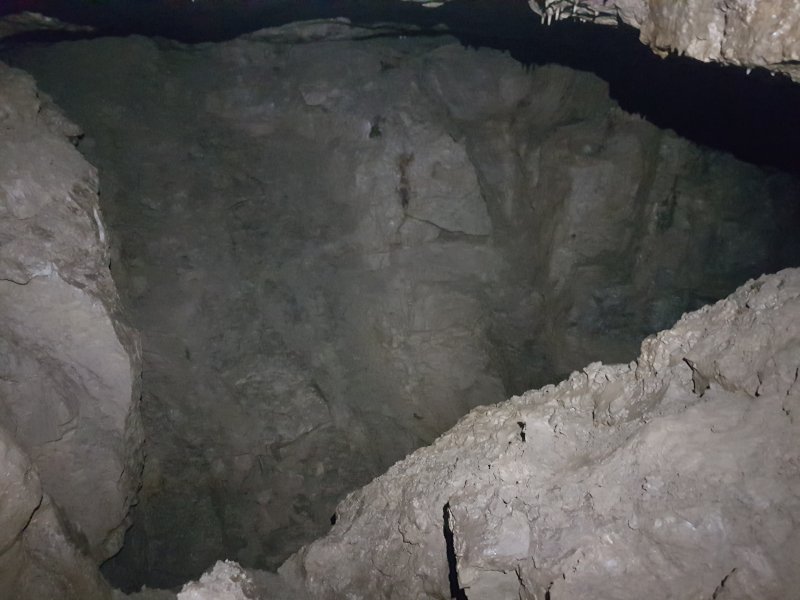 The pitch lands in a funnel of mud with a short fragment of streamway running parallel to, but not connected to, the nearby Blaen Elin streamway. It does not go far at all in either direction, but a hole up in the ceiling is the hole between boulders seen at the earlier junction. I recall one of us climbing up that route in the past, which looks like sheer insanity now.
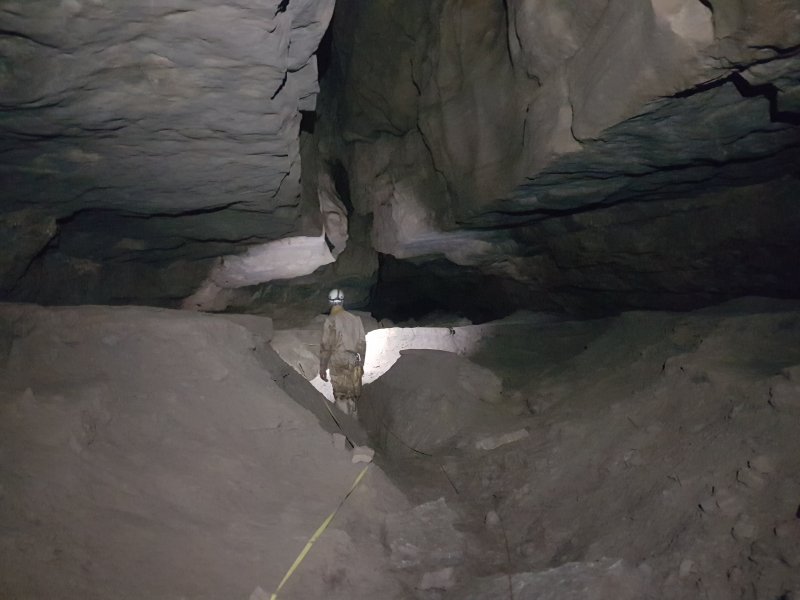 The superb and distinctive start of Promised Land, where the mud banks mirror the notched shape of the ceiling.
Modelling by Pete, lighting by Tarquin and Pete
The superb and distinctive start of Promised Land, where the mud banks mirror the notched shape of the ceiling.
Modelling by Pete, lighting by Tarquin and Pete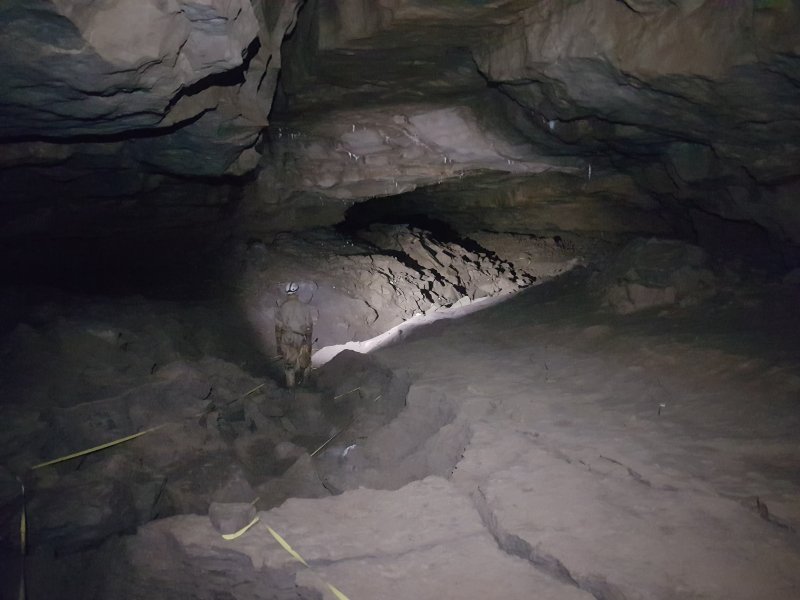 The shape then becomes a more normal oval.
Modelling by Pete, lighting by Tarquin and Pete
The shape then becomes a more normal oval.
Modelling by Pete, lighting by Tarquin and Pete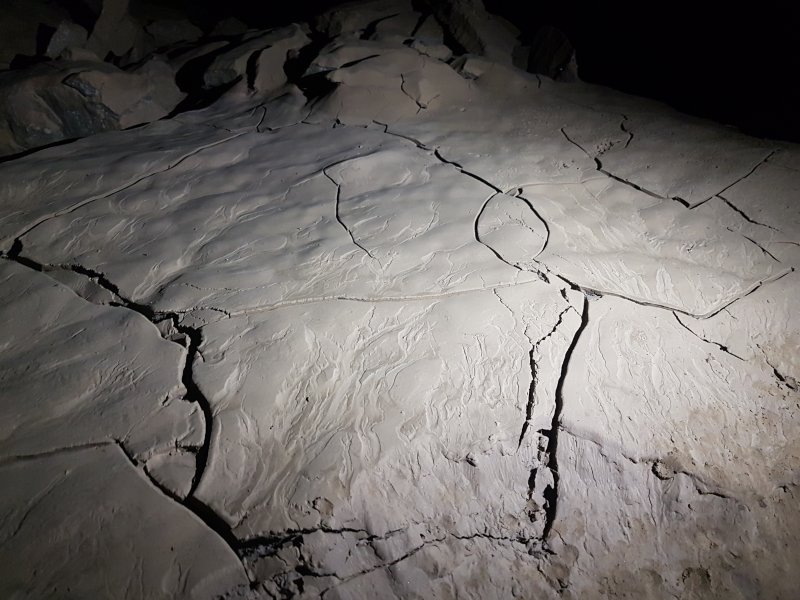 Cracked mud with very clear rivulet impressions, where the water last ran over it as it was draining.
Lighting by Pete
Cracked mud with very clear rivulet impressions, where the water last ran over it as it was draining.
Lighting by Pete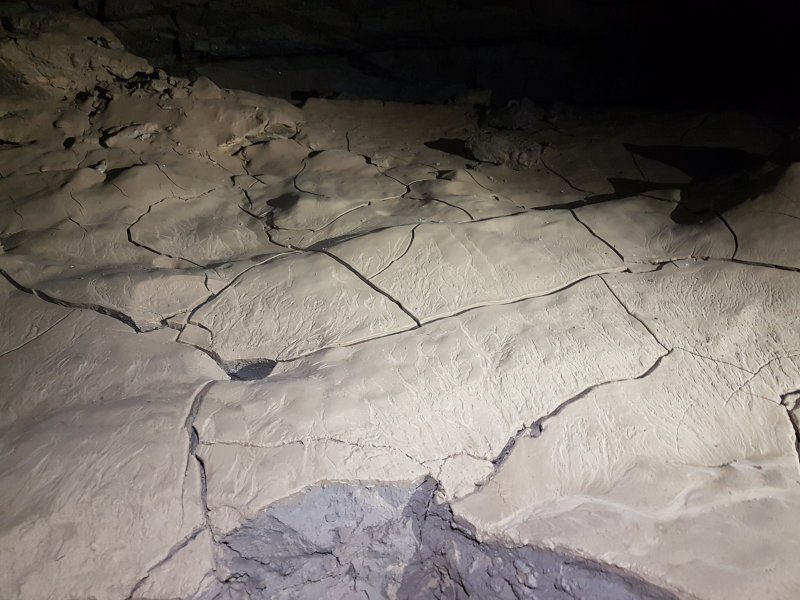 Beautifully preserved detail, presumably several thousand years old.
Lighting by Tarquin and Pete
Beautifully preserved detail, presumably several thousand years old.
Lighting by Tarquin and Pete Miniature stal dwarfed by the passage.
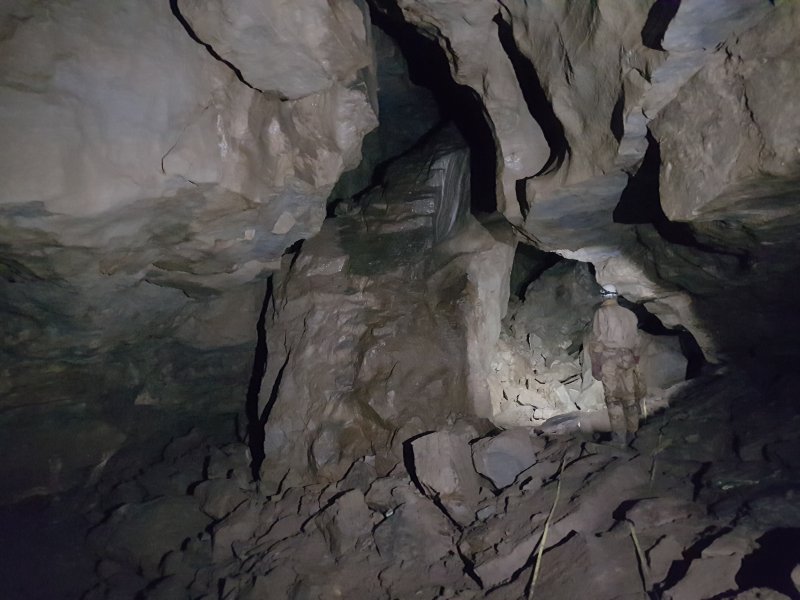 Immense fallen block that seems to have invented itself from nowhere. The sound when it fell from the ceiling must have been colossal. (And yes it made a sound, but it did not make a noise, since no one was there to hear it.)
Modelling by Pete, lighting by Tarquin and Pete
Immense fallen block that seems to have invented itself from nowhere. The sound when it fell from the ceiling must have been colossal. (And yes it made a sound, but it did not make a noise, since no one was there to hear it.)
Modelling by Pete, lighting by Tarquin and Pete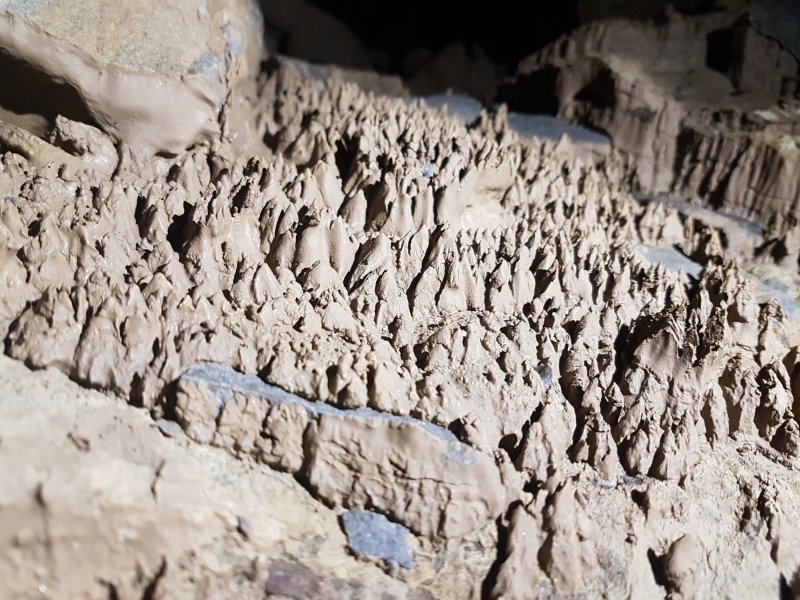 Miniature hoodoos.
 Reduced to its more normal size.
Modelling by Pete, lighting by Tarquin and Pete
Reduced to its more normal size.
Modelling by Pete, lighting by Tarquin and Pete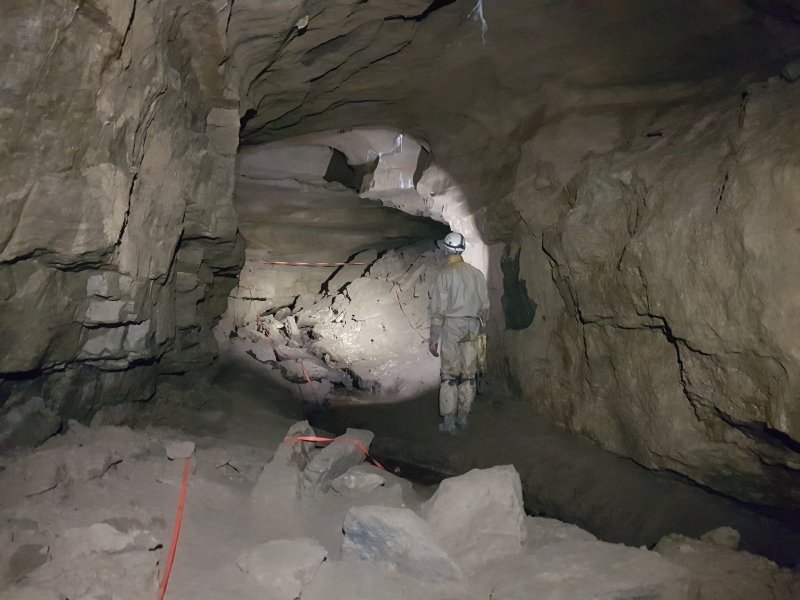 Nearly at the major obstruction.
Modelling by Pete, lighting by Tarquin and Pete
Nearly at the major obstruction.
Modelling by Pete, lighting by Tarquin and Pete The stream route then fills with mud and gravel, and instead, we take an oxbow beside the stal flow. On quick tourist visits, this is a convenient place to stop, before the awkward oxbow.
Modelling by Pete, lighting by Tarquin and Pete
The stream route then fills with mud and gravel, and instead, we take an oxbow beside the stal flow. On quick tourist visits, this is a convenient place to stop, before the awkward oxbow.
Modelling by Pete, lighting by Tarquin and Pete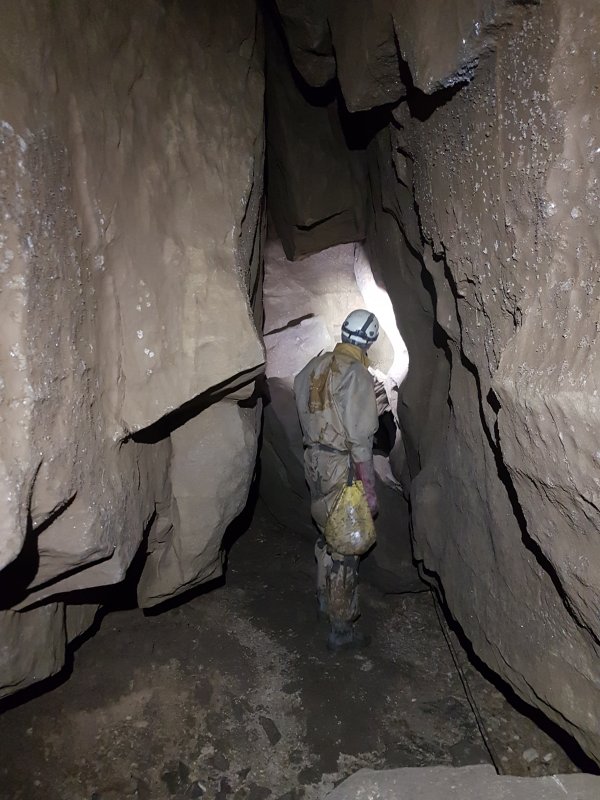 Start of the oxbow, with the first boulder obstacle.
Modelling by Pete, lighting by Tarquin and Pete
Start of the oxbow, with the first boulder obstacle.
Modelling by Pete, lighting by Tarquin and Pete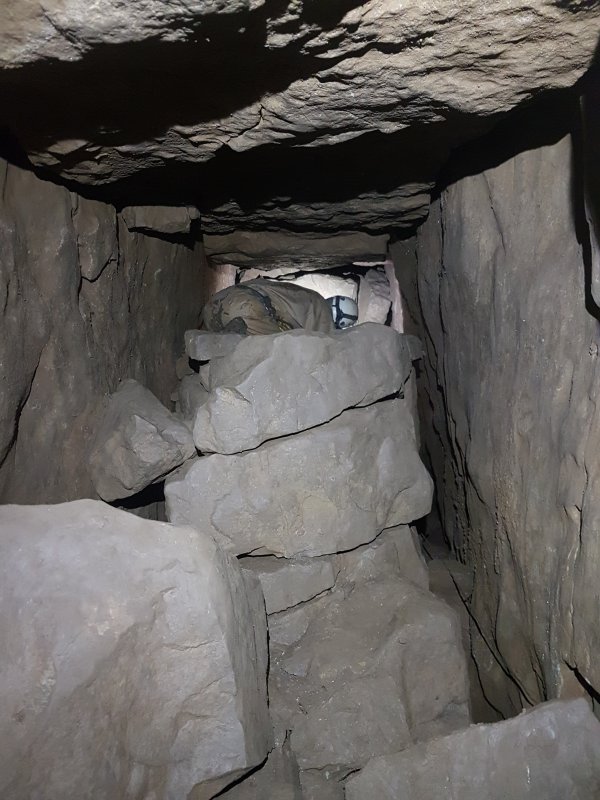 Another boulder obstacle that also seems to have come from nowhere.
Modelling by Pete, lighting by Tarquin and Pete
Another boulder obstacle that also seems to have come from nowhere.
Modelling by Pete, lighting by Tarquin and Pete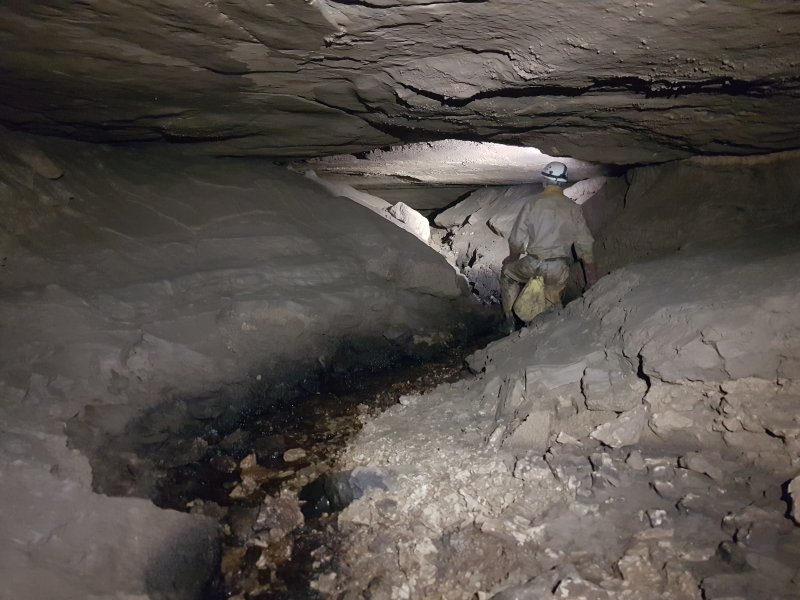 The oxbow regains the stream, with mud banks in the downstream direction.
Modelling by Pete, lighting by Tarquin and Pete
The oxbow regains the stream, with mud banks in the downstream direction.
Modelling by Pete, lighting by Tarquin and Pete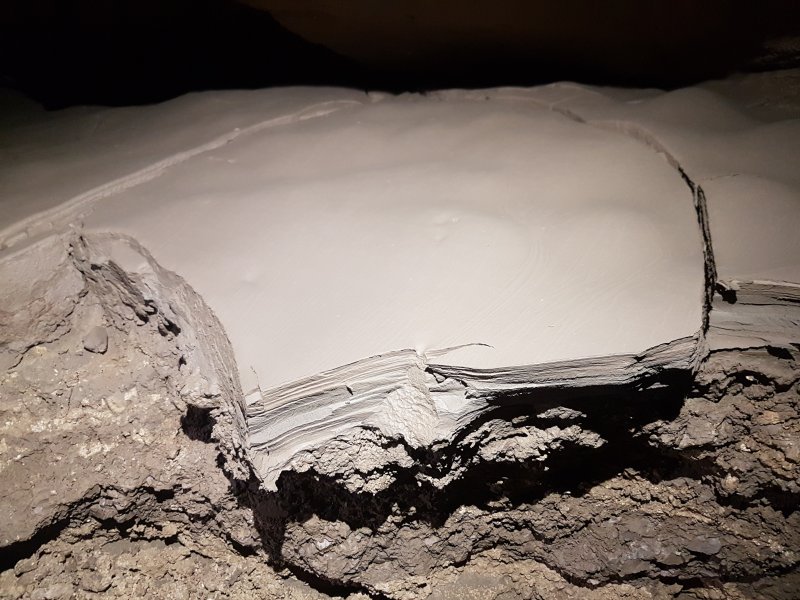 Layers of the mud banks.
Lighting by Pete
Layers of the mud banks.
Lighting by Pete Downstream ends as a wallow in the stream, which becomes too tight before it connects with the earlier passage.
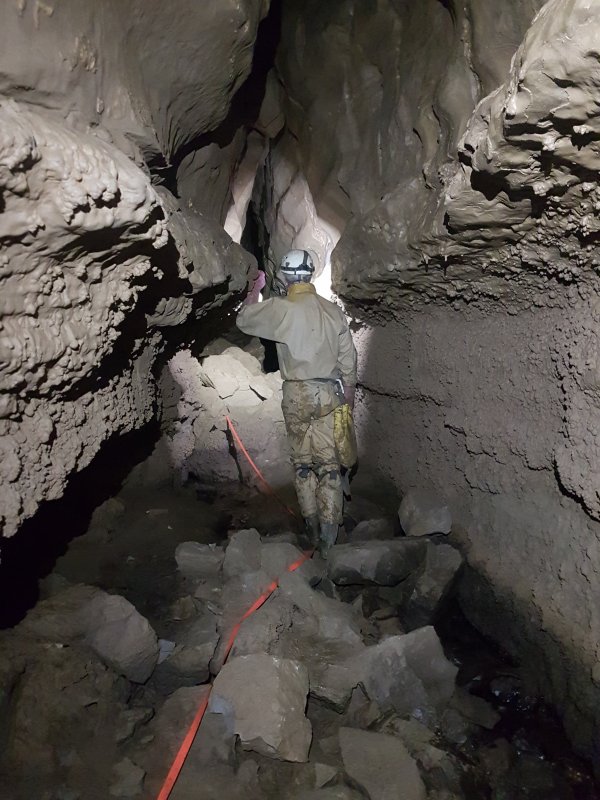 The upstream direction, adorned with mud formations.
Modelling by Pete, lighting by Tarquin and Pete
The upstream direction, adorned with mud formations.
Modelling by Pete, lighting by Tarquin and Pete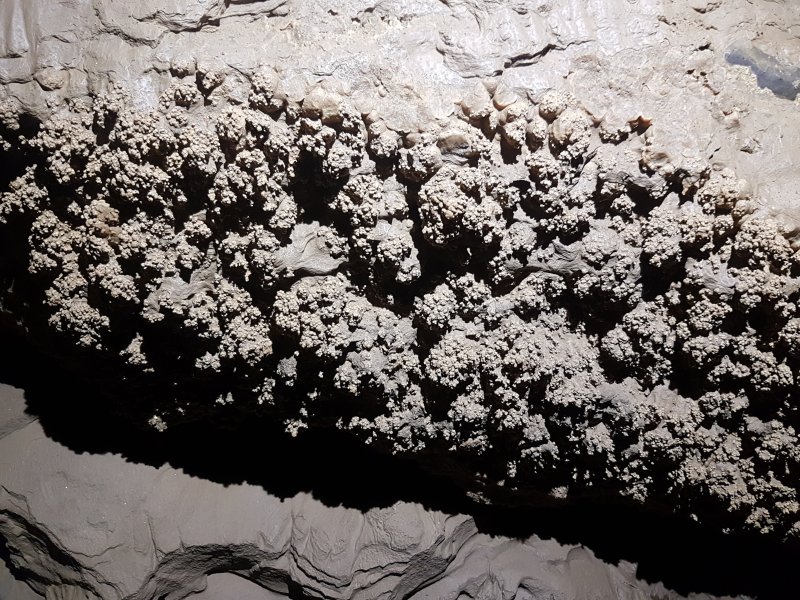 Mud formations.
 Mud formations.
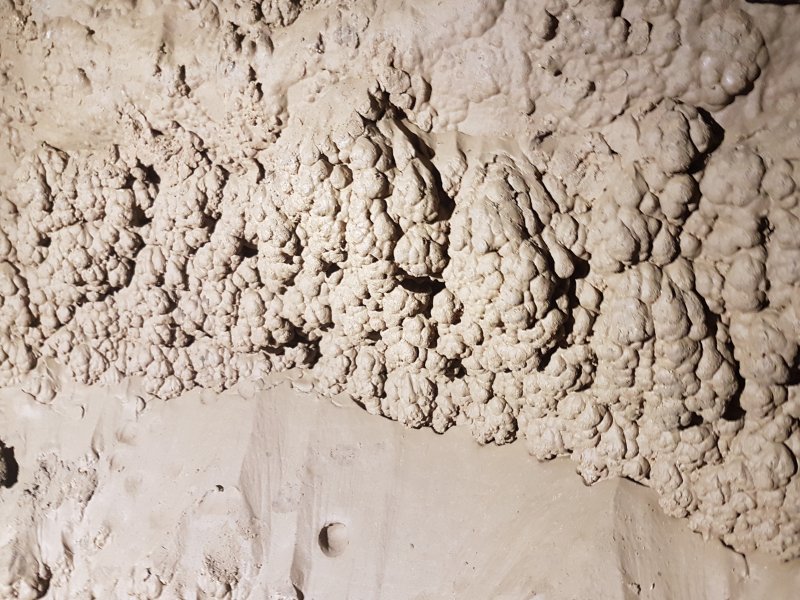 Mud formations.
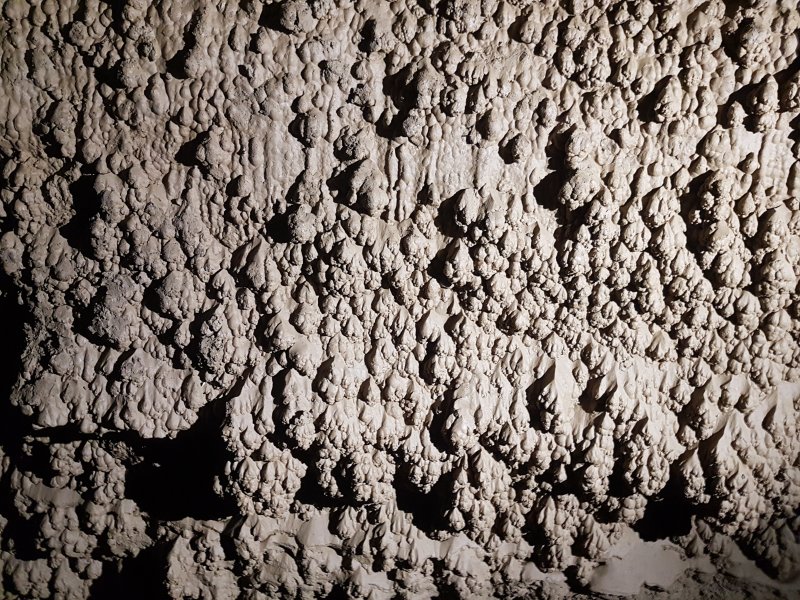 Mud formations.
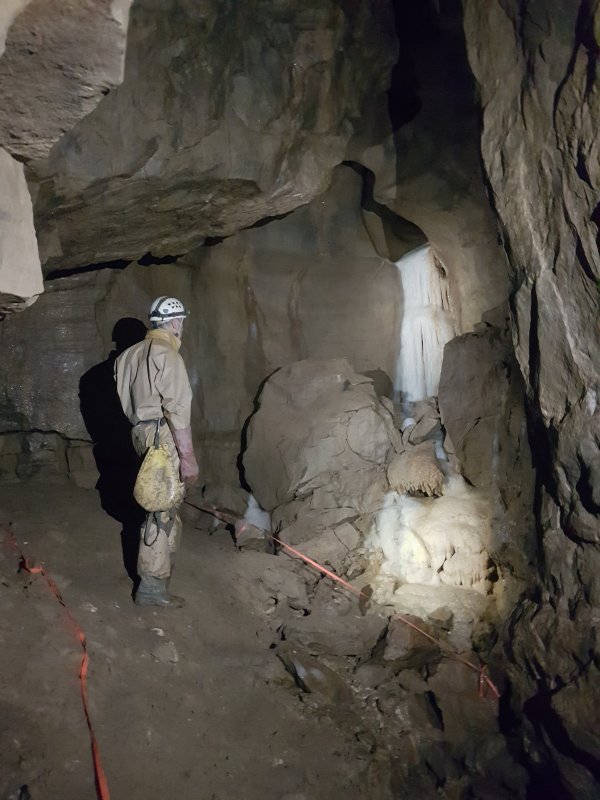 A beautiful flowstone formation, one of the best in the passage.
Modelling by Pete, lighting by Tarquin and Pete
A beautiful flowstone formation, one of the best in the passage.
Modelling by Pete, lighting by Tarquin and Pete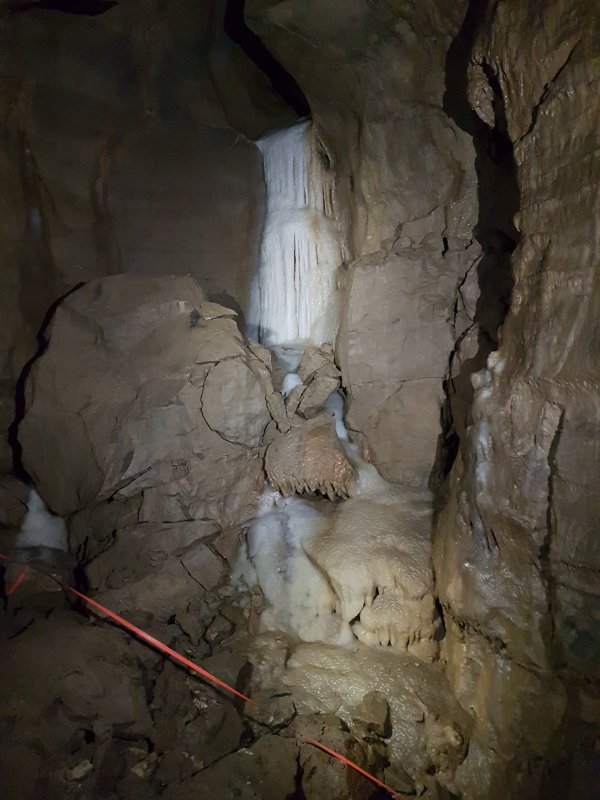 Almost pure white, with a tint on one side.
Lighting by Tarquin and Pete
Almost pure white, with a tint on one side.
Lighting by Tarquin and Pete Temporarily narrow.
Modelling by Pete, lighting by Tarquin and Pete
Temporarily narrow.
Modelling by Pete, lighting by Tarquin and Pete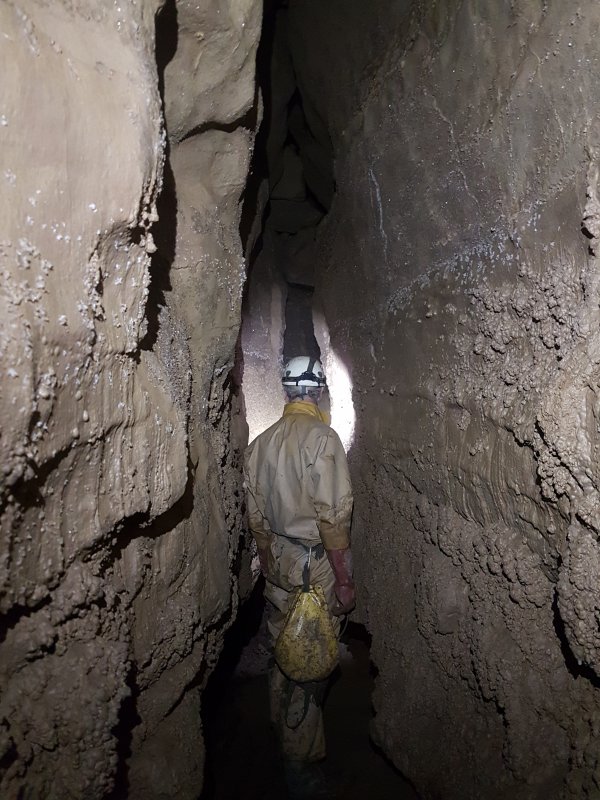 With mud and gypsum formations.
Modelling by Pete, lighting by Tarquin and Pete
With mud and gypsum formations.
Modelling by Pete, lighting by Tarquin and Pete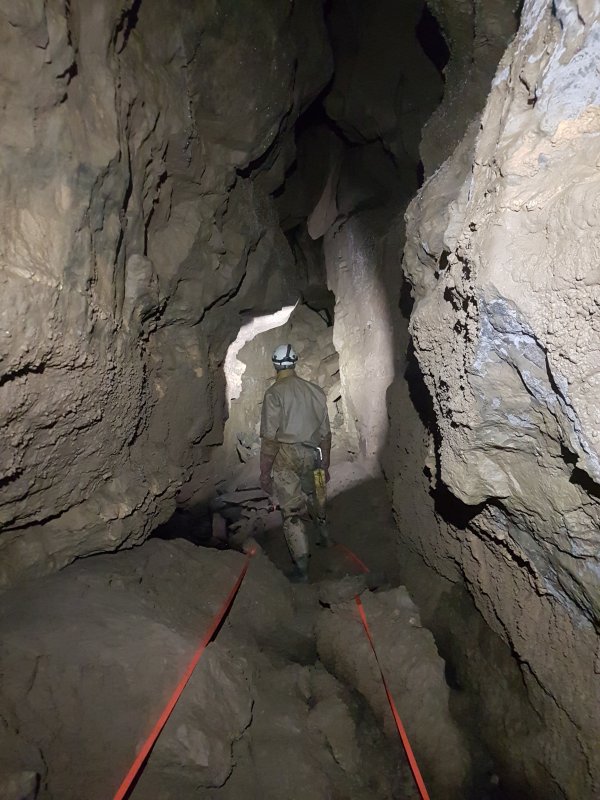 The stream has been regained.
Modelling by Pete, lighting by Tarquin and Pete
The stream has been regained.
Modelling by Pete, lighting by Tarquin and Pete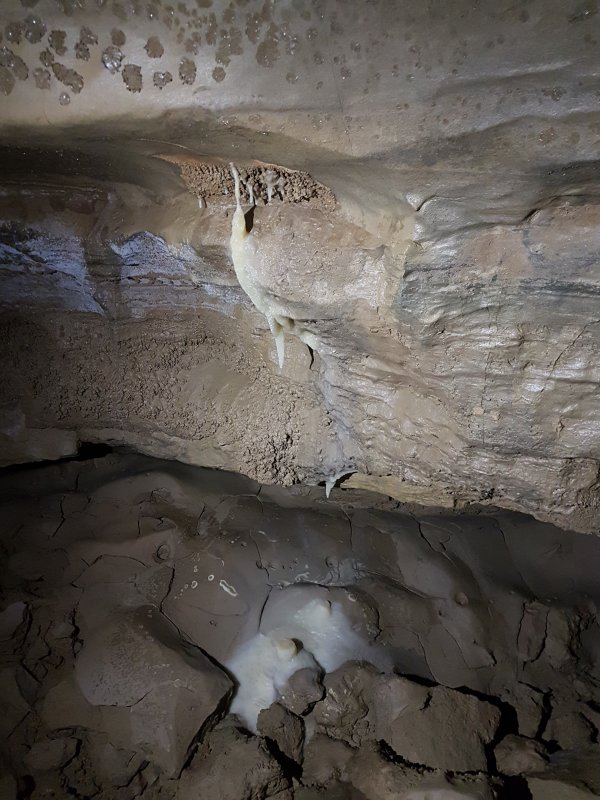 Minimalistic formations.
Modelling by Pete, lighting by Tarquin and Pete
Minimalistic formations.
Modelling by Pete, lighting by Tarquin and Pete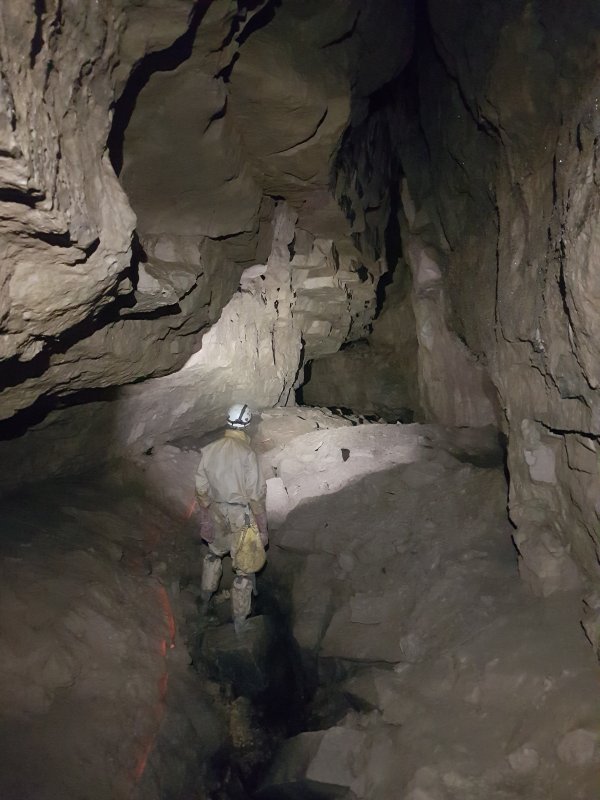 Growing back to its normal size again.
Modelling by Pete, lighting by Tarquin and Pete
Growing back to its normal size again.
Modelling by Pete, lighting by Tarquin and Pete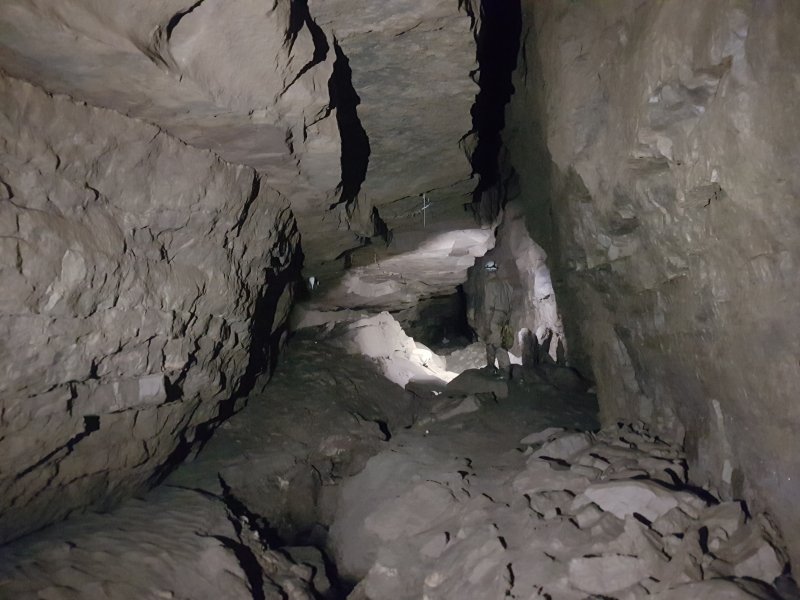 Always dominated by that fault line in the ceiling.
Modelling by Pete, lighting by Tarquin and Pete
Always dominated by that fault line in the ceiling.
Modelling by Pete, lighting by Tarquin and Pete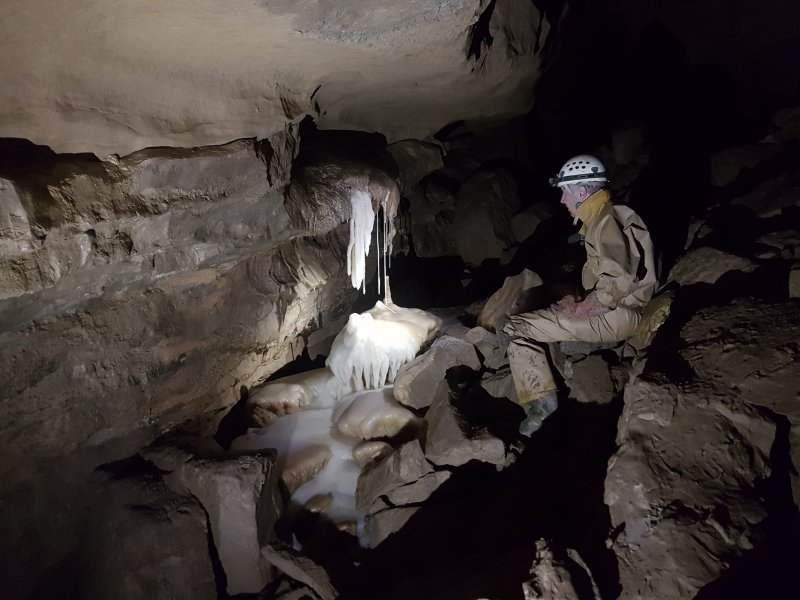 Another beautiful formation. You may notice that there is no flagging tape; so few people make it this far that there is no taping for the rest of the journey.
Modelling by Pete, lighting by Tarquin and Pete
Another beautiful formation. You may notice that there is no flagging tape; so few people make it this far that there is no taping for the rest of the journey.
Modelling by Pete, lighting by Tarquin and Pete The formations.
Lighting by Tarquin and Pete
The formations.
Lighting by Tarquin and Pete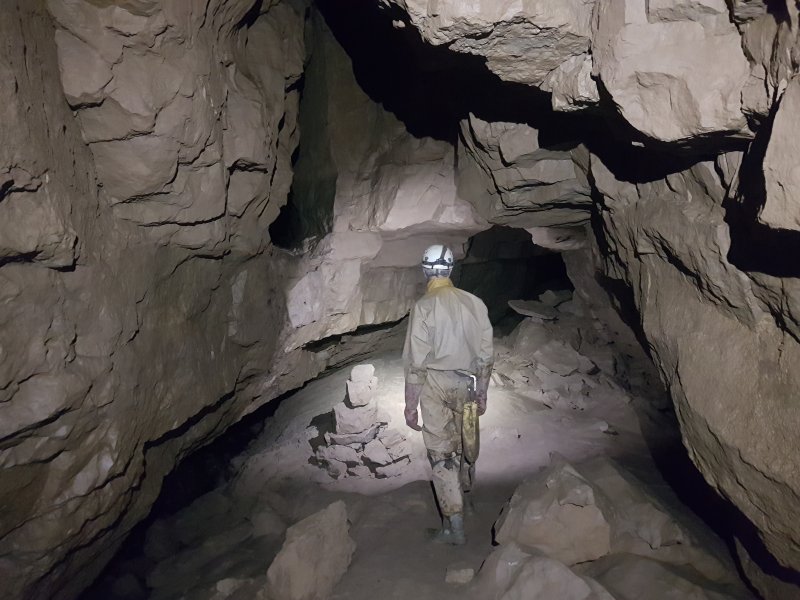 A cairn marks the location of the only significant side passage. Here the main passage jumps sideways away from the fault, and this passage continues along the fault.
Modelling by Pete, lighting by Tarquin and Pete
A cairn marks the location of the only significant side passage. Here the main passage jumps sideways away from the fault, and this passage continues along the fault.
Modelling by Pete, lighting by Tarquin and Pete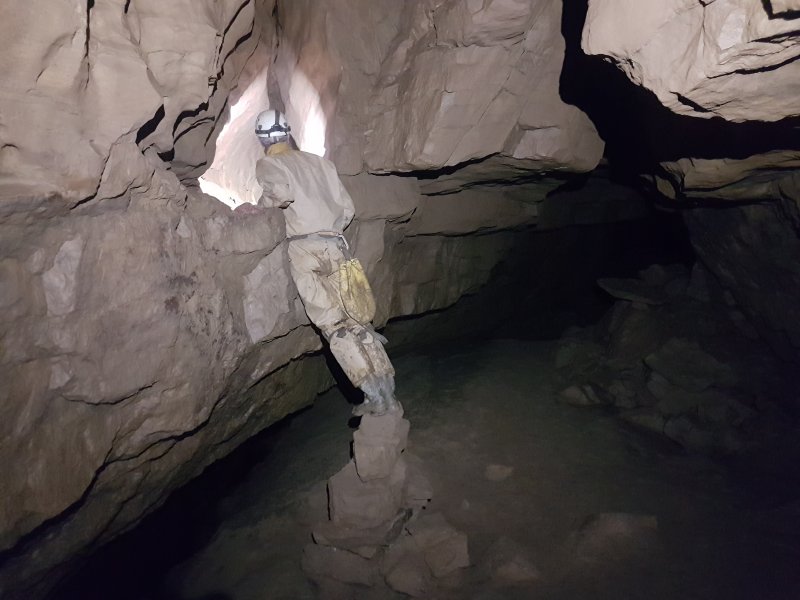 The cairn is a ladder used to reach the passage.
Modelling by Pete, lighting by Tarquin and Pete
The cairn is a ladder used to reach the passage.
Modelling by Pete, lighting by Tarquin and Pete The side passage is a crawl for most of its length.
Modelling by Pete, lighting by Tarquin and Pete
The side passage is a crawl for most of its length.
Modelling by Pete, lighting by Tarquin and Pete It ends at a dig that has seen some effort. This is the most promising passage for a connection with Daren Cilau, as it points towards the flowstone choked corner of Antler Passage, and has a draught. The original explorers, however, never wanted to make a connection (since through trips would put all the formations at risk of rushed tourist trips), and threatened to collapse any connections if one was made.
Modelling by Pete
It ends at a dig that has seen some effort. This is the most promising passage for a connection with Daren Cilau, as it points towards the flowstone choked corner of Antler Passage, and has a draught. The original explorers, however, never wanted to make a connection (since through trips would put all the formations at risk of rushed tourist trips), and threatened to collapse any connections if one was made.
Modelling by Pete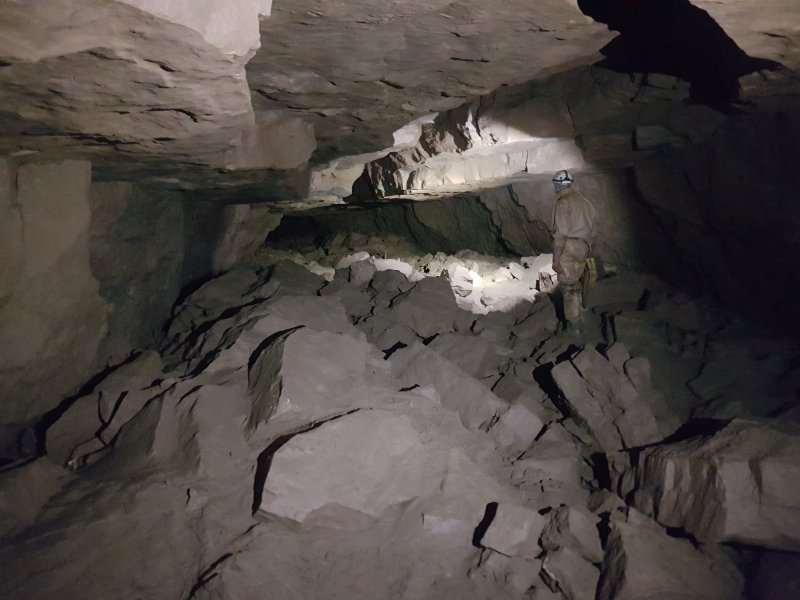 The main passage, freed from the fault, now enlarges dramatically.
Modelling by Pete, lighting by Tarquin and Pete
The main passage, freed from the fault, now enlarges dramatically.
Modelling by Pete, lighting by Tarquin and Pete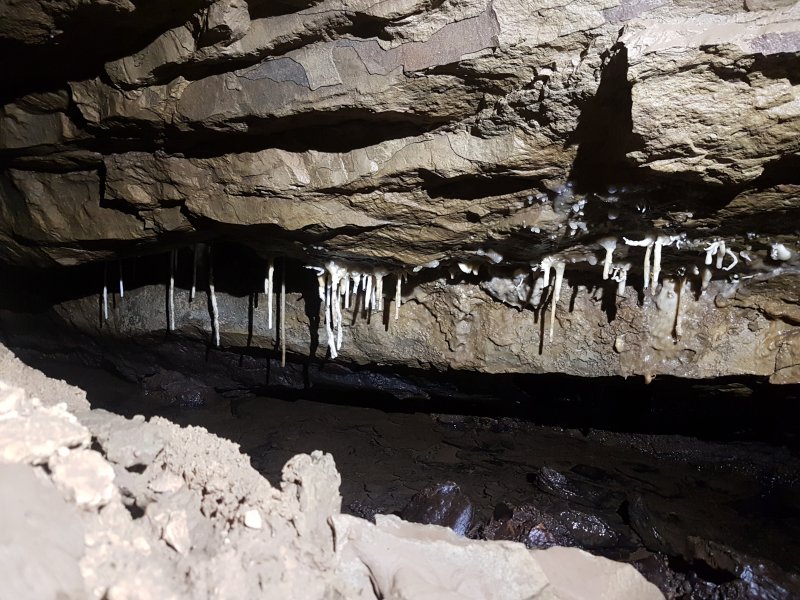 Stal in the undercut.
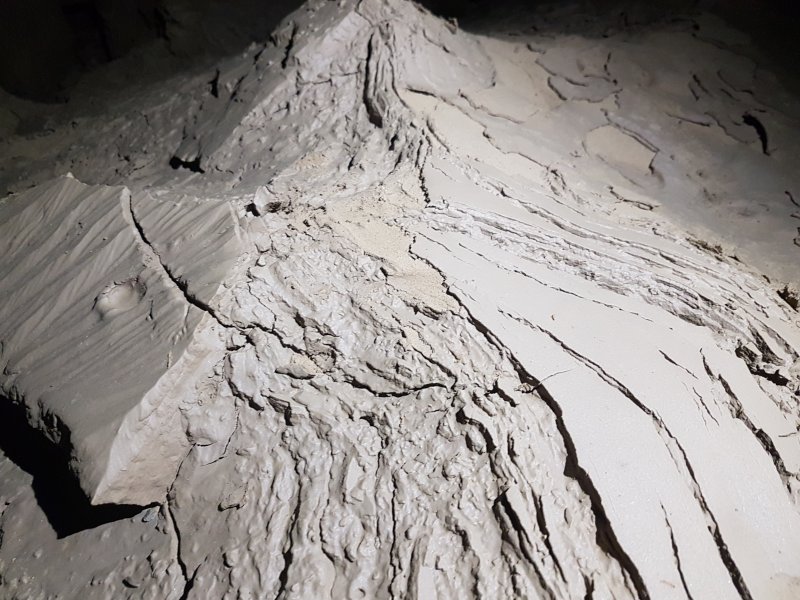 Mud formations. Without any tape, there is nothing to help avoid them, and these are exactly where you would want to stand to take photographs.
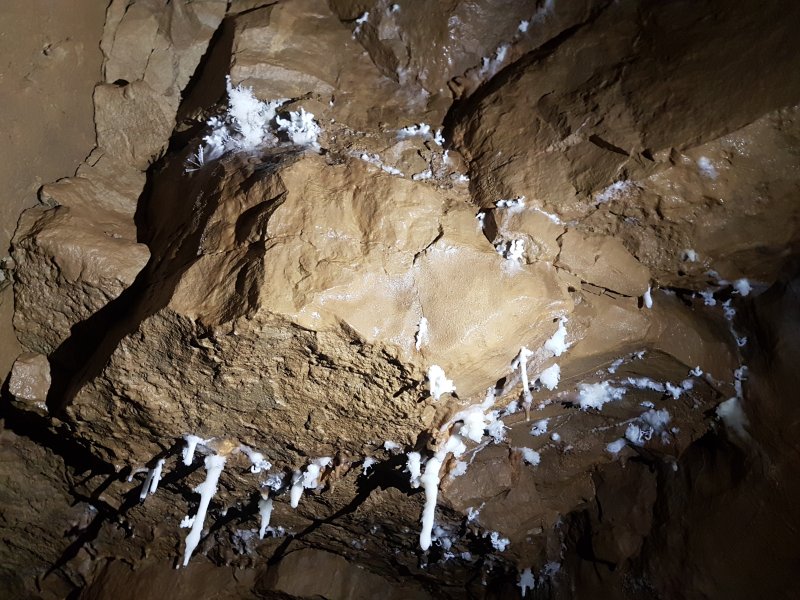 The only set of helictites in this part of Promised Land, positioned rather awkwardly out of range.
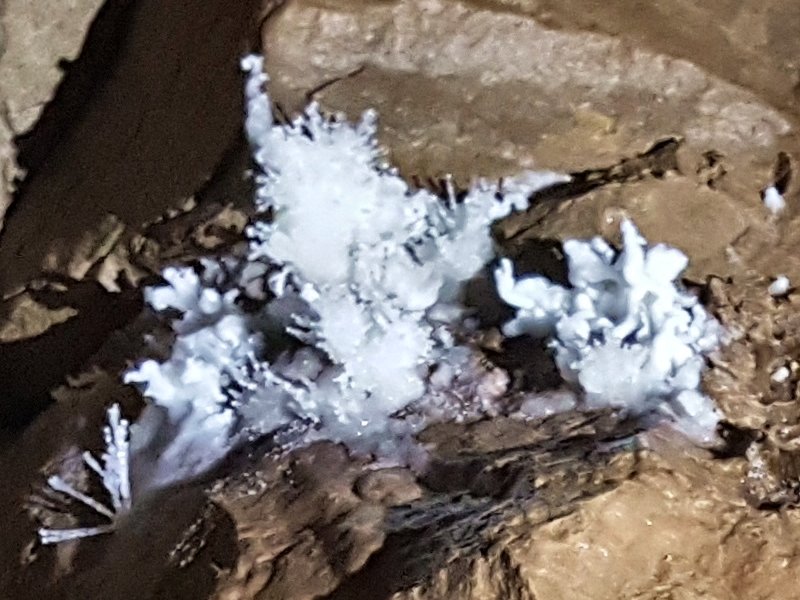 The best of the helictites and anthodites.
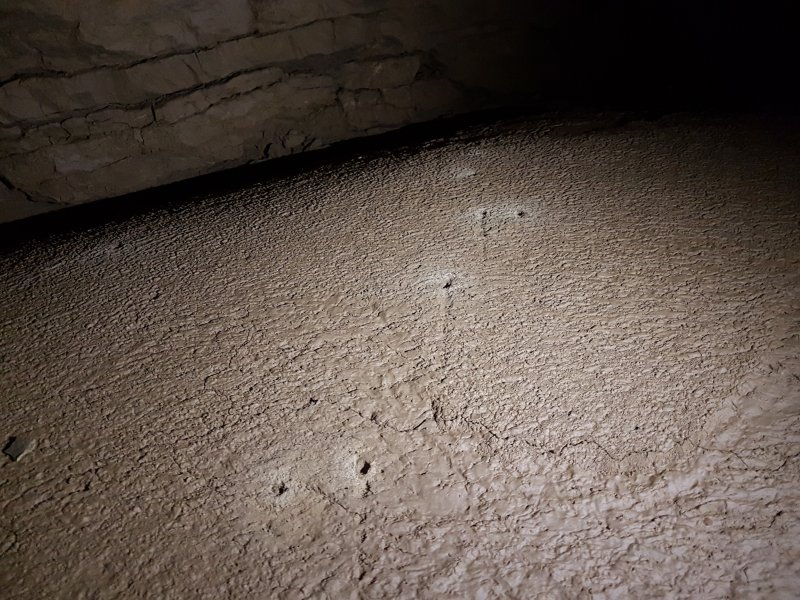 Immaculate mud bank with drip pockets.
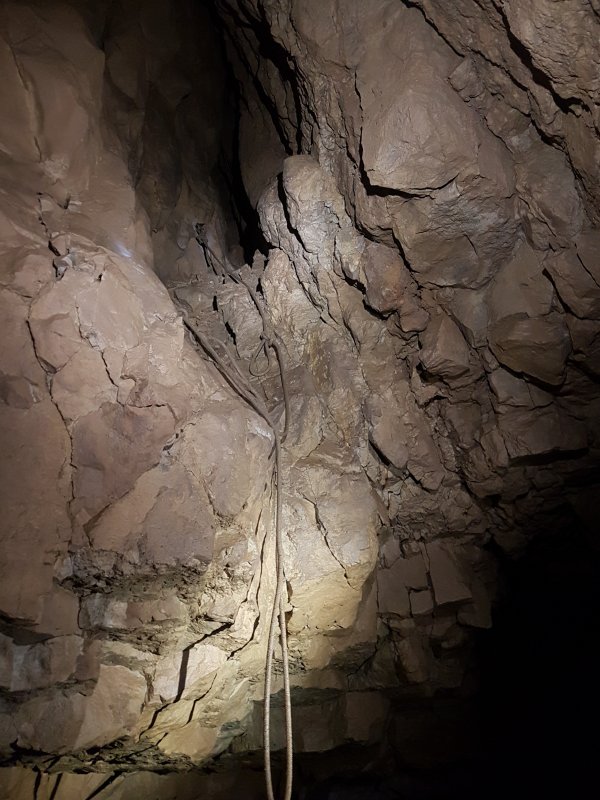 Roof tube with ropes. It looks promising, but chokes immediately. This is close to the end of the earlier side passage.
Lighting by Tarquin and Pete
Roof tube with ropes. It looks promising, but chokes immediately. This is close to the end of the earlier side passage.
Lighting by Tarquin and Pete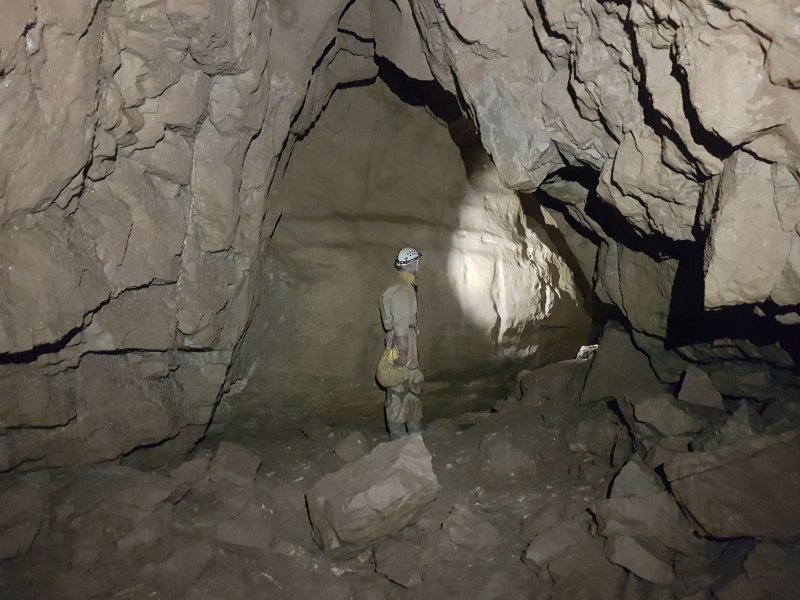 Finally, a really significant event; a corner. THE corner. The only one. The passage finally breaks completely free from the fault, and turns away from Daren Cilau. Some pitiful roof rifts try to mark the occasion but all seem to fizzle out or act as oxbows.
Modelling by Pete, lighting by Tarquin and Pete
Finally, a really significant event; a corner. THE corner. The only one. The passage finally breaks completely free from the fault, and turns away from Daren Cilau. Some pitiful roof rifts try to mark the occasion but all seem to fizzle out or act as oxbows.
Modelling by Pete, lighting by Tarquin and Pete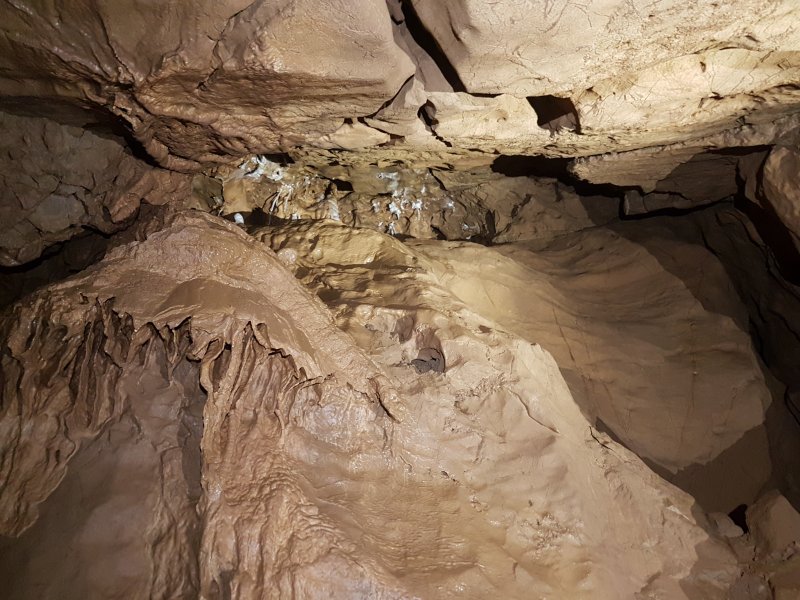 Formations tucked into the ceiling.
Lighting by Tarquin and Pete
Formations tucked into the ceiling.
Lighting by Tarquin and Pete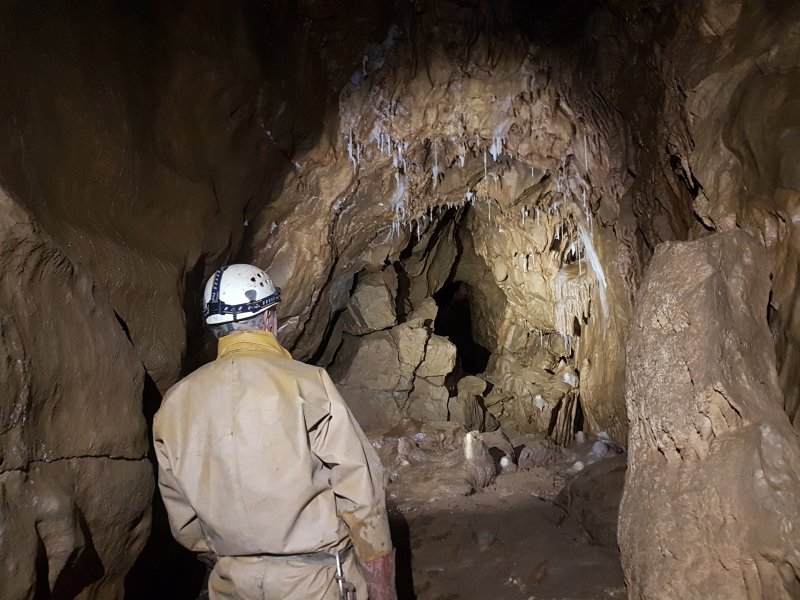 Passing through a grotto.
Modelling by Pete, lighting by Tarquin and Pete
Passing through a grotto.
Modelling by Pete, lighting by Tarquin and Pete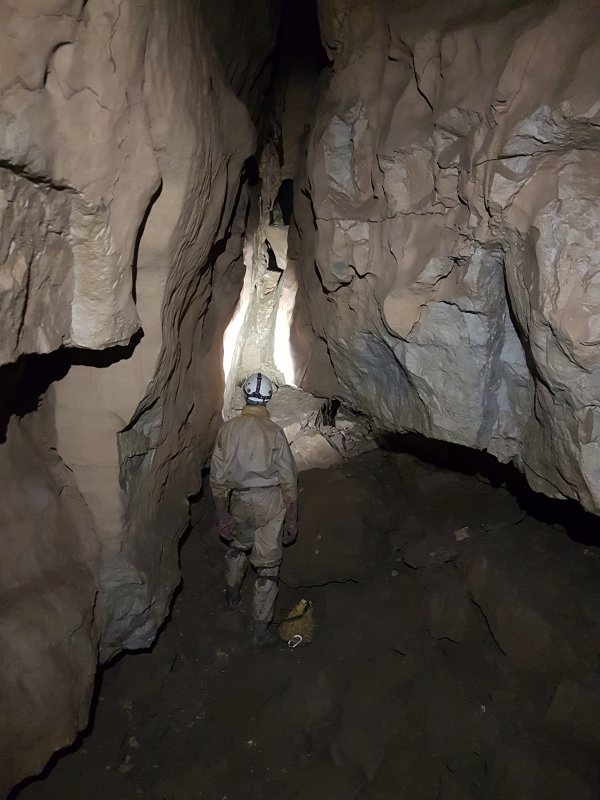 Beyond the grotto.
Modelling by Pete, lighting by Tarquin and Pete
Beyond the grotto.
Modelling by Pete, lighting by Tarquin and Pete A hole with old stal. The passage is definitely not as grand as it used to be.
Modelling by Pete, lighting by Tarquin and Pete
A hole with old stal. The passage is definitely not as grand as it used to be.
Modelling by Pete, lighting by Tarquin and Pete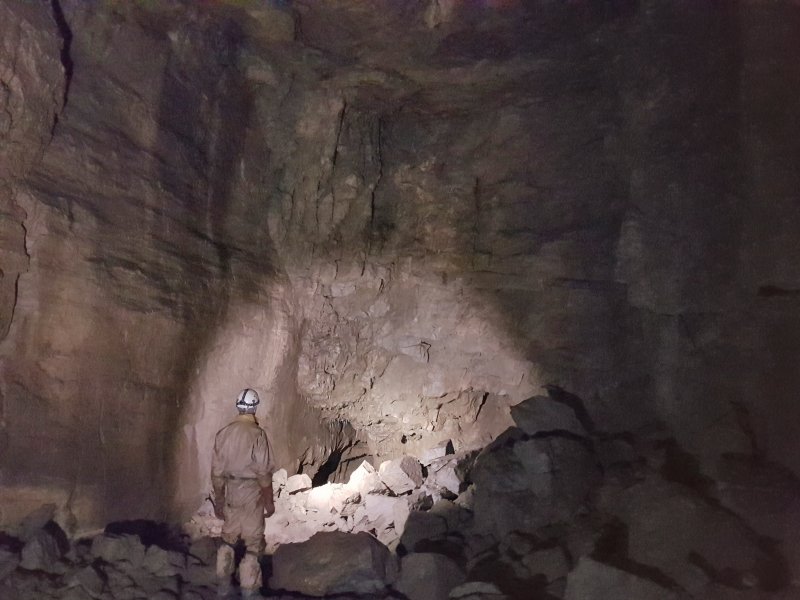 An unexpectedly large collapse chamber. This is the largest piece of cave beyond the corner.
Modelling by Pete, lighting by Tarquin and Pete
An unexpectedly large collapse chamber. This is the largest piece of cave beyond the corner.
Modelling by Pete, lighting by Tarquin and Pete The way on becomes a low crawl, and the stream is seen again.
Modelling by Pete, lighting by Tarquin and Pete
The way on becomes a low crawl, and the stream is seen again.
Modelling by Pete, lighting by Tarquin and Pete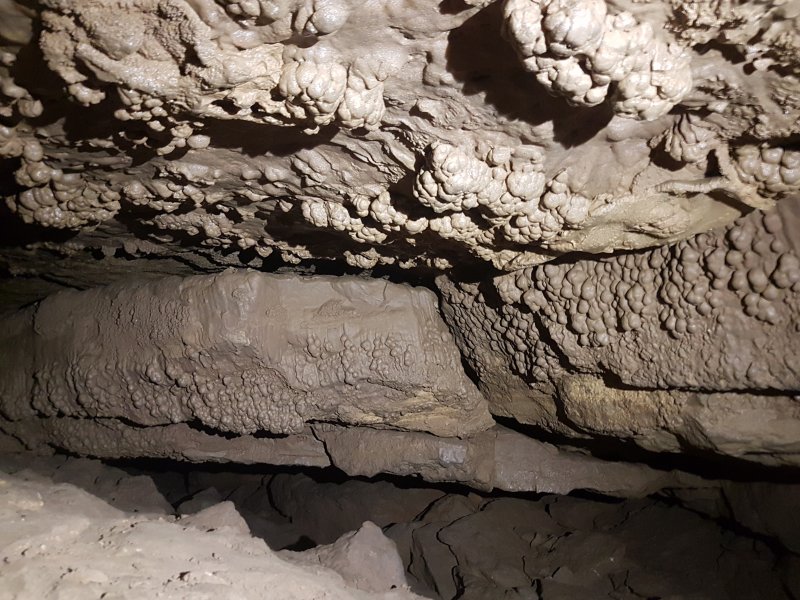 Mud formations on the ceiling of the crawl.
 The way ahead then becomes too low, so a side crawl is used to regain the way on.
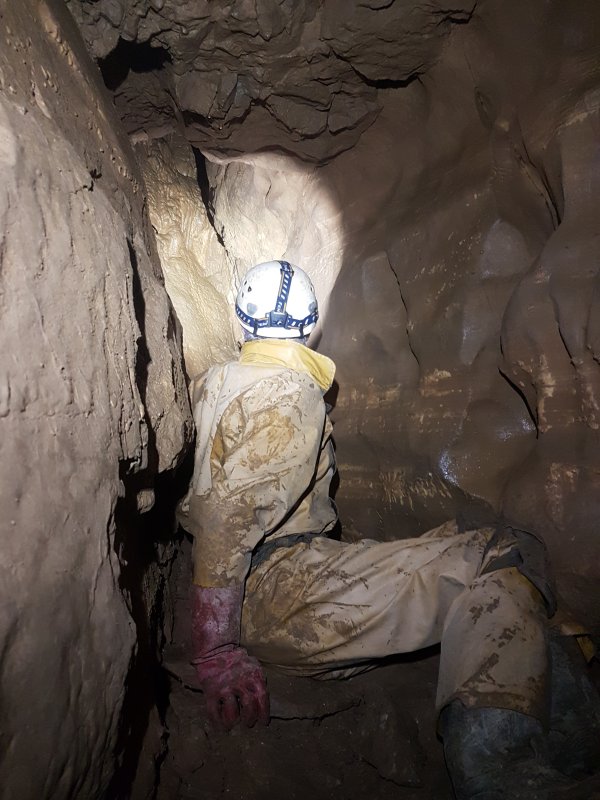 The side crawl pops up into a rift.
Modelling by Pete, lighting by Tarquin and Pete
The side crawl pops up into a rift.
Modelling by Pete, lighting by Tarquin and Pete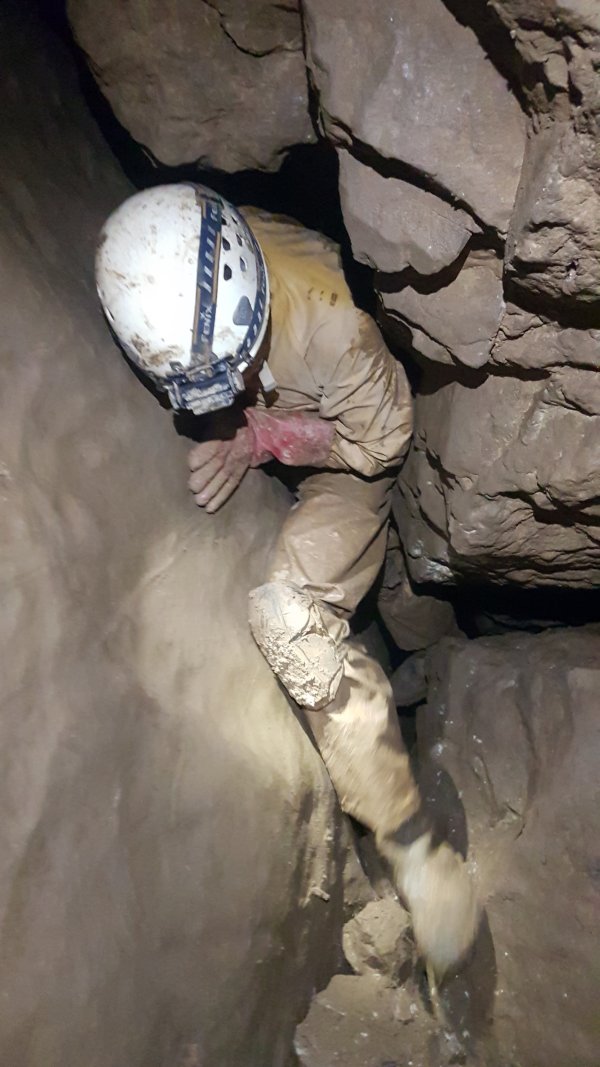 This then passes through a squeeze. This looks absolutely impossible on the way in, and requires a shimmy up to ceiling level, using the little stones on tip toe to get enough height to reach the wide section. On the way out (seen here), you simply fall through it, and wonder what all the fuss was about.
Modelling by Pete, lighting by Tarquin and Pete
This then passes through a squeeze. This looks absolutely impossible on the way in, and requires a shimmy up to ceiling level, using the little stones on tip toe to get enough height to reach the wide section. On the way out (seen here), you simply fall through it, and wonder what all the fuss was about.
Modelling by Pete, lighting by Tarquin and Pete Beyond the squeeze.
Modelling by Pete, lighting by Tarquin and Pete
Beyond the squeeze.
Modelling by Pete, lighting by Tarquin and Pete Passing over a very old flowstone floor.
Modelling by Pete, lighting by Tarquin and Pete
Passing over a very old flowstone floor.
Modelling by Pete, lighting by Tarquin and Pete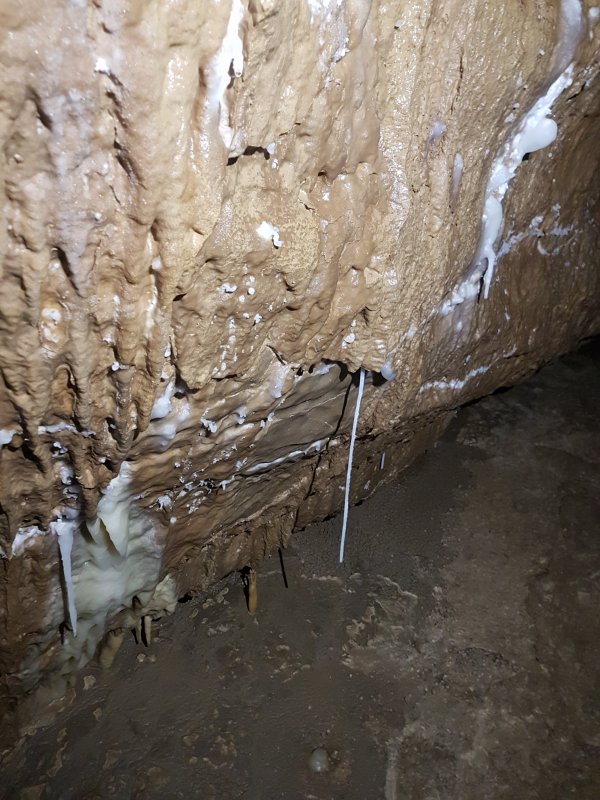 Minor stal formations.
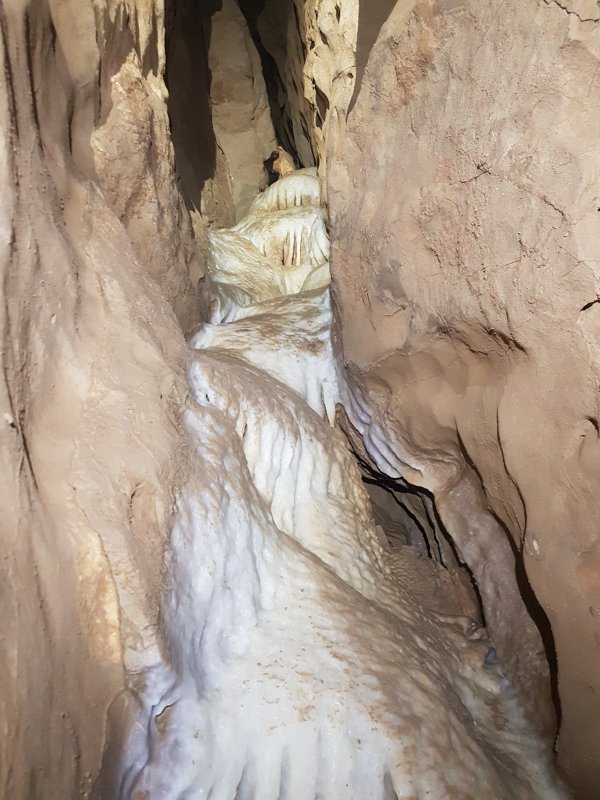 The route passes beneath this beautiful flow, which is easily missed on the way in. And yes, someone has been up it.
Lighting by Tarquin and Pete
The route passes beneath this beautiful flow, which is easily missed on the way in. And yes, someone has been up it.
Lighting by Tarquin and Pete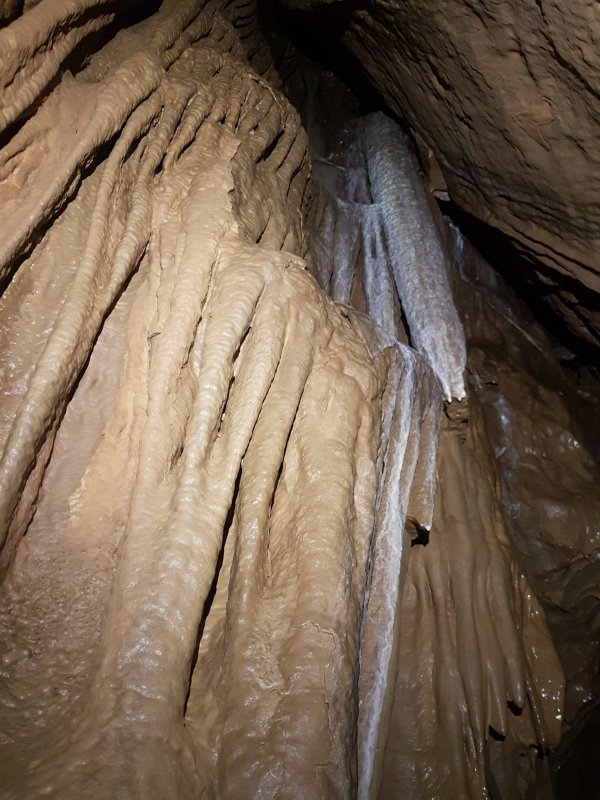 More stal in the ceiling.
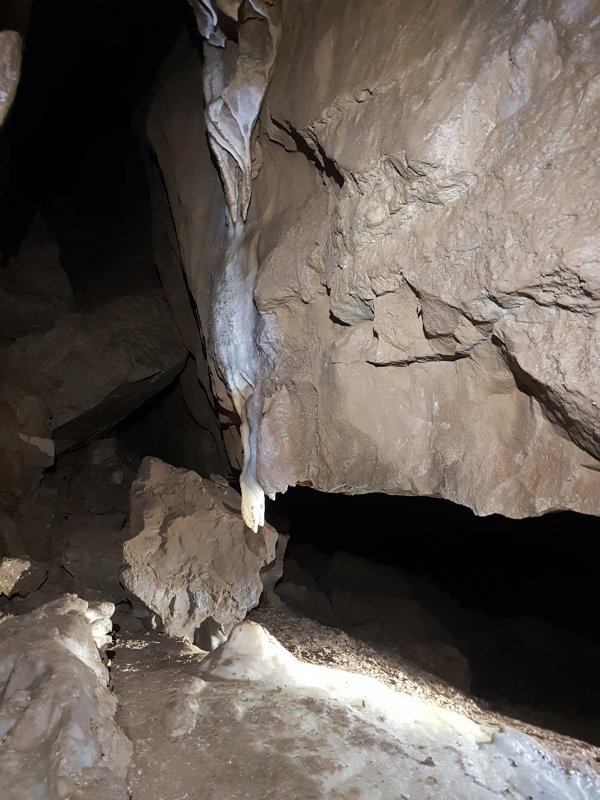 At floor level, it all looks a lot less impressive.
Lighting by Tarquin and Pete
At floor level, it all looks a lot less impressive.
Lighting by Tarquin and Pete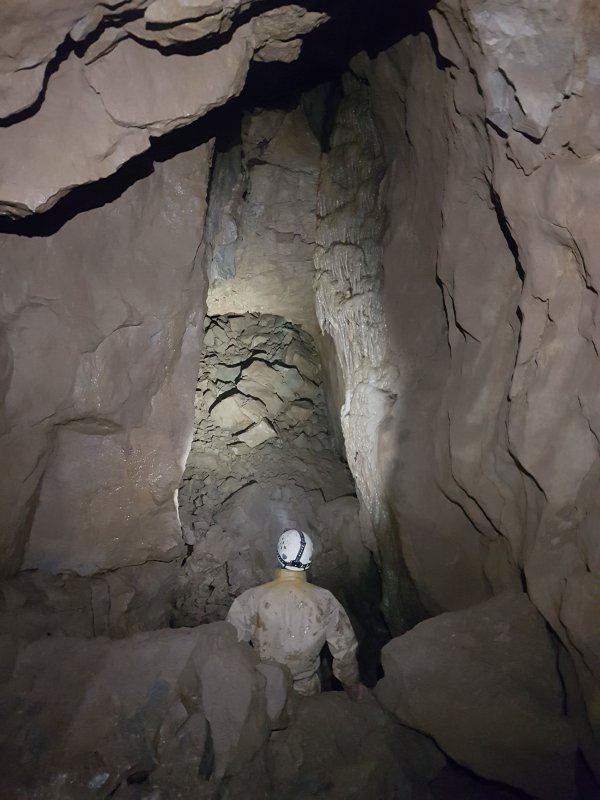 The passage reaches a bouldery chamber, which really looks like the end of the cave, but there are actually two ways on.
Modelling by Pete, lighting by Tarquin and Pete
The passage reaches a bouldery chamber, which really looks like the end of the cave, but there are actually two ways on.
Modelling by Pete, lighting by Tarquin and Pete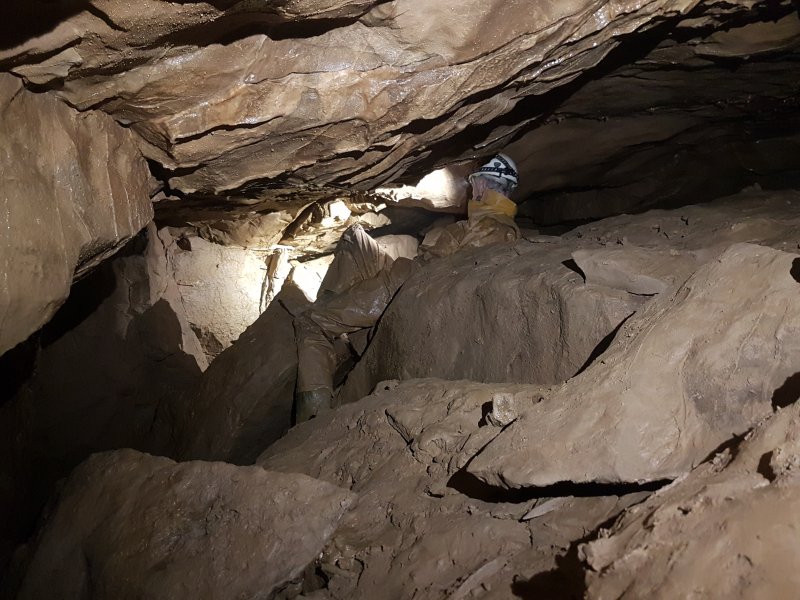 Two routes through the boulders on the left reunite in a large undercut. This is the only piece of passage pointing towards Busman's Holiday in Daren Cilau, but it does not have anywhere obvious to dig. It appears to just be a meander.
Modelling by Pete, lighting by Tarquin and Pete
Two routes through the boulders on the left reunite in a large undercut. This is the only piece of passage pointing towards Busman's Holiday in Daren Cilau, but it does not have anywhere obvious to dig. It appears to just be a meander.
Modelling by Pete, lighting by Tarquin and Pete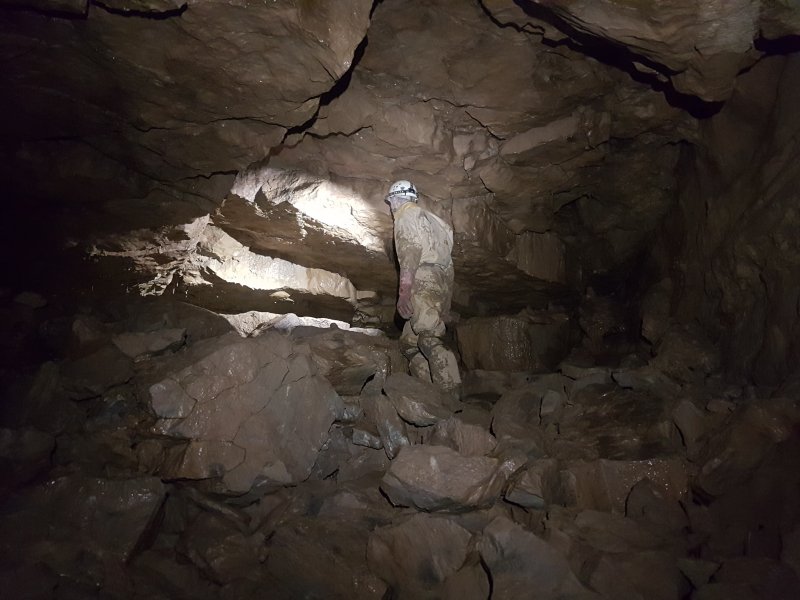 At the top of the boulder chamber is a bedding.
Modelling by Pete, lighting by Tarquin and Pete
At the top of the boulder chamber is a bedding.
Modelling by Pete, lighting by Tarquin and Pete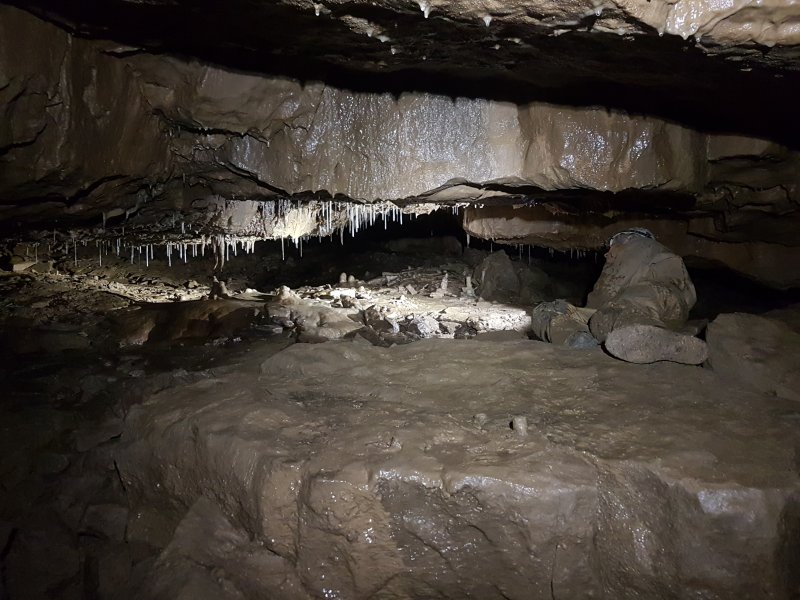 Stal in the bedding. The bedding appears very promising over to the left, but the only way on is to the right, regaining the direction of the passage.
Modelling by Pete, lighting by Tarquin and Pete
Stal in the bedding. The bedding appears very promising over to the left, but the only way on is to the right, regaining the direction of the passage.
Modelling by Pete, lighting by Tarquin and Pete At the back of the bedding is a squeeze down between rocks.
Modelling by Pete, lighting by Tarquin and Pete
At the back of the bedding is a squeeze down between rocks.
Modelling by Pete, lighting by Tarquin and Pete Holes dropping further down uner your feet.
Lighting by Tarquin and Pete
Holes dropping further down uner your feet.
Lighting by Tarquin and Pete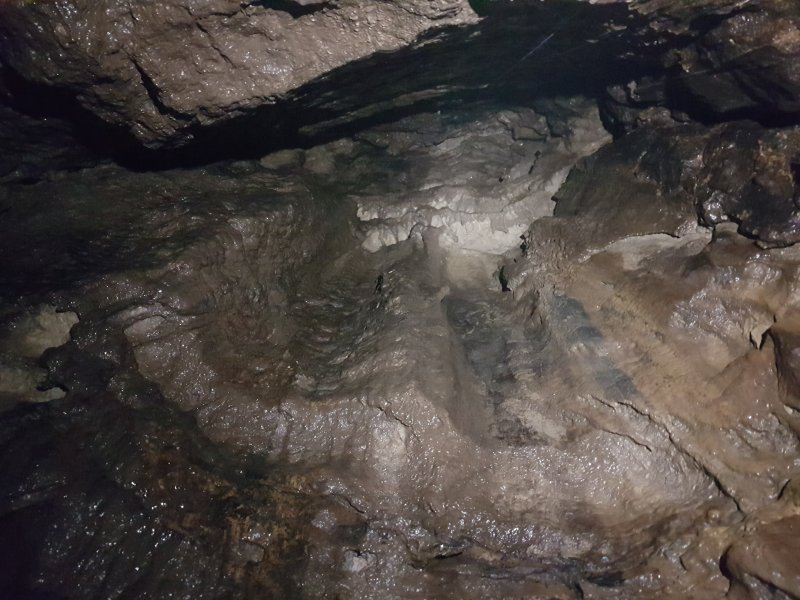 The squeeze lands in a tall aven, which is the source of the stream.
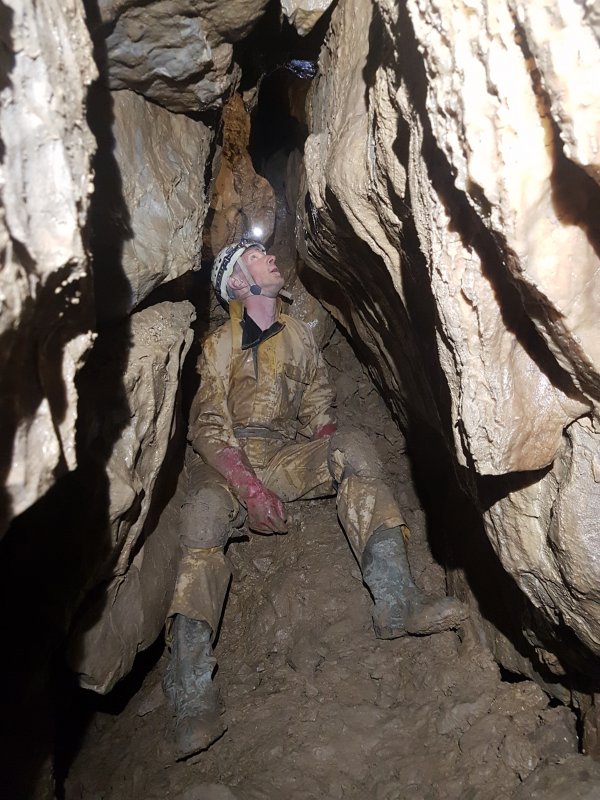 Continuing a little further reaches the base of a second aven.
Modelling by Pete, lighting by Tarquin and Pete
Continuing a little further reaches the base of a second aven.
Modelling by Pete, lighting by Tarquin and Pete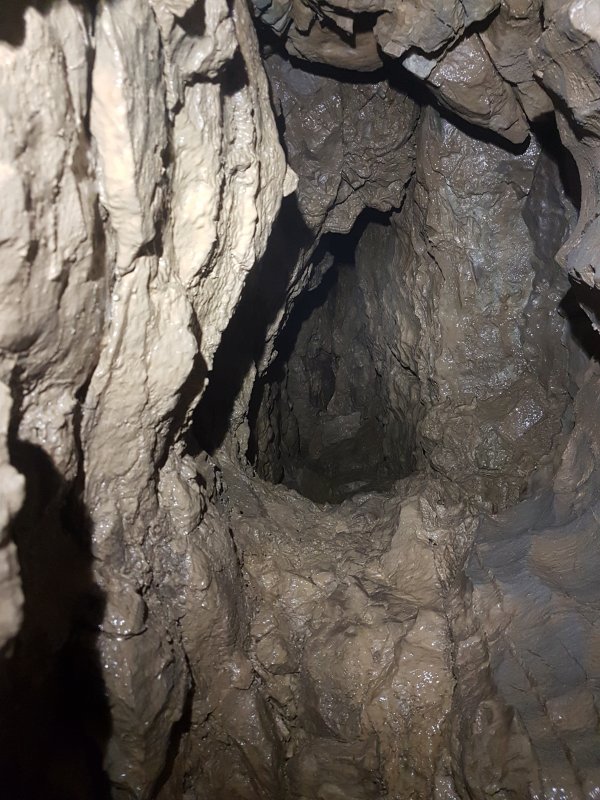 Climbing that aven reveals an eyehole at the top linking back to the first aven. There is no other way on at the top of either aven. This is the rather miserable end to a very fine passage, and it is time to turn around.
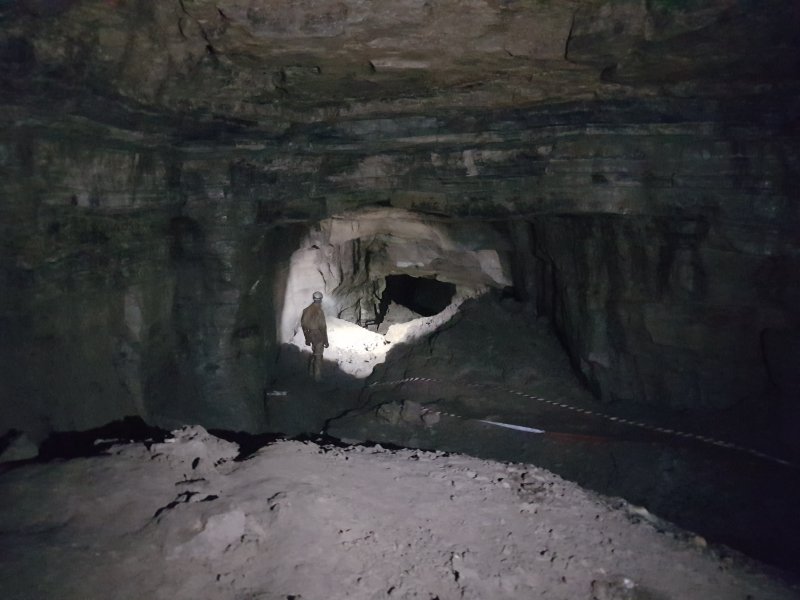 On our way back, at Hall Of The Mountain King, we decided to complete the set by photographing The Small Side Passage Near The Entrance. The name is a play on the name of the famous chamber in Ogof Ffynnon Ddu (Big Chamber Near The Entrance) and the similarly named chamber in Daren Cilau (Big Chamber Nowhere Near The Entrance). Despite its name, this passage is neither small, nor near the entrance. It is formed on the same fault as Third Choke, perpendicular to the main faults that control the rest of the cave.
Modelling by Pete, lighting by Tarquin and Pete
On our way back, at Hall Of The Mountain King, we decided to complete the set by photographing The Small Side Passage Near The Entrance. The name is a play on the name of the famous chamber in Ogof Ffynnon Ddu (Big Chamber Near The Entrance) and the similarly named chamber in Daren Cilau (Big Chamber Nowhere Near The Entrance). Despite its name, this passage is neither small, nor near the entrance. It is formed on the same fault as Third Choke, perpendicular to the main faults that control the rest of the cave.
Modelling by Pete, lighting by Tarquin and Pete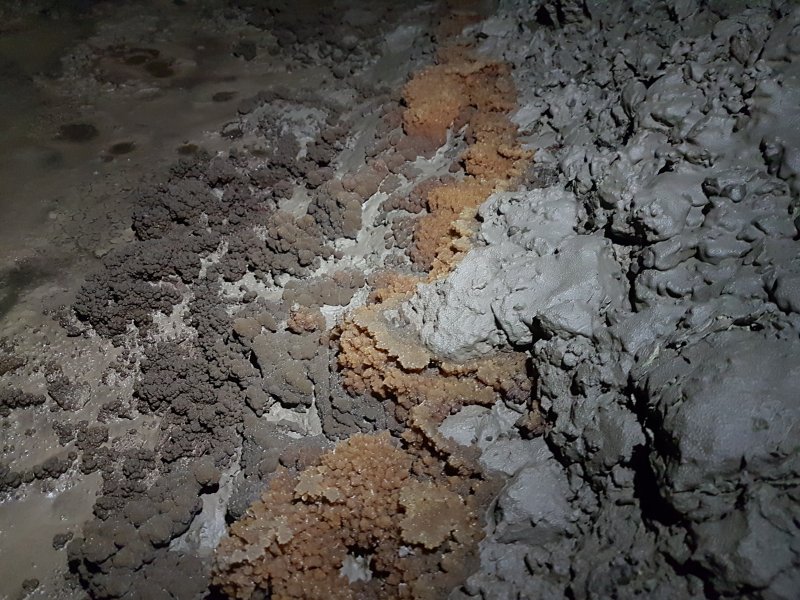 The side passage starts with a partially dry crystal pool formed in the mud, with the crystal growth showing the old water line. They are formed in the same way as Draenen's strawberries, and are much larger.
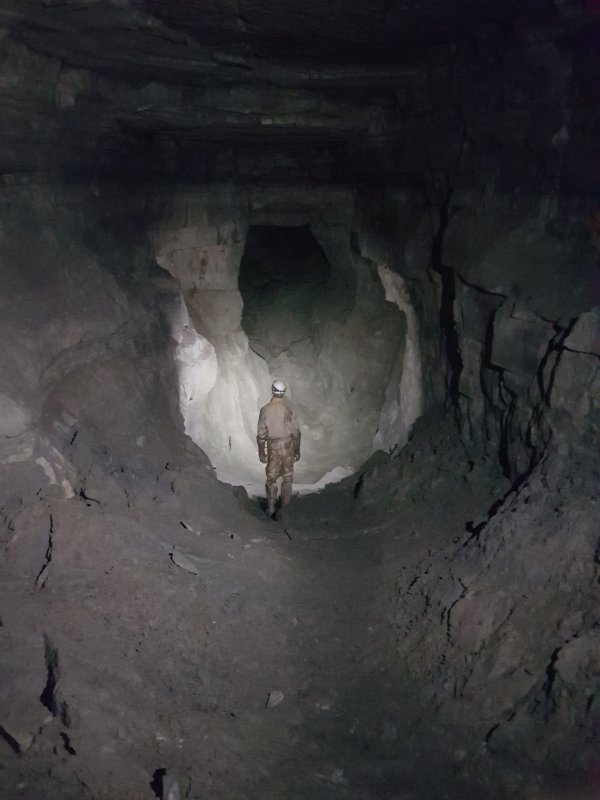 "Small" passage.
Modelling by Pete, lighting by Tarquin and Pete
"Small" passage.
Modelling by Pete, lighting by Tarquin and Pete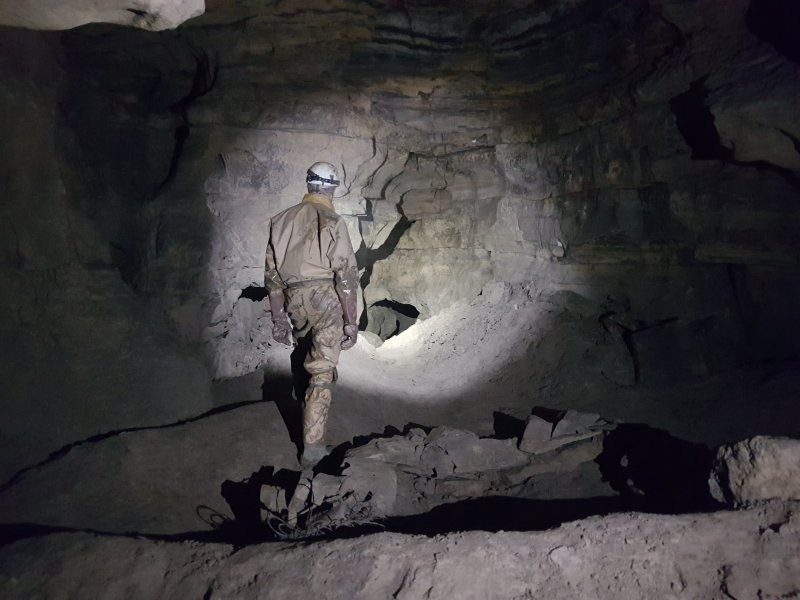 The passage shrinks dramatically at a junction. The dry stone wall in the floor seems to serve no purpose except maybe shelter.
Modelling by Pete, lighting by Tarquin and Pete
The passage shrinks dramatically at a junction. The dry stone wall in the floor seems to serve no purpose except maybe shelter.
Modelling by Pete, lighting by Tarquin and Pete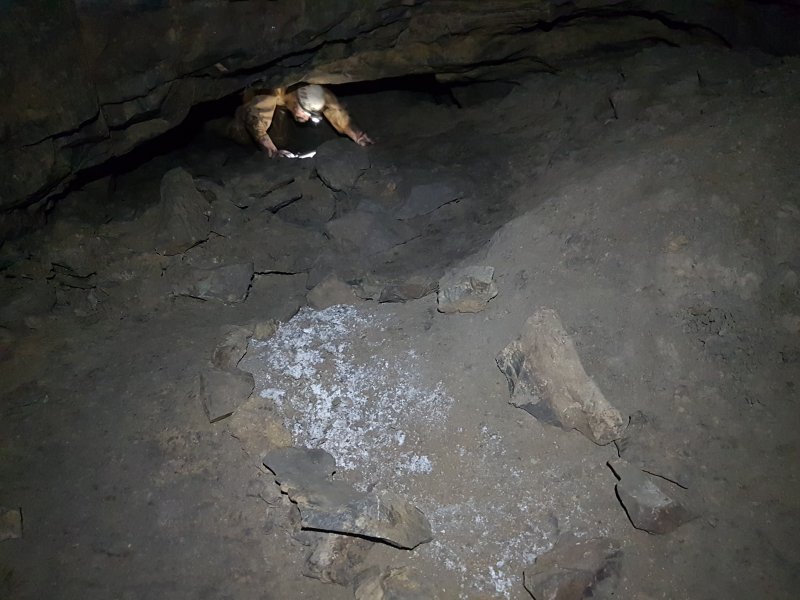 Under the wall to the right is the only substantial side passage, which has gypsum formations protected by a stone ring.
Modelling by Pete, lighting by Tarquin and Pete
Under the wall to the right is the only substantial side passage, which has gypsum formations protected by a stone ring.
Modelling by Pete, lighting by Tarquin and Pete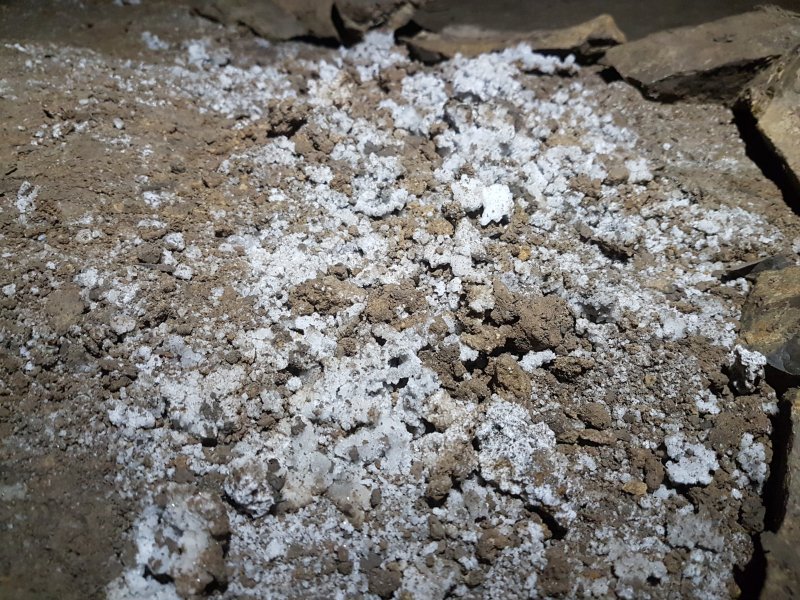 Gypsum formations.
 Gypsum formations.
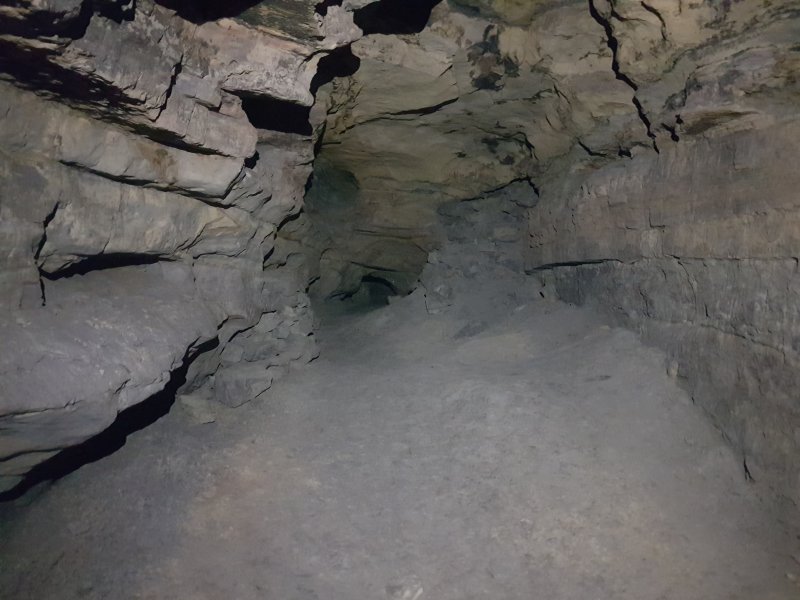 The side passage to the Small Side Passage reduces in size and pinches out. It points towards North West Inlet's choke, and is probably formed by the same fractures. Maybe that is why the Small Side Passage suddenly shrinks in size, because its size is lost into the streamway that lies hidden somewhere below.
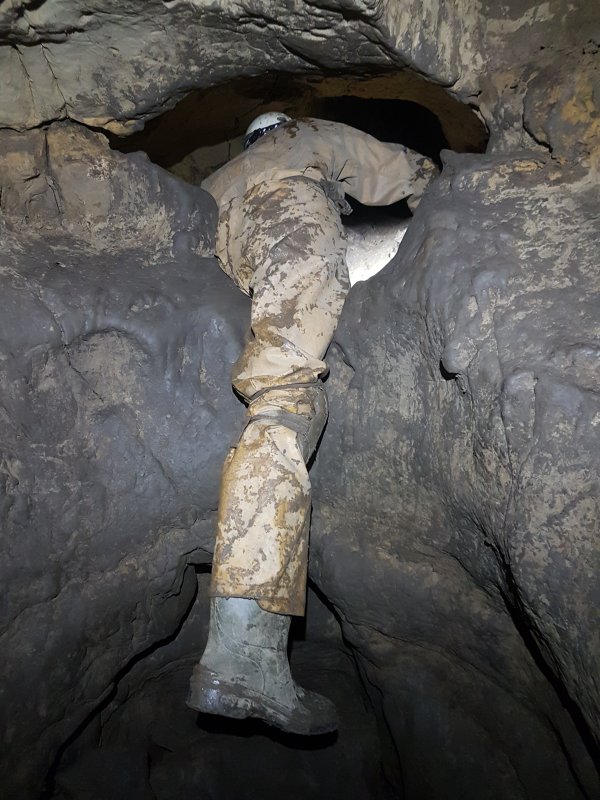 Continuing along The Small Side Passage Near The Entrance, the smaller passage enters a complex area with several awkward parts.
Modelling by Pete, lighting by Tarquin and Pete
Continuing along The Small Side Passage Near The Entrance, the smaller passage enters a complex area with several awkward parts.
Modelling by Pete, lighting by Tarquin and Pete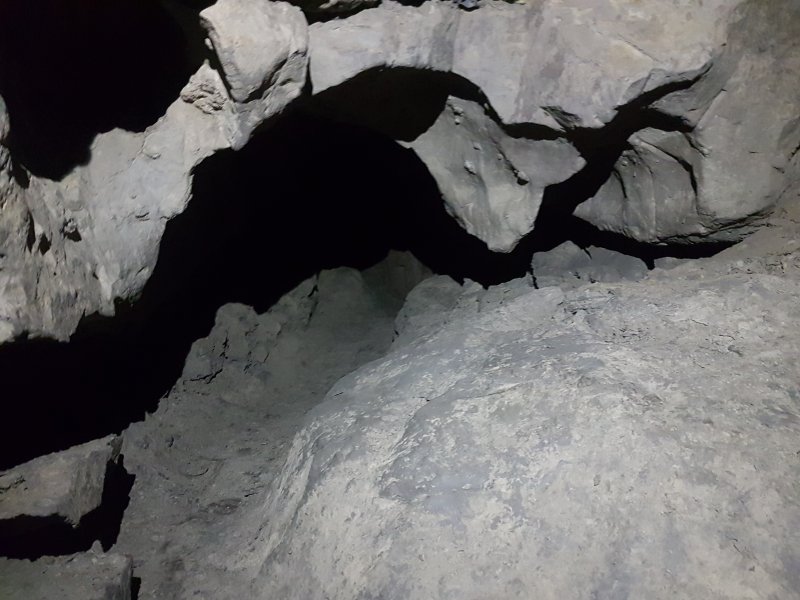 A probable oxbow on the side.
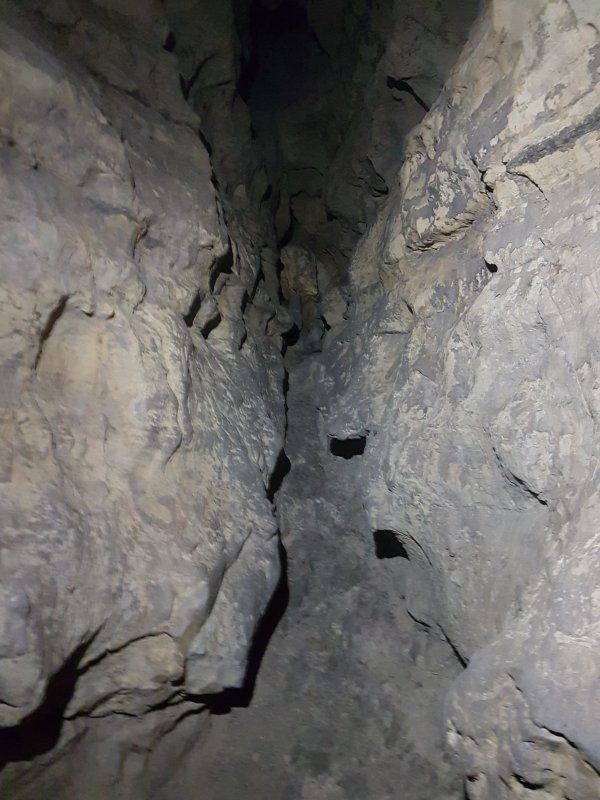 A narrowing, awkward rift, ending with an awkward step up.
Modelling by Pete, lighting by Tarquin and Pete
A narrowing, awkward rift, ending with an awkward step up.
Modelling by Pete, lighting by Tarquin and Pete A crawl around an awkward corner.
Modelling by Pete, lighting by Tarquin and Pete
A crawl around an awkward corner.
Modelling by Pete, lighting by Tarquin and Pete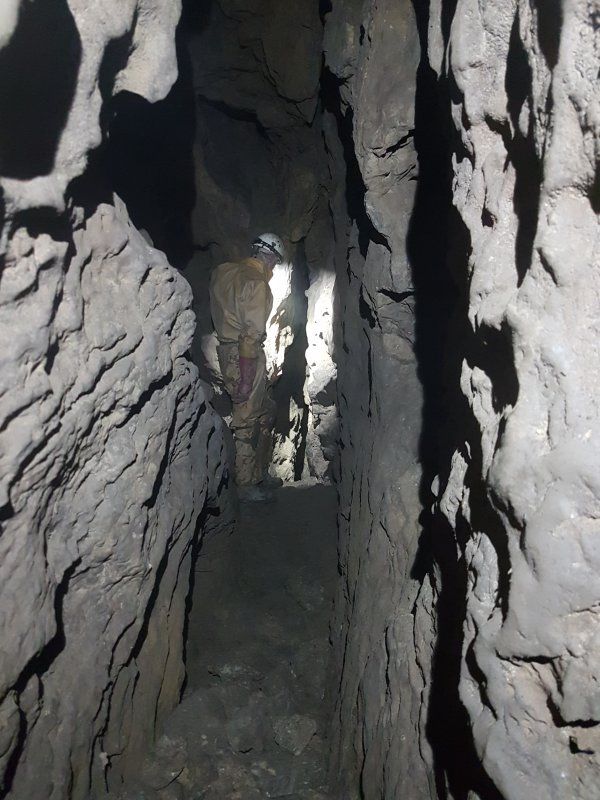 The final rift.
Modelling by Pete, lighting by Tarquin and Pete
The final rift.
Modelling by Pete, lighting by Tarquin and Pete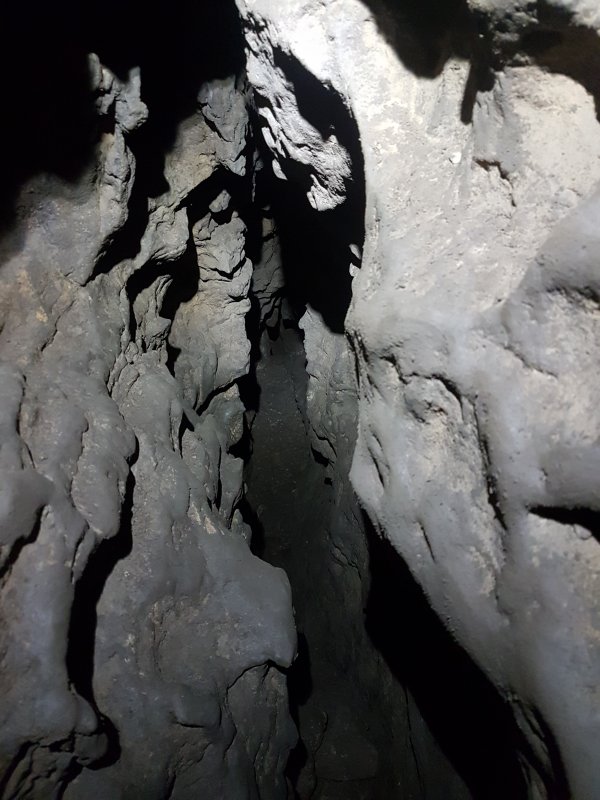 This then drops into a narrow slot that immediately becomes too narrow. Another miserable end to a fine passage.
Modelling by Pete, lighting by Tarquin and Pete
This then drops into a narrow slot that immediately becomes too narrow. Another miserable end to a fine passage.
Modelling by Pete, lighting by Tarquin and Pete